
I don’t know about you, but I absolutely melt when I see a toddler in a handmade dress. There’s something about tiny humans wearing crocheted garments that makes my crafter heart skip a beat.
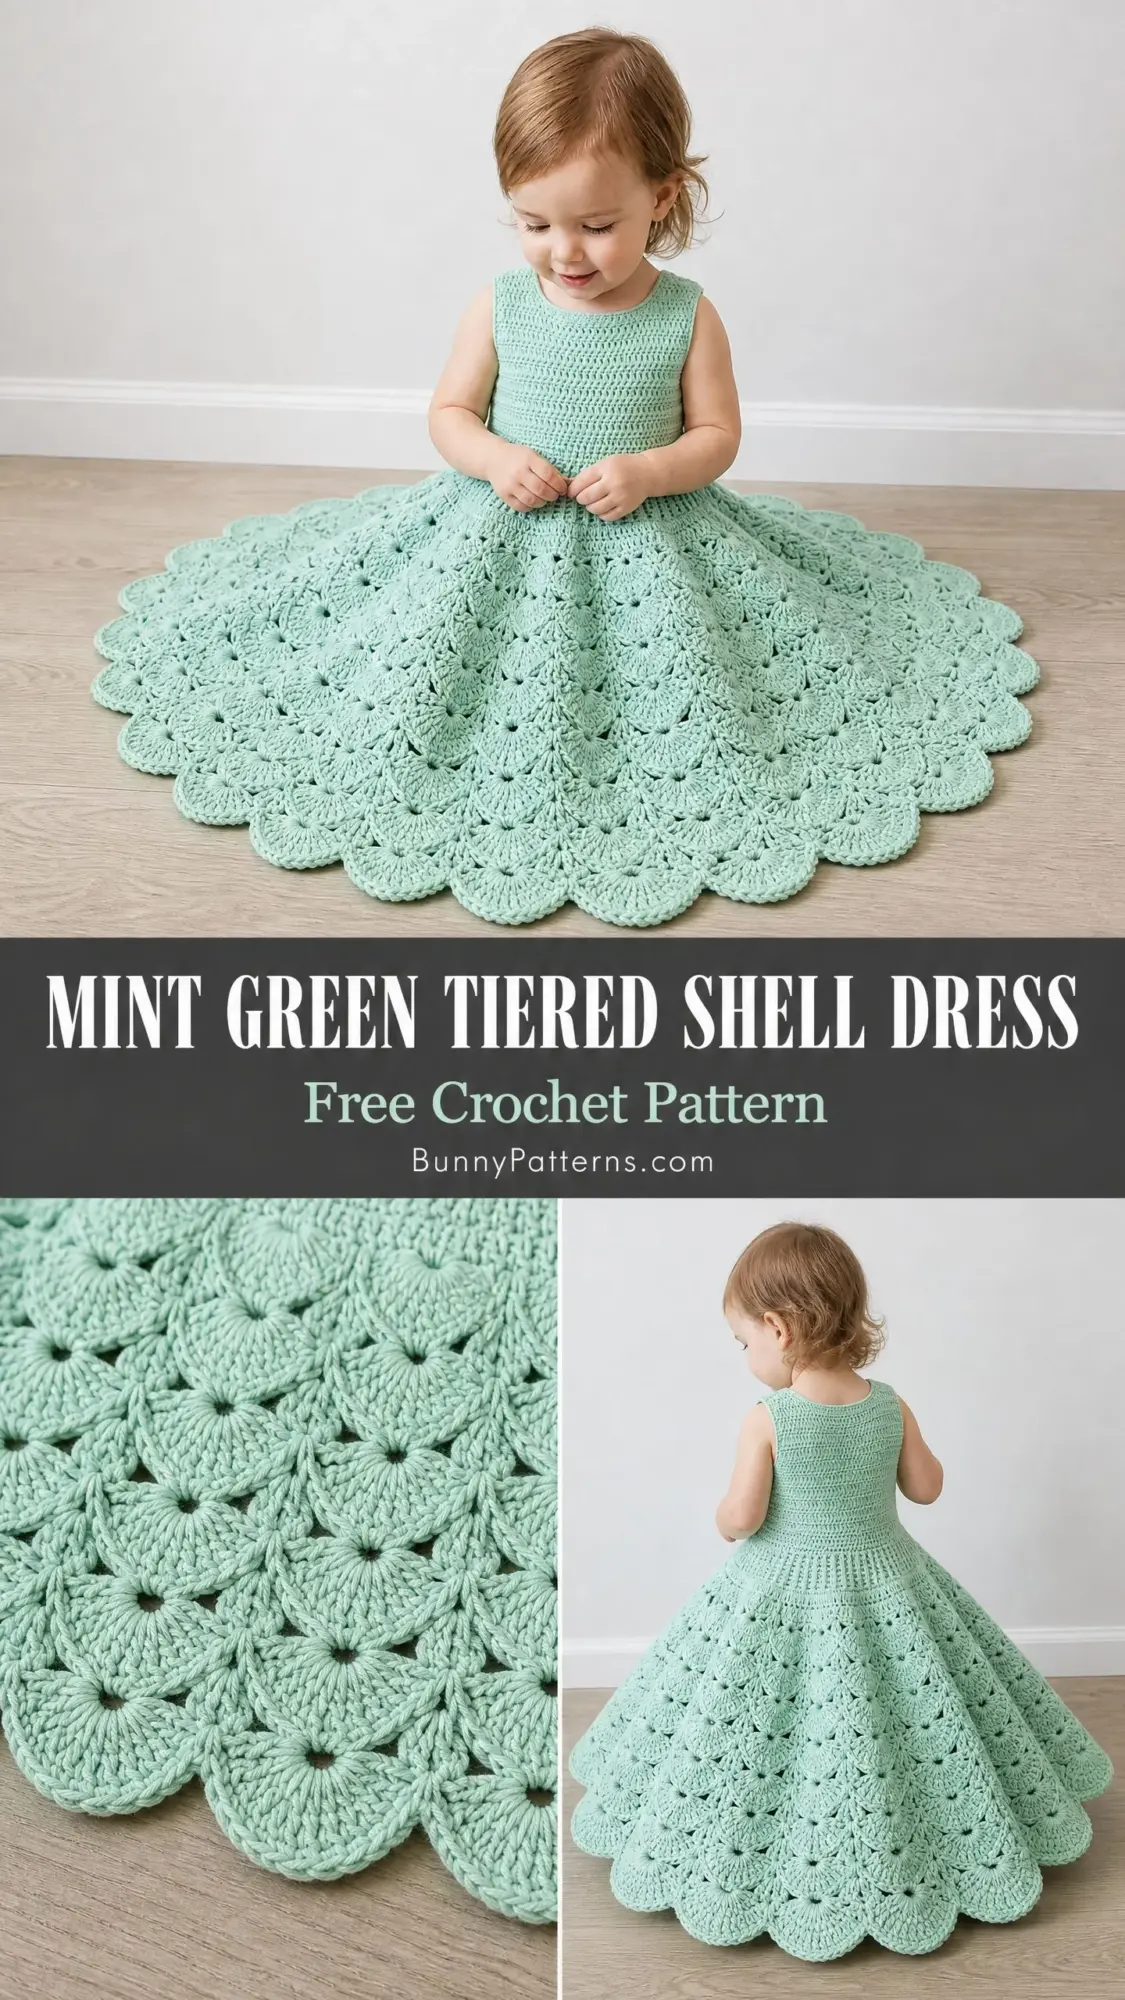
This mint green tiered shell dress has been living rent-free in my head since I first sketched it out. The dramatically full skirt, the delicate scalloped hem, the way it photographs like an absolute dream for portraits and special occasions.
If you’ve ever wanted to create a showstopper piece that looks far more complicated than it actually is, this is your pattern. The construction is straightforward once you understand the flow, and the shell fans practically work themselves once you get into the rhythm.
Why This Toddler Dress Pattern Works So Well
Let me break down what makes this crochet pattern special. The bodice uses simple single crochet worked flat, which means you’re building a solid, fitted top that actually stays in place on a wiggly toddler. Then the magic happens at the waist where you transition to working in the round and those gorgeous shell fans begin.
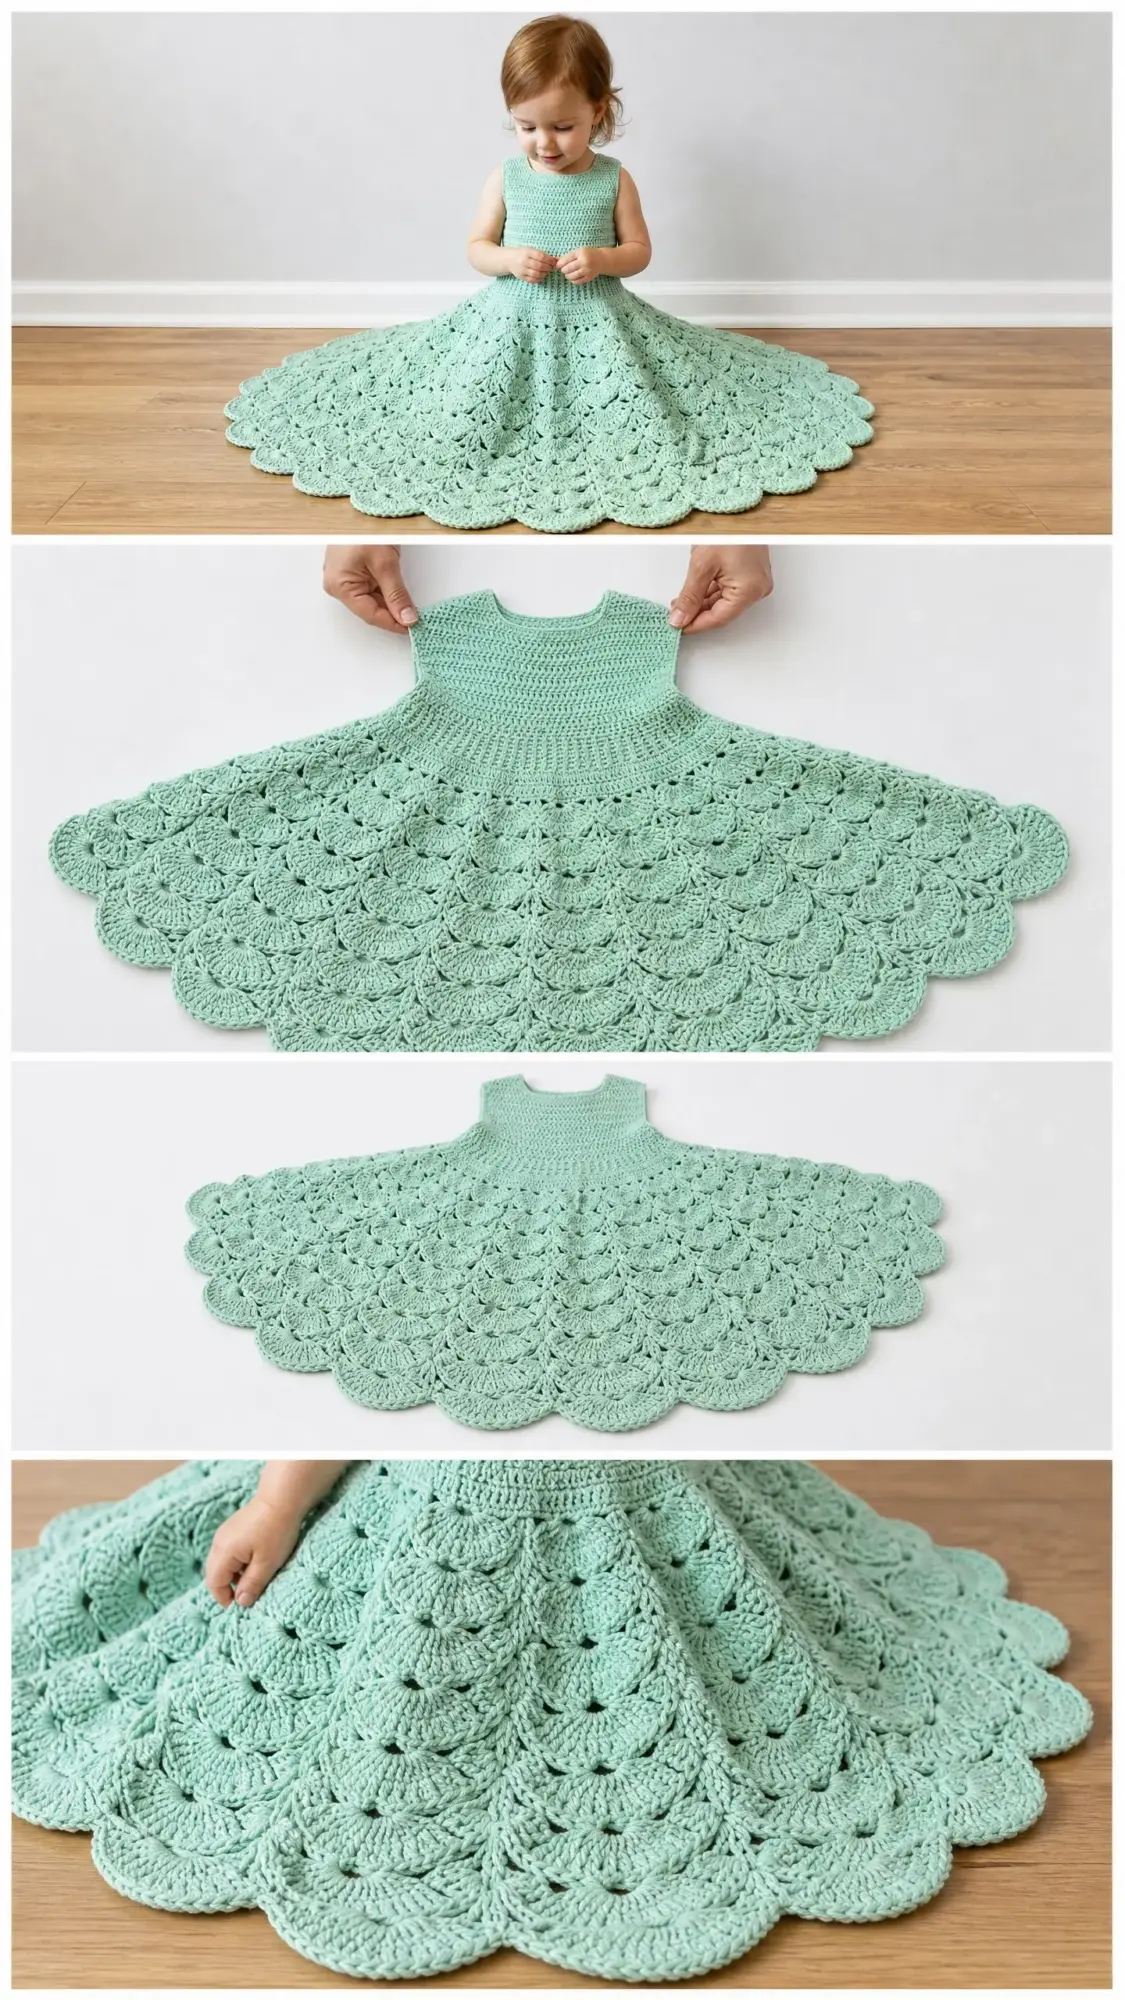
The two-tier skirt design is the real star here. You start with 12 shell fans, then double to 24 in the second tier. This creates that explosion of fabric and movement that makes the dress so photogenic. When your little one sits down, the skirt spreads out around them like flower petals.
The sleeveless design with rounded armholes keeps things comfortable for warm weather events. A single button closure at the back makes dressing time easier on everyone involved. Trust me, toddlers and complicated closures do not mix.
Materials You’ll Need for This Crochet Dress
Yarn: Worsted weight (category 4), approximately 400 to 450 yards total in mint green. I strongly recommend a smooth cotton or cotton-blend yarn for this project. The stitch definition in the shell fans really pops with cotton, and it breathes beautifully against little skin.
Here are some yarn suggestions that work wonderfully:
Lion Brand 24/7 Cotton in Mint is my top pick. It’s 100% mercerized cotton with excellent stitch definition. You’ll need 3 skeins (186 yards each). Machine washable, which parents will thank you for.
Paintbox Yarns Simply DK in Spearmint works if you adjust your hook down to US D-3 / 3.25 mm. You’ll need 4 skeins. Just make sure to check your gauge.
Drops Paris in color 15 Mint gives you a slightly heavier cotton that produces a beautifully weighted skirt. You’ll need 6 skeins (82 yards each).
Hook: US G-6 / 4.0 mm or size needed to obtain gauge
Notions: At least 4 stitch markers, yarn needle, one 1/2-inch / 12 mm button (white or pearl looks lovely), scissors
Gauge Information
Getting gauge right matters here. A bodice that doesn’t fit properly is just frustrating for everyone.
Single crochet gauge: 18 sc x 20 rows = 4 inches / 10 cm worked in rows, blocked
Shell fan gauge: One complete 5-dc shell fan plus its neighboring ch-2 space = approximately 1.25 inches / 3.2 cm wide
Make a 5-inch swatch, wash it, block it, then measure. Adjust your hook size up or down until you hit gauge before starting the bodice.
Finished Size
This pattern is written for Size 2T to 3T (fits chest 20 to 21 inches / 51 to 53 cm)
Size adjustment tips are included at the end if you need to go bigger or smaller.
Stitch Abbreviations and Definitions
Let me walk you through every stitch you’ll use in this crochet tutorial. Even if you’re familiar with these, a quick refresher never hurts.
ch = chain (yarn over, pull through loop on hook)
sl st = slip stitch (insert hook, yarn over, pull through stitch and loop on hook in one motion)
sc = single crochet (insert hook, yarn over, pull up loop, yarn over, pull through both loops)
dc = double crochet (yarn over, insert hook, yarn over, pull up loop, yarn over, pull through 2 loops twice)
hdc = half double crochet (yarn over, insert hook, yarn over, pull up loop, yarn over, pull through all 3 loops)
sk = skip
sp = space
st(s) = stitch(es)
beg = beginning
rep = repeat
rnd = round
RS = right side
WS = wrong side
yo = yarn over
Special Stitches
Shell Fan (shell): This is 5 double crochets all worked into the same stitch or space. It creates a pretty fan shape and is the heart of the skirt.
To work a shell: Yarn over, insert hook into indicated stitch or space, yarn over, pull up a loop, yarn over, pull through 2 loops (that’s 1 dc made). Without moving to a new stitch, work 4 more dc into that same spot. You now have 5 dc clustered together forming a fan.
sc2tog (single crochet two together): This is a decrease. Insert hook into next stitch, yarn over, pull up a loop (2 loops on hook). Insert hook into following stitch, yarn over, pull up a loop (3 loops on hook). Yarn over, pull through all 3 loops. Counts as 1 stitch.
Step by Step Crochet Pattern Instructions
Section 1: Left Back Panel
The left back panel forms the left shoulder strap, the left side of the neckline, and the left back of the bodice.
Foundation: Ch 13.
Row 1 (RS): Sc in 2nd ch from hook and in each ch across. Turn. (12 sc)
Row 2 (WS): Ch 1, sc in each st across. Turn. (12 sc)
Rows 3 to 16: Rep Row 2. Continue even in sc. Turn at end of each row. (12 sc each row)
After Row 16, do not fasten off. Set aside with a stitch marker in the last st to hold your place.
Section 2: Right Back Panel
Work same as Left Back Panel, Rows 1 to 16. (12 sc each row)
After Row 16, do not fasten off. Set aside.
Section 3: Bodice Body, Joining and Working Across
Now you’ll join both panels and work across a foundation row that spans the full width of the bodice front and back. Here’s how the construction works: Right back panel (12 sts), chain bridge for right armhole (10 ch), front bodice (24 sts worked fresh into a new foundation), chain bridge for left armhole (10 ch), left back panel (12 sts).
Before working Row 17: Make a separate chain of 26, sc in 2nd ch from hook and in each ch across (24 sc). This is your front foundation strip. Set it aside.
Row 17, Join Row (RS): With RS facing, return to the active loop of the right back panel. Ch 1, sc in each of the 12 sts of the right back panel, ch 10 (right armhole bridge), sc 24 across your prepared front strip, ch 10 (left armhole bridge), sc in each of the 12 sts of the left back panel. Turn.
Row 17 stitch count: 12 sc (right back) + 10 ch + 24 sc (front) + 10 ch + 12 sc (left back) = 68 sts
Row 18 (WS): Ch 1, sc in each of the 12 back sts, sc in each of the 10 ch of the armhole bridge, sc in each of the 24 front sts, sc in each of the 10 ch of the armhole bridge, sc in each of the 12 back sts. Turn. (68 sc)
Rows 19 to 26: Ch 1, sc in each st across. Turn. (68 sc each row)
Checkpoint: After Row 26 your bodice piece should be approximately 7 inches / 18 cm tall from the foundation chain edge.
Section 4: Waist Join
Setup Round: With RS facing, ch 1, sc across the 68 sts of Row 26. When you reach the end, bring the right edge and left edge of the back opening together, sl st through both layers to close the back split at the waist level only. Join to the first sc of this round with sl st to form a round. (68 sc)
The back opening above the waist remains open for the button closure.
Section 5: Waist Preparation Round
Transitional Round: Ch 3 (counts as dc), dc in same st, ch 2, sk next 5 sts, (2-dc cluster in next st, ch 2, sk next 5 sts) 10 times, 2-dc cluster in next st, ch 2, sl st to top of beg ch-3. (12 ch-2 sp)
Section 6: Tier 1 Shell Skirt
Round 1 of Tier 1 (Shell Round): Ch 3, 4 dc in first ch-2 sp (counts as first shell of 5 dc), ch 2, (shell of 5 dc in next ch-2 sp, ch 2) 11 times. Join with sl st to top of beg ch-3. (12 shells, 12 ch-2 sp)
Round 2 of Tier 1: Ch 1, sc in top of joining sl st, ch 3, (sc in ch-2 sp between shells, ch 3) 11 times, sc in last ch-2 sp, ch 3, join to first sc. (12 sc, 12 ch-3 sp)
Round 3 of Tier 1 (Shell Round): Sl st into first ch-3 sp, ch 3, 4 dc in same sp (first shell), ch 2, (shell in next ch-3 sp, ch 2) 11 times. Join with sl st to top of beg ch-3. (12 shells, 12 ch-2 sp)
Checkpoint: After Round 3 of Tier 1, the skirt should measure approximately 2.5 inches / 6.4 cm below the waist.
Section 7: Tier 1 to Tier 2 Expansion
This is where the skirt gets dramatic. You’re doubling from 12 shells to 24 shells.
Expansion Round: Ch 1, sc in the ch-2 sp after the first shell of Tier 1 Round 3. Working around: (ch 3, sc into the 3rd dc of the next shell (center dc), ch 3, sc into the following ch-2 sp) 12 times around, ending with ch 3, sl st to first sc. (24 ch-3 sp, 24 sc)
Section 8: Tier 2 Shell Skirt
Round 1 of Tier 2: Sl st into first ch-3 sp. Ch 3, 4 dc in same sp (first shell), ch 2, (shell in next ch-3 sp, ch 2) 23 times. Join to top of beg ch-3. (24 shells, 24 ch-2 sp)
Round 2 of Tier 2: Ch 1, sc in joining point, ch 3, (sc in ch-2 sp between shells, ch 3) 23 times, sc in last ch-2 sp, ch 3, join to first sc. (24 sc, 24 ch-3 sp)
Round 3 of Tier 2: Sl st into first ch-3 sp, ch 3, 4 dc in same sp, ch 2, (shell in next ch-3 sp, ch 2) 23 times. Join to top of beg ch-3. (24 shells, 24 ch-2 sp)
Round 4 of Tier 2: Ch 1, sc in joining, ch 3, (sc in ch-2 sp, ch 3) 23 times, sc in last ch-2 sp, ch 3, join to first sc. (24 sc, 24 ch-3 sp)
Round 5 of Tier 2 (final shell round): Sl st into first ch-3 sp, ch 3, 4 dc in same sp, ch 2, (shell in next ch-3 sp, ch 2) 23 times. Join to top of beg ch-3. (24 shells, 24 ch-2 sp)
Checkpoint: After Round 5 of Tier 2, the skirt should measure approximately 8 inches / 20 cm from the waist.
Section 9: Hem Finishing Round
Hem Round: Working across the top edge of the Tier 2 Round 5 shells: sc in the ch-2 sp after first shell, (3 sc across the tops of the 5 dc of the next shell, sc in following ch-2 sp) 23 times, 3 sc across tops of last shell. Join with sl st to first sc. Fasten off. (96 sc)
Section 10: Neckline and Armhole Edging
Block your dress before adding the edging for best results.
Neckline Edging: With RS facing, attach yarn at the top right corner of the back opening. Work sc evenly around the entire neckline opening: approximately 15 sc down the right back opening edge, approximately 12 sc across the back neck, approximately 15 sc down the left back opening edge, approximately 20 sc across the front neckline. Join with sl st. Do not turn.
Button loop: At the top right corner of the back opening, ch 5, sl st into same corner st to form the button loop. Fasten off.
Armhole Edging: With RS facing, attach yarn at the underarm center of one armhole. Sc evenly around the armhole opening, approximately 36 to 40 sc total. Join with sl st to first sc. Fasten off. Repeat for second armhole.
Section 11: Button Attachment
Sew the button to the left back opening edge at the neckline, aligned with the button loop on the right side.
Blocking and Finishing Your Shell Dress
Weave in all yarn ends securely, working through several stitches in different directions on the wrong side.
Wet blocking: Soak the finished dress in cool water with gentle wool wash for 15 to 20 minutes. Gently squeeze out excess water. Roll in a dry towel and press. Lay flat on a blocking mat, pin the scalloped hem points outward to emphasize each fan shape. Allow to dry completely.
Steam blocking (for acrylic): Hold a steam iron approximately 1 inch above the surface. Never press directly onto the fabric. Pin scallops while warm and allow to cool completely.
Size Customization Tips
To size up (4T to 5T): Increase shoulder strap panels from 12 sc to 14 sc wide. Increase front foundation from 24 sc to 28 sc. Create 16 platform ch-2 sp in the transitional round, then double to 32 shells in Tier 2. Add rows to the bodice section (end at Row 28 instead of 26).
To size down (12 to 18 months): Decrease shoulder strap panels to 10 sc wide. Decrease front foundation to 20 sc. Create 10 platform ch-2 sp, expanding to 20 shells in Tier 2. End bodice at Row 22.
Care Instructions for This Handmade Dress
For cotton versions, machine wash cold on gentle cycle in a mesh laundry bag. Reshape while damp and lay flat to dry. Skip the tumble dryer.
For acrylic versions, machine wash on gentle and tumble dry low. A light steam refresh restores the scallop definition after washing.
Final Thoughts on This Tiered Shell Dress Crochet Pattern
This dress takes approximately 10 to 14 hours for an experienced intermediate crocheter. It’s not a weekend project, but every minute you spend is worth it when you see that finished garment. The shell fans create such beautiful movement and texture, and the two-tier construction gives you that dramatic full skirt without overwhelming complexity.
Whether you’re making this for a special occasion, a photo session, or just because a little one in your life deserves something beautiful, this pattern delivers. The construction is logical, the techniques are approachable, and the results are genuinely stunning.
Thank you so much for choosing this pattern. I truly hope you love making it as much as I loved designing it. If you complete this dress, I would absolutely love to see your finished project. Tag me on Instagram or share a photo in my Facebook group. Seeing your makes genuinely makes my whole week.
If this pattern made your heart happy, go ahead and pin it to your Pinterest boards so you can find it again later. And please drop a comment below if you make this dress. I read every single one, and I love hearing about your color choices, the little ones you’re making for, and any modifications you tried. Happy crocheting, friend!
You Might Also Like
- Cream White Nursery Wall Organizer Free Crochet Pattern
- Pastel Rainbow Unicorn Granny Square Blanket Free Pattern
- Coral Sunset Ruffled Baby Romper Free Crochet Pattern
- Blush Pink Floral Crochet Gladiator Sandals Free Pattern