
I’ve been searching for the perfect romantic summer crochet dress for ages, and this one stopped me in my tracks. The raised rose motifs, the sweetheart neckline, the delicate scalloped edges. This is my absolute favourite cottagecore dress pattern, and I rounded up all the details you need to make it yourself.
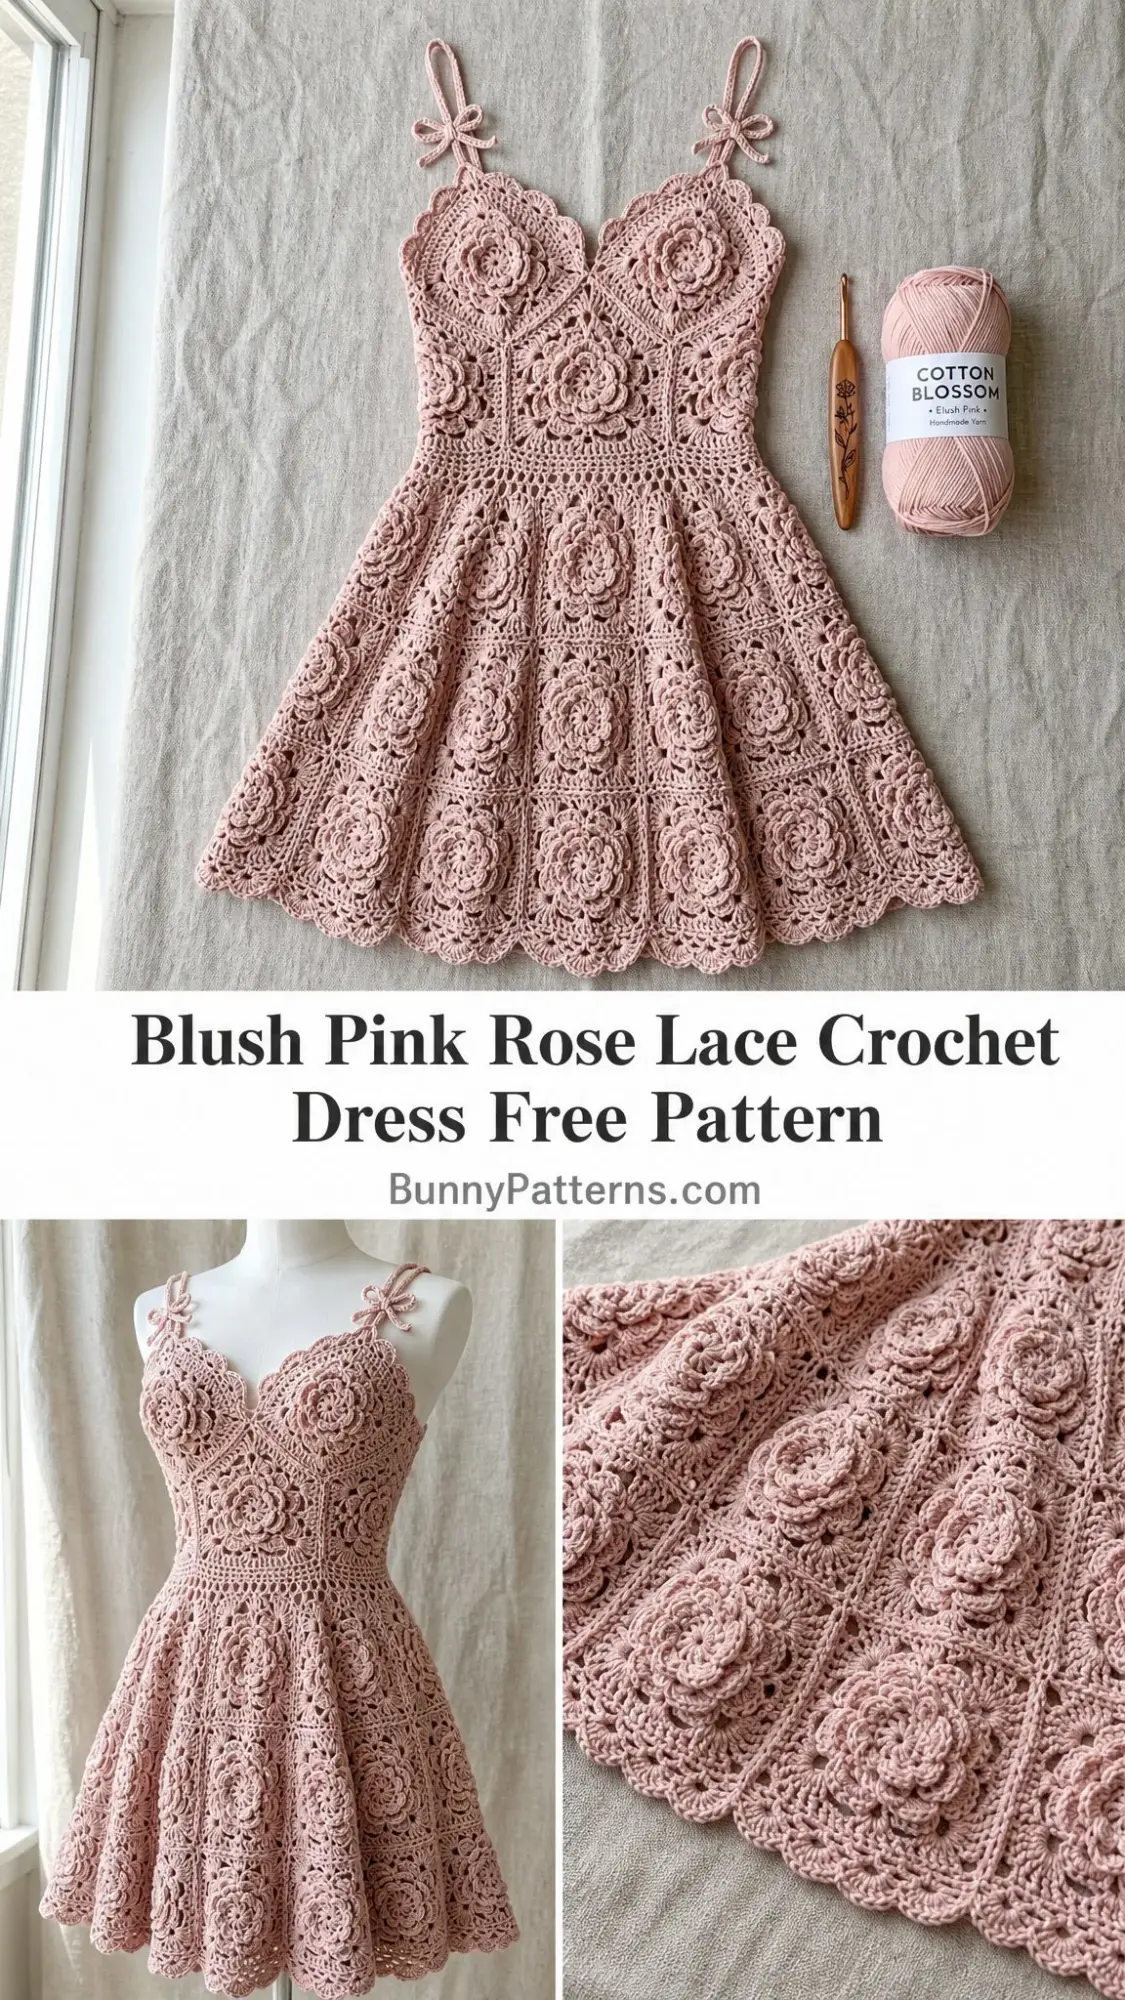
This blush pink beauty is built entirely from rose granny squares joined together to create a stunning A-line silhouette. The construction is clever. You work individual squares with dimensional rose centers, then join them as you go to build the bodice and flared skirt. The result looks incredibly complex but breaks down into manageable, repeatable steps.
Fair warning. This is an advanced pattern that takes 80 to 120 hours to complete. But if you have confident granny square skills and want a true showstopper garment, keep reading. I walk you through every single step.
About This Rose Lace Crochet Dress Pattern
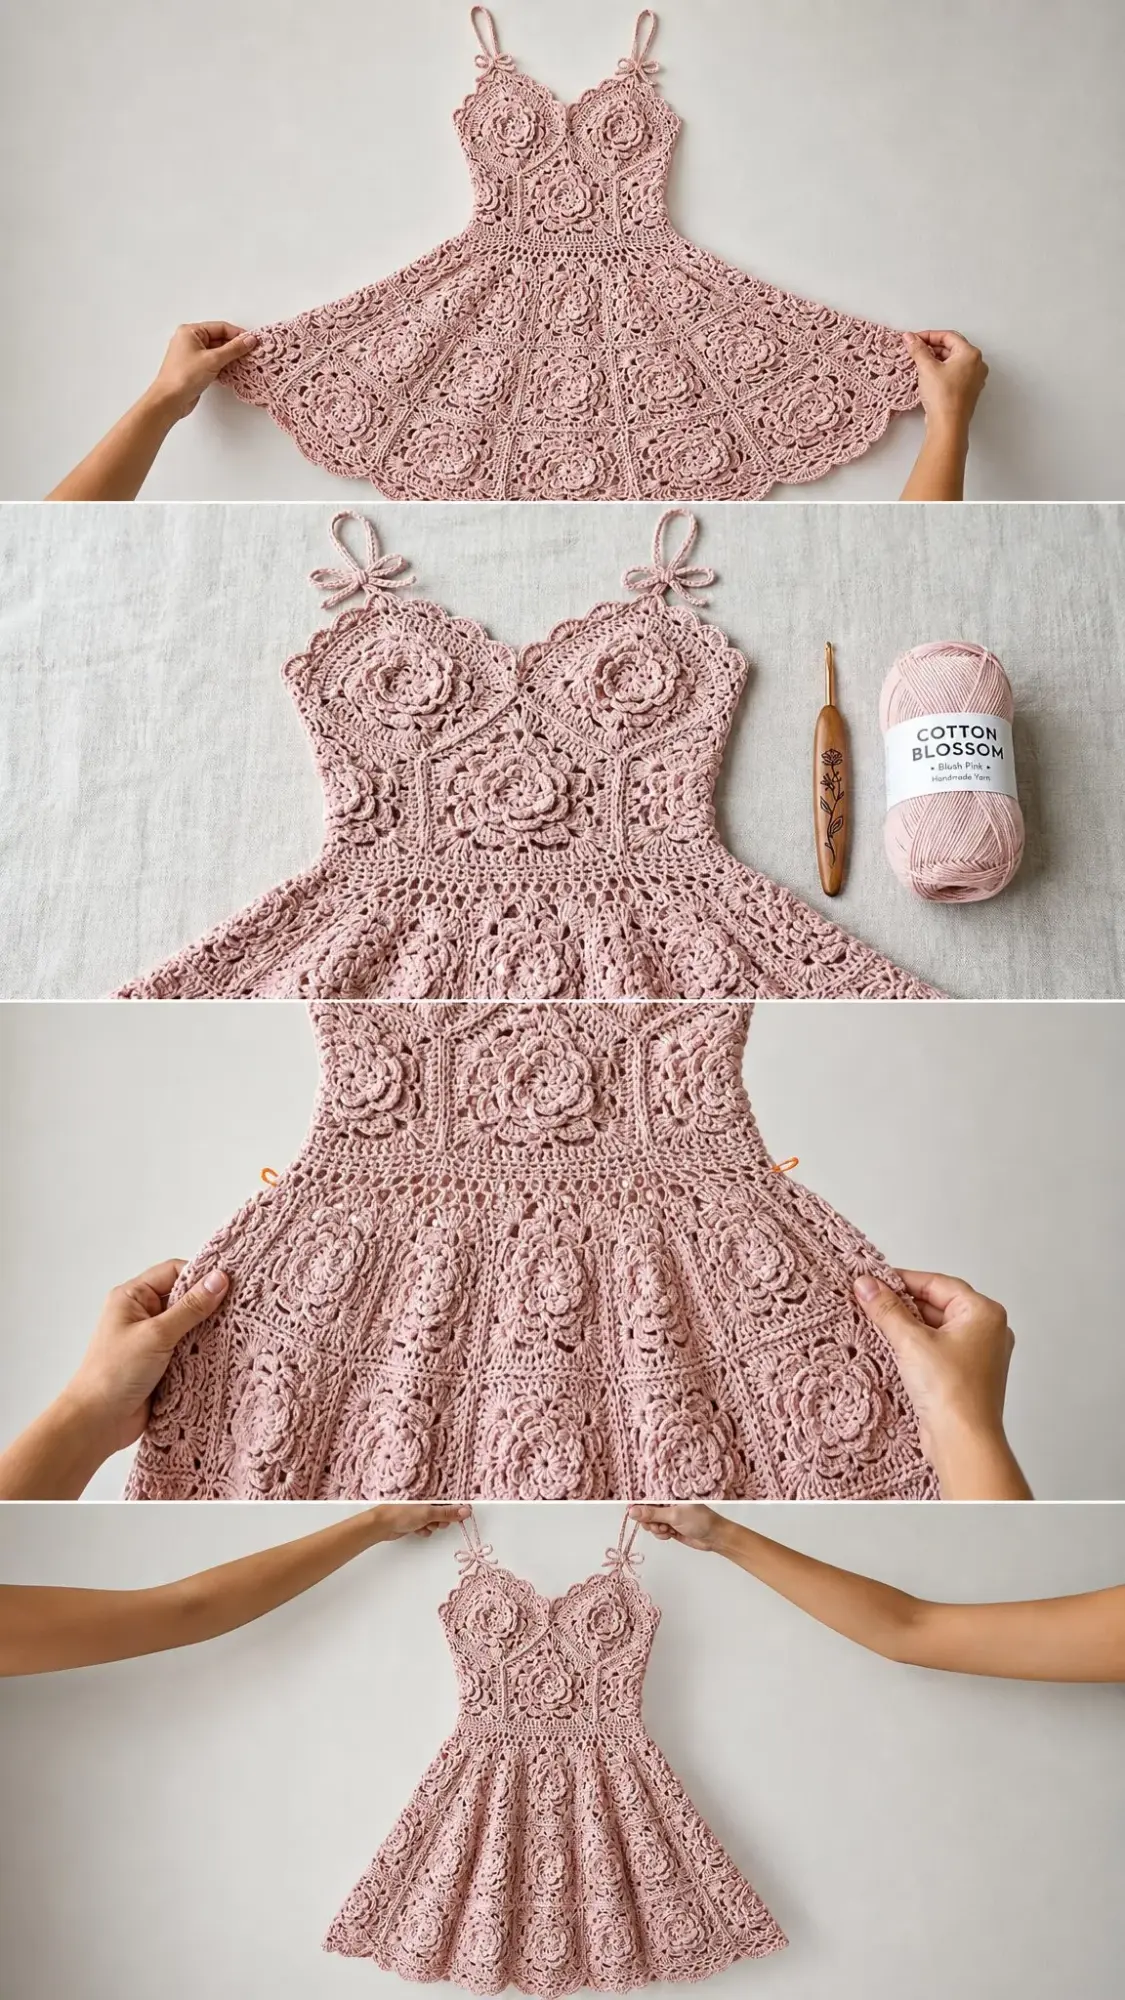
This dress features a fitted bodice made from rose-centered granny squares arranged to create a sweetheart neckline. The skirt expands in rows of squares for that gorgeous A-line flare. Delicate spaghetti straps with tiny bow details add the finishing touch, and a scalloped border frames both the neckline and hem.
The entire garment uses a single colour throughout. That blush pink cotton creates such a cohesive, romantic look. The raised three-dimensional rose centers give the fabric incredible texture and visual interest.
Finished Measurements (Size Small/Medium):
Materials You Will Need
Yarn: Approximately 1,200 to 1,400 yards (1,097 to 1,280 meters) of DK weight (light weight, #3) 100 percent mercerized cotton yarn in blush pink
The sample uses Cotton Blossom Handmade Yarn in Blush Pink. Here are some substitutes that work beautifully:
1. Paintbox Yarns Simply DK (100% cotton) in Dusty Rose. You need approximately 9 to 10 balls.
2. Lion Brand 24/7 Cotton DK (100% mercerized cotton) in Blush. You need approximately 7 to 8 balls.
3. Drops Safran (70% cotton, 30% viscose) in Powder Pink. The viscose adds a lovely subtle sheen. You need approximately 8 to 9 balls.
Important substitution note: Choose a smooth, tightly spun cotton. Avoid fuzzy or loosely spun yarns because the raised rose details will disappear. The lace openwork needs crisp stitch definition to shine.
Hook: US size E-4 / 3.5 mm crochet hook. I recommend wood or an ergonomic handle since you will be crocheting for many hours.
Other supplies:
Gauge (Please Check This)
One completed rose granny square measures 4 inches by 4 inches (10 cm by 10 cm) after blocking.
For the waistband: 20 single crochet (sc) and 22 rows equals 4 inches (10 cm).
Gauge matters so much for garments. Make at least two test squares before starting. Block them and measure carefully. If your square is smaller than 4 inches, go up a hook size. If larger, go down. Even a quarter-inch difference per square multiplied across 50 squares will throw off your finished size significantly.
Abbreviations Used in This Crochet Pattern
Let me define every stitch abbreviation you will encounter:
Special Stitches Explained
Rose Granny Square (Full Size)
This square is the building block of the entire dress. It creates a full open rose at the center surrounded by a lace granny frame with corner chain spaces. Work in six rounds.
Round 1 (Rose center):
Make a magic ring.
Ch 1, work 10 sc into the ring. Pull ring closed. Sl st to first sc to join. (10 sc)
Round 2 (Inner petals):
Ch 1. Working in front loops only: (sc, ch 1, dc, ch 1, sc) in each sc around. You will create 10 small petals. Sl st to first sc. (10 petals)
Round 3 (Back post setup):
Working behind Round 2 petals, insert hook from the back into the back loop of each Round 1 sc. Ch 1. Work 1 sc in each back loop around. (10 sc)
Round 4 (Outer petals):
Ch 1. Working in front loops only: (sc, ch 2, 3 dc, ch 2, sc) in each sc around. You will create 10 larger petals. Sl st to first sc. (10 petals)
Round 5 (Square frame setup):
Working behind Round 4 petals, insert hook from the back into the back loop of each Round 3 sc. Ch 3 (counts as first dc). Work 1 dc in next back loop. Ch 2 (corner). (2 dc in next back loop, ch 1, 2 dc in following back loop, ch 2) 4 times to create 4 corners and 4 sides. End with sl st to top of beg ch-3. (8 dc clusters, 4 ch-2 corner spaces, 4 ch-1 side spaces)
Note: You have 10 back loops distributed into 4 corners. The key structural element is achieving 4 ch-2 corner spaces. Exact stitch placement varies slightly and gets corrected during Round 6 and blocking.
Round 6 (Square frame):
Sl st into corner ch-2 sp. Ch 3 (counts as dc). Work (2 dc, ch 2, 3 dc) in same corner ch-2 sp. Ch 1. Work 3 dc in next ch-1 side sp. Ch 1. (3 dc, ch 2, 3 dc) in next corner ch-2 sp. Ch 1. 3 dc in next ch-1 side sp. Ch 1. Rep from corner to corner around all 4 sides. Sl st to top of beg ch-3.
Completed square has 4 corner ch-2 spaces and 2 ch-1 side spaces per side. Fasten off and weave in ends. Block to 4 inches by 4 inches.
Half Square
Work Rounds 1 through 5 of the Rose Granny Square. On Round 6, work only two sides plus two half-corners. On the flat joining edge, work a row of sc evenly across for a straight edge. Should measure approximately 4 inches wide by 2 inches tall after blocking.
Scallop Edge Stitch
Insert hook into designated stitch. Work (sc, hdc, 3 dc, hdc, sc) in same stitch. This forms one scallop shell. Skip 2 stitches between shells unless otherwise noted.
Bow Embellishment
Ch 20. Sl st in 10th ch from hook to form a loop. Ch 10. Sl st to base of first loop. Fasten off. Use yarn tail to tie the chain lengths around the center and knot tightly. Trim tails to 0.5 inch. Make 4 bows total.
Spaghetti Strap
Ch the required length. Turn. Sl st in second ch from hook and in every ch across for a firm rounded strap. Fasten off.
Join As You Go (JAYG) Method
When working Round 6 of a new square adjacent to a completed square, replace each ch-2 of a shared corner with (ch 1, sl st into corresponding corner ch-2 sp of completed square, ch 1). Replace each ch-1 of a shared side with a sl st into the corresponding ch-1 sp of the completed square. This creates a flat, invisible join.
Step-by-Step Instructions for the Crochet Dress Pattern
Section 1: Make Your Rose Granny Squares
Following the Rose Granny Square instructions above, make the following quantities. Block each square before joining.
Take your time with these. The consistency of your squares directly affects how well the dress fits together.
Section 2: Bodice Front
The bodice front is 4 squares wide and 2 full squares tall, with modifications for the sweetheart neckline.
Step 1: Lower bodice row
Join 4 full squares in a horizontal row (Row 1, the waist row) using JAYG. Label them B1, B2, B3, B4 from left to right.
Join B2 to B1 by working Round 6 of B2 while joining its left side to the right side of B1. Continue with B3 joining to B2, then B4 joining to B3.
Completed Row 1 measures approximately 16 inches wide by 4 inches tall.
Step 2: Upper bodice row
Join 4 full squares in Row 2 above Row 1, also joining their bottom edges to the top of Row 1 squares. Label them B5, B6, B7, B8.
Completed bodice block measures approximately 16 inches wide by 8 inches tall.
Step 3: Sweetheart shaping
Place one half square on the upper left of B5 with the straight edge forming the inner V. Place one half square on the upper right of B8 symmetrically. Sew or sl st them to the top edges.
The center positions above B6 and B7 remain partially open for the V of the sweetheart neckline. The neckline edging completes this shaping later.
Checkpoint: Bodice front should measure approximately 16 inches wide and 10 inches tall. The center top has an open V approximately 8 inches wide at its base.
Section 3: Bodice Back
The bodice back is 3 squares wide and 2 full squares tall for the open-back silhouette.
Step 1: Join 3 squares in Row 1 (K1, K2, K3). Measures approximately 12 inches wide by 4 inches tall.
Step 2: Join 3 squares in Row 2 (K4, K5, K6) above Row 1. Measures approximately 12 inches wide by 8 inches tall.
Step 3: Add one half square above K4 upper left and one above K6 upper right. Center above K5 stays open.
Checkpoint: Bodice back should measure approximately 12 inches wide by 10 inches tall.
Section 4: Waistband
The waistband joins front and back into a tube and creates the fitted waist.
Step 1: Hold bodice front and back with wrong sides together at side edges. The front wraps partially around the sides. Sc the left side edges together through the corner ch-2 spaces. Repeat for right side. You now have a tube.
Step 2: With RS facing, attach yarn to any point along the bottom edge of the joined bodice tube.
Round 1: Work sc evenly around the entire bottom edge. Work approximately 3 sc across each side of every square and 1 sc into each corner sp. Target: 140 sc. Adjust to reach a multiple of 4 if needed.
Round 2: Ch 1. Sc in each sc around. Sl st to beg sc. (140 sc)
Round 3: Ch 1. Sc in each st around. Sl st to beg sc. (140 sc)
Round 4 (decrease round): Ch 1. (Sc in 33 sc, sc2tog) 4 times. Sl st to beg sc. (136 sc)
Round 5: Ch 1. Sc in each st around. Sl st to beg sc. (136 sc)
Round 6: Ch 1. Sc in each st around. Sl st to beg sc. (136 sc)
Round 7 (decrease round): Ch 1. (Sc in 32 sc, sc2tog) 4 times. Sl st to beg sc. (132 sc)
Round 8: Ch 1. Sc in each st around. Sl st to beg sc. (132 sc)
Round 9: Ch 1. Sc in each st around. Sl st to beg sc. Do not fasten off. (132 sc)
Checkpoint: Waistband should measure approximately 26 to 28 inches in circumference and 1.75 inches tall. It should feel snug but not tight.
Section 5: Skirt
The skirt expands downward from the waistband in rows of rose squares.
Skirt Row 1 (12 squares around):
Attach 12 rose squares evenly around the waistband. Distribute 6 across front, 6 across back. Each square top edge spans approximately 11 waistband stitches (132 divided by 12). Attach by sl st through the top corner ch-2 sp and ch-1 side spaces into waistband stitches. Join adjacent squares along vertical edges using JAYG or sl st seaming.
Circumference: 12 squares x 4 inches = 48 inches.
Skirt Row 2 (14 squares around):
Work 14 squares, joining to the bottom of Row 1. To expand from 12 to 14, insert 2 extra squares at evenly spaced intervals, joining them to shared corners between Row 1 squares.
Circumference: 14 squares x 4 inches = 56 inches.
Skirt Row 3 (18 squares around):
Work 18 squares, joining to the bottom of Row 2. Add 4 expansion squares distributed evenly.
Circumference: 18 squares x 4 inches = 72 inches.
Checkpoint: Skirt measures approximately 12 inches tall. Hem circumference is approximately 72 inches for that beautiful A-line flare.
Section 6: Hem Scallop Border
With RS facing, attach yarn to any corner ch-2 sp along the bottom of the skirt.
Round 1: Ch 1. Work sc evenly around entire bottom edge, picking up 3 sc across each square side edge, 1 sc into each corner sp. Total: 144 sc. Sl st to beg sc.
Round 2 (scallops): Work (sk 2 sc, shell in next sc, sk 2 sc, sl st in next sc) 24 times around. (24 scallop shells)
Fasten off. Weave in ends.
Section 7: Neckline Scallop Border
With RS facing, attach yarn to the upper left outer corner of the bodice front.
Round 1: Work sc evenly across entire neckline edge including half squares, center V, and back neckline. Work 3 sc per square side, 1 sc at each corner. Target: approximately 96 sc. Sl st to beg sc.
Round 2: Work (sk 2 sc, shell in next sc, sk 2 sc, sl st in next sc) around neckline. (16 scallop shells)
Fasten off. Weave in ends.
Section 8: Straps
Make 4 identical straps.
For each strap: Ch 61. Turn. Sl st in 2nd ch from hook and in each ch across. (60 sl sts)
Fasten off leaving a 12-inch tail.
Attaching straps:
Section 9: Bows
Make 4 bows following the Bow Embellishment instructions.
Attach one bow to front of each double strap set (2 bows on front). Attach one bow where each strap meets the back bodice (2 bows on back). Sew through bow center into strap join point.
Section 10: Finishing
If gaps exist at side seams, work sc along each edge and sl st together. Or sew with mattress stitch for invisible seams.
Weave in all remaining ends, running tails through several stitches in different directions to secure.
Blocking Your Finished Dress
Before final assembly, wet block every square individually. Soak in cool water for 10 minutes. Press gently in a towel. Pin to blocking mats at exactly 4 by 4 inches. Allow 12 to 24 hours to dry.
After full assembly, wet block the completed garment flat. Submerge in cool water, press gently in a towel, and lay flat on blocking mats. Shape to finished measurements. Pin each hem and neckline scallop individually to open them fully. Allow to dry completely.
Do not hang the garment wet. Cotton stretches under its own weight.
Size Customization Tips
To increase bust by 4 inches: Add one additional square to bodice front rows (5 wide instead of 4) and one to back rows (4 instead of 3). Adjust waistband pickup to approximately 158 sc, decreasing to approximately 150 sc by final round.
To lengthen skirt: Add rows below Skirt Row 3, expanding by 2 to 4 squares per row. Each row adds approximately 4 inches.
To shorten to micro length: Use only Skirt Rows 1 and 2. Skirt will measure approximately 8 inches, total dress approximately 23 inches.
To adjust waist: Change number of decrease rounds. Each round reduces circumference by approximately 1 inch.
Care Instructions
Hand wash in cool water with gentle detergent. Do not wring. Press in a towel, then dry flat away from sunlight. Never tumble dry or hang wet. If pressing is needed, use a pressing cloth on low steam, wrong side only. Store folded to prevent stretching.
You Did It
This blush pink rose lace crochet dress is truly a labour of love. Every rose square you complete brings you closer to a one-of-a-kind garment that will turn heads wherever you wear it. The dimensional roses, the romantic sweetheart neckline, the flirty A-line skirt. It all comes together into something absolutely stunning.
Thank you so much for choosing this pattern for your next project. I cannot wait to see what you create.
If you are saving this crochet dress pattern to make later, go ahead and pin it to your Pinterest boards so you can find it easily when you are ready to start. And please leave a comment below if you make this dress. I would absolutely love to see your finished creation and hear which colour you chose for your roses.
You Might Also Like
- Ocean Breeze Granny Square Tote Free Crochet Pattern
- Dusty Rose Spiral Flap Backpack Free Crochet Pattern
- Ocean Blue Ombre Crochet Platform Wedge Sandals Pattern
- Ocean Blue Chameleon Amigurumi Free Crochet Pattern