
Go dig through your yarn stash right now. I know you have a skein of cotton in there that you have been saving for something special. This delicate floral crown is exactly the kind of project that deserves your prettiest fingering weight yarn.
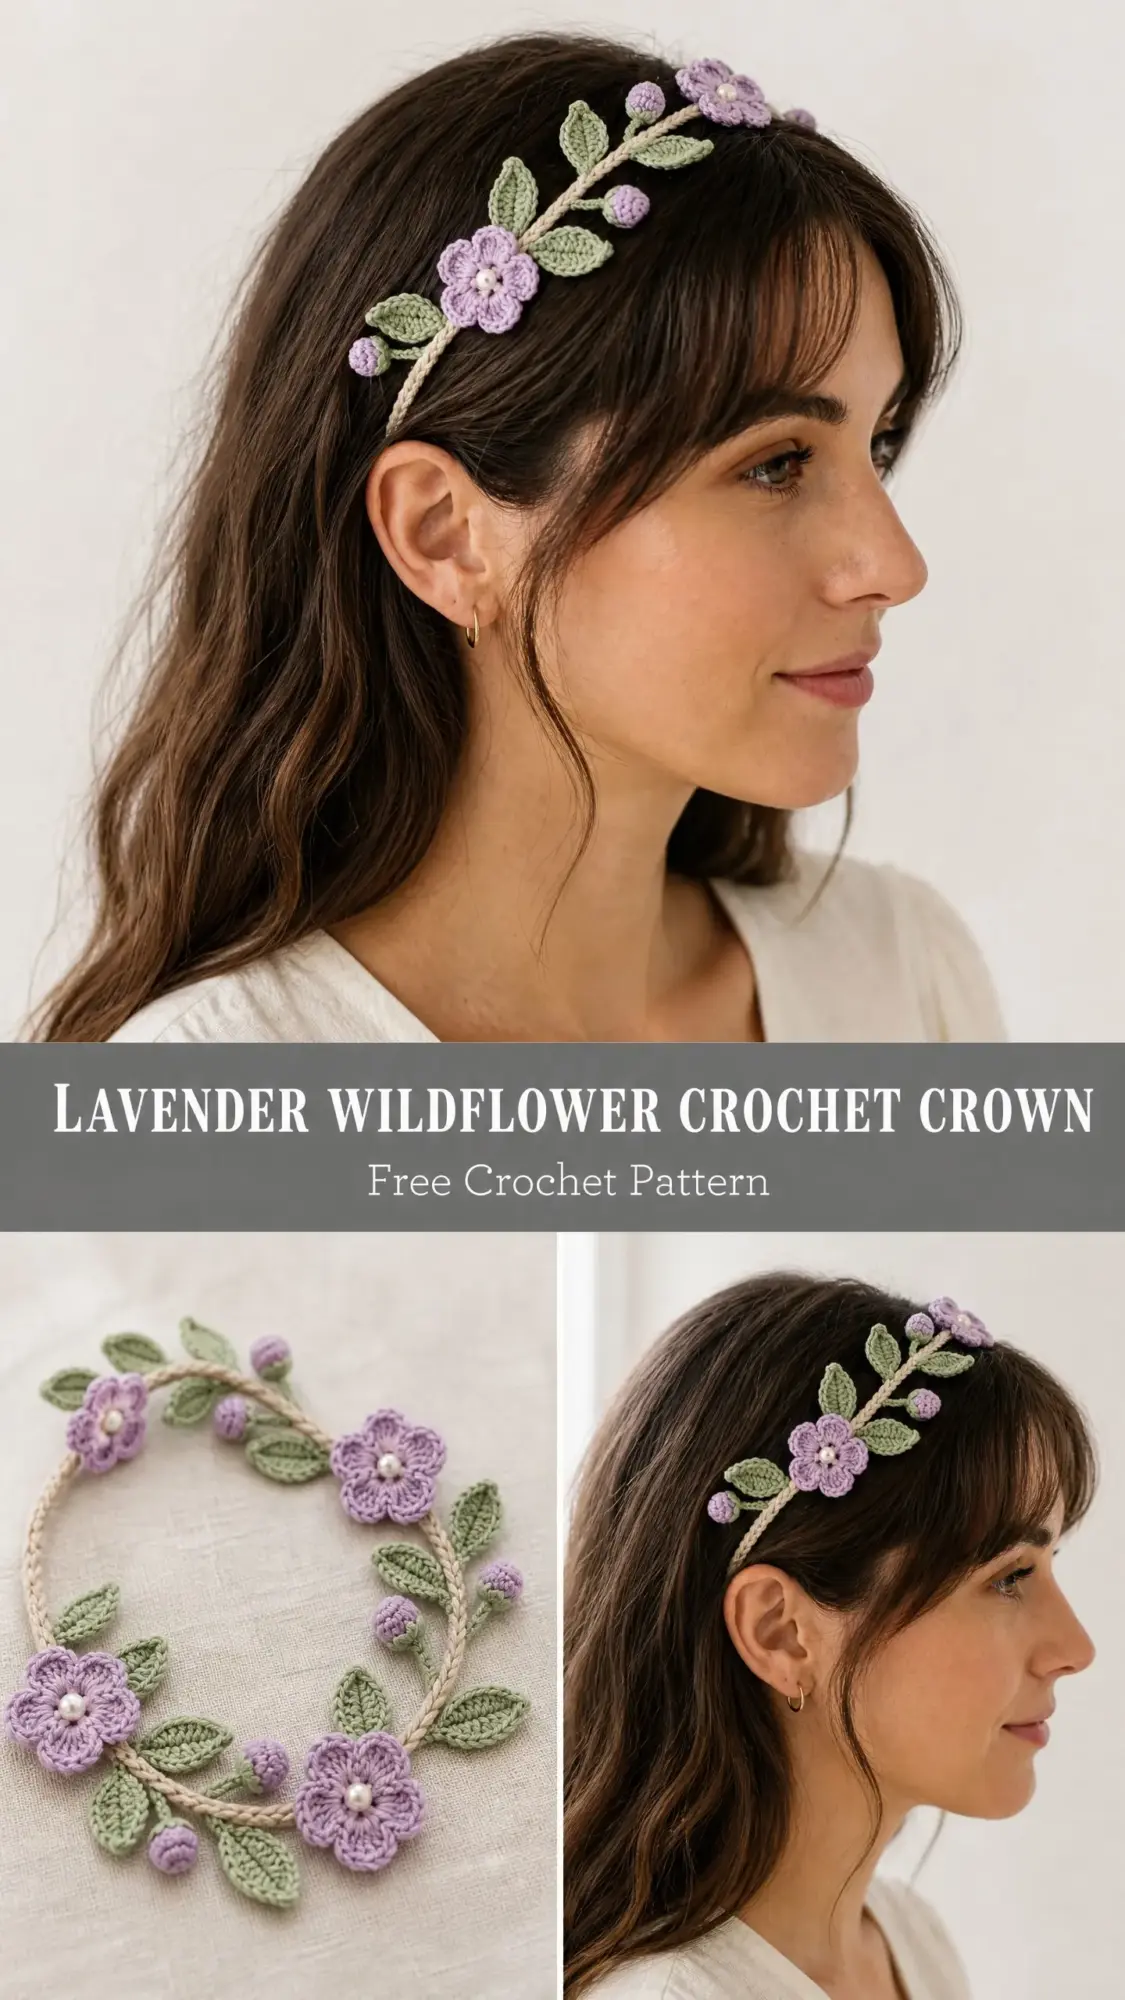
The construction here is genuinely interesting. You will create a braided cord band using a clever slip stitch technique, then work tiny flowers, round berries, and sweet little leaves as separate motifs. Everything gets assembled at the end, which means you can arrange and rearrange until the placement looks just right.
I will be honest with you about the skill level. This is an intermediate project, not because any single step is difficult, but because you are working small with a tiny hook. If you have mastered basic stitches and feel comfortable crocheting in the round, you can absolutely do this. Budget four to seven hours and give yourself permission to take breaks.
Why You Will Love This Crochet Pattern
This crown is the kind of project that looks incredibly impressive but breaks down into simple, manageable pieces. Each flower takes just two rounds. The berries are tiny balls worked in a continuous spiral. The leaves are flat ovals you can crochet in about five minutes each.
The magic happens in the assembly. When you arrange all those little motifs along the braided band, suddenly you have this gorgeous botanical headpiece that looks like it belongs in a garden wedding or a fairy tale photoshoot.
I love that you can customize this endlessly. Swap the lavender for blush pink or golden yellow. Use cream instead of sage for the leaves. Make extra berries or skip them entirely. The pattern gives you a framework, but the creative decisions are yours.
Materials You Will Need
Yarn:
Hook: US size B-1 / 2.25 mm crochet hook
Notions:
Yarn Suggestions
Paintbox Yarns Simply DK Cotton in Champagne White, Wisteria Purple, and Pistachio Green works beautifully. Note that this is DK weight, so if you go this route, move up to a US size E-4 / 3.5 mm hook and expect your motifs to be about 20% larger.
DMC Natura Just Cotton in Nacar, Viola, and Vert Mousse is ideal for fine detail work. This fingering weight cotton produces crisp, clean motifs at the gauge listed.
Lion Brand 24/7 Cotton in Ecru, Lavender, and Sage is widely available and gives a lovely slight sheen from the mercerized finish.
Any smooth fingering weight or light DK cotton will work. Avoid fuzzy or textured yarns because they will obscure the stitch definition in your small motifs.
Finished Measurements
Gauge
With fingering weight yarn and US B-1 / 2.25 mm hook:
Gauge matters here. Swatch the braided band before beginning to make sure your finished crown will fit comfortably.
Abbreviations Used in This Crochet Pattern
Special Techniques
The Braided Chain Band
This technique creates a twisted rope appearance by working slip stitches along both sides of a foundation chain. Here is how it works:
Step 1: Work the foundation chain to your desired length.
Step 2: Turn. Beginning in the 2nd chain from the hook, slip stitch into the back bump of each chain across. The back bump is the third loop on the back of each chain stitch. Do not turn when you finish.
Step 3: Rotate the piece 180 degrees so you are now working along the opposite side of the foundation chain. Slip stitch into each of the unused front loops of the original foundation chain across. Fasten off.
This creates a firm, slightly rounded band with a braided appearance on the top surface. It holds its shape beautifully.
Picot (Optional for Leaf Tips)
Chain 3, then slip stitch into the first of those 3 chains. This creates a small decorative knot at the leaf tip for extra detail.
Step by Step Crochet Pattern Instructions
Section 1: The Band
With Color A and your 2.25 mm hook, work as follows.
Foundation chain: Ch 160.
This yields a band approximately 10 inches or 25.5 cm long before the braiding technique. The braiding draws in the chain slightly, producing a finished length of approximately 9 inches or 23 cm of rigid band. Two 6 inch tie tails at each end bring the total wearable length to approximately 21 inches or 53 cm.
Row 1 (Braiding Pass 1): Turn. Beginning in the 2nd ch from the hook, sl st into the back bump of each ch across. Do not fasten off and do not turn. (159 sl sts)
Row 2 (Braiding Pass 2): Rotate work 180 degrees. Working along the opposite side of the foundation chain, sl st into each unused front loop of the original foundation chain across. (159 sl sts)
Fasten off, leaving a 6 inch tail for finishing. If you are using the tie method, leave a longer tail.
Checkpoint: Your completed band should measure approximately 9 to 9.5 inches or 23 to 24 cm in length. It should have a firm, braided cord appearance and hold its shape without curling.
Section 2: The Flowers
Make 3 flowers in Color B.
Round 1: Make a MR. Ch 1 (does not count as a st). Work 6 sc into the MR. Pull ring closed. Sl st to first sc to join. (6 sc)
Round 2: Ch 1 (does not count as a st). Working in front loops only for this round, work (sc, hdc, dc, hdc, sc) into each st around. This creates 6 petals. Sl st to first sc to join. (30 sts total: 6 petals each consisting of 5 sts)
Fasten off, leaving a 6 inch tail for sewing.
The pearl bead will be sewn to the center of each flower during assembly. Set your beads aside for now.
Section 3: The Berries
Make 5 berries (or 6 for a fuller arrangement) in Color B.
Round 1: Make a MR. Ch 1 (does not count as a st). Work 6 sc into the MR. Pull ring closed. Do not join. (6 sc)
Round 2: Working in a continuous spiral (pm in first st of round to track beginning), 2 sc in each st around. (12 sc)
Round 3: Sc in each st around. (12 sc)
Round 4: Sc2tog around until 6 sts remain. You can stuff lightly with a small amount of yarn scraps or leave unstuffed for a flatter profile. The crown shown appears to have lightly stuffed berries, giving a round bobble look. (6 sc)
Round 5: Sc2tog around. (3 sc)
Fasten off, leaving a 6 inch tail. Thread tail onto yarn needle and pass through remaining 3 sts, pull to close opening. Knot to secure.
Section 4: The Leaves
Make 6 to 8 leaves in Color C. Each leaf is worked flat in rows.
Foundation: Ch 7.
Row 1 (RS): Starting in the 2nd ch from the hook, sc in next 1 ch, hdc in next 1 ch, dc in next 1 ch, hdc in next 1 ch, sc in next 1 ch, then work 3 sc into the last ch (this is the leaf tip).
Rotating to work along the opposite side of the foundation chain, sc in next 1 ch, hdc in next 1 ch, dc in next 1 ch, hdc in next 1 ch, sc in next 1 ch. Sl st to the first sc at the base to join. (13 sts around the leaf perimeter, not counting the sl st join)
Fasten off, leaving a 6 inch tail for sewing.
Optional detail: For leaves with a slightly pointed tip, substitute a picot at the center of the 3 sc tip. Work sc, ch 3, sl st into first of those 3 chs (picot), sc into the same tip chain space.
Checkpoint: Each leaf should measure approximately 1 inch or 2.5 cm long and 1/2 inch or 1.3 cm wide at its widest point. Each berry should measure approximately 3/8 to 1/2 inch or 1 to 1.3 cm in diameter. Each flower should measure approximately 1 inch or 2.5 cm across.
How to Customize the Size
For a smaller head or child size: Reduce the foundation chain by 16 stitches per inch you wish to remove. For a head circumference of 18 to 19 inches, reduce to ch 128 and adjust tie length as needed.
For a larger head or looser fit: Add 16 stitches per inch you wish to add. For a head circumference of 23 to 24 inches, increase to ch 176.
For a longer decorative section: Make 4 flowers instead of 3 and 8 to 10 berries and 10 leaves, spacing them to cover 9 inches or 23 cm of the front band.
Hook size adjustments: Moving to a US C-2 / 2.75 mm hook will produce motifs and band approximately 10 to 12% larger. Moving to a US D-3 / 3.25 mm hook produces motifs approximately 20% larger, which is more suitable for DK weight yarn.
Finishing and Assembly
Step 1: Weave in all ends on all motifs except the sewing tails. You need those tails to attach everything to the band.
Step 2: Block the flowers and leaves lightly. Pin them flat on a foam blocking board, mist with water, and allow to dry completely. Blocking opens the petals and flattens the leaves for a much neater finished appearance. Do not skip this step.
Step 3: Lay the completed band flat on your work surface. Mark the center 7 inches or 18 cm of the band with stitch markers or pins. This is your decorative placement zone.
Step 4: Arrange the motifs along the marked front section of the band without sewing, following this layout:
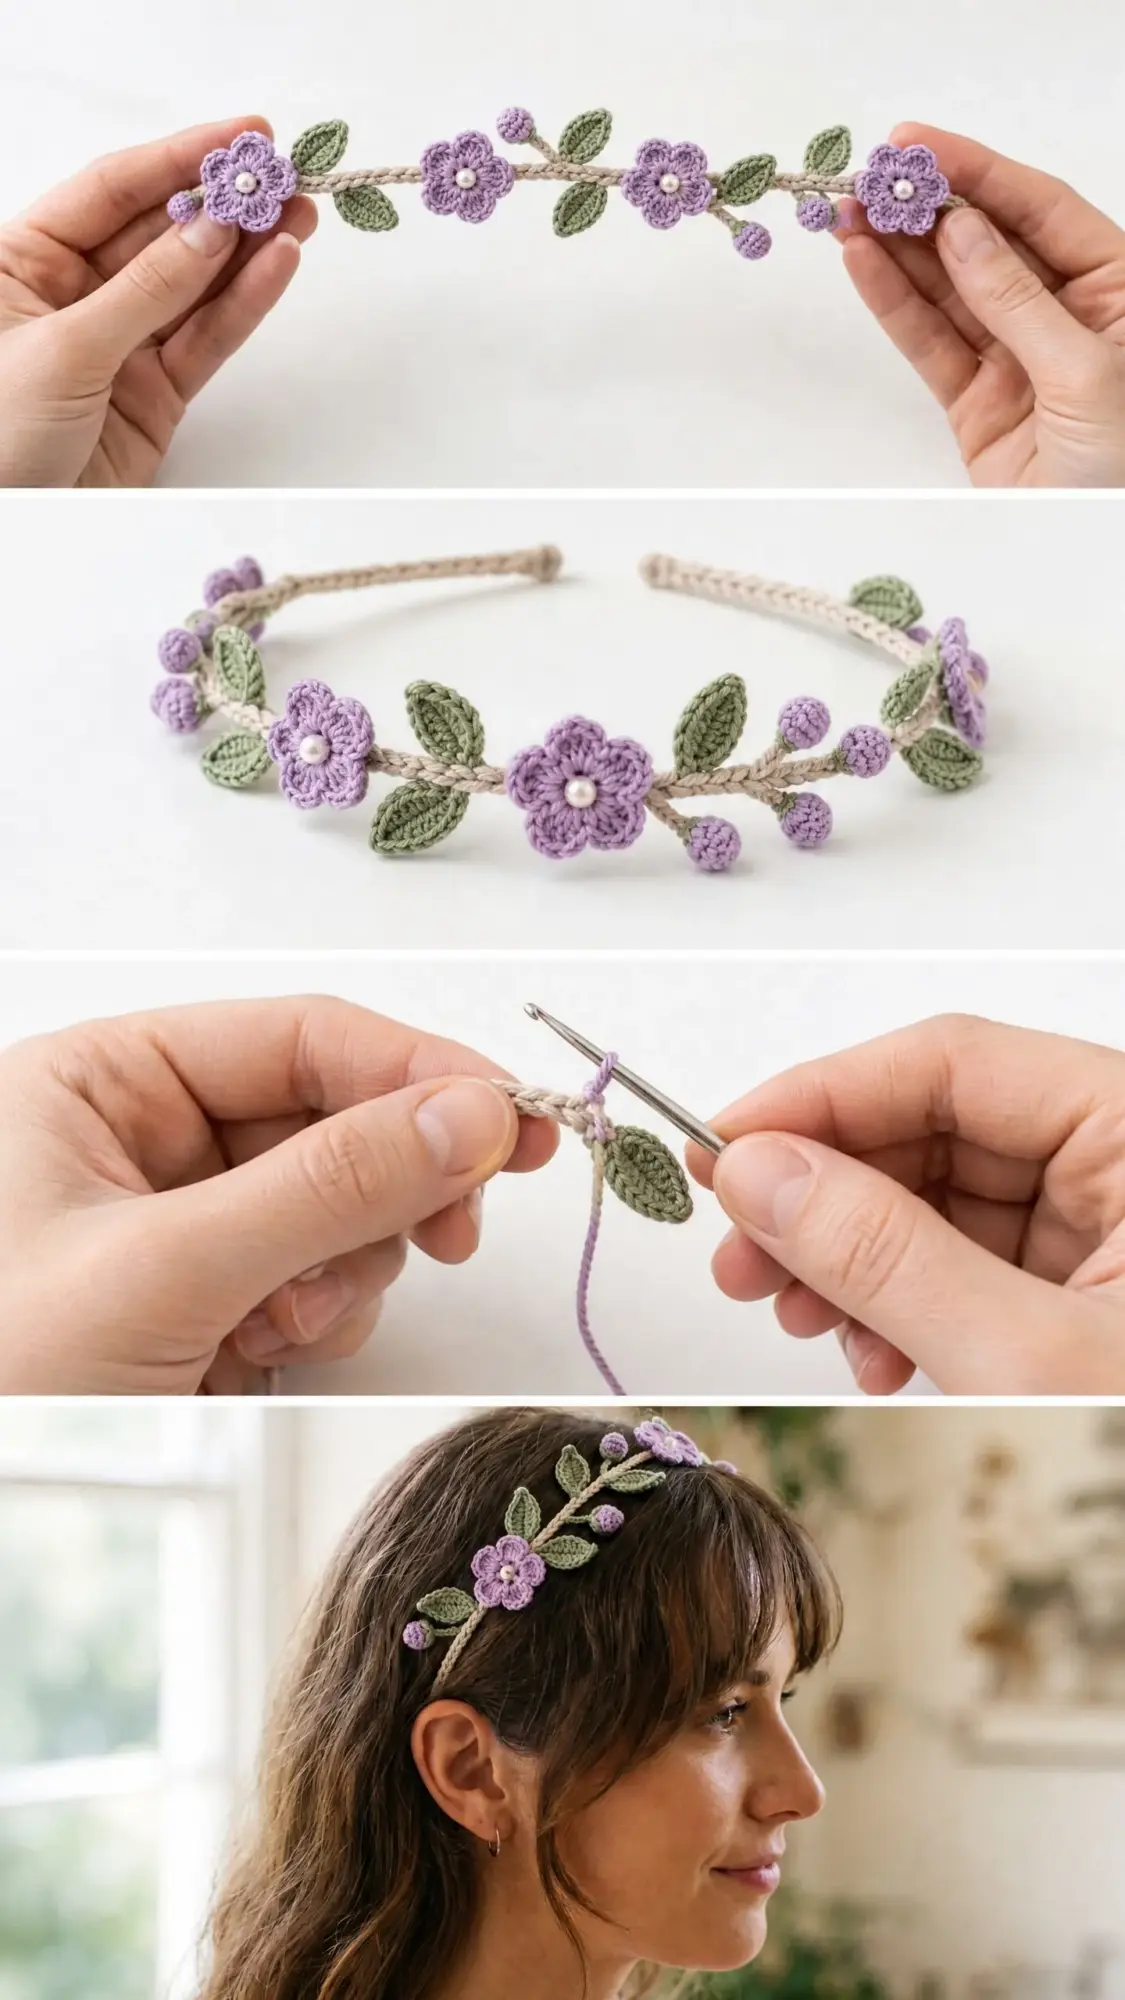
Fill remaining gaps between motifs with single leaves or lone berries as desired. The vine appearance comes from the braided cord itself acting as the stem, so position motifs close to or slightly overlapping the band.
Step 5: Once you are happy with the arrangement, pin all motifs in place.
Step 6: Using the sewing tails and a yarn needle, sew each motif to the band with several secure stitches. Pass the needle through the band stitches to anchor well. For berries, stitch through the base. For leaves, stitch along the center spine at the base. For flowers, stitch through the back at the center.
Step 7: Using a beading needle and matching white or cream thread, sew one pearl bead securely to the center of each flower. Pass the thread through the bead at least 3 times and knot firmly at the back of the flower.
Step 8: Weave in all remaining ends.
Step 9: Finish the ends of the band using your chosen method.
For the tie method: Trim ends to 6 inches or 15 cm or longer if desired. You can leave the ends as plain cord for tying or wrap with a few overhand knots to prevent fraying. If the yarn end frays, apply a small amount of fabric glue or clear nail polish to the tip.
For the button and loop method: Sew a small button to one end of the band approximately 1/4 inch or 0.6 cm from the end. At the opposite end, attach Color A yarn with a sl st and ch 6, sl st back into the same point on the band to form a loop. Fasten off and weave in end. Try the loop over the button before fastening off to ensure a secure but workable fit.
Blocking Your Finished Crown
Wet blocking is recommended for the best results. Submerge all finished motifs and the completed assembled crown briefly in cool water. Gently squeeze out excess water without wringing. Pin to a foam mat in the desired shape, opening petals on flowers and smoothing leaves flat. Allow to dry fully before wearing.
Cotton holds its blocked shape beautifully. This step makes a significant difference in how polished your finished crown looks.
Care Instructions
Hand wash in cool water with a gentle soap. Do not wring or twist. Lay flat to dry. If the crown becomes misshapen with wear, a light misting with water and gentle reshaping by hand will restore its form.
Store flat or loosely coiled to avoid crushing the dimensional motifs. If your beads are sewn securely, the crown can be gently hand washed. Otherwise, remove the beaded flowers before washing and reattach after drying.
Pattern Notes to Keep in Mind
Work all your motifs first before attaching anything to the band. This lets you see exactly what you have and adjust quantities if needed.
The decorative section spans approximately the front 7 inches, which is roughly the front center third of the crown. The remaining back portion stays plain and undecorated for comfort against your head.
All rounds are worked with the right side facing unless specified. Do not turn between rounds unless instructed.
The crown shown uses a natural linen toned Color A for the band, lavender for all flowers and berries, and sage green for all leaves. Feel free to substitute any three complementary colors that make your heart happy.
Who Is This Crochet Crown Perfect For?
This wildflower crown makes an absolutely stunning accessory for photo shoots, garden weddings, flower girl outfits, fairy costumes, birthday celebrations, or just wearing around the house because you feel like a woodland princess.
It also makes a thoughtful handmade gift. The recipient will not believe you made it yourself.
Thank you so much for choosing this Lavender Wildflower Crochet Crown pattern. I really hope you enjoy creating it and wearing it even more. If you make one, I would absolutely love to see your finished crown. Tag me on Instagram or share a photo in my Facebook group. Seeing your creations genuinely makes my day.
If you want to save this pattern for later, go ahead and pin it to your favorite Pinterest board so you can find it when you are ready to start. And if you have any questions or just want to share how yours turned out, leave a comment below. I read every single one.
You Might Also Like
- Mint Green Shell Stitch Baby Dress Free Crochet Pattern
- Sage Green Romantic Peplum Crochet Top Free Pattern
- Sage Green Halter Peplum Dress Free Crochet Pattern
- Ocean Wave Granny Square Bamboo Tote Free Crochet Pattern