
A handmade baby dress makes one of the most treasured gifts you can give to new parents. This sweet mint green dress features a structured bodice with flutter sleeves and a beautifully draped shell stitch skirt that flows with every tiny movement. The construction uses familiar stitches like single crochet (sc) and double crochet (dc) arranged in an elegant shell pattern that looks far more complex than it actually is. Perfect for baby showers, christenings, or simply spoiling the little one in your life, this dress works up in about 10 to 15 hours and fits babies aged 6 to 12 months.
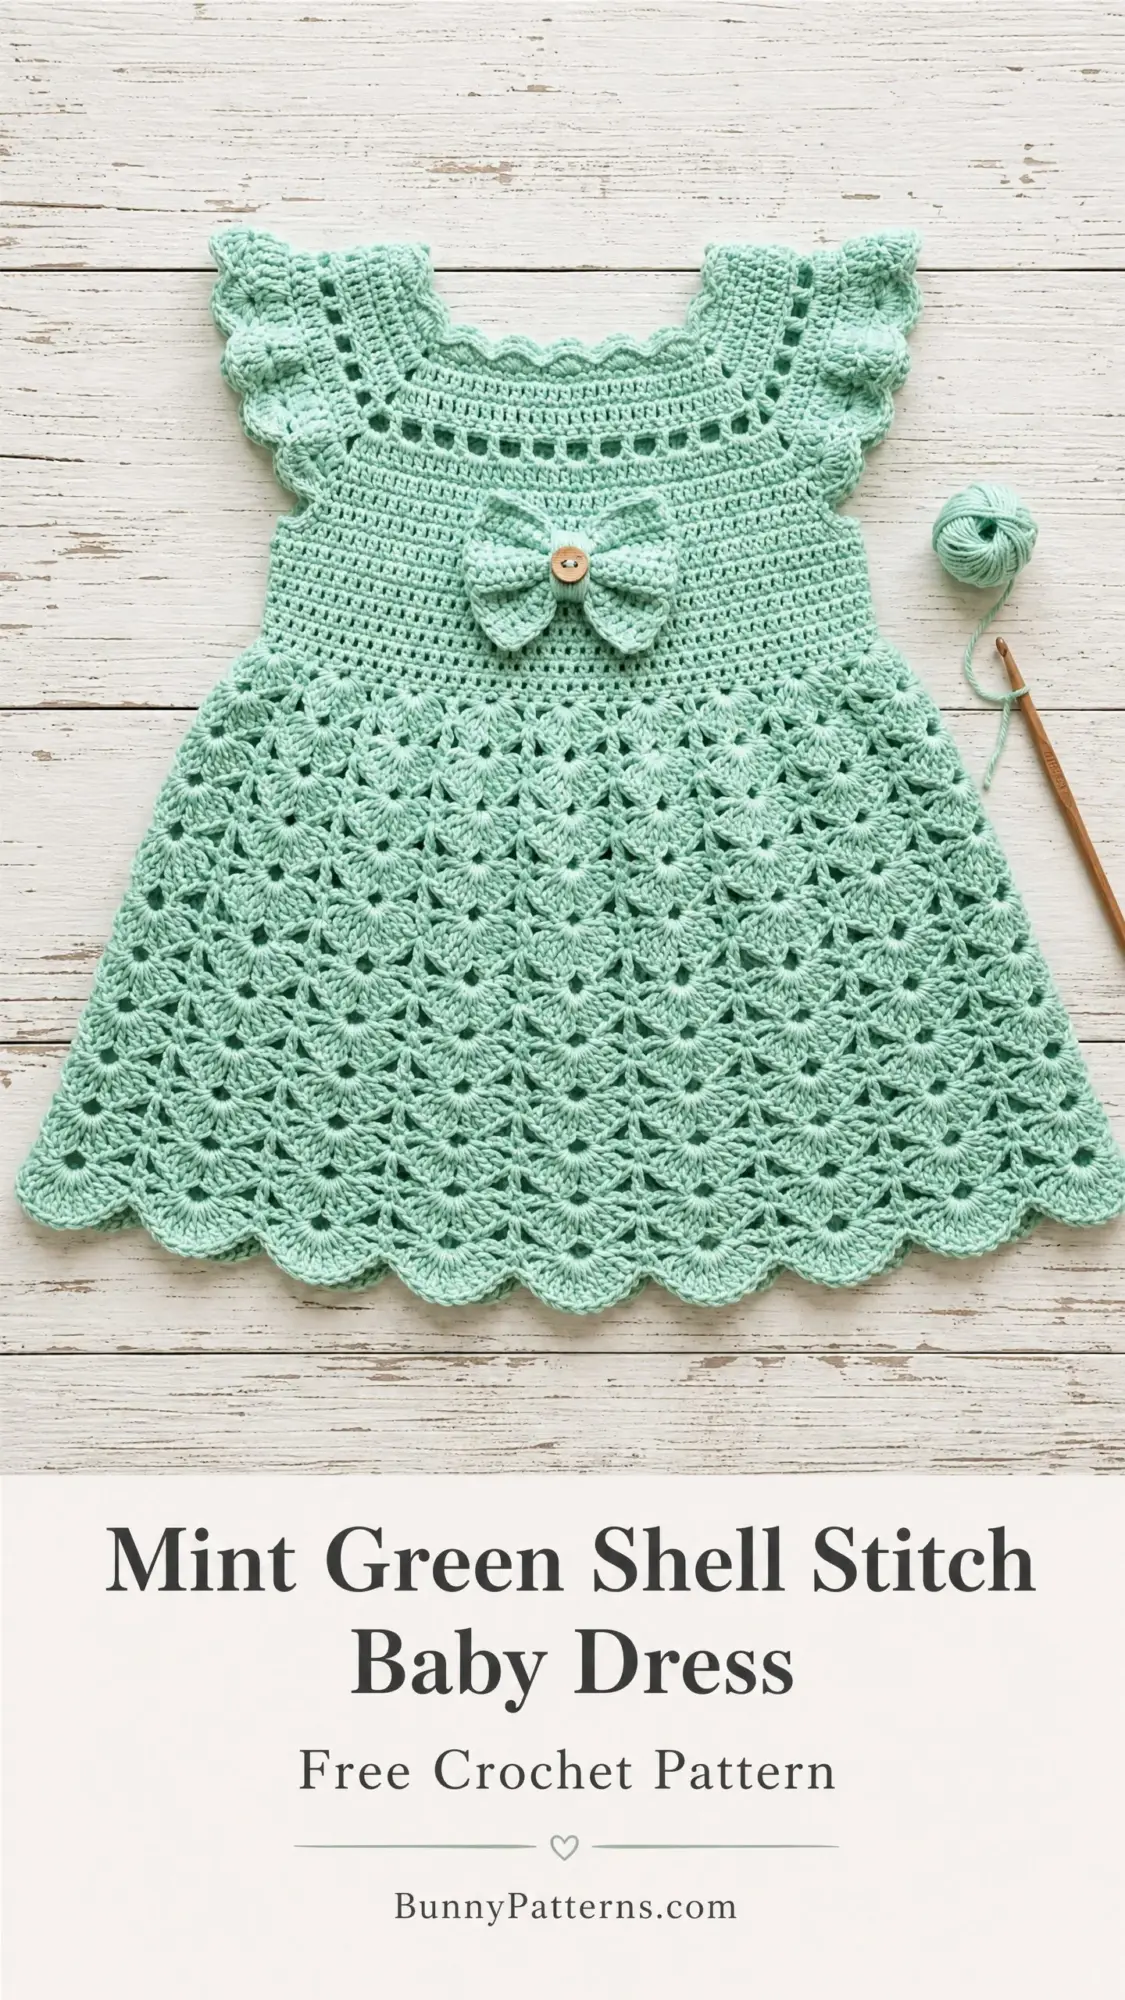
The soft scalloped edges at the neckline, sleeves, and hem give this piece a delicate heirloom quality. A crocheted bow with a wooden button accent sits at the waist, adding the perfect finishing touch.
Whether you are making this for your own granddaughter, a friend’s baby shower, or a charity donation, this pattern delivers stunning results that will be cherished for years. Let me walk you through every single step.
Why You Will Love This Baby Dress Pattern
This dress has everything I look for in a baby garment pattern. The top-down construction means you can try it on as you go (if the baby is cooperative, of course). The shell stitch skirt creates beautiful drape without adding bulk. And the flutter sleeves? They add just enough sweetness without getting in the way of tiny arms exploring the world.
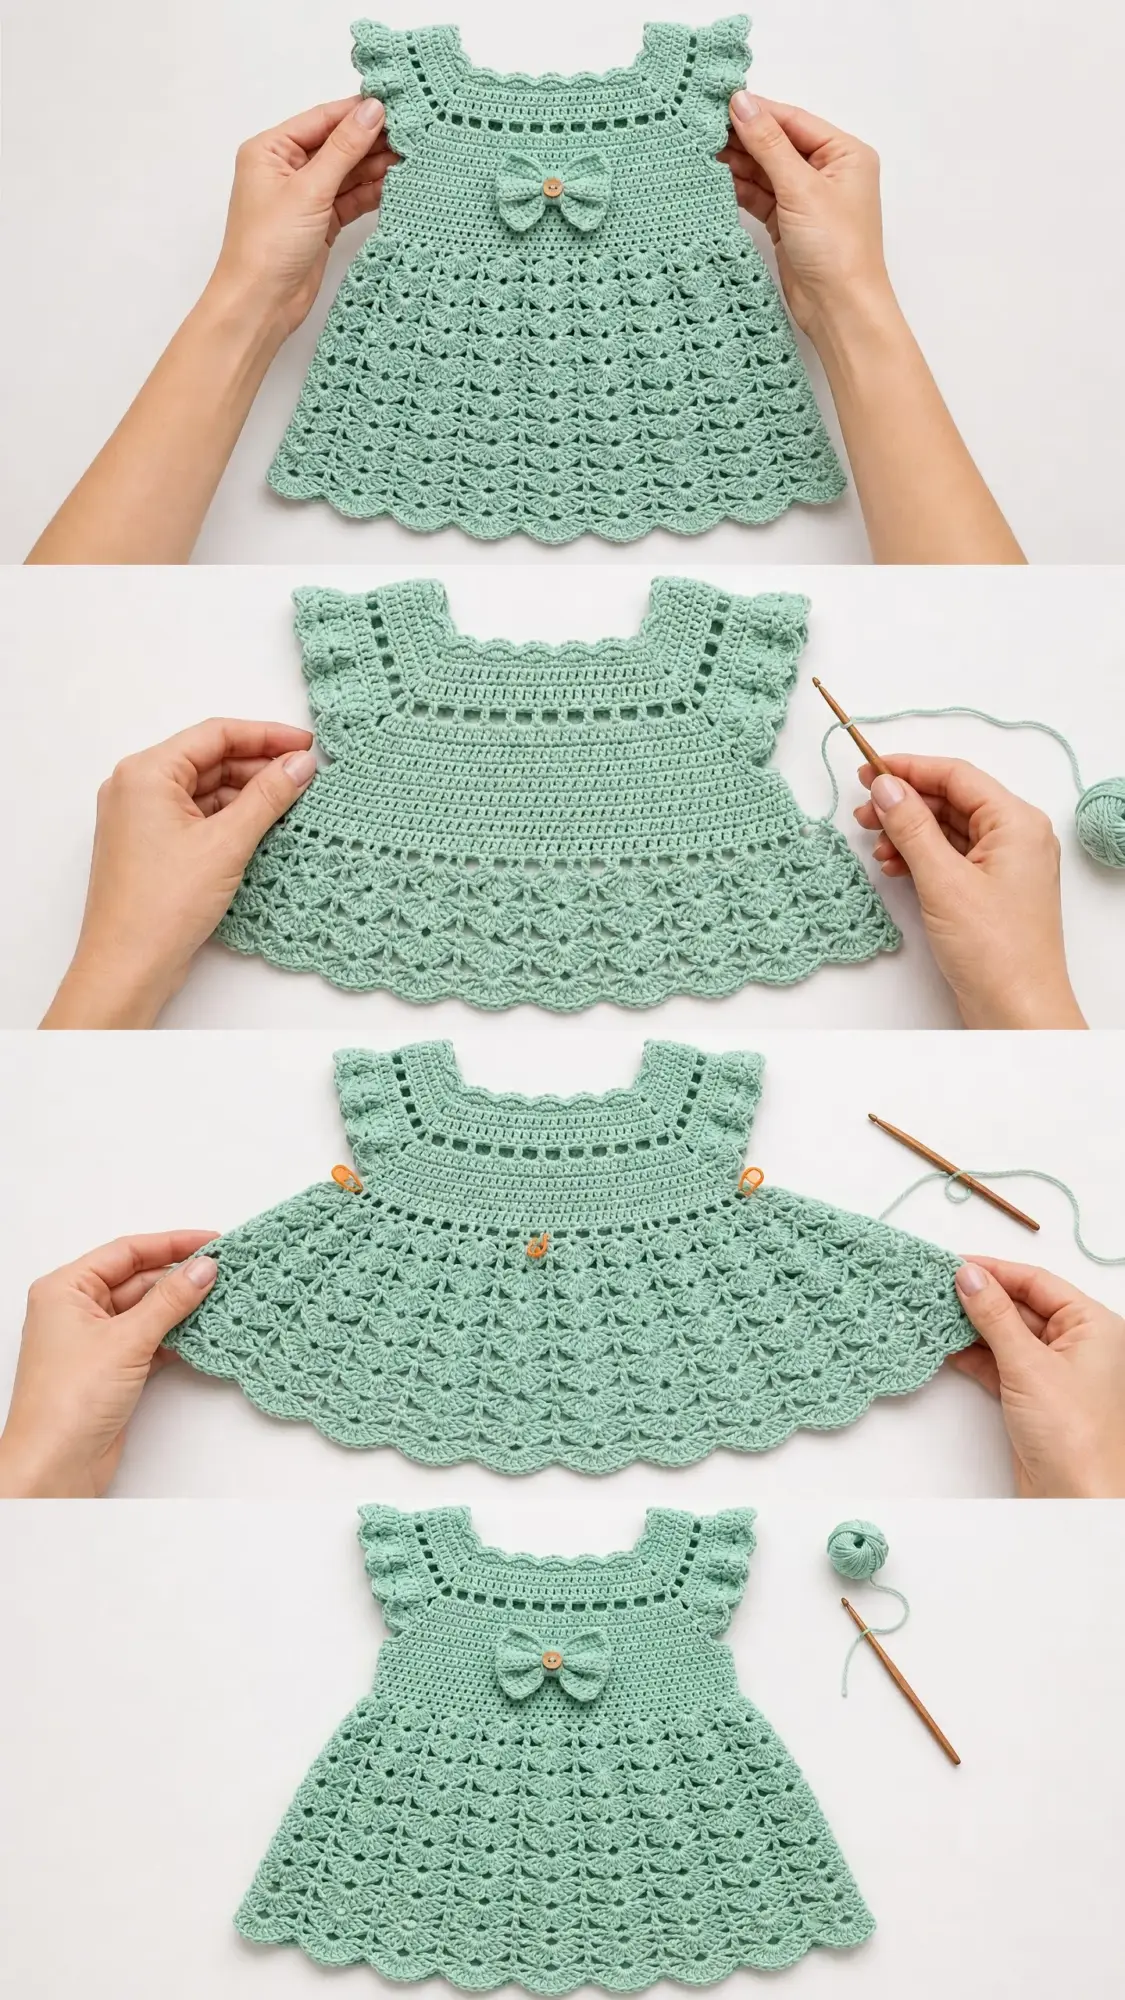
The bodice is worked flat in two pieces, which keeps things simple and manageable. Once you seam the sides together, you pick up stitches around the bottom edge and work the skirt in joined rounds. This means the right side always faces you while you work the shell pattern, so you can admire your progress the whole time.
Cotton yarn is my strong recommendation here. It blocks beautifully, washes easily, and feels gentle against baby skin. The finished dress has a classic look that photographs wonderfully and holds up to repeated wear and washing.
Materials You Will Need
Gather these supplies before you begin:
Yarn: Approximately 250 to 300 yards of DK weight yarn (CYCA #3). I recommend 100% cotton or a cotton blend for softness and drape. Great options include Paintbox Yarns Simply DK in Spearmint, Lion Brand 24/7 Cotton DK in Mint, or Drops Safran in Mint Green.
Hook: US size E-4 / 3.5 mm crochet hook
Notions:
Finished Measurements
This dress is designed to fit babies aged 6 to 12 months:
Gauge
18 stitches and 20 rows = 4 inches / 10 cm in single crochet, blocked
One shell stitch repeat (6 stitches wide) = approximately 1.33 inches / 3.4 cm
5 rows of shell stitch pattern = approximately 1.5 inches / 3.8 cm
Please swatch before beginning. Gauge matters for fitted garments. If your swatch is too big, try a smaller hook. Too small? Go up a hook size. A few minutes spent swatching saves hours of frustration later.
Abbreviations and Stitch Definitions
Let me break down every stitch you will use in this pattern:
Special Stitches for the Shell Stitch Baby Dress
Shell Stitch: Work 5 dc into the same stitch or space. This creates a fan shape that forms the main texture of the skirt.
Half Shell: Work 3 dc into the same stitch or space. Used at the beginning and end of rows to maintain clean edges.
Scallop Edging: This decorative finish appears at the neckline, sleeves, and hem. You will work it as follows: sc in first stitch, skip 2 stitches, work 5 dc in next stitch, skip 2 stitches, sc in next stitch. Repeat this sequence around the edge.
Pattern Notes Before You Begin
Read through these notes first. They will save you confusion later.
1. The bodice is worked flat in two pieces (front and back), then seamed at the sides. The skirt is picked up from the bottom edge and worked in joined rounds.
2. The skirt rounds are not turned. The right side always faces you.
3. For sc rows, chain 1 to turn. This chain does NOT count as a stitch.
4. For dc rows, chain 3 to turn. This chain DOES count as your first dc.
5. Stitch counts appear in parentheses at the end of each row or round.
6. The dress slips over the head. There is no button closure at the back.
7. Work loosely throughout, especially in the shell stitch sections, to maintain drape.
Step by Step Instructions
Front Bodice Panel
The front bodice is worked flat from the neckline down to the underarm.
Foundation Chain: Ch 37.
Row 1 (RS): Sc in 2nd ch from hook and in each ch across. Ch 1, turn. (36 sc)
Row 2: Sc in each st across. Ch 1, turn. (36 sc)
Row 3 (neckline eyelet row): Sc in first 3 sts, (ch 1, sk 1 st, sc in next st) 15 times, sc in last 3 sts. Ch 1, turn. (21 sc plus 15 ch-1 sps = 36 working positions)
Row 4: Sc in each sc and in each ch-1 sp across. Ch 1, turn. (36 sc)
Rows 5 through 6: Sc in each st across. Ch 1, turn. (36 sc)
Row 7 (begin armhole shaping): Sc in first 4 sts. These form the right strap area. Fasten off. Skip to stitch 5, rejoin yarn, and sc across to stitch 32. Ch 1, turn. (28 sc across chest panel)
The 4 stitches at each end form the armhole borders.
Rows 8 through 16: Sc in each st across. Ch 1, turn. (28 sc each row)
After Row 16, your front bodice panel should measure approximately 5.5 inches from the foundation chain. Fasten off.
Back Bodice Panel
Work exactly as the Front Bodice Panel, Rows 1 through 16. Fasten off.
Assembling the Bodice
Lay the front and back pieces with right sides facing each other. Using your yarn needle and a mattress stitch or slip stitch seam, join the side seams from Row 7 down to Row 16 on each side. Leave the shoulder area open. The dress slips over the head through this generous neckline opening.
Checkpoint: Your assembled bodice should measure approximately 5.5 inches tall and 8 inches wide (about 16 inches around the chest).
Waist Join and Skirt Setup
With RS facing, join yarn at either side seam at the lower edge of the bodice.
Setup Round: Work 1 sc in each stitch across the lower edge of the front panel (28 sc), then work 1 sc in each stitch across the lower edge of the back panel (28 sc). Join with sl st to first sc. (56 sc)
Increase Round: Ch 1 (does not count as st), work 2 sc in each of 56 sc around. Join with sl st to first sc. (112 sc)
This increase round doubles your stitch count to create the flared skirt base.
Working the Shell Stitch Skirt
The skirt is worked in joined rounds with the RS always facing you.
Skirt Round 1 (transition): Ch 4 (counts as dc plus ch 1), sk 1 st, (dc in next st, ch 1, sk 1 st) 55 times. Join with sl st to 3rd ch of beg ch-4. (56 dc plus 56 ch-1 sps)
Skirt Round 2 (shell foundation): Ch 1, sc in same sp (the first ch-1 sp), ch 2, 5 dc in next dc (shell made), ch 2, (sc in next ch-1 sp, ch 2, 5 dc in next dc, ch 2) 13 times, ending last rep with sc in last ch-1 sp, ch 2, sl st to first sc to join. (14 shells, 14 sc, 28 ch-2 sps)
Skirt Round 3: Ch 3 (counts as dc), 2 dc in same sc (half shell at beg), ch 1, sc in center dc of next shell, ch 1, (5 dc in next sc, ch 1, sc in center dc of next shell, ch 1) 13 times, 2 dc in same sc as beg ch-3 (completing beg half shell). Join with sl st to top of beg ch-3. (14 shell positions total)
Skirt Round 4: Ch 1, sc in joining st, ch 2, 5 dc in next sc (shell), ch 2, (sc in center dc of next shell, ch 2, 5 dc in next sc, ch 2) 13 times. Join with sl st to first sc. (14 shells, 14 sc)
Skirt Rounds 5, 7, 9, 11, 13, 16, 18, 20, 23, and 25: Rep Round 3.
Skirt Rounds 6, 10, 12, 14, 17, 19, 21, 24, and 26: Rep Round 4.
Skirt Round 8 (increase round): Ch 1, sc in joining st, ch 2, 7 dc in next sc (large shell for increase), ch 2, (sc in center dc of next shell, ch 2, 7 dc in next sc, ch 2) 13 times. Join with sl st to first sc. (14 large shells of 7 dc each, 14 sc)
Skirt Round 15 (increase round): Rep Round 8 using 7-dc shells.
Skirt Round 22 (increase round): Rep Round 8 using 7-dc shells.
Fasten off after Round 26.
Checkpoint: Your skirt should measure approximately 7.5 inches from the waist. The hem circumference should be approximately 28 inches.
Hem Scallop Edging
Join yarn at any sc between shells on the final round.
Round 1: Ch 1, sc in same sc, sk 2 dc, 5 dc in next dc (center of shell), sk 2 dc, (sc in next sc, sk 2 dc, 5 dc in next dc, sk 2 dc) around. Join with sl st to first sc. Fasten off. (14 scallops)
Neckline Edging
Join yarn at any point along the neckline edge.
Round 1: Ch 1, sc evenly around the neckline, placing 1 sc in each chain loop and 1 sc in each row end. Adjust to approximately 42 sc total. Join with sl st to first sc. (42 sc)
Round 2 (scallop): Ch 1, sc in first sc, sk 2 sc, 5 dc in next sc, sk 2 sc, (sc in next sc, sk 2 sc, 5 dc in next sc, sk 2 sc) 6 times. Join with sl st to first sc. Fasten off. (7 scallops)
Flutter Sleeves
Work one sleeve on each armhole opening.
Setup Round: Join yarn at the underarm. Ch 1, sc evenly around the armhole opening, adjusting to 24 sc total. Join with sl st to first sc. (24 sc)
Flutter Row 1: Ch 3 (counts as dc), 2 dc in same sc, 3 dc in each sc around. Join with sl st to top of beg ch-3. (72 dc)
Flutter Edging Round: Ch 1, sc in first dc, sk 2 dc, 5 dc in next dc, sk 2 dc, (sc in next dc, sk 2 dc, 5 dc in next dc, sk 2 dc) 11 times. Join with sl st to first sc. Fasten off. (12 scallops)
Repeat for the second armhole.
Crocheted Bow Embellishment
Rectangle panel: Ch 17.
Row 1: Sc in 2nd ch from hook and in each ch across. (16 sc)
Rows 2 through 10: Ch 1, turn, sc in each st across. (16 sc)
Fasten off. Fold the rectangle so the short ends meet. Pinch the center tightly and wrap yarn around the middle several times to create a bow shape. Secure with several stitches. Sew a button to the center.
Sew the completed bow to the center front of the dress at the waist join.
Finishing and Blocking Your Baby Dress
Weave in all ends securely using your yarn needle. Pay special attention to the waist join and sleeve joins where tension is greatest.
Wet blocking transforms this dress from nice to stunning. Soak the finished piece in cool water for 15 to 20 minutes. Gently squeeze out excess water without wringing. Lay flat on a blocking mat and pin the hem scallops, neckline, and sleeve ruffles into their final shapes. Allow to dry completely before removing pins.
Blocking opens up the shell stitch pattern beautifully and gives the dress its polished, heirloom appearance.
Size Adjustments
For larger sizes (12 to 24 months): Add 6 stitches to the foundation chain for each size up. Work 2 to 4 additional rows in the bodice. Increase to 126 or 140 stitches at the waist. Add extra skirt rounds before the hem.
For smaller sizes (0 to 6 months): Reduce the foundation chain by 6 stitches. Work fewer bodice rows. Reduce skirt increase rounds to two instead of three.
Care Instructions
Machine wash cold on a gentle cycle if using machine-washable cotton yarn. Lay flat to dry. Do not tumble dry. Store folded or rolled, not hung, to prevent stretching.
Final Thoughts on This Shell Stitch Baby Dress Crochet Pattern
This little dress is the kind of project that reminds me why I fell in love with crochet in the first place. Watching the shell stitch pattern develop round after round, seeing those flutter sleeves take shape, and adding that final bow at the waist is so incredibly satisfying.
The finished piece looks like something from a boutique, but it is made with your own two hands and filled with love. That is something no store-bought dress can ever replicate.
If you enjoyed making this pattern, I would absolutely love to see your finished dress! Save this page to your Pinterest boards so you can find it easily when you are ready to start. And please leave a comment below sharing your color choices or any tips you discovered along the way. Happy crocheting, friend!
You Might Also Like
- Dusty Rose Spiral Flap Backpack Free Crochet Pattern
- Sage Green Textured Clutch Bag Free Crochet Pattern
- Coral Sunset Mandala Crochet Two-Piece Free Pattern
- Champagne Gold Bell Sleeve Crochet Top Free Pattern