
Okay, yarn lovers. This is your sign to finally use those beautiful pastel skeins you have been saving for "the right project." You know the ones I mean. They are sitting in your stash, waiting for something worthy of their soft lavender and minty goodness.
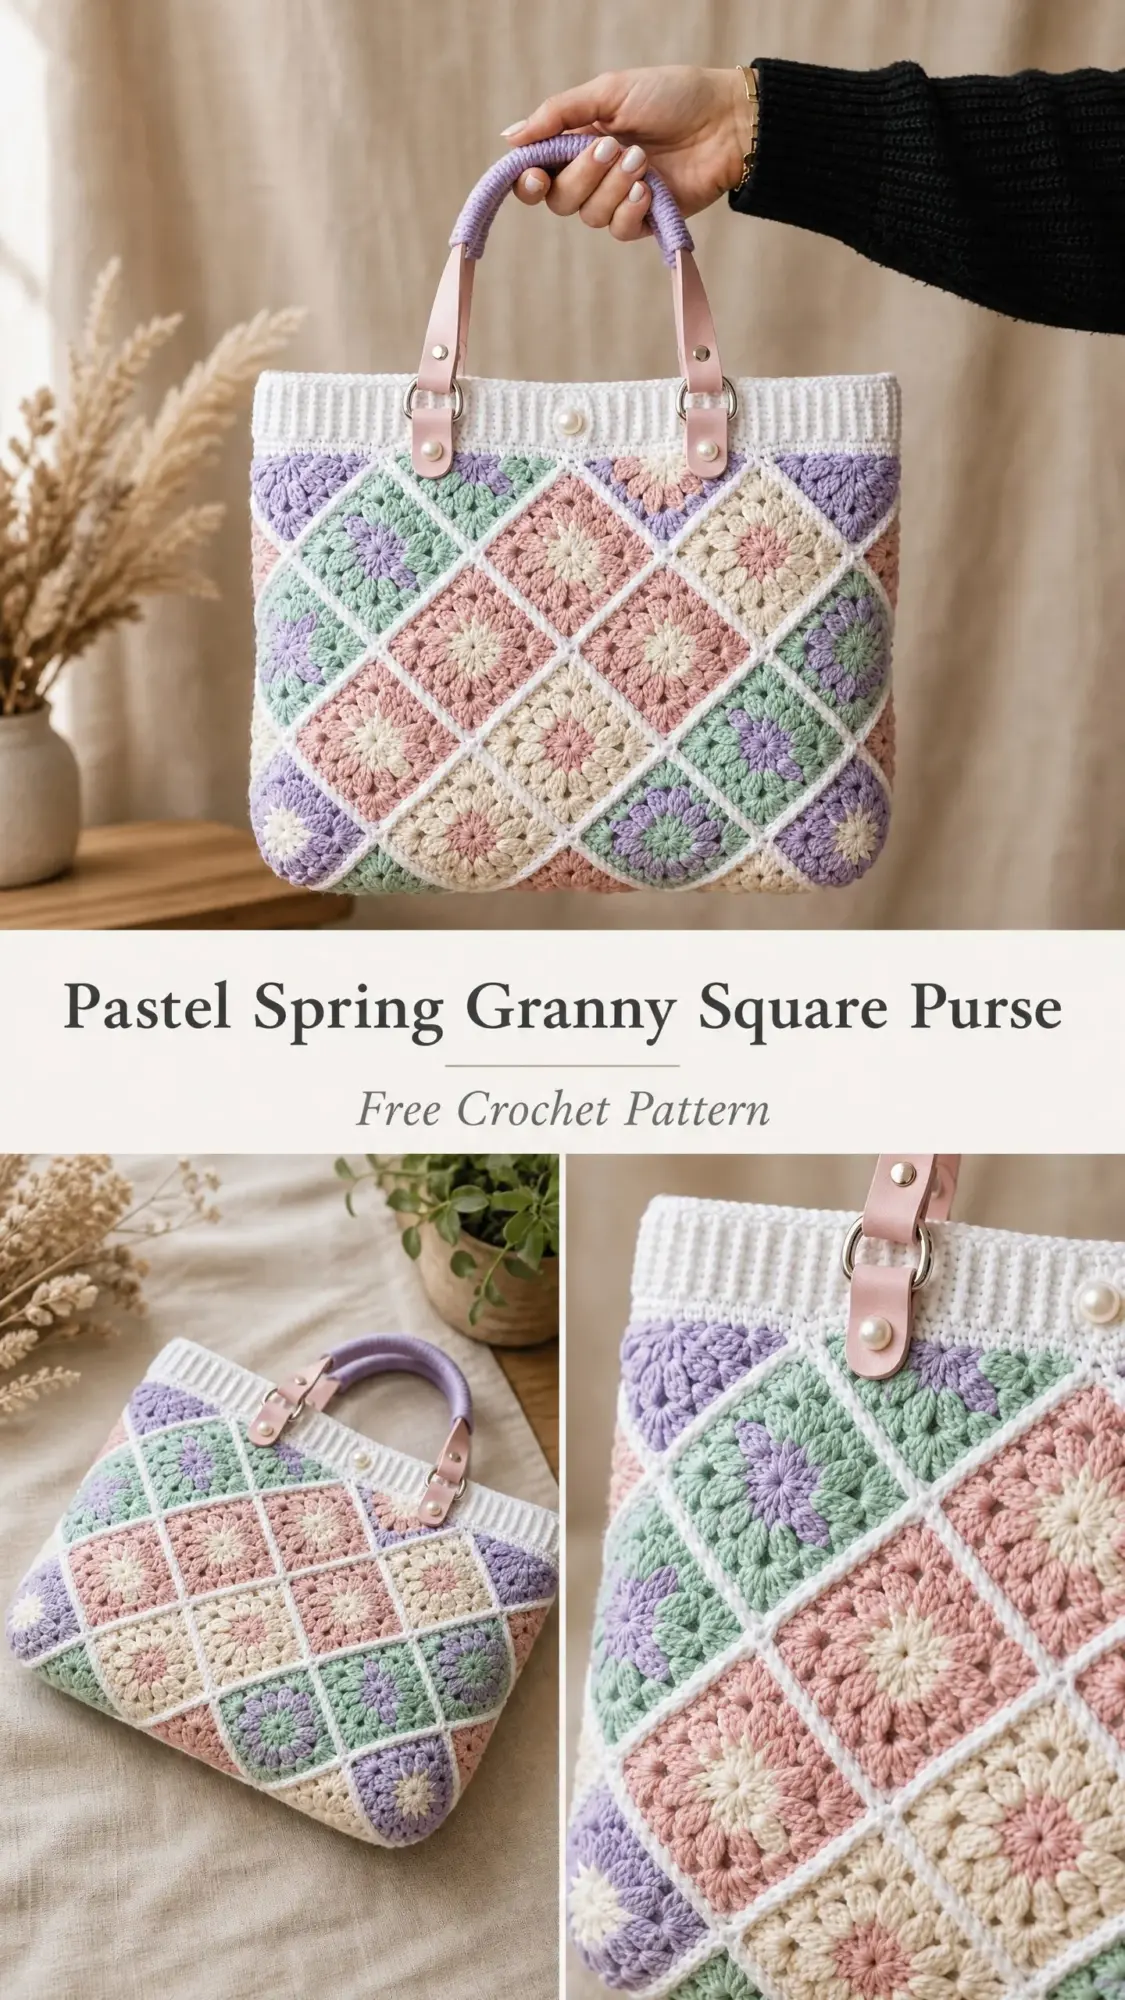
This granny square purse is that project. The construction is genuinely interesting because the squares sit on the diagonal, creating a diamond lattice effect that looks far more complicated than it actually is. You will work classic granny squares, join them as you go, add a crisp ribbed band at the top, and finish with some lovely hardware details.
Fair warning: this is an intermediate project. You should be comfortable with granny squares worked in the round and joining techniques. But if you have made a few granny square blankets or scarves, you are absolutely ready for this. Let me walk you through every single step.
Why This Granny Square Purse Pattern Works So Well
The magic of this design comes from setting traditional granny squares at a 45-degree angle. Instead of a standard grid, you get this gorgeous diamond pattern across the front and back panels. The white border around each square creates clean lines that make the pastel centers really pop.
I love that this bag has actual structure. With a plastic canvas insert at the bottom and an optional fabric lining, it holds its shape beautifully. No floppy tote syndrome here. The finished purse stands up on its own and looks polished enough for everyday use.
The ribbed top band adds a professional touch that elevates the whole piece. Combined with the blush pink faux leather strap tabs, lavender wrapped handle, and pearl button details, this is a bag you will be proud to carry everywhere.
Materials You Will Need
Before you start, gather everything on this list. Having all your supplies ready makes the process so much smoother.
Yarn (DK weight, light weight #3, cotton or cotton blend):
Total yarn needed: approximately 500 yards (457 m)
Hook: US size E-4 (3.5 mm) crochet hook
Notions:
Yarn Suggestions:
Lion Brand 24/7 Cotton works beautifully for this project in Ecru, White, Lavender, Mint, and Blush. The 100% mercerized cotton holds its shape well and shows the granny square texture cleanly.
Paintbox Yarns Simply DK is another excellent option. The acrylic-cotton blend has consistent yardage and great stitch definition.
You can also use Scheepjes Catona (fingering or sport weight) held double throughout. This gives you the same approximate DK gauge while offering an enormous range of pastel colorways.
Substitution tip: Choose any smooth DK weight yarn with a tight twist for best stitch definition. Avoid fluffy or hairy yarns because they will obscure the open cluster texture. For a bag that holds its shape without a stiffener, 100% cotton is preferred over 100% acrylic.
Gauge
Getting gauge right matters for this project. Your finished bag dimensions depend on consistent square size across all 32 squares.
Granny square gauge: One completed granny square (4 rounds) = 4 inches by 4 inches (10 cm by 10 cm), blocked.
Ribbing gauge: 16 single crochet (sc) by 20 rows = 4 inches by 4 inches (10 cm by 10 cm) in single crochet ribbing.
If your squares are larger than 4 inches, go down a hook size. If your squares are smaller than 4 inches, go up a hook size.
Finished Dimensions
Skill Level and Time Estimate
This is an intermediate level crochet pattern. You should be comfortable working granny squares in the round, joining squares using the join-as-you-go method, reading diagonal set layouts, working ribbing in rows, and attaching hardware like strap tabs, rivets, and buttons.
No advanced shaping is required, but the assembly sequence and diagonal placement need careful planning.
Time estimate: 12 to 16 hours total, including squares, joining, ribbing, and finishing.
Abbreviations
Let me define every abbreviation before we dive in. I will explain each one in plain English so you know exactly what to do.
Special Stitches
3dc-cl (3 Double Crochet Cluster)
This stitch forms one compact unit that creates the petal and flower center texture visible in each granny square.
Step 1: Yarn over, insert hook into next stitch, yarn over, pull up a loop, yarn over, pull through 2 loops on hook (first dc incomplete, 2 loops remain on hook).
Step 2: Yarn over, insert hook into same stitch, yarn over, pull up a loop, yarn over, pull through 2 loops on hook (second dc incomplete, 3 loops remain on hook).
Step 3: Yarn over, insert hook into same stitch, yarn over, pull up a loop, yarn over, pull through 2 loops on hook (third dc incomplete, 4 loops remain on hook).
Step 4: Yarn over, pull through all 4 loops on hook. One 3dc-cl made.
Granny Corner
Work (3dc-cl, ch 2, 3dc-cl) all into the same corner ch-2-sp. This creates the characteristic corner bump of each granny square.
JAYG Join (Join-As-You-Go)
When beginning a corner or side ch-2 on a new square that touches a finished square, replace the ch 2 with: ch 1, slip stitch into the corresponding ch-2-sp or joining point on the neighboring finished square, ch 1. This creates a flat, invisible seam between squares without sewing.
Important Pattern Notes
Read these before you start:
1. All granny squares are worked in the round with the right side always facing. Do not turn at the end of rounds.
2. The squares are set on the diagonal (rotated 45 degrees) in the finished bag. Each square appears as a diamond shape when the bag is held upright.
3. The bag uses 32 granny squares total: 12 for the front panel, 12 for the back panel, and 8 for the two side gussets (4 squares each side, arranged in a vertical strip 1 square wide by 4 squares tall).
4. Color assignment: Each granny square uses one pastel color (B, C, D, or E) for rounds 1 and 2, and Color A (White) for rounds 3 and 4.
5. Chain-3 at the beginning of a round of double crochet counts as 1 dc throughout this pattern.
6. Blocking is essential. Pin each wet square to a foam mat at exactly 4 inches by 4 inches and allow to dry completely. This makes JAYG joining far easier and more accurate.
Granny Square Instructions (Make 32 Total)
You will make these quantities of each pastel color center:
Round 1
Using your assigned pastel color, ch 4. Join with sl st to first ch to form a ring.
Ch 3 (counts as first dc). Work 2 incomplete dc into ring (the ch-3 serves as the first leg, so only 2 additional incomplete dc are needed before the final pullthrough). Yarn over, pull through all 3 loops. Ch 2. (3dc-cl into ring, ch 2) 3 times. Join with sl st to top of ch-3.
You now have 4 clusters and 4 ch-2 corner spaces.
Round 2
Sl st into first ch-2 corner sp. Ch 3 (counts as dc). Work 2 incomplete dc into same corner sp (to complete a 3dc-cl). Ch 2. 3dc-cl into same corner sp (first Granny Corner made). Ch 1. (Granny Corner in next ch-2 sp, ch 1) 3 times. Join with sl st to top of ch-3.
You now have 4 corners, 4 ch-1 side spaces, and 8 clusters total.
Round 3 (Switch to Color A, White)
Fasten off pastel color. Join Color A with sl st to any corner ch-2 sp.
Ch 3. Work 3dc-cl to complete first corner cluster. Ch 2. 3dc-cl into same sp (first corner made). Ch 1. 3dc-cl into next ch-1 side sp. Ch 1. (Granny Corner in next corner ch-2 sp, ch 1, 3dc-cl into ch-1 side sp, ch 1) 3 times. Join with sl st to top of ch-3.
You now have 4 corners, 8 side clusters, 16 clusters total, 4 corner ch-2 sps, and 8 ch-1 side sps.
Round 4 (Color A, White)
Continue with Color A. Ch 3. Complete first corner cluster. Ch 2. 3dc-cl into same sp (Granny Corner). Ch 1. (3dc-cl into next ch-1 sp, ch 1) twice. (Granny Corner in next corner ch-2 sp, ch 1, (3dc-cl into next ch-1 sp, ch 1) twice) 3 times. Join with sl st to top of ch-3.
You now have 4 corners with ch-2 sps, 12 side clusters, 3 clusters per side between corners, and 20 clusters total.
Fasten off, leaving a 6-inch tail for weaving. Block each square to 4 inches by 4 inches before assembly.
Checkpoint: After completing all 32 granny squares and blocking, each square should measure exactly 4 inches by 4 inches. Lay several squares side by side to confirm consistent sizing before proceeding.
Color Layout for Front and Back Panels
Each panel (front and back) uses 12 squares set on the diagonal, forming a 4-column by 3-row arrangement on the diagonal grid. Counting from left to right and top to bottom in diagonal rows:
Key rule: No two same-color squares share an edge. Corner-to-corner contact of the same color is acceptable. Use this layout as a starting guide and adjust as desired.
For the side gussets, each gusset is a vertical strip of 4 squares joined in a column (1 square wide, 4 squares tall, also set on the diagonal). Use a balanced mix of the four pastel colors across the 8 gusset squares.
Assembly: Joining Squares with JAYG
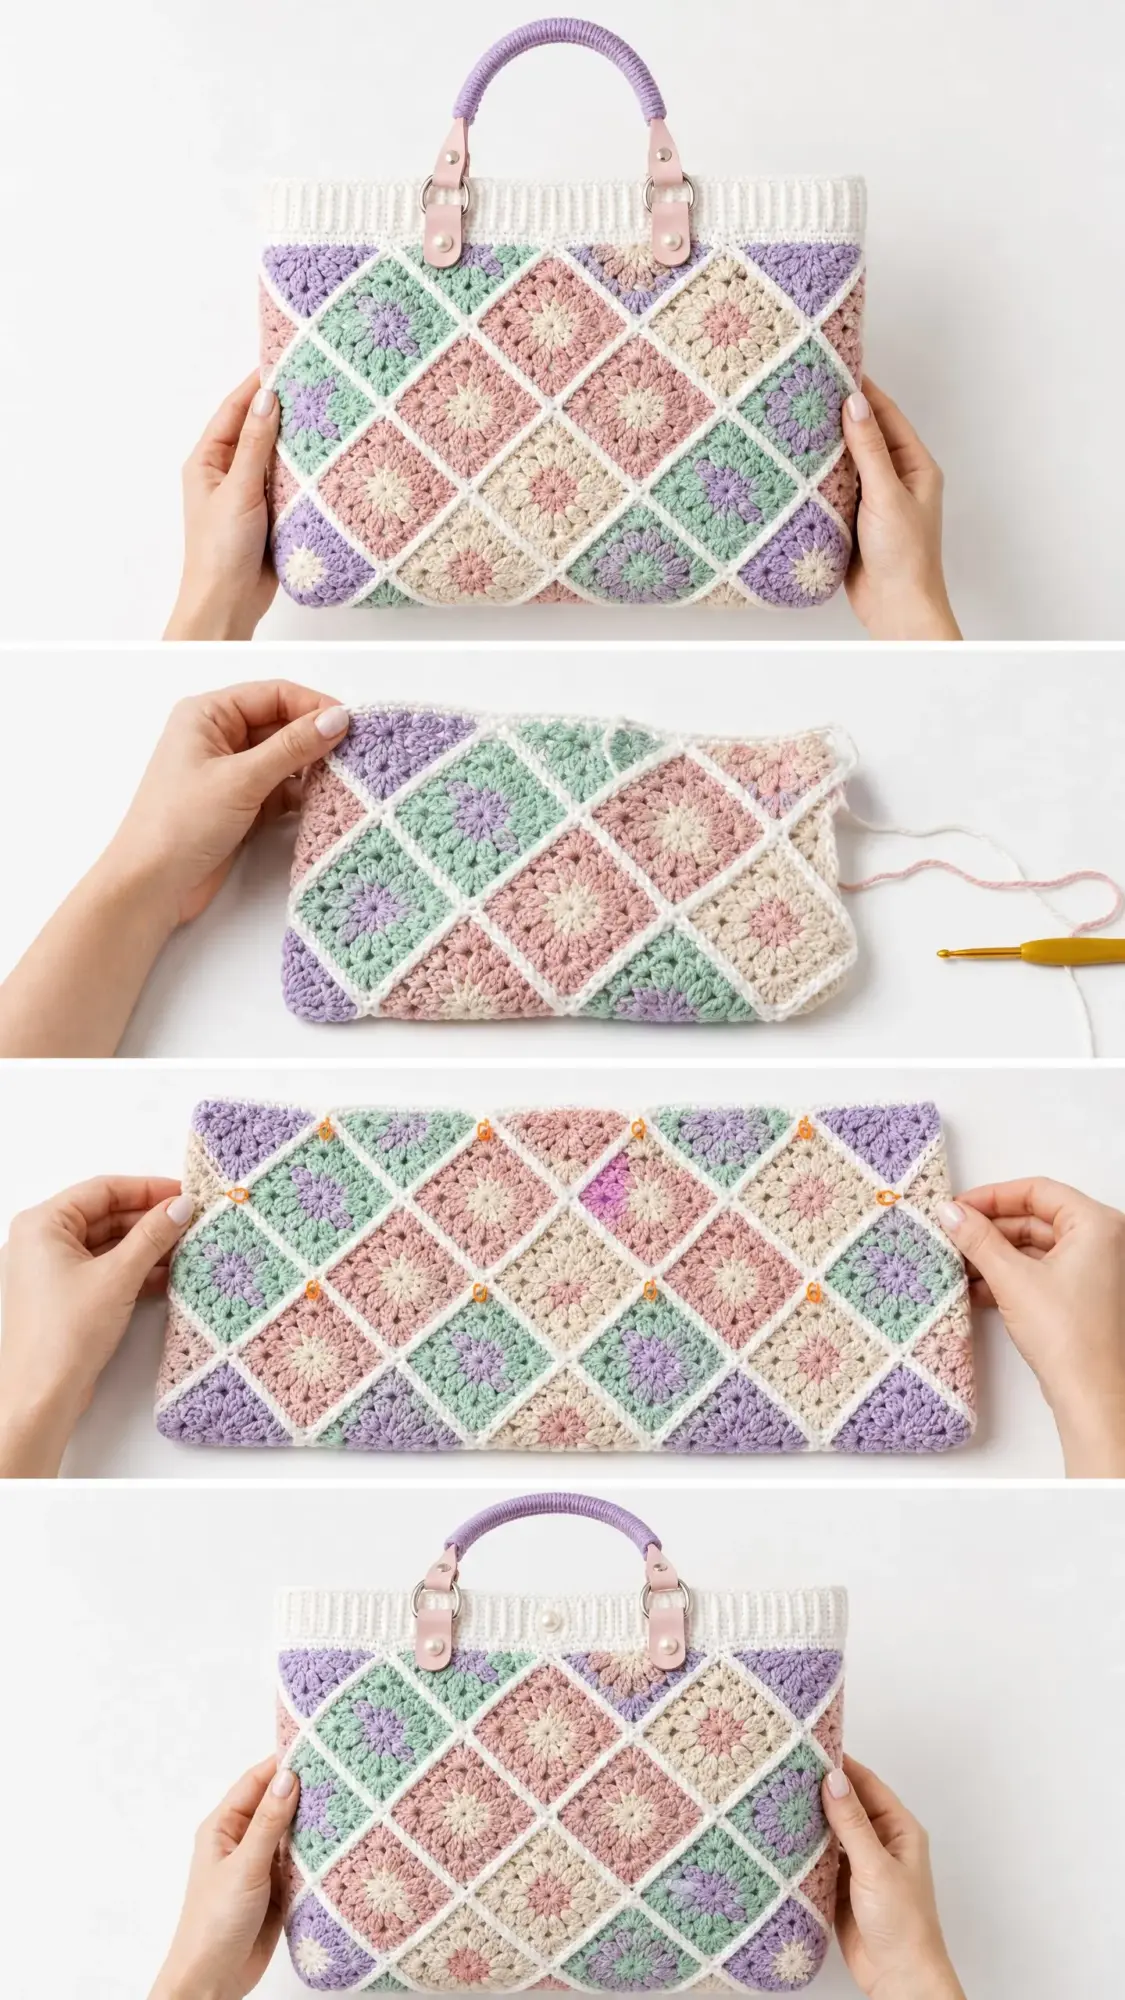
Step 1: Arrange all 32 blocked squares face-up on a flat surface in the final layout. Front panel: 12 squares. Back panel: 12 squares. Left gusset: 4 squares. Right gusset: 4 squares.
Step 2: Begin with the front panel. Join squares in diagonal rows from top to bottom. Work round 4 of each new square using the JAYG method at every shared edge.
Step 3: JAYG method in detail: When a square shares one edge with a finished neighbor, on round 4 of the new square, replace each ch 2 at a shared corner with ch 1, sl st into corresponding corner ch-2 sp of finished neighbor, ch 1. Replace each ch 1 at a shared side sp with sl st into corresponding ch-1 side sp of finished neighbor. Continue working round 4 on the new square normally on all other sides.
Step 4: When joining squares that share two edges (interior squares), work both shared edges using JAYG simultaneously during round 4.
Step 5: Complete the front panel, then the back panel (using the same layout, mirrored if desired), then each side gusset strip.
Step 6: Join the side gusset strips to the front panel. Hold one gusset strip against the right side edge of the front panel, matching corner ch-2 sps edge to edge. Using Color A and a yarn needle or crochet hook, sl st or sc through both layers along the shared edge. Repeat for the left gusset and both edges of the back panel.
Checkpoint: After assembly, the body of the bag (without the top band) should measure approximately 13 inches wide by 11 inches tall by 3 inches deep.
Top Ribbed Band
The top band is worked flat in rows in single crochet through the back loop only (BLO), then attached to the top opening of the assembled bag. The ribbing creates horizontal ridges.
The total top opening circumference is approximately 32 inches.
Band Instructions
Foundation chain: Ch 9.
Row 1 (RS): Sc in 2nd ch from hook and in each ch across. Turn. (8 sc)
Row 2 (WS): Ch 1, sc in BLO of each st across. Turn. (8 sc)
Repeat Row 2 until the strip measures 32 inches (81 cm) in length, or long enough to encircle the top opening of your assembled bag.
At approximately 32 inches, the strip will require approximately 160 rows at the stated row gauge.
Fasten off, leaving a long tail for seaming.
Joining the Band
Fold the strip in half along its length (meeting the two short ends) and sl st the short ends together to form a continuous loop. Attach the band to the top edge of the assembled bag by holding the band with its seam aligned with a side gusset seam, right sides together, and working sc through both the band edge and the top edge of the bag all the way around. Adjust spacing evenly.
Checkpoint: After attaching the top band, the total bag height (body plus band) should measure approximately 13 inches. The band should stand upright and fold over cleanly without bunching.
Finishing Steps
Strap Tab Attachment
Position one faux leather strap tab on the front of the bag, centered horizontally, with the tab’s lower edge touching the upper edge of the crochet body. The tab itself lies against the white ribbed band. Using the rivet setter tool, attach the tab through the bag band and the pre-punched holes in the leather tab. Attach a second rivet approximately 0.5 inch above the first. Repeat for the second strap tab on the back of the bag.
Handle Attachment
Thread the D-ring end of the lavender wrapped rope handle through the slot or ring at the top of each strap tab (front and back). The handle forms a short loop over the top opening.
Pearl Button Attachment
Sew one pearl button to the center front of the ribbed band, approximately 1 inch from the top edge of the band, centered horizontally. Sew a second pearl button to the center back in the same position. These are decorative. If you want a functional closure, work a ch-5 button loop on the inside facing band edge aligned with the buttons.
Lining (Recommended)
Cut two lining pieces: 14 inches by 12 inches each for front and back. Cut two side gusset lining pieces: 4 inches by 12 inches each. Cut one bottom lining piece: 14 inches by 4 inches.
With right sides together, sew the lining pieces together using a 0.5-inch seam allowance. Attach the bottom piece. Leave the top open. Slip the plastic canvas bottom stiffener between the bag base and the lining before closing. Insert the lining into the bag, wrong side of lining against wrong side of crochet. Fold the top edge of the lining under by 0.5 inch and hand-sew the folded edge to the inside of the top band using a whip stitch.
Weave in all yarn ends securely.
Blocking Your Finished Bag
Wet-block all 32 squares individually before assembly. Submerge each in cool water, press out excess water in a towel, and pin to a foam mat at exactly 4 inches by 4 inches. Allow to dry completely.
After the bag is assembled and finished, lightly spritz the exterior with cool water and reshape by stuffing the bag with plastic bags or a towel to hold the rectangular form. Allow to dry flat.
Do not steam-block faux leather hardware or pearl buttons.
Size Customization Tips
Smaller bag (approximately 10 inches by 8.5 inches): Use 3-round granny squares instead of 4-round squares. Each 3-round square will measure approximately 3 inches by 3 inches.
Larger tote (approximately 16 inches by 14 inches): Add a round 5 to every granny square, following the same increase pattern. Each square will measure approximately 5 inches by 5 inches. Increase the number of squares per panel to 4 columns by 4 rows (16 squares per panel).
Adjusting depth: Add or remove 1 square per gusset strip to increase or decrease the bag depth by 4 inches per square.
Care Instructions
Hand wash in cool water with a gentle yarn-safe detergent. Do not wring. Lay flat or shape over a bag form to dry. Do not put in the washing machine unless all yarn labels confirm machine-wash safe. Do not tumble dry. Do not iron directly over the faux leather tabs or pearl buttons. Store stuffed with tissue paper to maintain shape.
You Did It!
Thank you so much for making this Pastel Spring Granny Square Purse with me. I hope you love carrying it as much as I loved designing it. Those diagonal granny squares really do create something special, and the hardware details take it from craft project to actual accessory you will reach for again and again.
I would absolutely love to see your finished bags! Tag me on Instagram or share in my Facebook group. Seeing your color combinations and personal touches is genuinely the best part of sharing patterns.
If you enjoyed this crochet tutorial, go ahead and save it to your Pinterest boards so you can find it later. And please drop a comment below if you make this purse. I read every single one, and your feedback helps me create better patterns for you.
You Might Also Like
- Mustard Yellow Duck Toilet Paper Cozy Free Crochet Pattern
- Sage Green Mandala Market Bag Free Crochet Pattern
- Dusty Rose Floral Lace Bucket Bag Free Crochet Pattern
- Terracotta Desert Shell Purse Free Crochet Pattern