
Got a stash of cotton yarn in pretty coastal colors just waiting for the right project? This is the one. Grab those skeins of navy, teal, sage, white, and sandy tan because this Ocean Waves Baby Romper is begging to be made.
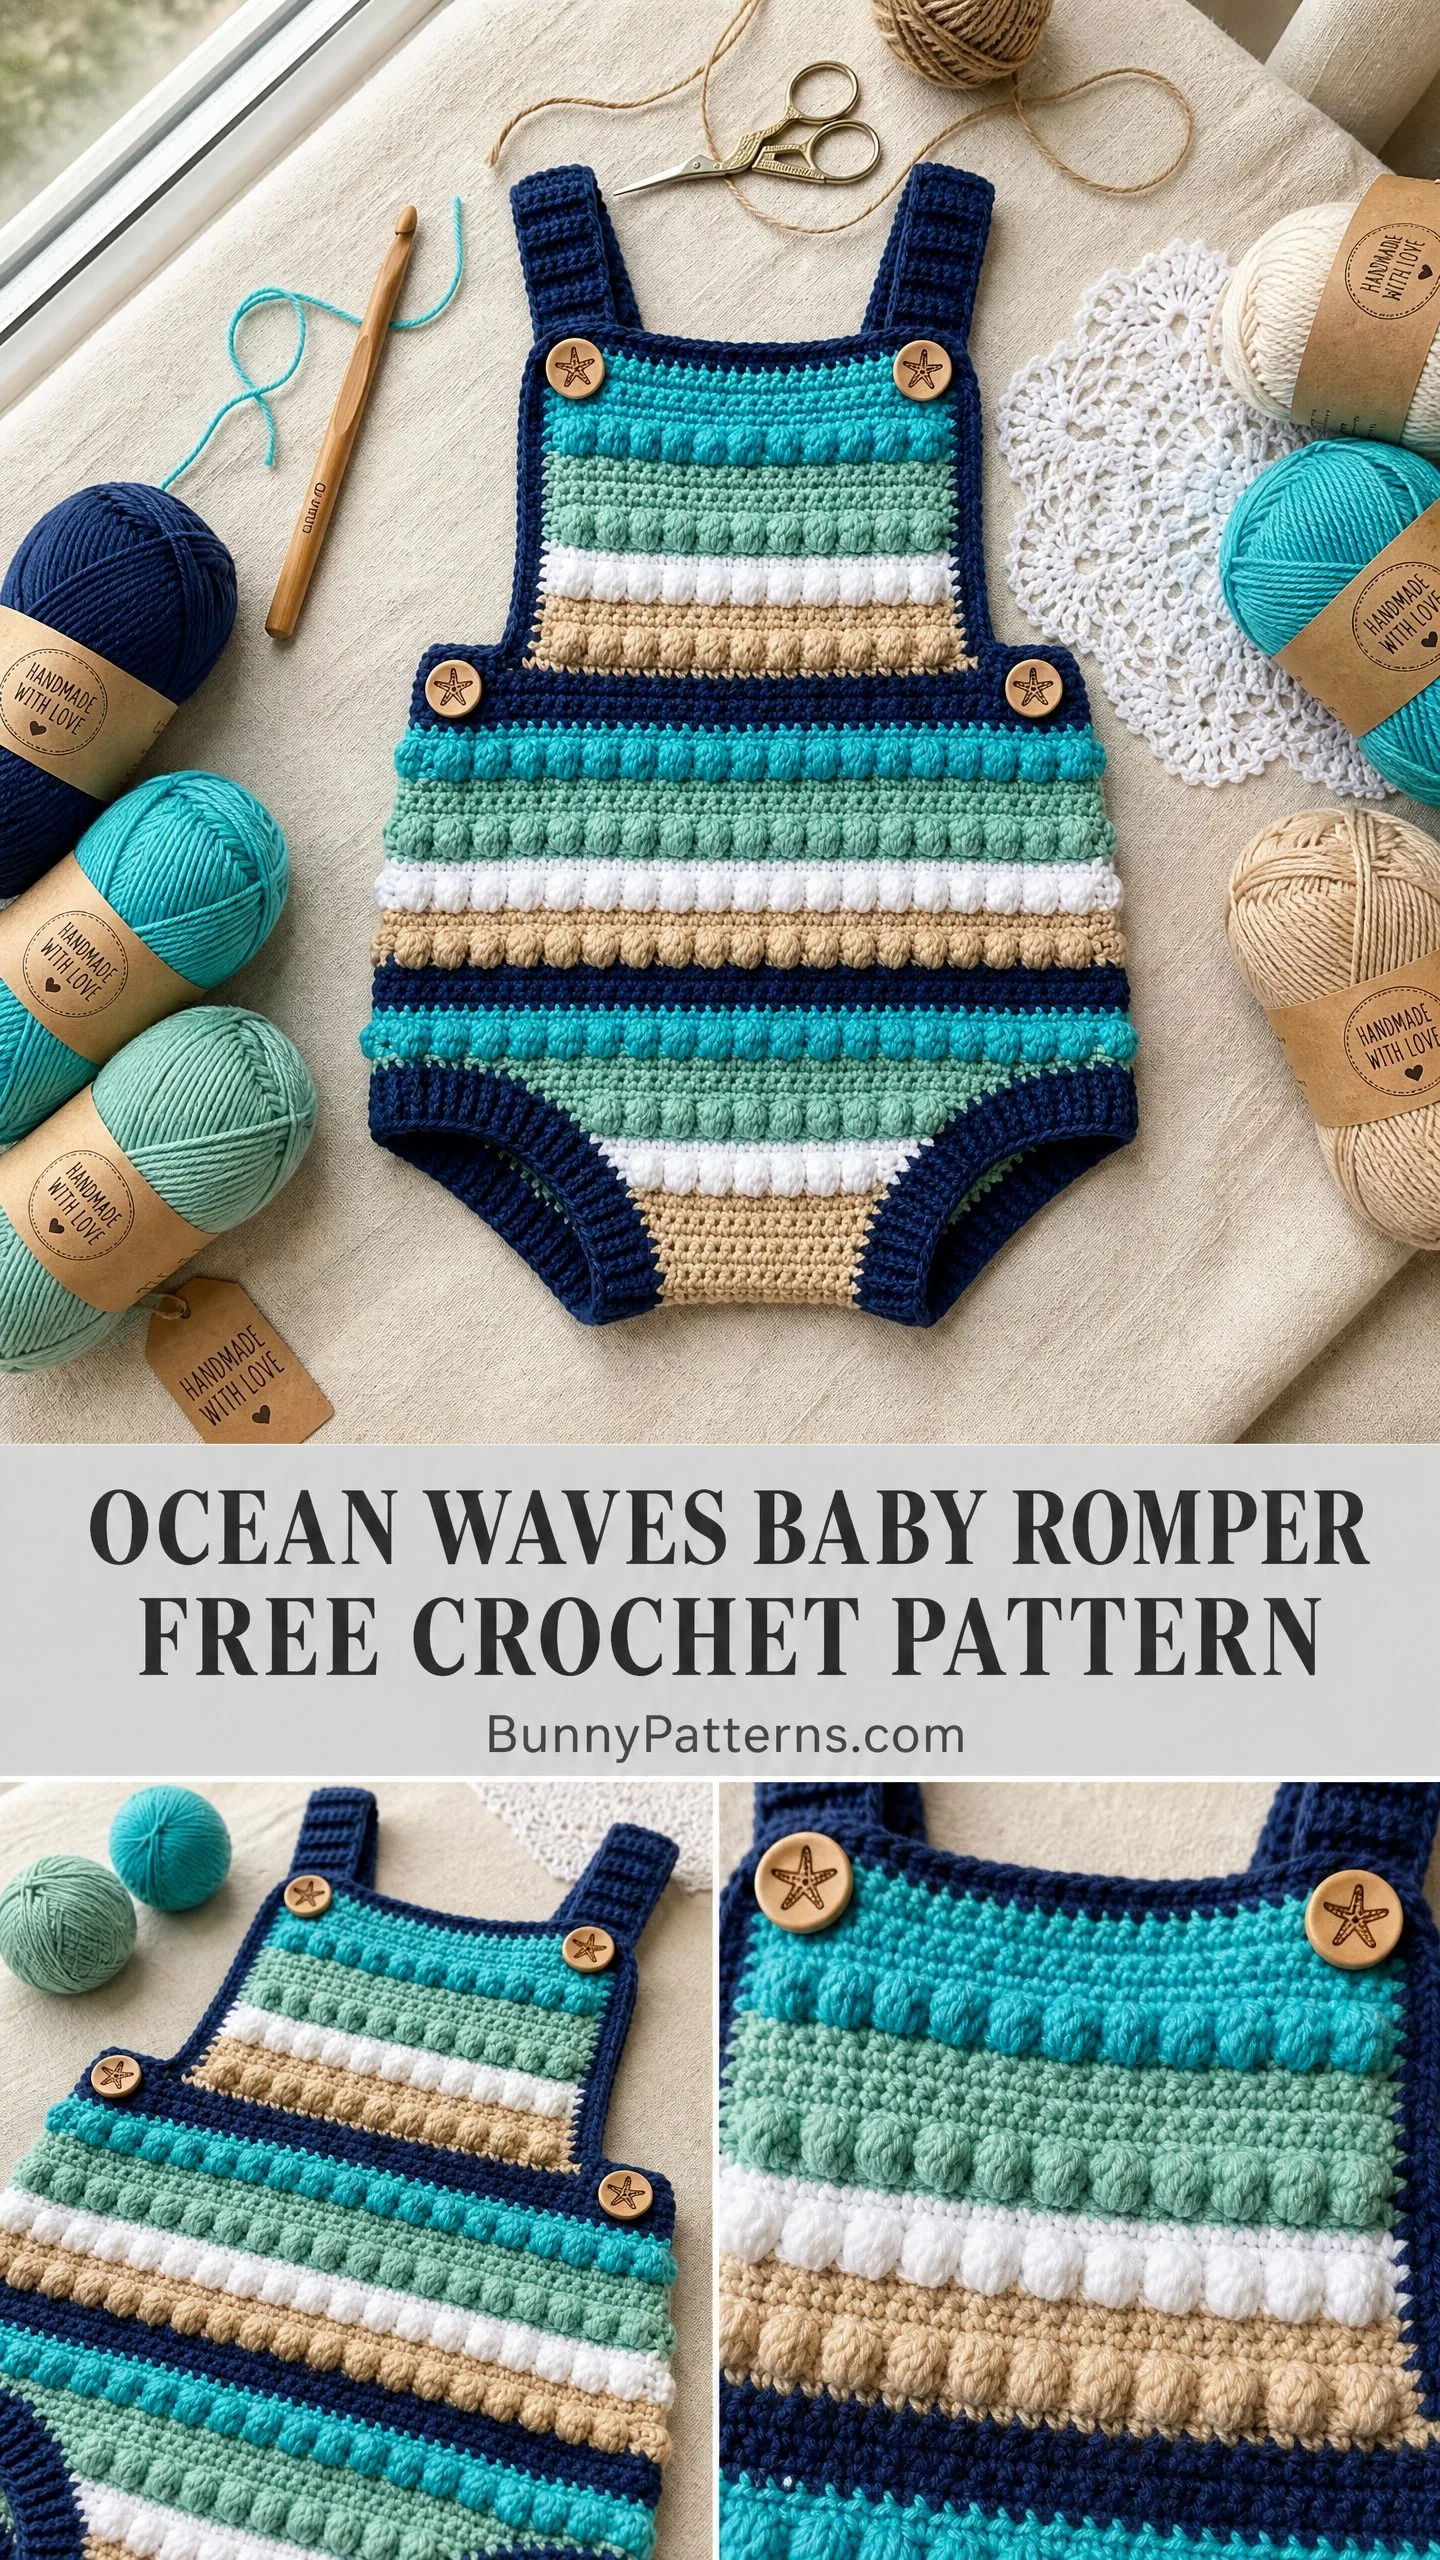
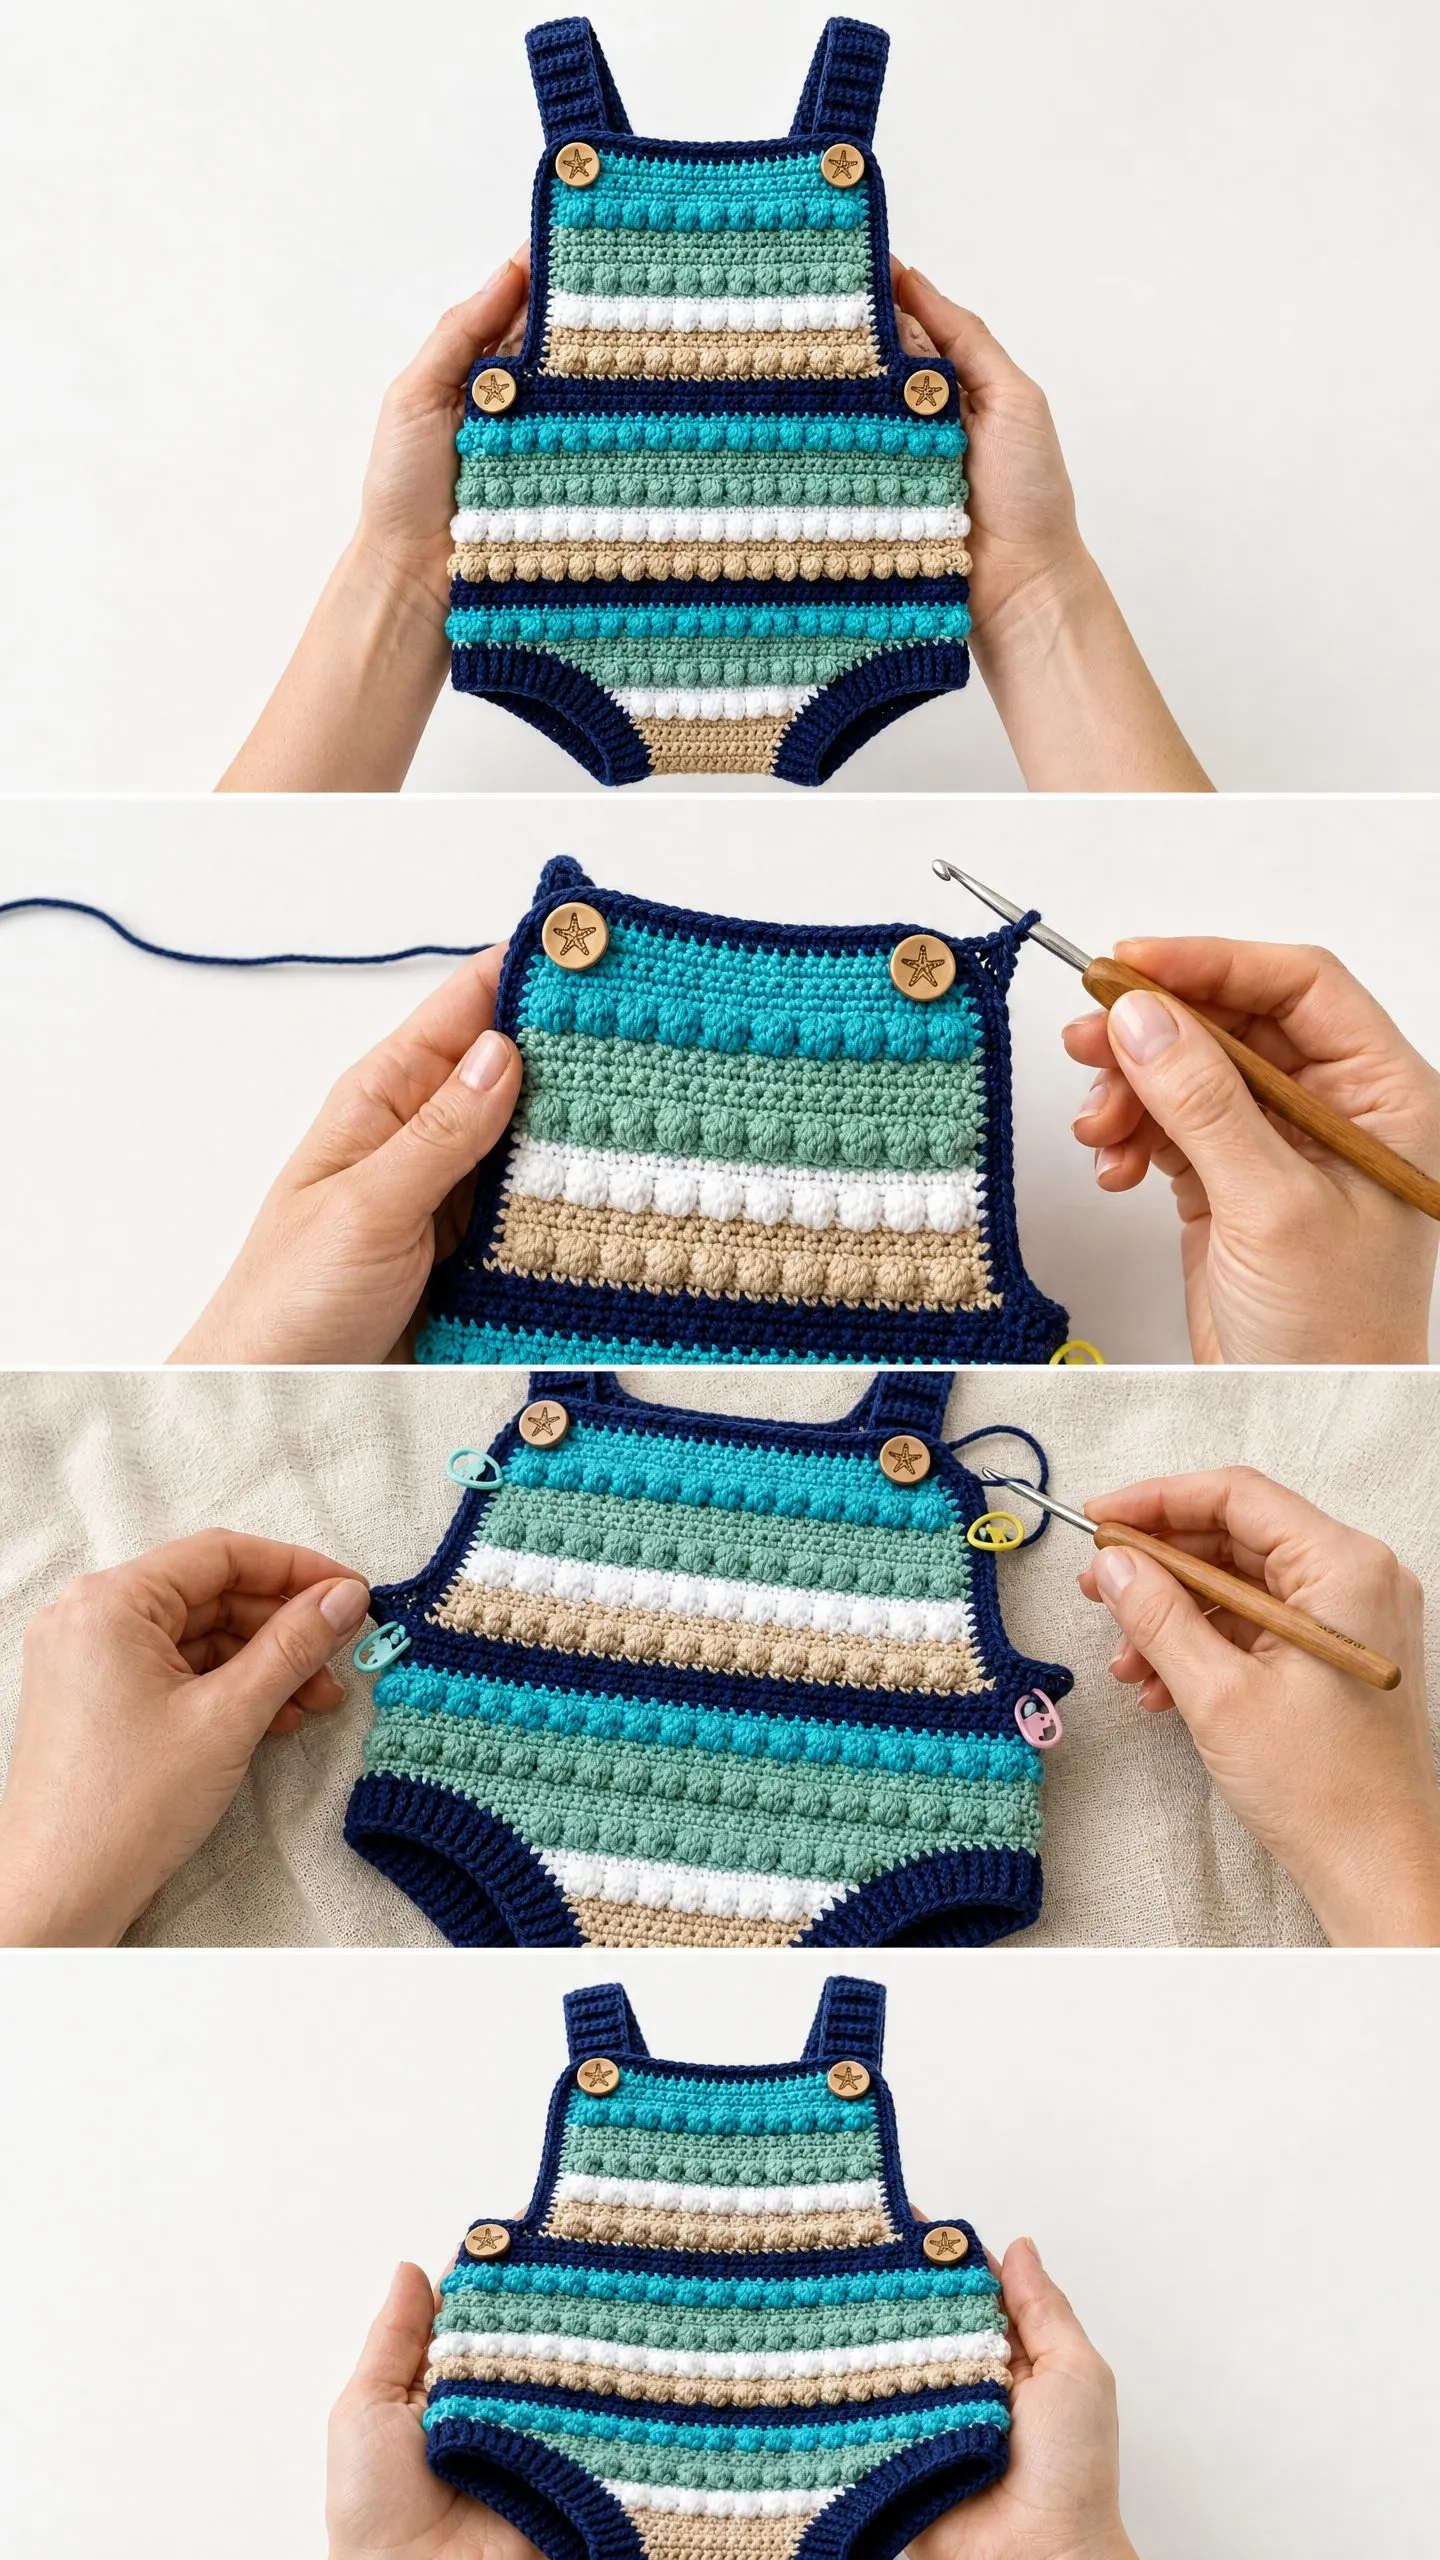
The construction here is genuinely interesting. You work a raised bib panel first, then pick up stitches along the bottom edge and expand outward to create the full body width. The signature bobble stripes push forward on the right side, creating that gorgeous textured look you see in the photos. The navy yarn frames everything with clean, crisp borders.
I will be honest with you. This is an intermediate project. You need to be comfortable with bobble stitches, color changes, and picking up stitches along finished edges. But if you have made a couple of garments before and your color changes are reasonably clean, you can absolutely do this. The pattern walks you through every single row.
Why This Baby Romper Pattern Works So Well
This crochet pattern creates a seamless, top-down romper with adjustable button-closure straps and stretchy ribbed leg openings. The color palette evokes a beach theme that works beautifully for summer babies, beach photo sessions, or baby shower gifts.
The bobble stitch texture is the star here. Every other stripe features bobbles that pop forward, alternating with smooth half double crochet (hdc) rows in coordinating colors. The navy separator rows between each color create that distinctive striped look with clear definition.
The finished romper fits babies from newborn through 12 months, depending on which size you choose. The pattern is written for size 0 to 3 months, with instructions for 3 to 6 months and 6 to 12 months in parentheses throughout.
Finished Measurements
Chest circumference: 14 (16, 18) inches / 35.5 (40.5, 45.5) cm
Torso length from shoulder to crotch: 12 (13.5, 15) inches / 30.5 (34, 38) cm
Bib width: 5 (5.5, 6) inches / 12.5 (14, 15) cm
Bib height: 3 (3.25, 3.5) inches / 7.5 (8, 9) cm
Materials Needed for the Ocean Waves Baby Romper
Yarn: Worsted weight, #4, 100 percent cotton or cotton-acrylic blend recommended
Total yarn: approximately 300 (350, 415) yards across all colors
Hook: US size G-6 / 4.0 mm (or size needed to obtain gauge)
Notions: Yarn needle, stitch markers (at least 6), scissors, 4 decorative wooden buttons approximately 20 mm diameter with star or starfish motif, sewing needle and thread to match navy for attaching buttons
Yarn Suggestions
Lion Brand 24/7 Cotton in Navy, Turquoise, Jade, White, and Tan works beautifully here. This 100 percent mercerized cotton gives excellent stitch definition for those bobbles and washes like a dream.
Paintbox Yarns Simply Cotton is another great option with a wide coastal color palette.
Avoid fuzzy or textured yarns. They will obscure your bobble definition and you will lose that gorgeous texture.
Gauge
18 stitches and 20 rows = 4 inches / 10 cm in half double crochet, blocked
Gauge matters here. A difference of even one stitch per 4 inches will alter chest circumference by over an inch in a finished garment this small. Please swatch first.
Abbreviations and Special Stitches
Before we dive in, let me define every stitch you will use.
ch: chain. Wrap yarn over hook and pull through the loop on your hook.
sl st: slip stitch. Insert hook, yarn over, pull through both the stitch and the loop on your hook in one motion.
sc: single crochet. Insert hook, yarn over and pull up a loop (2 loops on hook), yarn over and pull through both loops.
hdc: half double crochet. Yarn over, insert hook, yarn over and pull up a loop (3 loops on hook), yarn over and pull through all 3 loops.
dc: double crochet. Yarn over, insert hook, yarn over and pull up a loop (3 loops on hook), yarn over and pull through 2 loops (2 loops remain), yarn over and pull through remaining 2 loops.
st(s): stitch(es)
RS: right side (the public-facing side)
WS: wrong side (the inside)
rep: repeat
BLO: back loop only
hdc2tog: half double crochet two together (a decrease). Yarn over, insert hook into first stitch, pull up a loop. Yarn over, insert hook into next stitch, pull up a loop. You have 5 loops on your hook. Yarn over and pull through all 5 loops.
Bobble Stitch (Bob)
This is a 5-double-crochet bobble worked into one stitch. It sounds complicated but becomes rhythmic quickly.
Step 1: Yarn over, insert hook into indicated stitch.
Step 2: Yarn over and pull up a loop (3 loops on hook).
Step 3: Yarn over and draw through 2 loops only (2 loops remain on hook). One incomplete dc made.
Step 4: Repeat Steps 1 through 3 four more times, each time into the same stitch, until you have 6 loops on hook.
Step 5: Yarn over and draw through all 6 loops on hook. One bobble complete.
Step 6: Ch 1 to close and lock the bobble. This ch-1 does NOT count as a stitch.
The bobble pops toward you on the right side. Always work bobble rows from the RS.
Ribbed Single Crochet (rsc)
This creates the stretchy ribbed texture on straps and leg edgings.
Work a regular single crochet, but insert your hook under the back loop only of each stitch. This creates vertical ridges and nice stretch.
Pattern Notes Before You Begin
Turning Chains: For hdc rows, ch 2 at the beginning. The turning ch-2 does NOT count as a stitch in this pattern. Work your first hdc into the first stitch at the base of the chain.
For sc and rsc rows, ch 1 to turn. The ch-1 does NOT count as a stitch.
Color Changes: Change color on the last yarn-over of the last stitch of a row. This pulls the new color through cleanly.
Stitch Count Consistency: On bobble rows, each bobble plus its closing ch-1 occupies one stitch position. The following hdc row treats each bobble position as a single stitch. Your stitch count stays the same.
Step by Step Instructions
Section 1: Front Bib Panel
The front bib is the raised rectangular panel at the chest. You work it flat, starting at the top edge.
Using Color A (Navy), ch 24 (27, 30).
Row 1 (RS): Hdc in 3rd ch from hook and in each ch across. Ch 2, turn. 22 (25, 28) hdc.
Row 2 (WS): Hdc in each st across. Ch 2, turn. 22 (25, 28) hdc.
Row 3 (RS): Hdc in each st across. Ch 2, turn. 22 (25, 28) hdc.
This creates the top navy border of the bib. Now begin the stripe sequence.
Row 4 (WS): Join Color B (Teal). Ch 2, turn. Hdc in each st across. 22 (25, 28) hdc.
Row 5 (RS): Ch 2, turn. Bob in first st, (hdc in next st, Bob in next st) rep across to last st, hdc in last st. 22 (25, 28) sts.
Row 6 (WS): Join Color A (Navy). Ch 2, turn. Hdc in each st across. 22 (25, 28) hdc.
Row 7 (WS): Join Color C (Sage). Ch 2, turn. Hdc in each st across. 22 (25, 28) hdc.
Row 8 (RS): Ch 2, turn. Bob in first st, (hdc in next st, Bob in next st) rep across to last st, hdc in last st. 22 (25, 28) sts.
Row 9 (WS): Join Color A (Navy). Ch 2, turn. Hdc in each st across. 22 (25, 28) hdc.
Row 10 (WS): Join Color D (White). Ch 2, turn. Hdc in each st across. 22 (25, 28) hdc.
Row 11 (RS): Ch 2, turn. Bob in first st, (hdc in next st, Bob in next st) rep across to last st, hdc in last st. 22 (25, 28) sts.
Row 12 (WS): Join Color A (Navy). Ch 2, turn. Hdc in each st across. 22 (25, 28) hdc.
Row 13 (WS): Join Color E (Tan). Ch 2, turn. Hdc in each st across. 22 (25, 28) hdc.
Row 14 (RS): Ch 2, turn. Bob in first st, (hdc in next st, Bob in next st) rep across to last st, hdc in last st. 22 (25, 28) sts.
Row 15 (WS): Join Color A (Navy). Ch 2, turn. Hdc in each st across. 22 (25, 28) hdc.
Fasten off, leaving a long tail for seaming.
Checkpoint: Your bib should measure approximately 3 to 3.5 inches tall and 5 to 6 inches wide depending on size.
Section 2: Front Body Panel
Now you expand from the bib to full chest width by adding stitches at the sides.
Setup: With RS facing, join Color A to the bottom-right corner of the bib. Ch 2. Work hdc across the 22 (25, 28) bottom edge stitches of the bib. At the end, ch 9 (9, 10) for the right side extension.
Join Color A to the bottom-left corner of the bib. Ch 9 (9, 10) for the left side extension. Now work across the full width to join all sections.
Full body width: 9 + 22 + 9 = 40 (9 + 25 + 9 = 43, 10 + 28 + 10 = 48) hdc.
Body Row 1 (RS): Ch 2, turn. Hdc across all 40 (43, 48) sts. 40 (43, 48) hdc.
Body Row 2 (WS): Join Color B (Teal). Ch 2, turn. Hdc across. 40 (43, 48) hdc.
Body Row 3 (RS): Ch 2, turn. Bob in first st, (hdc in next st, Bob in next st) rep across to last st, hdc in last st. 40 (43, 48) sts.
Body Row 4 (WS): Join Color A. Ch 2, turn. Hdc across. 40 (43, 48) hdc.
Continue this stripe sequence: Sage hdc row plus bobble row, Navy separator, White hdc row plus bobble row, Navy separator, Tan hdc row plus bobble row, Navy separator.
Work through Body Row 25 following the same color pattern, completing two full Stripe Sets.
Checkpoint: Your front body panel should be 40 (43, 48) stitches wide and approximately 5 inches tall from the base of the bib.
Crotch Shaping (Front)
Now create the curved leg openings with decrease rows in Color A.
Crotch Row 1 (RS): Join Color A. Ch 2, turn. Hdc2tog over first 2 sts, hdc across to last 2 sts, hdc2tog. 38 (41, 46) hdc.
Crotch Row 2 (WS): Ch 2, turn. Hdc2tog, hdc across to last 2 sts, hdc2tog. 36 (39, 44) hdc.
Crotch Row 3 (RS): Ch 2, turn. Hdc2tog, hdc across to last 2 sts, hdc2tog. 34 (37, 42) hdc.
Crotch Row 4 (WS): Ch 2, turn. Hdc2tog, hdc across to last 2 sts, hdc2tog. 32 (35, 40) hdc.
Now split for the leg openings.
Right Leg:
Crotch Row 5 Right (RS): Ch 2, turn. Hdc2tog, hdc across first 14 (15, 18) sts, hdc2tog. Leave remaining sts unworked. 15 (16, 19) hdc.
Crotch Row 6 Right (WS): Ch 2, turn. Hdc2tog, hdc across to last 2 sts, hdc2tog. 13 (14, 17) hdc.
Crotch Row 7 Right (RS): Ch 2, turn. Hdc2tog, hdc across to last 2 sts, hdc2tog. 11 (12, 15) hdc.
Fasten off.
Left Leg: Rejoin Color A to the remaining stitches at the center.
Work Crotch Rows 5 through 7 Left as mirror image, ending with 10 (11, 14) hdc.
Fasten off. Set front panel aside.
Section 3: Back Panel
The back panel works identically to the front body, but without the raised bib.
Using Color A, ch 42 (45, 50).
Back Row 1 (RS): Hdc in 3rd ch from hook and in each ch across. Ch 2, turn. 40 (43, 48) hdc.
Back Rows 2 through 3: Hdc in each st across, ch 2, turn after each. 40 (43, 48) hdc.
Work the full two-Stripe-Set stripe sequence exactly as written for the front body (Body Rows 2 through 25).
Then work crotch shaping decreases exactly as written for the front.
Fasten off.
Section 4: Side Seams
Place front and back panels with wrong sides together, aligning all edges. Using a yarn needle and Color A, seam the left and right side edges using mattress stitch. Begin at the underarm edge and seam down the sides, stopping at the upper edge of the crotch shaping. Leave the leg openings open.
Section 5: Straps
Make 2.
Using Color A, ch 7.
Strap Row 1 (RS): Sc in 2nd ch from hook and in each ch across. Ch 1, turn. 6 sc.
Strap Row 2 (WS): Working in BLO (rsc), sc in each st across. Ch 1, turn. 6 rsc.
Repeat Strap Row 2 until strap measures 6.5 (7, 7.5) inches or desired length.
Fasten off, leaving a 12-inch tail for sewing.
Strap Placement: Attach each strap to the top edge of the front bib (approximately 1 inch in from each side edge) and to the top edge of the back upper border (approximately 1 inch in from each side edge).
Button Placement: Position one button on the RS of each strap where it meets the front bib top edge (2 buttons on front). Position the remaining two buttons on the strap ends where they meet the back. The wooden star buttons add that perfect coastal touch.
Section 6: Leg Opening Edging
With RS facing, join Color A at the inner crotch point of one leg opening. Work 1 round of sc evenly around the entire leg opening. Aim for approximately 30 (32, 36) sc. Join with sl st to first sc.
Round 2: Ch 1, rsc (BLO sc) in each st around. Join with sl st. 30 (32, 36) rsc.
Round 3: Ch 1, rsc in each st around. Join with sl st. 30 (32, 36) rsc.
Fasten off. Repeat for second leg opening.
Finishing and Blocking
Weave in all yarn ends securely on the WS, working ends in at least 1 inch in two directions. Pay careful attention to those color-change ends at stripe transitions.
Wet blocking is recommended for cotton yarn. Submerge the finished romper in cool water, gently squeeze out excess (do not wring), and lay flat on a blocking mat. Pin to measurements and let dry completely.
Care Instructions
Machine wash on gentle cycle in cool water, or hand wash. Lay flat to dry. Do not tumble dry. Store folded, not hung.
Time Estimate
Plan for 8 to 12 hours for an experienced intermediate crocheter working the 3 to 6 month size. Add 2 to 4 hours if you are newer to garment making.
This Ocean Waves Baby Romper crochet pattern creates such a special handmade gift. The bobble texture, the coastal colors, those sweet starfish buttons. It all comes together into something truly beautiful that any parent would treasure.
I hope you love making this as much as I loved designing it. Thank you for choosing this pattern! If you make one, I would absolutely love to see it. Tag me on Instagram or share in our Facebook group. Seeing your finished projects honestly makes my whole day.
Save this pattern to your Pinterest crochet board so you can find it when you are ready to cast on! And if you make this sweet little romper, drop a comment below. I would love to hear how it turns out for you.
You Might Also Like
- Teal Ocean Wave Crochet Robe Free Pattern
- Mint Daisy Spring Barrel Handbag Free Crochet Pattern
- Lavender Bloom Granny Square Table Runner Free Crochet Pattern
- Ocean Blues Beaded Sea Creature Anklet Free Crochet Pattern