
You know that gorgeous skein of size 10 crochet thread you’ve been saving? The one in the perfect shade of teal that’s too pretty to use on just anything? This is the project it’s been waiting for.
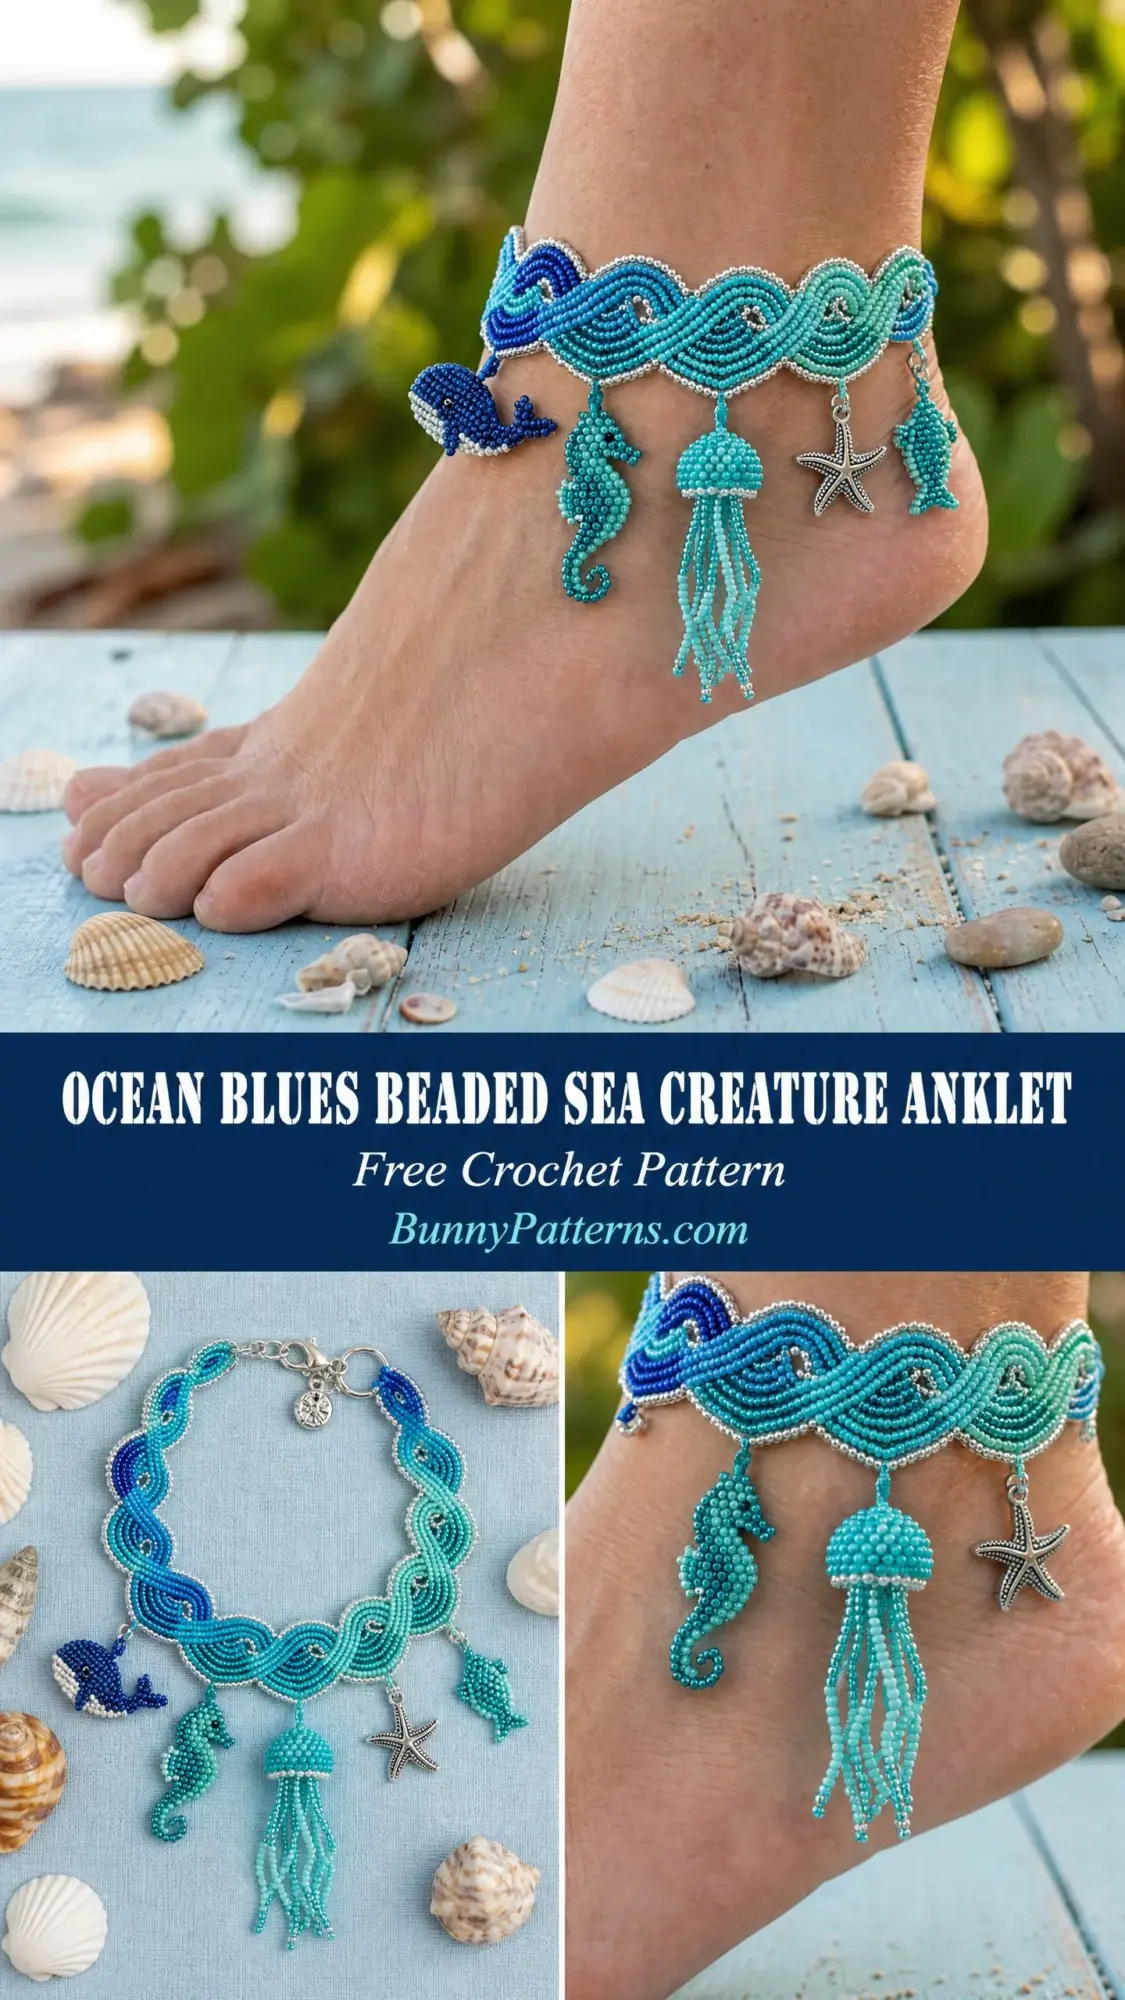
Grab your seed beads and your finest steel hook because we’re making something truly special today. This ocean-themed anklet combines bead crochet slip stitch technique with handmade charms to create wearable art. A beaded whale, seahorse, jellyfish with flowing tentacles, and a silver starfish dangle from an undulating wave band that graduates from cobalt blue through teal to soft aqua.
I’ll be honest with you. This is an intermediate to advanced project that requires comfort with pre-stringing beads and working tight, consistent slip stitches. But if you’ve done any bead crochet tubes or flat panels before, you’re absolutely ready. And if this is your first bead crochet adventure, take your time with the techniques section below and you’ll do just fine.
Why You’ll Love This Crochet Anklet Pattern
This isn’t your average anklet. The wave band creates a stunning gradient effect using three shades of blue and teal seed beads, with silver-lined crystal beads adding sparkle highlights through the center section. The scalloped lower edge mimics ocean waves, and each of the four charms represents a different sea creature.
The finished piece measures approximately 9 inches around, fitting a standard adult ankle of 8 to 9 inches comfortably. The longest charm, that jellyfish with its beaded tentacles, hangs about 1.5 inches below the band. Total drop from the top of the band to the bottom of the tentacles is roughly 2.25 inches.
What I love most about this design is how the colors blend together. The cobalt blue occupies the left third of the band, medium teal takes the center, and aqua fills the right third. When worn, this creates a beautiful ombre effect that catches the light differently as you move.
Materials Needed for Your Beaded Anklet
Crochet Thread
You’ll need size 10 crochet cotton thread in four colors:
I recommend Aunt Lydia’s Classic Crochet Thread Size 10 for its smooth finish and consistent thickness. DMC Cebelia Crochet Cotton Size 10 works beautifully too, with a slight sheen that complements the metallic seed beads.
Whatever you choose, avoid fuzzy or loosely plied threads. They’ll catch on your beads during stringing and make placement inconsistent.
Seed Beads
Use size 11/0 Japanese seed beads (approximately 2mm diameter):
Additional Supplies
Gauge
Working flat bead crochet slip stitch with your size 8 steel hook and size 10 thread:
10 bead slip stitches = 0.75 inch wide
12 rows of bead slip stitch = 0.75 inch tall
Gauge matters here for proper fit. If yours is looser, your anklet will be larger. Go down a hook size or tighten your tension. If tighter, go up a hook size.
Abbreviations and Stitch Definitions
Let me walk you through every abbreviation you’ll encounter:
Understanding the Bead Slip Stitch (bsc)
This technique is also called strung-bead crochet or Native American bead crochet. Here’s exactly how to work it:
Step 1: Before inserting your hook, slide one bead along the thread until it sits snugly at the base of your working loop, right at the hook.
Step 2: Insert hook into the next stitch.
Step 3: With the bead positioned between the hook and your work, yarn over.
Step 4: Draw the yarn through both the stitch and the loop on your hook in one motion. The bead is now locked into the front face.
Step 5: One bead slip stitch complete. One bead is visible on the right side of your work.
The key is keeping your tension firm but not so tight that beads distort. They should lie flat and perpendicular to the thread, covering the foundation completely.
Pre-Stringing Your Beads
This is crucial. All beads must be pre-strung onto your thread in reverse order before you begin. The last bead you want to appear goes onto the thread first.
The main band is 12 stitches wide and 120 rows long. That’s 12 beads per row times 120 rows, which equals 1,440 beads for the main band alone.
Color placement per row (12 beads, positions 1 through 12 from left to right):
For Rows 1 through 40 and Rows 81 through 120:
For Rows 41 through 80 (the center section with diagonal wave effect):
String beads in reverse order. Position 12 goes on first, position 1 goes on last per row. When you crochet from left to right, the beads will emerge correctly.
Main Wave Band Instructions
Foundation Chain
Using Color B medium teal thread with your beads pre-strung, and your size 8 steel hook:
Foundation: Ch 14.
Working into the back bumps of your foundation chain:
Row 1 (RS): Skip first ch, work 1 bsc into each of the next 12 ch, sl st into last ch to anchor. Turn. (12 bsc, 12 beads placed)
Row 2: Ch 1 (does not count as stitch), turn. Work 1 bsc into each of 12 sts across. Turn. (12 bsc)
Rows 3 through 120: Repeat Row 2. (12 bsc per row throughout)
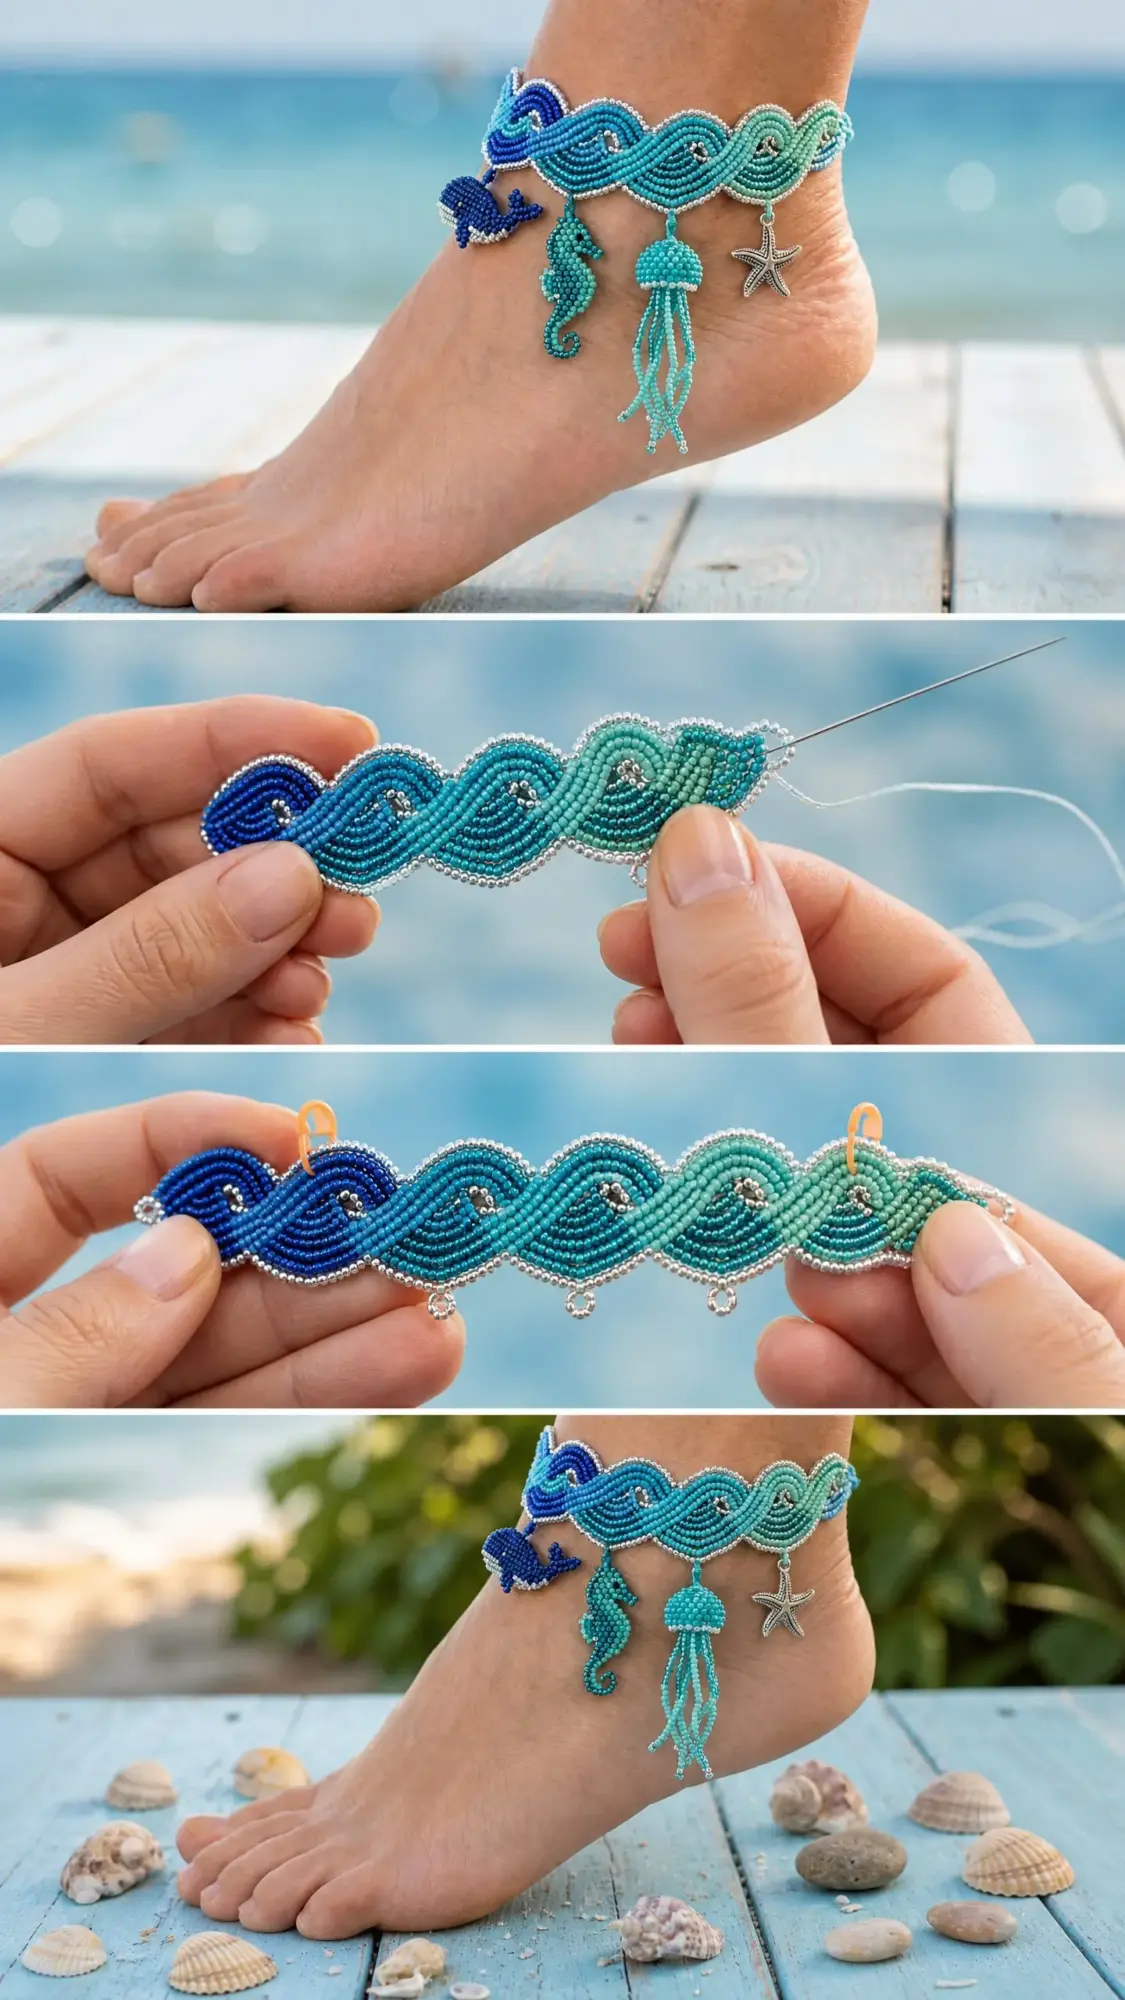
After completing Row 120, your main band should measure approximately 9 inches long and 0.75 inch wide. It should lie flat. If it’s curling, your tension may be too tight. Block lightly with steam before continuing.
Do not fasten off. Proceed to the white edging.
White Bead Edging
Upper Edge Pass
Pre-string 42 white seed beads onto Color D white thread.
With RS facing, join Color D thread with a slip stitch at the upper right corner of your band.
Work 1 bsc into each row end along the upper long edge. That’s 120 bsc along the length. At the end corner, work 1 sl st to anchor. Fasten off and weave in ends. (120 bsc along upper edge)
Lower Edge Pass
Pre-string 42 more white seed beads onto a fresh length of Color D thread.
Join Color D thread at the lower right corner. Work 1 bsc into each row end along the lower long edge, placing 1 white bead per row end, for 120 bsc. Fasten off and weave in ends. (120 bsc along lower edge)
Your band should now have a clean white bead border along both long edges.
Scallop Lower Edge
Using Color C aqua thread (no beads for this pass), join thread at the far left lower corner.
Scallop pass: (Sl st into next st, ch 3, 3 dc into same st, ch 3, sl st into same st, skip 2 sts) repeat across. Work the final scallop into the last available stitch, then sl st to the corner to anchor. Fasten off.
The lower edge has 120 stitches. Each scallop repeat consumes 3 stitches. 120 divided by 3 equals 40 scallops exactly. (40 scallops)
You should now have 40 raised scallop points along the lower edge, creating that beautiful undulating wave silhouette.
Closure
Pre-string 8 white beads (Color 4) onto Color D thread.
Join Color D thread at the end of the last row on the right short end of the band.
Closure loop: Ch 8 (with 1 bead slid up per chain, working 8 bsc), then sl st back to the base of the ch-8 to close the loop. (8-bead loop)
Fasten off and weave in end securely.
Closure bead button: At the left short end, use Color D thread to sew the large cobalt blue 4mm button bead firmly to the center of the end row. Knot securely and weave in all ends.
Whale Charm
Use Cobalt Blue (Color 1) and Dark Navy Blue (Color 5) beads on Color A cobalt blue thread.
Foundation: Ch 8.
Row 1 (body base): Sk 1 ch, work 1 bsc into each of next 6 ch. Turn. (6 bsc, all Color 1 beads)
Row 2: Ch 1, 1 bsc in each of 6 sts. Turn. (6 bsc, all Color 1)
Row 3: Ch 1, 1 bsc in each of 6 sts. Turn. (6 bsc, beads: positions 1 to 2 Color 5, positions 3 to 6 Color 1)
Row 4: Ch 1, 1 bsc in each of 6 sts. Turn. (6 bsc, all Color 1)
Row 5: Ch 1, sl st across first st without a bead (decrease), 1 bsc in each of next 4 sts, sl st last st without bead (decrease). Turn. (4 bsc, all Color 1)
Row 6: Ch 1, 1 bsc in each of 4 sts. Turn. (4 bsc, all Color 1)
Row 7 (tail split, left fluke): Ch 1, 1 bsc in first 2 sts only. Turn. (2 bsc, Color 1)
Row 8 (left fluke tip): Ch 1, 1 bsc in each of 2 sts. Fasten off. (2 bsc)
Return to Row 6 remaining stitches. Re-join thread at stitch 3 of Row 6.
Row 7 (right fluke): 1 bsc in each of remaining 2 sts. Turn. (2 bsc)
Row 8 (right fluke tip): Ch 1, 1 bsc in each of 2 sts. Fasten off. (2 bsc)
Use a tapestry needle to add a Color 5 navy bead as the eye by threading through the charm at Row 3, position 2. Knot firmly and weave in all ends.
Seahorse Charm
Use Color C aqua thread with Color 2 medium teal beads and Color 3 aqua beads.
Foundation: Ch 5.
Row 1: Sk 1 ch, 1 bsc into each of next 3 ch. Turn. (3 bsc, Color 2, Color 3, Color 2)
Row 2: Ch 1, 1 bsc in each of 3 sts. Turn. (3 bsc, all Color 3)
Row 3: Ch 1, 1 bsc in each of 3 sts. Turn. (3 bsc, Color 2, Color 2, Color 3)
Row 4: Ch 1, 1 bsc in each of 3 sts. Turn. (3 bsc, Color 3, Color 2, Color 3)
Rows 5 through 10: Ch 1, 1 bsc in each of 3 sts per row. Turn after each row. (3 bsc per row, alternating Color 2 and Color 3)
Row 11 (begin taper): Ch 1, sl st in first st (no bead), 1 bsc in next 2 sts. Turn. (2 bsc)
Row 12: Ch 1, 1 bsc in each of 2 sts. Turn. (2 bsc)
Row 13: Ch 1, sl st in first st (no bead), 1 bsc in next 1 st. Turn. (1 bsc)
Row 14 (tail tip): Ch 1, 1 bsc in 1 st. Fasten off. (1 bsc)
Head section: At the foundation chain end, re-join thread at the left side. Work (ch 3, 2 dc, ch 3, sl st) into the corner stitch to form the snout curve. Fasten off.
Jellyfish Charm
Use Color C aqua thread with Color 3 aqua turquoise beads.
Foundation ring: Ch 6, sl st to first ch to form ring.
Rnd 1: Ch 1, work 8 bsc evenly around ring. Sl st to first bsc to join. (8 bsc)
Rnd 2: Ch 1, work 2 bsc in each st around. Sl st to join. (16 bsc)
Rnd 3: Ch 1, (1 bsc in next st, 2 bsc in next st) around. Sl st to join. (24 bsc)
Rnd 4: Ch 1, (1 bsc in each of next 2 sts, 2 bsc in next st) around. Sl st to join. (32 bsc)
Rnd 5: Ch 1, 1 bsc in each st around. Sl st to join. (32 bsc)
Rnd 6: Ch 1, (1 bsc in each of next 2 sts, sc2tog over next 2 sts) around. Sl st to join. (24 sts)
Rnd 7: Ch 1, (1 bsc in next st, sc2tog) around. Sl st to join. (16 sts)
Rnd 8: Ch 1, (sc2tog) around. Sl st to join. (8 sts)
Fasten off, leaving a 6-inch tail. Thread tail through remaining 8 sts and pull snug to close. Knot firmly.
Tentacles
Cut 8 lengths of Color C thread, each 4 inches long. Pre-string 18 Color 3 aqua beads onto each length.
Fold each length in half and attach the folded center point to one of 8 evenly spaced points around Round 4 using a lark’s head knot. Slide all 18 beads down toward the ends. Thread the two thread tails through the bead column and knot at the bottom to secure. Trim to even length.
Finishing and Assembly
Charm placement (positions counted from left end of band):
To attach crocheted charms: Cut a 12-inch length of matching thread. Thread onto a beading needle. Pass through the top edge of the charm and then through the thread between two beads at the appropriate scallop point. Pass through again in the same path. Pull snug so the charm sits flush against the band edge. Knot with 3 half hitches, trim tail to 0.25 inch and tuck between beads.
Size Customization
Need a different size? Adjust rows in multiples of 3 to maintain scallop repeat divisibility.
Each additional 12 rows requires approximately 144 additional main band beads and 24 additional white edging beads.
Care Instructions
Hand wash only in cool water with mild soap. Do not wring or twist. Pat flat on a clean towel to dry. Store flat or coiled loosely to prevent tangling.
Time Estimate
Plan for 8 to 12 hours total. The main wave band takes 4 to 6 hours. All four charms require 3 to 5 hours. Finishing and closure add about 30 minutes.
Thank you so much for choosing this pattern. I truly hope you love making this ocean-inspired anklet as much as I loved designing it. If you create one, I’d be thrilled to see your finished piece. Tag me on Instagram or share in my Facebook group.
If this pattern is calling to you but you’re not quite ready to start today, go ahead and pin it to your favorite Pinterest board so you can find it easily when the time is right. And once you’ve finished your anklet, please come back and leave a comment below. I love hearing how your projects turn out and seeing all the beautiful color combinations you choose.
You Might Also Like
- Emerald Diamond Lattice Mermaid Gown Free Crochet Pattern
- Mint Daisy Spring Barrel Handbag Free Crochet Pattern
- Arctic Ice Mermaid Plush Doll Free Crochet Pattern
- Pastel Rainbow Shell Stitch Bodysuit Free Pattern