
I set out to design a baby dress that would make every crafter feel like they had created something truly heirloom worthy. I wanted delicate details without overwhelming complexity. I wanted a fitted bodice that actually looked professional, a skirt with beautiful movement, and those sweet little butterflies that make everyone stop and say "you made that?"
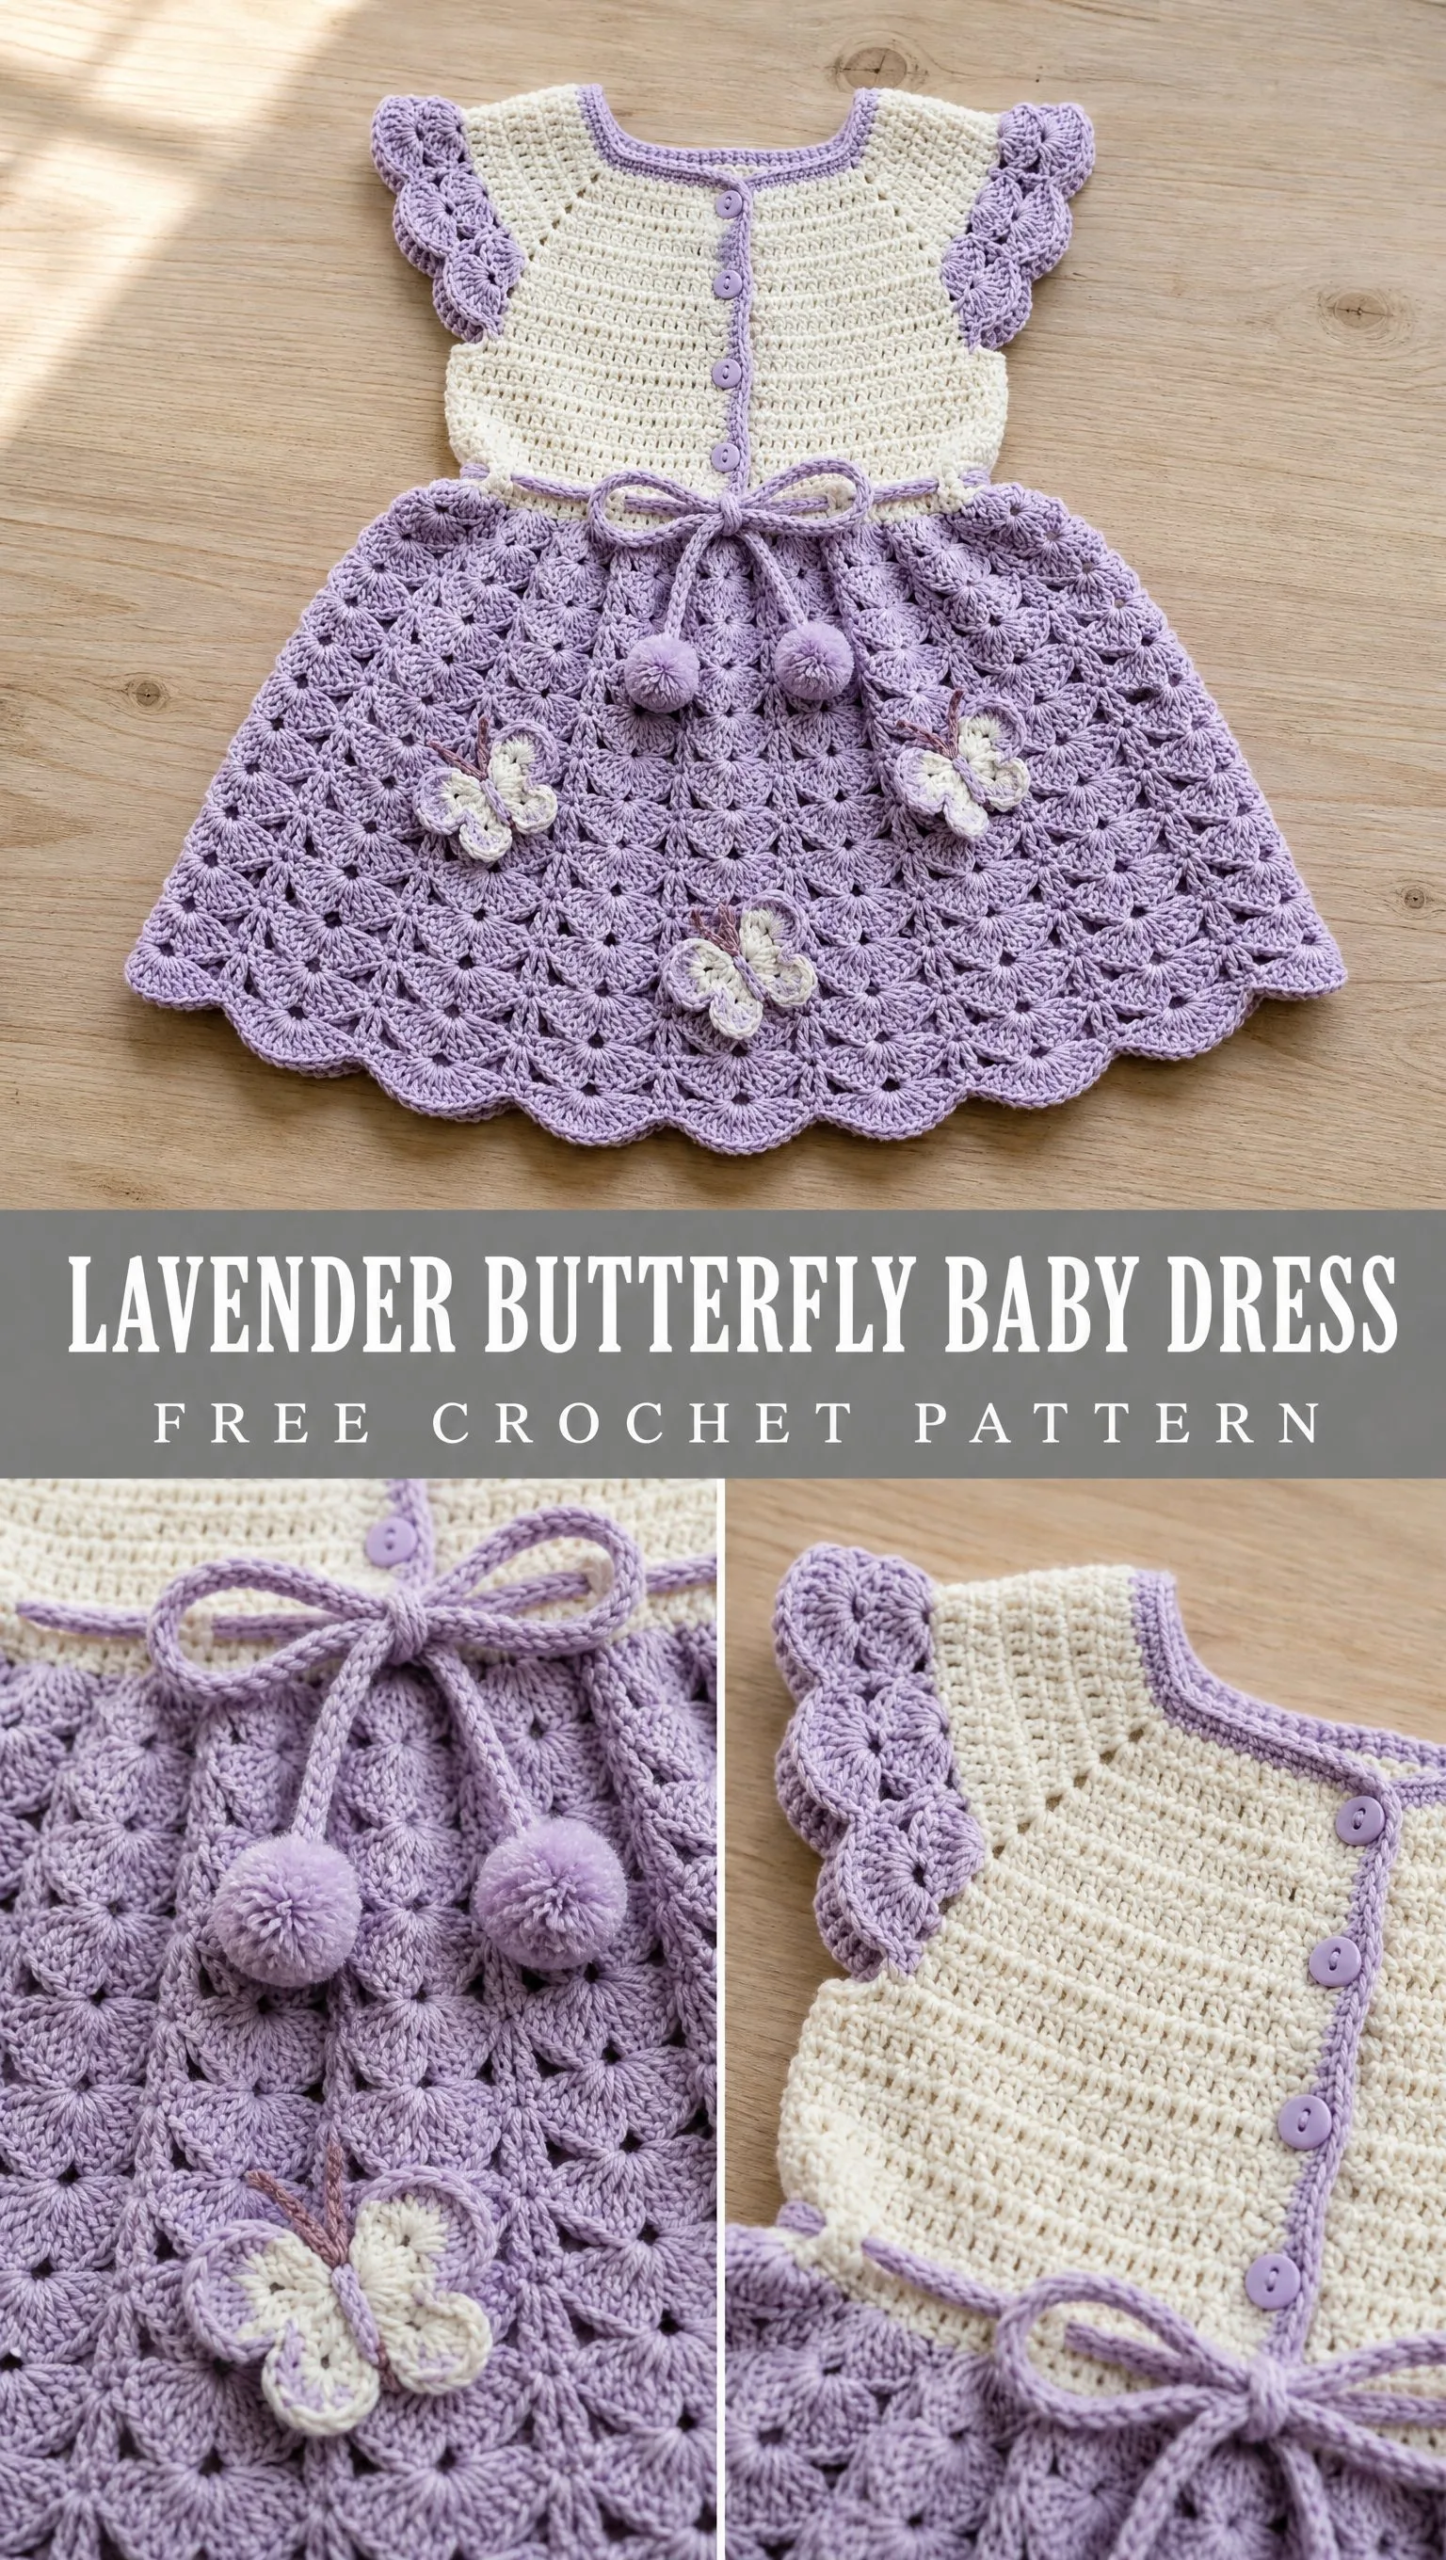
When I finished the first sample of this lavender butterfly baby dress, I actually did a little happy dance in my craft room. The shell stitch skirt has exactly the right amount of drape. The flutter sleeves add that vintage sweetness without being fussy. And those pompom ties at the waist? Pure joy.
I am SO pleased with how this crochet pattern turned out. Every single detail came together exactly as I pictured it, and I cannot wait for you to make one too.
About This Baby Dress Crochet Pattern
This adorable baby dress combines a clean, solid bodice in creamy white with a gorgeous lavender shell stitch skirt. The construction is top down, which means you start at the neckline and work your way to the hem. No seaming the bodice to the skirt later. No fiddly bits to figure out at the end.
The bodice uses simple double crochet (dc) stitches worked flat in rows. If you can chain and double crochet, you can make this bodice. The skirt switches things up with a shell stitch pattern worked in the round, creating those lovely scalloped waves you see in the photo.
Three crocheted butterfly appliques decorate the front of the skirt, and a twisted cord with pompom ends ties at the empire waist. Five small buttons close the front bodice. The finished dress fits a 12 month old baby with an 18 inch chest, and I have included sizing tips for 6 months and 18 months at the end.
Skill Level
This pattern is rated Advanced Beginner to Intermediate. The bodice portion uses straightforward double crochet with basic raglan shaping. Nothing scary there. The skirt requires you to work a shell stitch pattern in the round, which takes a bit of focus but becomes rhythmic quickly.
The butterfly appliques are small motifs worked in joined rounds. They look impressive but are actually quite simple once you get the hang of them. If you are comfortable with basic increases, working in the round, and sewing pieces together, you can absolutely complete this project.
Allow yourself 12 to 18 hours total depending on your experience. The bodice takes about 4 to 5 hours, the skirt 5 to 6 hours, and the butterflies plus finishing work another 3 to 4 hours.
Finished Measurements
Size: 12 months
Chest: Fits 18 inches (45.5 cm)
Length: Approximately 16 inches (40.5 cm) from shoulder to hem
Materials Needed
Yarn
You will need worsted weight yarn (category 4) in two colors:
Color A (Cream): Approximately 150 yards (137 meters)
Color B (Lavender): Approximately 300 yards (274 meters)
Yarn Suggestions
Lion Brand Pound of Love (100% acrylic, worsted weight, 1020 yards per pound skein) is machine washable, widely available, and soft against baby skin. Purchase one skein each of off white and soft purple.
Cascade 220 Superwash (100% superwash merino wool, 220 yards per 100g skein) gives beautiful stitch definition and is machine washable. Purchase one skein each of cream and light violet.
Paintbox Yarns Simply DK (100% acrylic, 137 yards per 50g ball) is a lovely option, but note this is DK weight. If using this yarn, drop your hook to US size E-4 (3.50 mm) and reswatch to match gauge before beginning.
Any smooth worsted weight yarn that achieves the stated gauge will work. Avoid textured or boucle yarns as they obscure the shell stitch pattern. Always wash your swatch if you plan to wash the finished garment since some yarns relax significantly after washing.
Hook
US size G-6 (4.00 mm) crochet hook
Notions
Gauge
18 dc x 10 rows = 4 inches (10 cm) in double crochet, worked flat, blocked.
1 shell repeat (7 stitches wide) x 4 rows = approximately 1.75 inches x 1.5 inches (4.5 cm x 4 cm) in shell pattern, worked in the round, blocked.
Gauge is critical for a fitted garment. Adjust hook size as needed to match gauge before beginning. A too loose gauge will make the dress too big and floppy. A too tight gauge will make it stiff and small.
Abbreviations
Before we dive into the step by step instructions, let me define all the abbreviations you will encounter. I will also explain each one in plain English so nothing feels mysterious.
Special Stitches
These special techniques appear throughout the pattern. Take a moment to familiarize yourself with them before starting.
Shell Stitch
Work 5 dc all into the same stitch or space. This creates one shell unit that fans out beautifully.
Scallop Edge
Work [sl st, ch 2, 4 dc, ch 2, sl st] all into the same stitch or space. This creates one decorative scallop shell for edgings.
Dc2tog (Double Crochet 2 Together)
This decreases 2 stitches into 1. Work [yo, insert hook into next st, yo, pull up a loop, yo, pull through 2 loops] twice, then yo and pull through all 3 loops on hook. Counts as 1 stitch.
Dc5tog (Double Crochet 5 Together)
Work [yo, insert hook into next st, yo, pull up a loop, yo, pull through 2 loops] 5 times into 5 consecutive stitches, then yo and pull through all 6 loops on hook. Counts as 1 stitch.
Pompom
Cut a 3 inch wide piece of cardboard. Wrap yarn around it approximately 50 times. Slide the bundle off, tie tightly at center with a separate length of yarn leaving long tails for attaching. Cut all loops. Trim into a round shape approximately 1 inch (2.5 cm) in diameter.
Twisted Cord
Cut 6 strands of Color B each 48 inches (122 cm) long. Fold in half and secure one end. Twist tightly in one direction until the strands begin to kink. Fold in half again at the midpoint and allow to twist onto itself. Knot ends securely. Finished cord measures approximately 11 inches (28 cm).
Pattern Notes
Please read these notes before beginning. They will save you confusion later.
The dress bodice is worked flat in rows from the neckline down, then joined to work the skirt in the round.
The button band runs down the center front of the bodice, not the back. The back is worked open and overlapping for ease of dressing, then the back edges are slip stitched together for approximately 1 inch (2.5 cm) at the top for shoulder stability.
When working the yoke increases, place stitch markers at the 4 raglan points and move them up with each row. This keeps your shaping organized.
The skirt uses a multiple of 7 stitches plus 1 for the shell pattern. Confirm your stitch count is divisible by 7 plus 1 before beginning the skirt. This is non negotiable for the pattern to work correctly.
Chain 3 at the beginning of a double crochet row counts as 1 dc throughout this pattern unless otherwise noted.
All edgings are worked with Color B.
Step by Step Instructions
Bodice
The bodice is worked flat in rows. Begin at the neckline.
With Color A, ch 52.
Foundation Row (WS): Dc in 4th ch from hook and in each ch across, turn. (50 dc)
Place stitch markers in stitches 9, 16, 35, and 42 to mark raglan points (right back shoulder, right underarm, left underarm, left back shoulder).
Yoke Row 1 (RS): Ch 3, 2 dc in first st, dc to 1 st before first marker, [2 dc in next st, 2 dc in next st] at each of the 4 raglan points, dc to last st, 2 dc in last st, turn. (60 dc)
Yoke Row 2 (WS): Ch 3, dc in each st across, turn. (60 dc)
Yoke Row 3 (RS): Ch 3, 2 dc in first st, dc to 1 st before first marker, [2 dc in next st, 2 dc in next st] 4 times at raglan points, dc to last st, 2 dc in last st, turn. (70 dc)
Yoke Row 4 (WS): Ch 3, dc in each st across, turn. (70 dc)
Yoke Row 5 (RS): Ch 3, 2 dc in first st, dc to 1 st before first marker, [2 dc in next st, 2 dc in next st] 4 times at raglan points, dc to last st, 2 dc in last st, turn. (80 dc)
Yoke Row 6 (WS): Ch 3, dc in each st across, turn. (80 dc)
Yoke Row 7 (RS): Ch 3, 2 dc in first st, dc to 1 st before first marker, [2 dc in next st, 2 dc in next st] 4 times at raglan points, dc to last st, 2 dc in last st, turn. (90 dc)
Yoke Row 8 (WS): Ch 3, dc in each st across, turn. (90 dc)
After Yoke Row 8, the stitch distribution across panels should be approximately: right back 10, right sleeve 14, front 32, left sleeve 14, left back 10. Total: 90 dc.
Separate Sleeves from Body
Yoke Row 9 (RS, joining row): Ch 3, dc across 10 right back sts, ch 4 (underarm bridge), skip 14 right sleeve sts, dc across 32 front sts, ch 4, skip 14 left sleeve sts, dc across 10 left back sts, turn.
After joining: 10 + 4 + 32 + 4 + 10 = 60 working sts/chs.
Bodice Row 1 (WS): Ch 3, dc in each st and each ch across, turn. (60 dc)
Bodice Row 2 (RS): Ch 3, dc in each st across, turn. (60 dc)
Bodice Row 3 (WS): Ch 3, dc in each st across, turn. (60 dc)
Bodice Row 4 (RS): Ch 3, dc in each st across, turn. (60 dc)
Bodice Row 5 (WS): Ch 3, dc in each st across, turn. (60 dc)
Bodice Row 6 (RS): Ch 3, dc in each st across, turn. (60 dc)
Checkpoint: After the bodice, your piece should measure approximately 6 inches (15 cm) from neckline to bottom of bodice. If it is shorter, work additional plain rows of dc until you reach this measurement.
Waist Joining Round
Do not fasten off. With RS facing, join the bodice into a round by slip stitching the back opening closed. The center back edges overlap by approximately 1 inch (2.5 cm). Fold the left back edge over the right back edge and pin in place. Working through both layers at the top back, sl st through both layers for 4 sts to secure the overlap.
Turn work so RS is facing. Rejoin Color A at the right back side seam with a sl st.
Waist Round 1: Ch 3, dc in each st around the entire waist opening. Total working sts around waist: 60 dc. Join with sl st to top of ch-3. (60 dc)
Waist Increase Round: Ch 1, sc in each of first 5 sts, [2 sc in next st, sc in each of next 5 sts] 10 times, 2 sc in last st, join with sl st to first sc. (71 sc)
Change to Color B. Do not cut Color A.
Checkpoint: Before beginning the skirt, count your stitches. You must have exactly 71 stitches. This is the foundation count for the shell pattern to work correctly.
Skirt
The skirt is worked in the round in Color B using a shell stitch pattern.
Skirt Round 1: Join Color B with sl st in first sc. Ch 1, sc in same st, [sk 2 sts, shell (5 dc) in next st, sk 2 sts, sc in next st] 10 times, join with sl st to first sc. (10 shells + 10 sc)
Skirt Round 2: Ch 3, 2 dc in same sc, [sc in center dc of next shell, shell in next sc] 9 times, sc in center dc of last shell, 2 dc in same sc as starting ch-3, join with sl st to top of ch-3. (10 shells + 10 sc)
Skirt Round 3: Ch 1, sc in join sp, [shell in next sc, sc in center dc of next shell] 10 times, join with sl st to first sc. (10 shells + 10 sc)
Skirt Round 4: Ch 3, 2 dc in same sc, [sc in center dc of next shell, shell in next sc] 9 times, sc in center dc of last shell, 2 dc in same sc as starting ch-3, join with sl st to top of ch-3. (10 shells + 10 sc)
Rounds 3 and 4 establish the alternating shell pattern. Continue working Rounds 3 and 4 alternately through Round 6.
Skirt Expansion
Expansion Round A (after Round 6): Ch 1, sc in first sc, [shell in next sc, sc in center dc of shell, ch 2, sc in same center dc] 10 times, work last rep without final ch-2, join.
Expansion Round B: Ch 1, sc in first sc, [shell in next sc, sc in center dc of shell, shell in ch-2 sp, sc in next sc] 9 times, shell in last sc, sc in center dc of last shell, shell in ch-2 sp, join with sl st to first sc. (20 shells + 20 sc)
Rounds 8 through 14: Work as established with 20 shell repeats, alternating shell to sc positions each round. (20 shells + 20 sc per round)
Checkpoint: After Round 14, the skirt should measure approximately 5.5 to 6 inches (14 to 15 cm) from the waist.
Scallop Hem Edging
Round 15 (Scallop Edging): Ch 1, [sl st in sc, ch 2, 4 dc in same sc, ch 2, sl st in same sc, sl st in each of next 5 dc of shell] 20 times, join with sl st to first sl st. Fasten off Color B. Weave in ends.
Total hem scallops: 20.
Sleeve Edging
The sleeve openings have approximately 18 sts around each armhole.
Rejoin Color B at underarm bridge of one sleeve opening with sl st.
Sleeve Edging Round 1: Ch 1, sc evenly around sleeve opening, aiming for a total of 18 sc around, join with sl st to first sc. (18 sc)
Sleeve Edging Round 2 (Flutter Ruffle): Ch 3, 2 dc in same sc, 3 dc in each sc around, join with sl st to top of ch-3. (54 dc)
Sleeve Edging Round 3 (Scallop): [Sl st in next dc, ch 2, 3 dc in same dc, ch 2, sl st in same dc, sk 2 dc] 18 times, join with sl st. Fasten off.
Repeat for second sleeve.
Neckline Edging
Rejoin Color B at right back neck edge with sl st, RS facing.
Neckline Round 1: Ch 1, sc evenly around neckline, aiming for 50 sc total, join with sl st to first sc. (50 sc)
Neckline Round 2 (Scallop): [Sl st in next sc, ch 2, 3 dc in same sc, ch 2, sl st in same sc, sk 2 sc] 16 times, sl st in last 2 sc, join. Fasten off.
Button Band
With Color B, RS facing, rejoin at top right corner of center front opening.
Button Band Row 1: Ch 1, work 1 sc in each row end down the right front edge, approximately 30 sc for the bodice length, turn. (30 sc)
Button Band Row 2: Ch 1, sc in each sc across, turn. (30 sc)
Fasten off.
Buttonhole Band (Left Front)
Buttonhole Band Row 1: Ch 1, work 1 sc in each row end down left front edge, turn. (30 sc)
Buttonhole Band Row 2: Ch 1, sc in first 2 sc, [ch 2, sk 2 sc, sc in next 4 sc] 4 times, ch 2, sk 2 sc, sc in last 2 sc, turn. (5 buttonholes made)
Buttonhole Band Row 3: Ch 1, sc in each sc and 2 sc in each ch-2 sp across, turn. (30 sc)
Fasten off. Weave in ends.
Butterflies (Make 3)
Each butterfly has 4 wings (2 upper, 2 lower) and 1 body.
Upper Wing (make 2 per butterfly, 6 total): With Color A, ch 4, join with sl st to form ring.
Round 1: Ch 3 (counts as dc), 4 dc in ring, ch 2, sl st in ring, ch 2, 5 dc in ring, sl st in ring. Fasten off leaving a 10 inch (25 cm) tail for sewing. (10 dc total per upper wing piece)
Lower Wing (make 2 per butterfly, 6 total): With Color A, ch 4, join with sl st to form ring.
Round 1: Ch 3, 2 dc in ring, ch 2, sl st in ring, ch 2, 3 dc in ring, sl st in ring. Fasten off leaving a 10 inch (25 cm) tail. (6 dc total)
Butterfly Body: With Color B, ch 7.
Row 1: Sc in 2nd ch from hook and in each ch across. (6 sc)
Fasten off leaving a 10 inch (25 cm) tail. Pinch the body strip at its center. Wrap Color B yarn tightly around the pinch 6 times and knot firmly to form the butterfly waist.
Assemble butterfly: Arrange 2 upper wings and 2 lower wings around the body. Upper wings go at the top angled outward. Lower wings sit below angled slightly downward and out. Use tails to sew wing pieces to the body center securely.
Finishing
Weave in all loose ends throughout the dress.
Button Attachment: Sew 5 lavender or white buttons to the right front button band, evenly spaced, aligning with the 5 buttonholes on the left front band. Space buttons approximately 0.75 inch (2 cm) apart beginning 0.5 inch (1.5 cm) from the neckline.
Twisted Cord Placement: Thread the twisted cord through the dc stitches at the waist join round, weaving in and out approximately every 3rd stitch to create a drawstring effect. Center the cord at the front. Tie a bow at the center front, leaving the pompom tipped ends free.
Butterfly Placement: Using a yarn needle and the long sewing tails, attach the 3 butterflies to the front skirt. Position one butterfly at the center bottom of the skirt approximately 3 inches (7.5 cm) above the hem. Position the other two butterflies on either side, approximately 2 inches (5 cm) above the hem and 3 inches (7.5 cm) from center. Sew through the butterfly body center to the skirt, knotting securely on the wrong side.
Back Overlap: Lap the left back bodice edge over the right back edge. The overlap should be approximately 1 inch (2.5 cm) wide. Tack the overlap at the top (neckline) and at the waist with a few whip stitches using Color A, leaving the button band free.
Blocking
Wet block the finished dress by soaking in cool water for 15 minutes. Gently squeeze out water without wringing. Lay flat on a blocking mat, pin the skirt hem into a smooth scalloped circle and the sleeve ruffles into gentle waves. Pin the bodice to the correct measurements. Allow to dry completely before removing pins, approximately 24 hours.
Size Customization Tips
To size up to 18 months: Begin the foundation chain with 56 ch instead of 52. Add 2 additional rows of bodice dc after the underarm separation (8 rows total instead of 6). Work 2 additional shell rounds in the skirt before the Expansion Round, and work 4 additional rounds after Expansion before the scallop edging. The finished chest circumference will be approximately 20 inches (51 cm).
To size down to 6 months: Begin with 48 ch. Remove 2 bodice rows after underarm separation (4 rows total). Work 2 fewer rounds after expansion. The finished chest will be approximately 17 inches (43 cm).
For any size change, recheck that your stitch count before the skirt remains a multiple of 7 plus 1, adjusting the waist increase round accordingly.
Care Instructions
Machine wash on gentle cycle in cold water. Lay flat to dry. Do not tumble dry, iron, or bleach. If using a wool or wool blend yarn, hand wash only in cool water and dry flat. Store folded, away from direct sunlight, to preserve the lavender color.
You Did It!
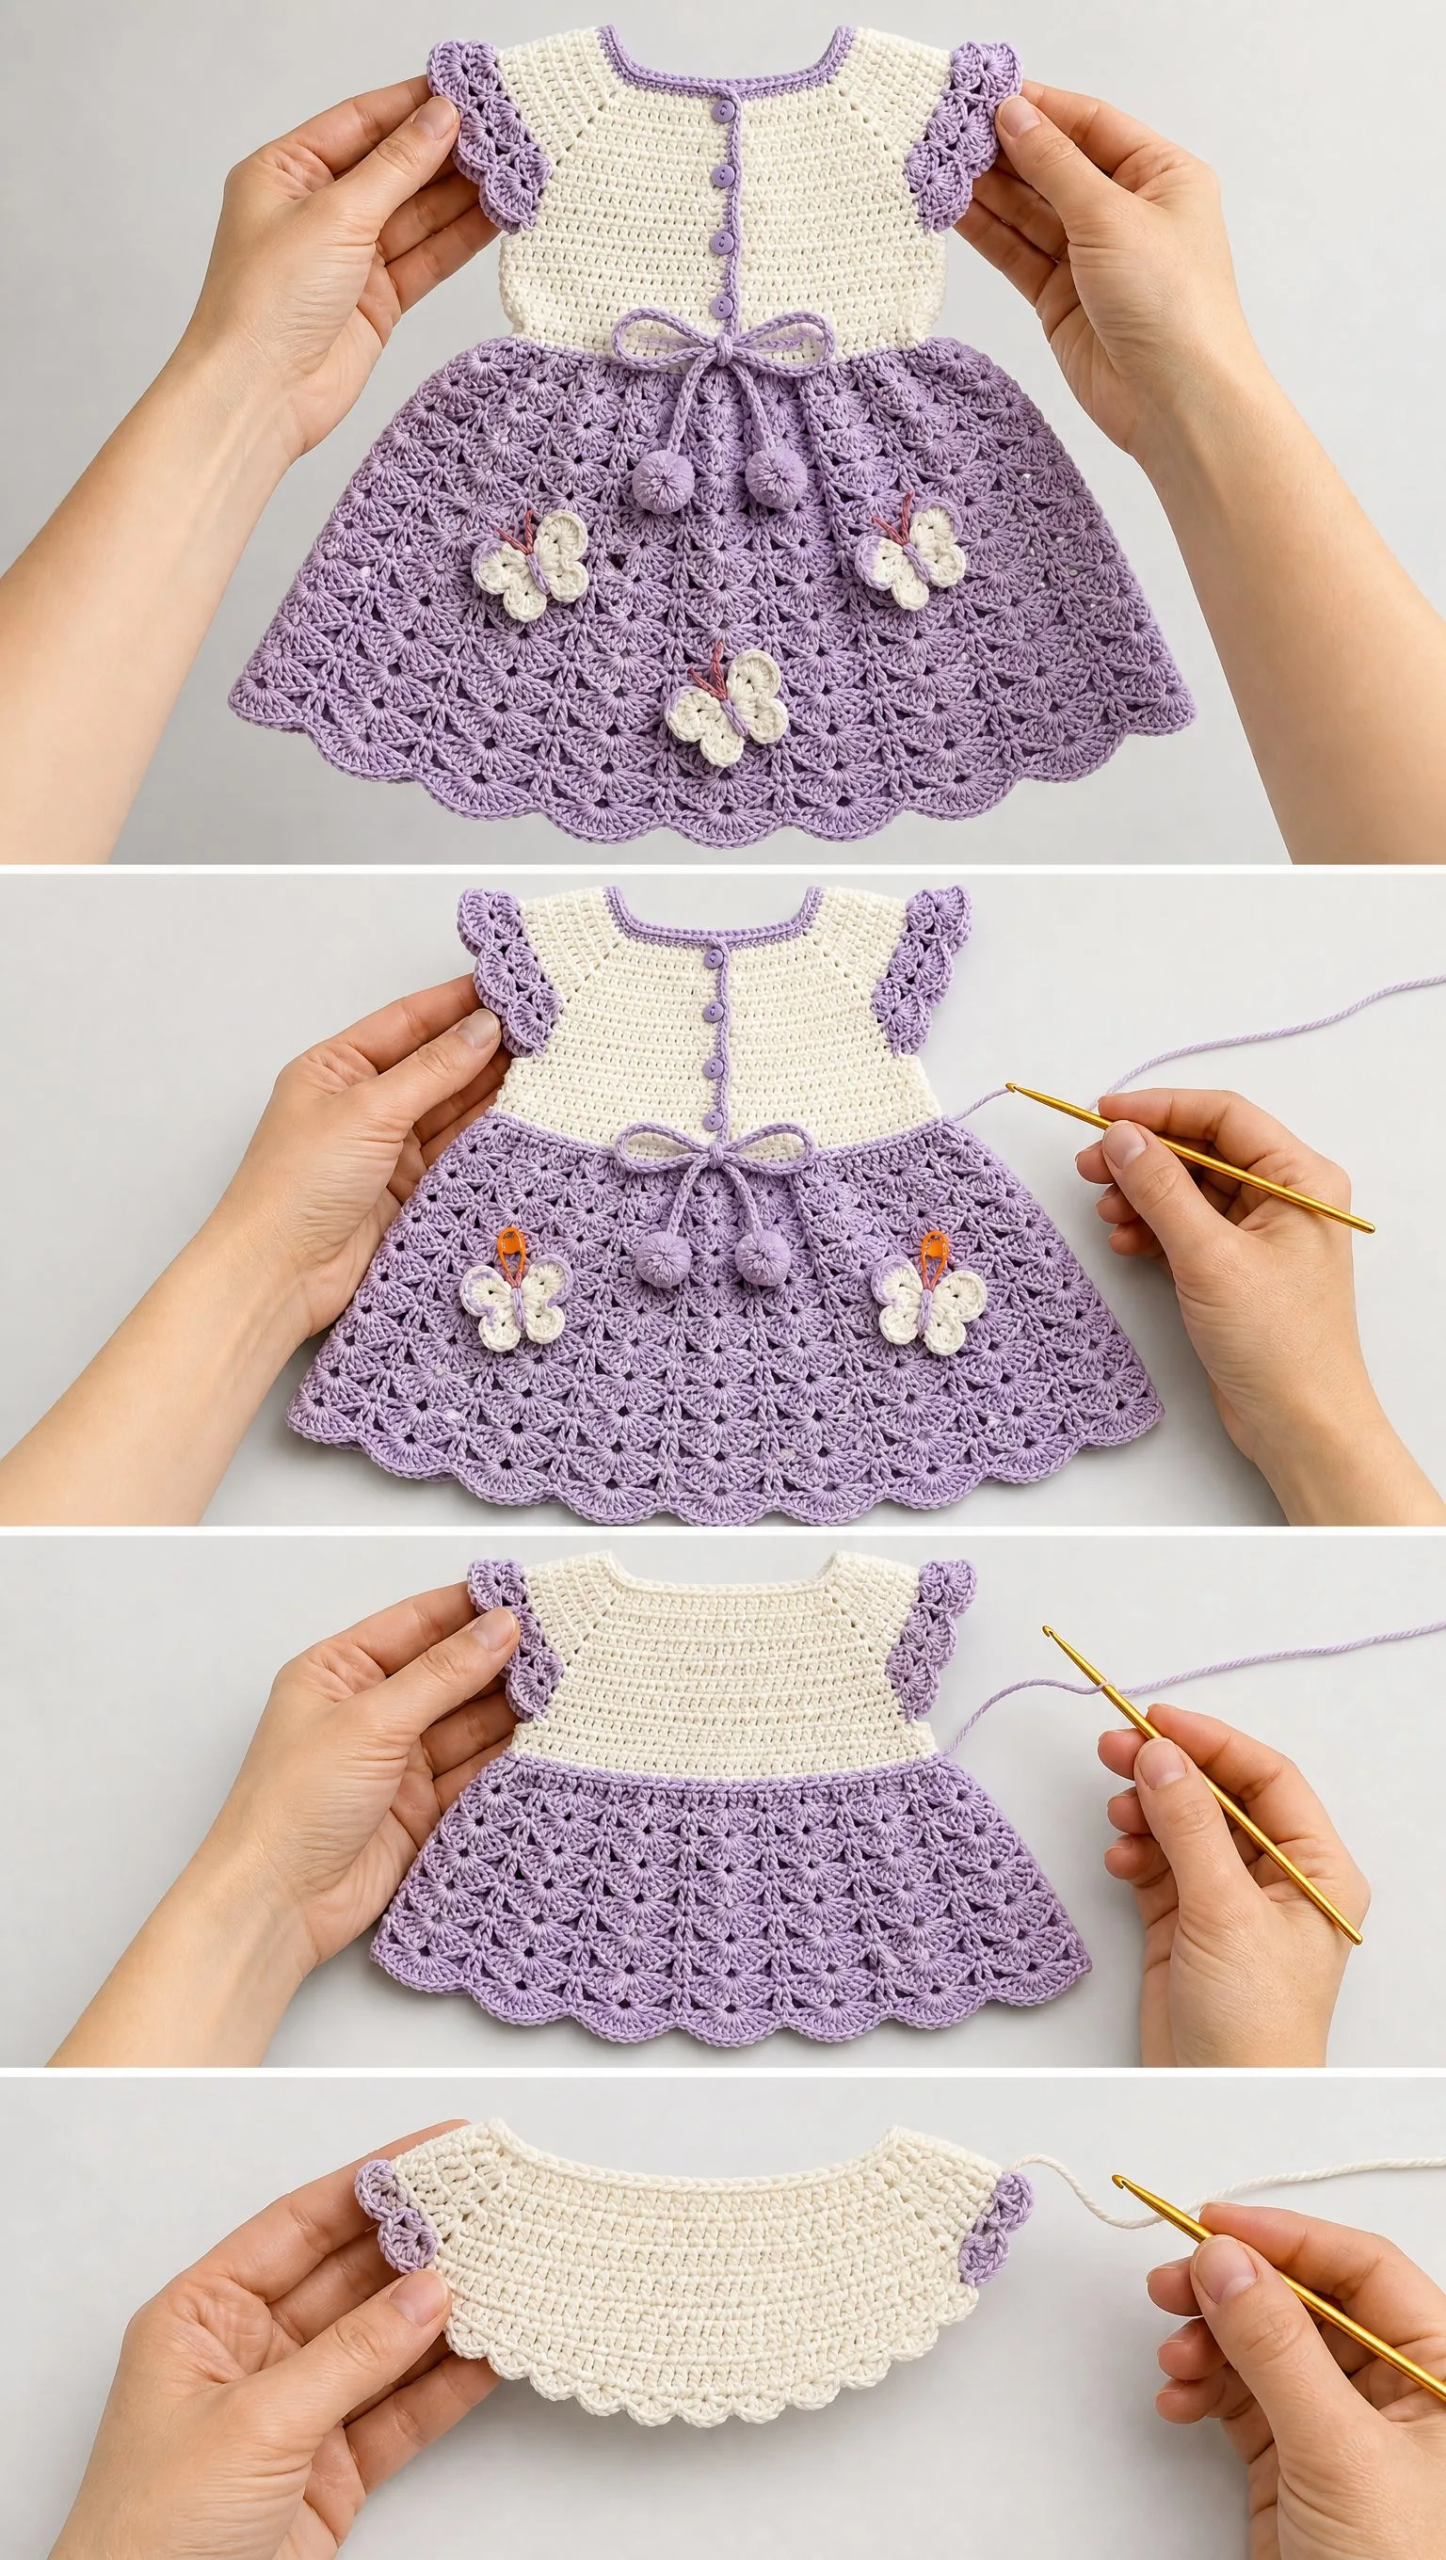
This lavender butterfly baby dress crochet pattern creates something truly special. Every detail, from the flutter sleeves to the shell stitch skirt to those sweet little butterflies, comes together into a garment that looks like it belongs in a boutique window. The little one who wears this dress will look absolutely precious, and you will have made something their family treasures for years.
Thank you so much for choosing this crochet tutorial for your next project. I would absolutely love to see your finished dresses! Tag me on Instagram or share in my Facebook group so I can cheer you on. There is nothing better than seeing these patterns come to life in your hands.
If you loved making this baby dress, save it to your Pinterest boards so you can find it again for the next baby shower invitation in your mailbox. And please drop a comment below if you make one. I read every single comment and love hearing about your projects!
You Might Also Like
- Pastel Rainbow Granny Square Purse Free Crochet Pattern
- Dusty Rose Boho Crochet Three-Piece Set Free Pattern
- Lavender Dream Tiered Baby Dress Free Crochet Pattern
- Lavender Garden Ear Cuff Free Crochet Pattern