
Looking for a project that transforms your dining table into something truly special? This Lavender Blossom Table Set delivers exactly that. You get a stunning lace placemat, a three-layer dimensional flower, and a coordinating napkin ring, all worked in sport weight cotton with delicate silver accents.
Get the Ad-Free PDF Pattern
You can find the free pattern below, or you can purchase the ad-free printable PDF from my shop.
Get the Printable PDF →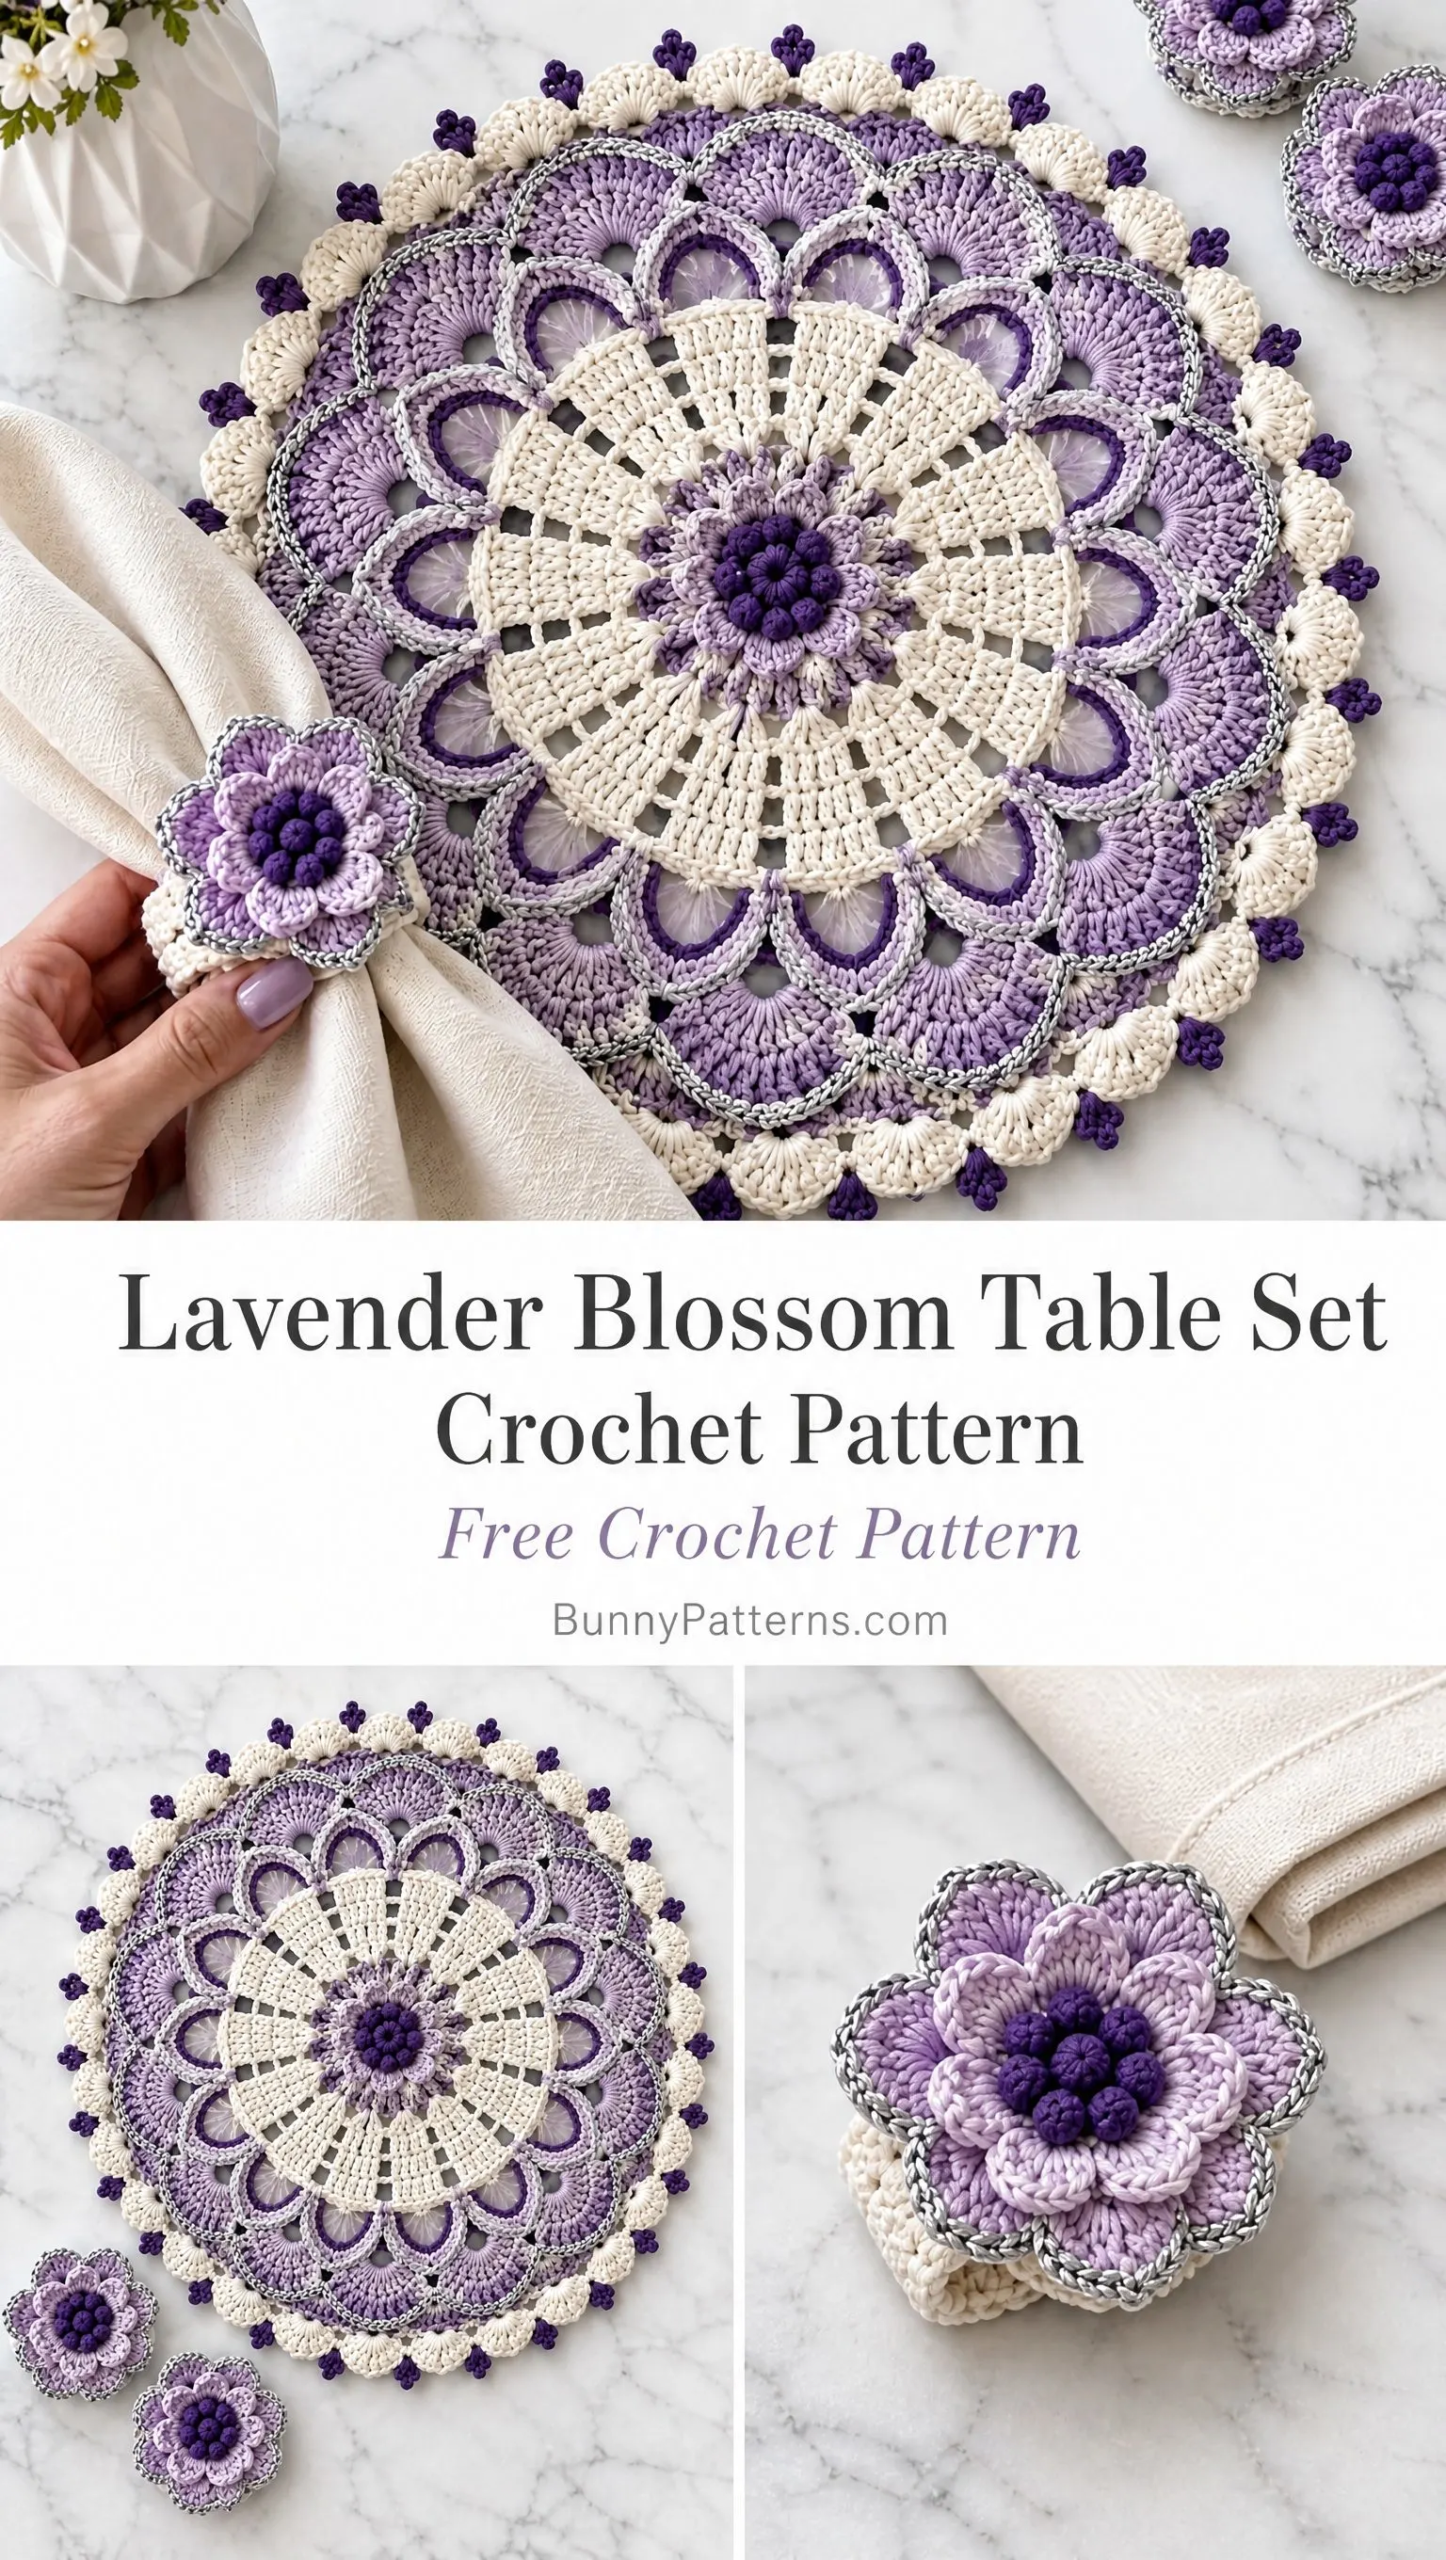
The set uses mostly double crochet stitches, chain spaces, and a few puff stitches for texture. It works up beautifully as a hostess gift, a wedding present, or a treat for your own home. If you have been wanting to try colorwork in the round or practice your lace skills, this intermediate-level project gives you plenty of satisfying techniques without overwhelming complexity.
Each placemat finishes at approximately 14 to 15 inches in diameter, making it perfect for a charger-style presentation under your dinner plates. The napkin flower adds that dimensional pop that guests always notice. Let me walk you through everything you need to create this gorgeous set.
About This Pattern
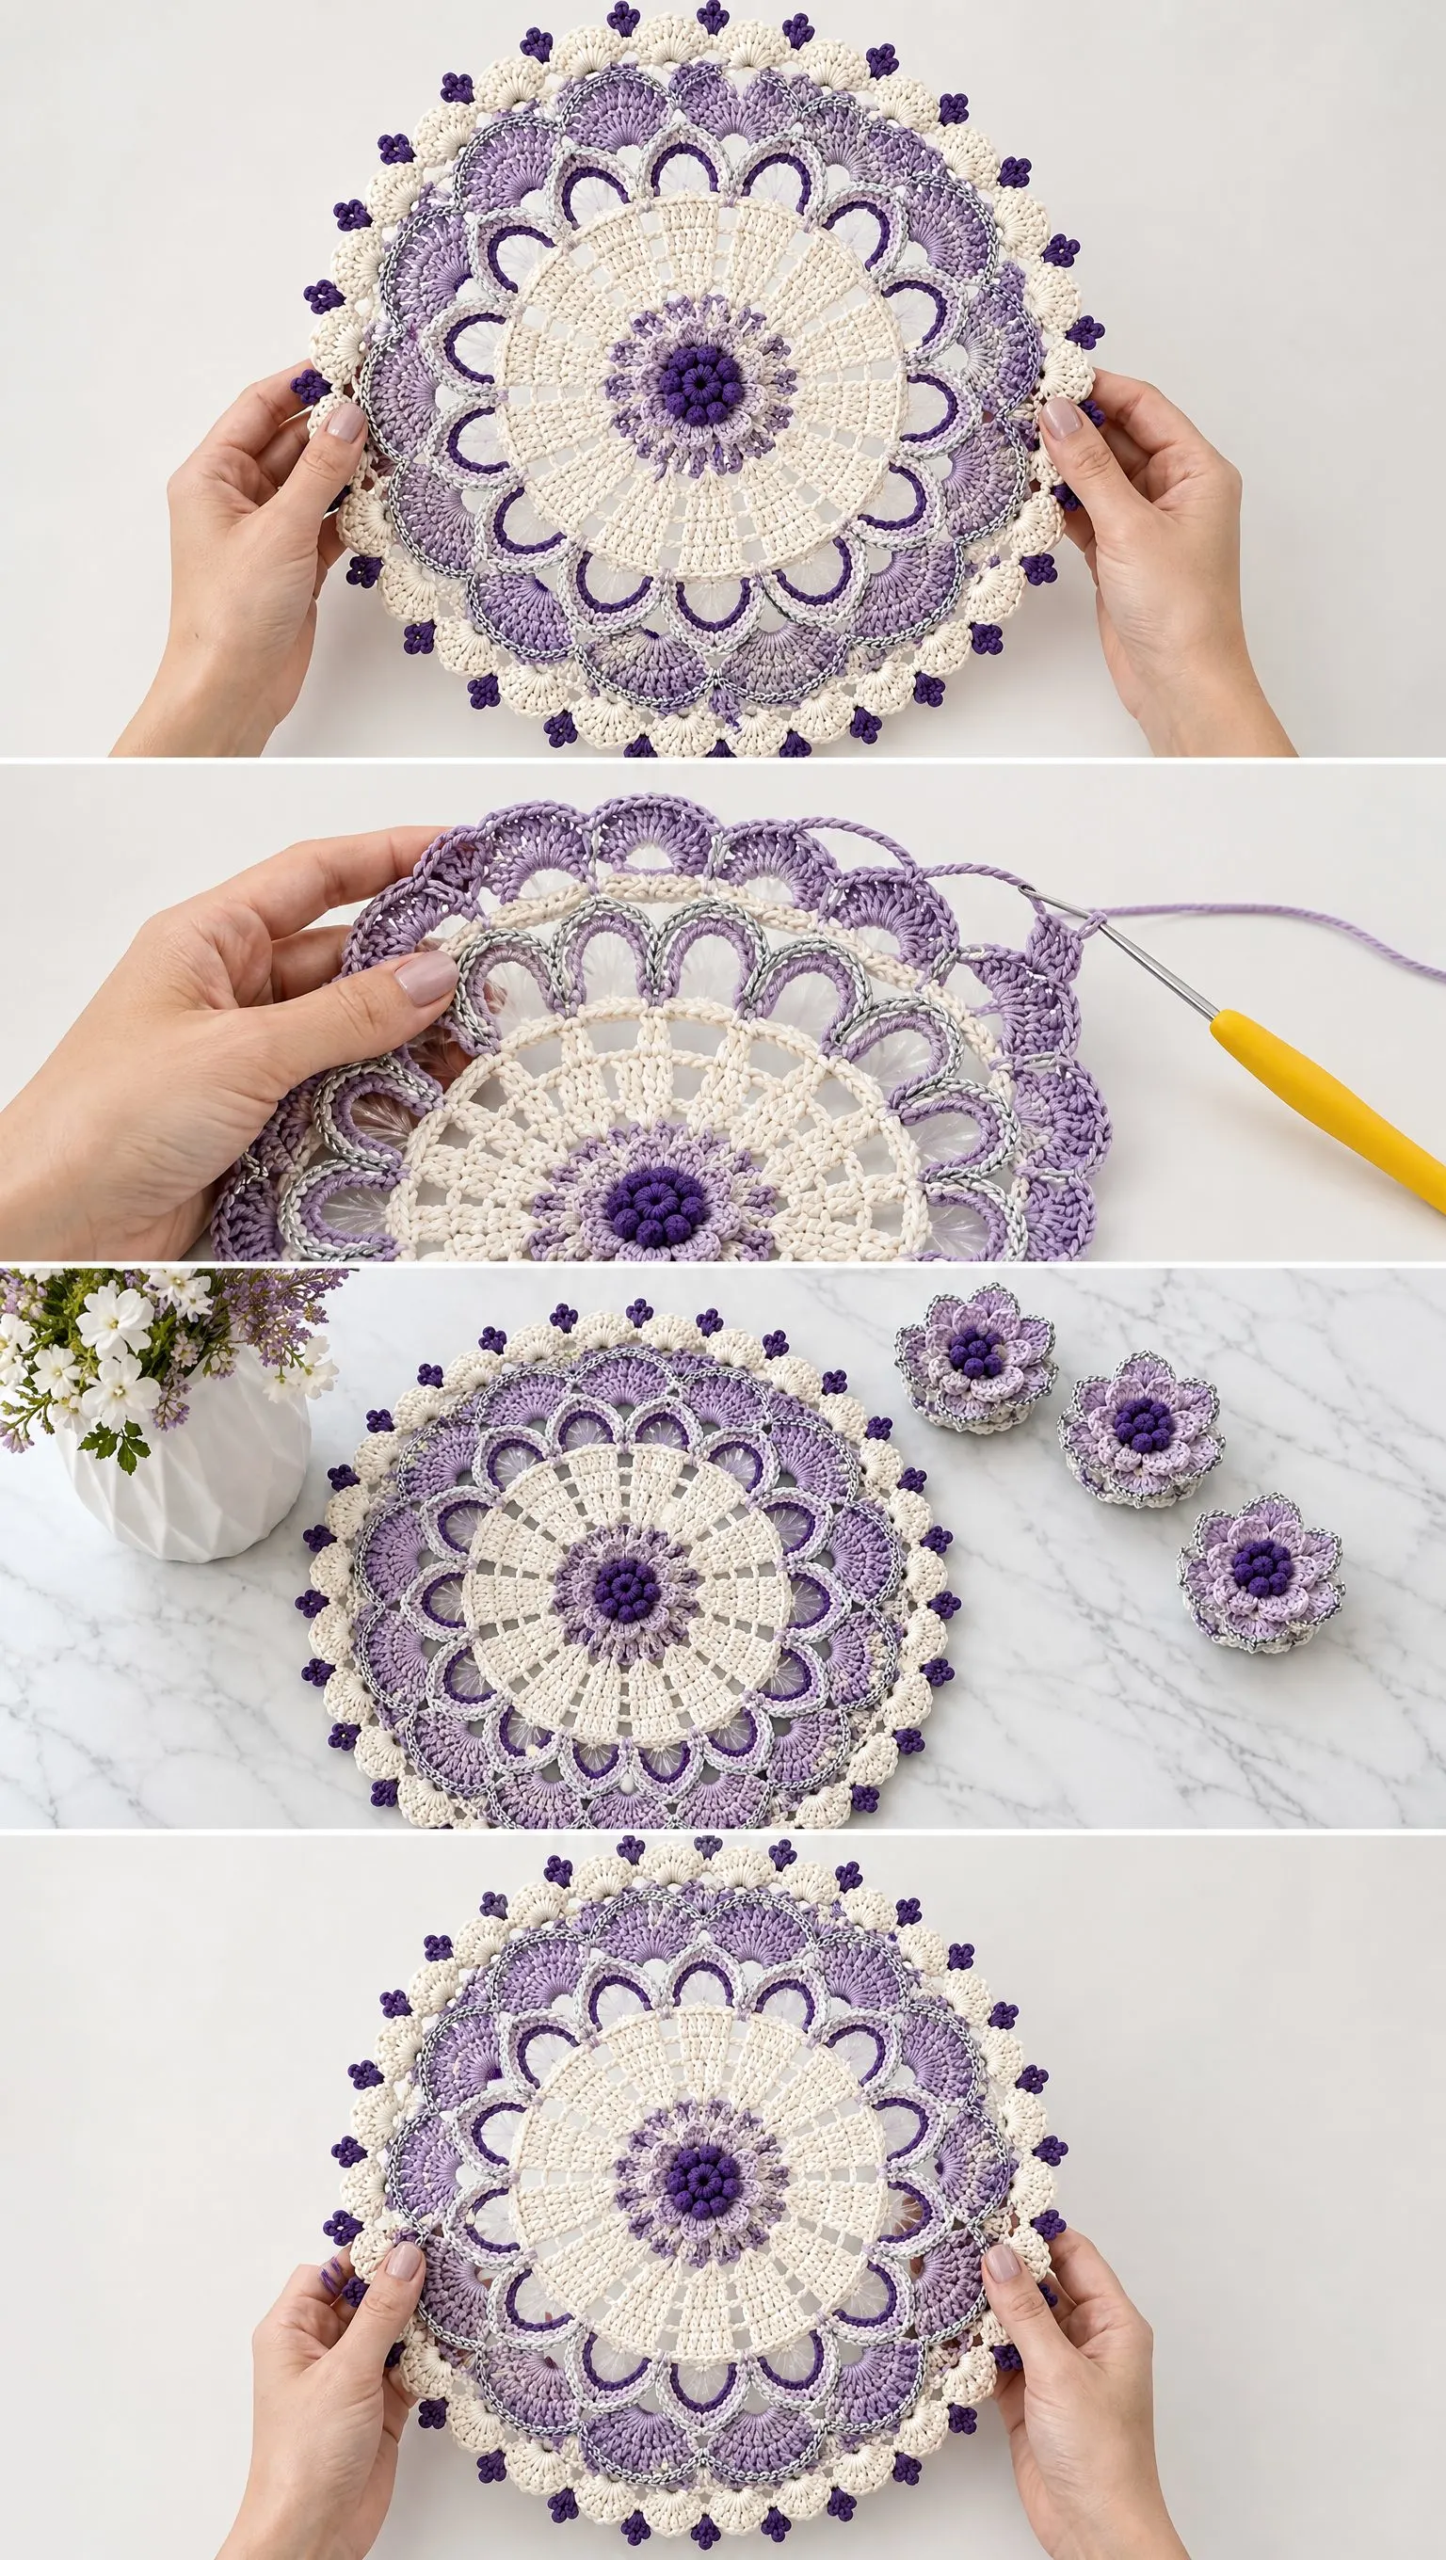
This crochet table set combines several elements that work together for a cohesive look. The round lace placemat builds outward from a compact violet flower center, through an ivory radial wheel section, lilac looped windows, two graduated rings of fan shells, silver surface edging, and a final ivory puff border finished with violet picots.
The coordinating three-layer lavender blossom mounts on an ivory napkin band, creating a complete place setting that looks professionally designed. The pattern uses four colors strategically placed to create depth and visual interest.
Skill Level: Intermediate
This pattern assumes you are comfortable with basic crochet stitches and working in the round. The techniques include working behind previous rounds, surface slip stitches for the silver accents, and creating layered petals. If you have made doilies or mandalas before, you will feel right at home here.
Materials You Will Need
Yarn:
Hooks:
Notions:
Gauge and Sizing Information
Getting your gauge right ensures your finished placemat reaches the target size. Here are the checkpoints to measure as you work:
| Checkpoint | Target Size | Adjustment |
|---|---|---|
| After Round 6 | Approximately 4.5 inches / 11.5 cm | Change hook size if more than 0.5 inch off |
| After Round 12 | Approximately 10 inches / 25.5 cm | Spread chain windows evenly while blocking |
| Finished | 14 to 15 inches / 36 to 38 cm | Block to a true circle, do not stretch picots sharply |
| Napkin Flower | 3.75 to 4.25 inches / 9.5 to 11 cm | Use smaller hook for a firmer flower |
Abbreviations and Special Stitches
Before you begin, familiarize yourself with these abbreviations and special stitches used throughout the pattern.
Standard Abbreviations:
Special Stitches:
Picot: Chain 3, slip stitch in first chain. This creates a small decorative bump.
V-st (V-stitch): Work (dc, ch 1, dc) all in the same space. This creates a V-shaped cluster with a chain space in the center.
Fan: Work 7 dc in the indicated space. All seven stitches go into one spot, fanning out naturally.
5-Loop Puff Stitch: Yarn over, insert hook in indicated stitch or space, yarn over and pull up a loop to double crochet height. Repeat this sequence 5 times total (you will have 11 loops on your hook). Yarn over and draw through all loops on hook, chain 1 to close. The closing chain does not count as a separate stitch unless stated.
Standing Join: For clean color changes, join the new color with a standing single crochet or standing double crochet in the indicated space instead of chaining up. A conventional slip stitch join may also be used if you prefer.
Placemat Pattern Instructions
Color Plan: A equals deep violet, B equals ivory, C equals lilac/lavender, D equals silver accent. Keep tails on the wrong side and weave them in after each major section so the finished mat remains smooth and reversible.
Round 1: Violet Center (Color A)
Make a magic ring. Chain 3 (this counts as your first dc), work 11 dc into the ring. Join with slip stitch to the top of the beginning chain-3.
Stitch Count: 12 dc
Round 2: Cluster Petals (Color A)
Chain 1. In each dc work the following sequence: (sc, ch 3, 2 dc, ch 3, sc). This creates 12 tiny raised petals around the center. Join in first sc. Fasten off Color A.
Stitch Count: 12 petals
Round 3: Ivory Foundation (Color B)
Working behind the violet petals, join Color B in any gap between petals. Chain 3, work 1 dc in the same gap, chain 2. Work 2 dc in the next gap, chain 2. Repeat from * around. Join.
Stitch Count: 12 groups of 2 dc
Round 4: Radial Spokes (Color B)
Slip stitch to the first chain-2 space. Chain 3, work 2 dc in the same space, chain 1. Work 3 dc in the next chain-2 space, chain 1. Repeat from * around. Join.
Stitch Count: 12 groups of 3 dc
Round 5: Widen Spokes (Color B)
Chain 3, dc in the same stitch, dc in the next stitch, 2 dc in the next stitch, chain 2. Work 2 dc in the first dc of the next group, dc in the next dc, 2 dc in the last dc, chain 2. Repeat from * around. Join.
Stitch Count: 12 wedges of 5 dc each
Round 6: Open Radial Wheel (Color B)
Chain 3, dc in the next 4 dc, chain 3. Dc in the next 5 dc, chain 3. Repeat from * around. Join.
Stitch Count: 12 solid wedges separated by chain-3 spaces
Checkpoint: Your work should measure approximately 4.5 inches / 11.5 cm in diameter. If you are more than 0.5 inch off, adjust your hook size.
Round 7: Lilac Loop Windows (Color C)
Join Color C in any chain-3 space. Chain 1, sc in the same space, chain 7, sc in the next chain-3 space. Chain 7, sc in the next chain-3 space. Repeat from * around. Join.
Stitch Count: 12 chain-7 loops
Round 8: Framed Loops (Color C)
Slip stitch into the first loop. Work 9 dc in each chain-7 loop around. Join.
Stitch Count: 108 dc total (9 dc in each of 12 loops)
Round 9: Window Arch Edging (Color D)
Join Color D to the first dc of any 9-dc shell. Slip stitch in each of the first 4 dc, chain 2, skip the center dc, slip stitch in the next 4 dc. Chain 1 and move directly to the next shell. Repeat around. This silver line should sit lightly on the front edge. Fasten off.
Round 10: First Lavender Fan Tier (Color C)
Join Color C in the skipped center dc of any Round 8 shell. Chain 3, work 6 dc in the same center stitch (this creates a 7-dc fan), chain 3, sc in the join area between this shell and the next shell, chain 3. Work 7 dc in the center dc of the next shell, chain 3, sc between shells, chain 3. Repeat from * around. Join.
Stitch Count: 12 fans
Round 11: Fan Shoulders (Color C)
Slip stitch to the 4th dc (the center dc) of the first fan. Chain 1, sc in the center dc, chain 5, sc in the center dc of the next fan. Chain 5, sc in the center dc of the next fan. Repeat from * around. Join.
Stitch Count: 12 chain-5 arches
Round 12: Second Fan Tier (Color C)
Slip stitch into the first chain-5 space. Chain 3, work 8 dc in the same space (this creates a 9-dc fan). Work 9 dc in the next chain-5 space. Repeat from * around. Join.
Stitch Count: 12 large fans (9 dc each)
Checkpoint: Your work should measure approximately 10 inches / 25.5 cm in diameter.
Round 13: Silver Fan Outline (Color D)
Join Color D at the first dc of any fan. Slip stitch loosely across all 9 dc of the fan, chain 1, slip stitch in the first dc of the next fan. Continue around, keeping the silver strand relaxed so the mat stays flat. Fasten off.
Round 14: Ivory Bridge Round (Color B)
Join Color B between any two large fans. Chain 1, sc in the join point, chain 3, skip 2 dc, sc in the next dc, chain 3, skip 2 dc, sc in the next dc, chain 3, skip 2 dc, sc in the next dc, chain 3, sc in the join between fans. Repeat this bridge pattern around. Join.
Round 15: Puff Border (Color B)
Slip stitch into the first chain-3 space. Work 1 puff stitch in each chain-3 space, chain 2 between puffs. Continue evenly around. Join.
Stitch Count: 48 puffs (if Round 14 was worked with four arches per fan section)
Round 16: Violet Picot Finish (Color A)
Join Color A in any chain-2 space. Sc in the chain-2 space, picot, sc in the same space. Repeat from * in every chain-2 space around. Join invisibly and fasten off.
Flatness Check: After Rounds 8, 12, and 15, place the work flat without stretching. If the edge cups upward, add a slightly larger hook or one extra chain in the arches. If it ripples, reduce the arch chains by one or use a smaller hook for the next round.
Three-Layer Lavender Blossom Pattern
Make one blossom for each napkin ring, plus three loose flowers if you want to reproduce the styled table setting shown in the photos. The flower is worked from the center outward with three offset layers of six petals each.
Step 1: Center Bobble Ring (Color A)
Make a magic ring. Chain 1. Work 6 compact bobbles into the ring, separated by chain 1 between each bobble. Join. Pull the ring firmly closed. For a fuller center, work a second mini-round of (small bobble, chain 1) in each chain-1 space.
Step 2: Back-Loop Foundation
Turn the center over so you are working on the back. Working behind the bobbles, make 6 evenly spaced chain-3 loops anchored with slip stitches around the base. These loops will hold Layer 1.
Step 3: Layer 1 Inner Petals (Color C)
In each chain-3 loop work: sc, hdc, 3 dc, hdc, sc. This creates six petals. Pinch each petal gently at the center while still warm from your hands to cup it slightly.
Step 4: Layer 2 Foundation
Behind Layer 1, anchor a new set of 6 chain-5 loops. Offset each loop so it emerges between two petals from Layer 1.
Step 5: Layer 2 Petals (Color C)
In each chain-5 loop work: sc, hdc, 2 dc, 2 tr, 2 dc, hdc, sc. This creates six broader petals.
Step 6: Layer 3 Foundation
Behind Layer 2, work 6 chain-6 loops, again offset between petals.
Step 7: Layer 3 Petals (Color C)
In each chain-6 loop work: sc, hdc, dc, 3 tr, dc, hdc, sc. This creates six outer petals. For more curl, work the center treble stitches through the back loop only.
Step 8: Silver Outline (Color D)
With Color D and a 2.5 mm hook, slip stitch loosely around the outer edge of each Layer 3 petal only. Do not pull tight. Fasten off invisibly.
Ivory Napkin Band Pattern
1. With Color B and 2.5 mm hook, chain 13.
2. Row 1: Sc in the 2nd chain from hook and across. You will have 12 sc. Chain 1, turn.
3. Rows 2 through 28: Sc in back loop only across. Chain 1, turn. The ribbed strip should measure about 6.5 to 7 inches / 16.5 to 18 cm long unstretched.
4. Bring short ends together without twisting. Slip stitch or whipstitch the ends together to form a snug ring.
5. Position the flower over the seam. Sew securely through the underside of the flower and the band only, keeping stitches invisible from the front.
Sizing Note: The band should slide over a folded or lightly gathered cloth napkin without crushing the flower. Add or remove rows in pairs if you need a larger or smaller circumference.
Finishing and Blocking Your Table Set
Proper finishing makes the difference between a nice project and a stunning one. Take your time with these steps.
Weaving in Ends: Weave in all ends on the wrong side, following the direction of nearby stitches for at least 1.5 inches / 4 cm before trimming.
Wet Blocking the Placemat: Soak the placemat in cool water, then roll it in a towel to remove excess water. Do not wring. Pin the center first, then pin opposite points of the outer edge so the circle remains balanced. Continue around until the diameter reaches 14 to 15 inches / 36 to 38 cm. Shape the lilac fan tiers so each shell opens evenly. Keep silver edging relaxed and smooth.
Shaping the Flower: Shape flower petals by cupping them gently over a rounded object or your fingers. Allow all pieces to dry completely before removing pins.
Assembly Order for the Complete Set
1. Crochet and block the placemat
2. Crochet the layered blossom and add the silver outline
3. Crochet and seam the ivory napkin band
4. Sew the blossom to the band with the flower centered over the seam
5. Make three additional loose blossoms for table styling if desired
6. Repeat the placemat for as many place settings as needed, matching finished diameter during blocking
Color and Stitch Reference
| Section | Color | Main Texture | Visual Purpose |
|---|---|---|---|
| Center | Deep violet | dc plus tiny petal clusters | Dark floral focal point |
| Radial wheel | Ivory | dc wedges plus chain spaces | Bright structured center |
| Loop windows | Lilac | chain arches plus dc shells | Open lace transition |
| Fan tiers | Lilac | 7-dc then 9-dc fans | Layered floral scallops |
| Accent | Silver | loose surface slip stitch | Fine metallic outline |
| Outer border | Ivory plus violet | puffs plus picots | Soft pale edge with purple tips |
| Napkin flower | Lilac plus violet plus silver | 3 petal layers plus bobbles | Dimensional matching blossom |
Troubleshooting Common Issues
Mat bowls upward: Increase hook size by 0.25 to 0.5 mm for the next lace round, or add 1 chain to each arch.
Mat ripples: Reduce one chain per arch or use a slightly smaller hook. Do not add extra stitches to fan rounds.
Silver edging puckers: Redo the slip stitches loosely. Metallic thread has less elasticity than cotton.
Flower lies too flat: Use the 2.5 mm hook, tighten the foundation loops, and gently cup petals during damp blocking.
Flower too bulky for napkin: Omit Layer 3 or work it with hdc/dc instead of treble crochet.
Care Instructions
Hand wash or machine wash on a gentle cycle in cool water using a mild detergent. Reshape while damp and dry flat. Avoid high heat, especially if the silver accent is metallic. Light steaming from above may be used on cotton, but do not press the raised petals flat.
Maker Tip: For a refined matching set, wind all four colors before starting and make every placemat through the same checkpoint round before moving on. This makes diameter and tension differences easier to correct consistently.
Final Thoughts on This Crochet Table Set Pattern
This Lavender Blossom Table Set brings together classic lace techniques with modern color placement for a result that looks far more complicated than it actually is. Once you understand the rhythm of working behind previous rounds and adding those delicate silver accents, the whole project flows smoothly from start to finish.
Thank you so much for choosing this pattern for your next project. I truly hope it brings beauty to your table and joy to your crafting time. If you make this set, I would absolutely love to see your finished pieces. Tag me on Instagram or share a photo in my Facebook group so we can celebrate your beautiful work together.
Save this pattern to your Pinterest boards so you can find it whenever you are ready to start, and please leave a comment below once you make it. I always love hearing which colors you chose and how your blocking turned out. Happy crocheting!
Want a Quick & Easy Printable Version?
Get a clean, beautifully formatted PDF of this pattern — easy to follow step by step, ready to print or save on any device. No scrolling, no distractions, just the pattern.
Get the Printable PDF →You Might Also Like
- Rose Gold Monarch Crochet Mini Dress Free Pattern
- Cinderella Blue Baby Dress Set Free Crochet Pattern
- Berry Purple Magenta Crochet Platform Wedge Sandals Pattern
- Blush Pink Tiered Baby Dress Free Crochet Pattern