
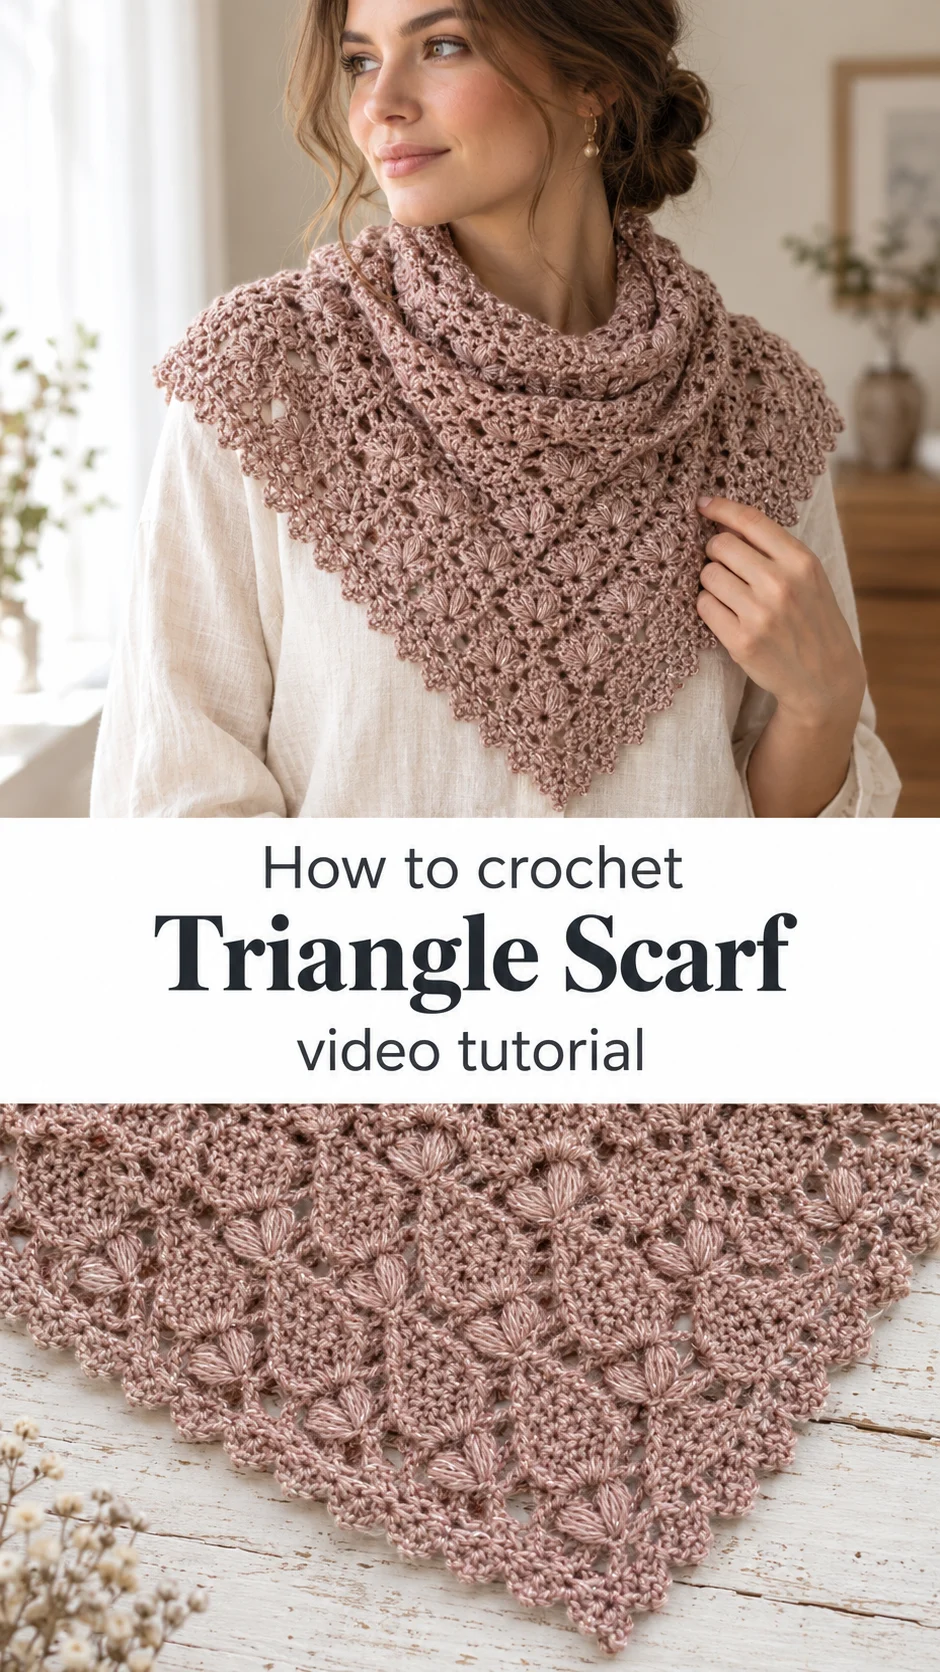
A crochet triangle scarf in dusty rose lace drapes like a whisper across the shoulders, and every row of puffed flowers and scalloped fans makes the piece feel a little more special.
The Crochet Triangle Scarf
This crochet triangle scarf is built from a repeating lace motif that opens up like a row of small fans. Between the fans sit tight clusters of puff stitches, each one looking like a tiny tulip bud. Solid, closely worked wedges alternate with airy mesh, so the fabric has both body and breathing room. A shimmer thread runs through the soft dusty rose yarn and catches the light with every movement. The lower edge finishes in a scalloped border of little shell loops that gives the whole piece a delicate, antique look. The shape tapers toward a point, which makes it easy to wear folded over the collarbones. It suits cool evenings, wedding season and any outfit that needs a gentle finishing touch.
Worn as a neck wrap, it sits close and frames the face. Draped over a coat or blazer, it reads as jewellery made of yarn. It also makes a lovely gift, because the pattern looks far more complicated than it feels once the rhythm settles in. For a crocheter who enjoys texture, it is a rewarding project that builds confidence with puff stitches and lace repeats.
Triangle Scarf Related Posts:
- Crochet Lace Doily: A Delicate Decorative Accent
- Crochet Christmas Tree: A Festive Holiday Accent
- Crochet Daisy Flower: A Delicate Floral Accent
- Crochet Star Granny Square: A Bold Decorative Accent
Materials
For a crochet triangle scarf like this one, choose a fine, smooth yarn with a soft halo and a thread of metallic shimmer. The yarn in the photos looks like a lightweight blend, probably wool or acrylic with a little mohair or nylon, and the sparkle is subtle rather than glittery. A small hook, in the range of 2.5 to 3.5 mm, keeps the stitches neat and lets the puffs stand up. Go slightly smaller if the fabric looks floppy, because lace needs structure to hold its fan shapes. You will also need a tapestry needle for weaving in ends, a pair of sharp scissors and pins for blocking. A single ball of fingering or lace-weight yarn goes a long way, but buy a second if you want a deeper wrap. Keep a stitch marker handy for the centre point, since it helps you find your place at the start of each row.
Choosing the Best Yarn for Lace and Shimmer
Yarn decides whether this scarf looks refined or limp. The fabric in the photos has clear stitch definition and a gentle fuzz, which suggests a fine yarn with a slight brushed finish. That combination softens the edges of each puff without hiding the pattern.
A wool blend gives the best drape and blocks beautifully, holding the scalloped edge open after a light steam. A cotton blend works too, but it is heavier and can stretch downward over time, so pull the stitches a little tighter. Pure mohair is tempting, yet the fuzz can swallow the puff clusters and make the lace hard to read.
Be careful with yarns that have a heavy glitter strand. The metallic thread in this piece is fine and tucked into the ply, so it never scratches. A coarse tinsel yarn would catch on the hook and make each puff stitch frustrating to pull through.
For colour, the dusty rose in the photos is flattering and easy to wear. Oatmeal, soft sage and pale grey all keep the same quiet elegance. Deep jewel tones also work, though they hide the stitch detail a little, so test a small swatch first.
The Puff Flowers and Fan Motifs
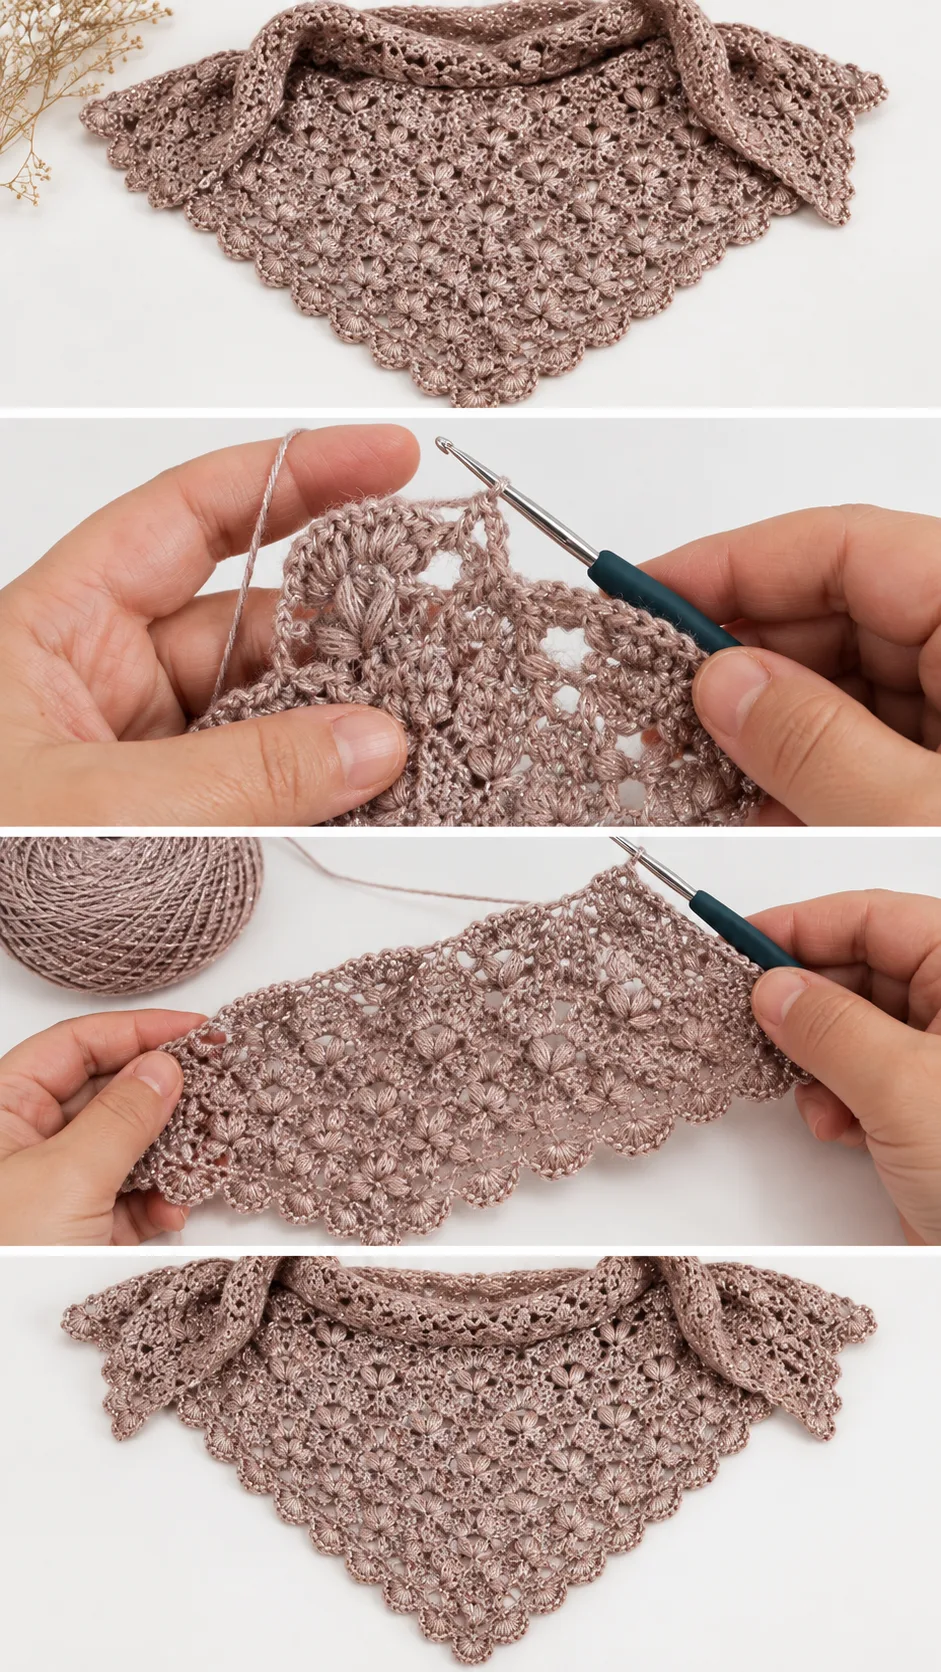
Two shapes carry the design. The first is the puff cluster, a row of tall, plump loops gathered into one bud that sits at the centre of each repeat. The second is the fan, a rounded wedge of dense stitches that grows outward from a narrow base and gives the scarf its petal-like outline.
The puffs are the part to watch closely in the video. Pause when the creator draws up the loops, and note how high each loop is pulled. Even loop height is what makes the buds look uniform. If some puffs look squashed and others look tall, the tension in your drawing-up hand is changing from stitch to stitch.
Between the buds, the fabric switches to a compact, solid texture that looks like a close single crochet. This dense wedge supports the lace around it, so the open mesh never sags. If your solid sections look loose and gappy, drop down a hook size for those stitches only.
Chain spaces frame each flower and form small windows in the lace. Count them as you go rather than trusting your eye, because a missed space shifts the whole motif sideways. If you find a mistake several rows back, ripping out is often kinder than trying to compensate.
The Scalloped Border
The edge is a row of small rounded shells, each one worked into the end of a fan. It gives the scarf a finished, lace-trim look and echoes the curved fans above it. Work this border loosely, since a tight edge pulls the points inward and makes the lower edge ripple. If the border curls, a firm blocking session usually flattens it.
Shape and How the Scarf Grows
The scarf is a triangle, wide along the top and tapering to a point. The photos show the lace repeats stacking in diagonal lines, which points to a centre-out or point-up construction where the motifs multiply as the rows lengthen. Shaping happens at the edges and along the central spine, so each row is a little longer than the last.
That steady growth is what makes the project forgiving. You always know where you are, because the pattern repeats in the same order every time. Mark the centre with a stitch marker and move it up each row, so you never lose the spine.
Row length is the real test of patience. Early rows fly by, and later rows take longer as the stitch count rises. If you are worried about running short, weigh your yarn at the halfway point and compare it to what remains. A scarf that is a few rows shorter is far better than one that runs out in the middle of the border.
The video shows a close view of the work in progress, so watch how the creator turns at the edge and starts the next row. Pause and replay that turn until it feels natural, because a sloppy turning chain makes the side edges uneven.
Skill Level and Techniques
This is an upper-beginner to intermediate project. The stitches themselves are not exotic, but the pattern asks you to combine puffs, chains and dense wedges in a set order. If you have made a granny square and a simple shell edging, you already have the basic skills.
The hardest stitch is the puff. It needs a steady hand to draw up several loops without twisting them, then pull through all at once. Practise a few on a scrap swatch before you begin the scarf. If the loops feel tight, slide your finger behind the hook to keep them loose.
Patience matters more than speed. Lace crochet rewards slow, deliberate work, and mistakes show clearly once the piece is laid flat. Treat each row as a small project in itself, and you will find the whole scarf comes together faster than expected.
Blocking for Open, Even Lace
Lace changes dramatically after blocking. A freshly finished scarf will look slightly crumpled, with puffs bunched together and fans folded in on themselves. Wet or steam it gently, pin the points of each scallop out to the shape you want, and leave it to dry flat.
Pin the scalloped border first, placing one pin at the tip of each shell. Then straighten the top edge and gently stretch the body so the fans open into rounded wedges. If the fabric feels stubborn, a light mist of water and a little patience will help it relax.
Avoid hot irons directly on the yarn, especially with a shimmer thread, since heat can dull the sparkle or melt synthetic fibres. A steamer held an inch above the surface is much safer. If the edges still curl after drying, repeat the process and let the piece rest longer before unpinning.
How to Style a Crochet Triangle Scarf
The softly shimmering dusty rose works with almost any neutral. Fold the scarf in half along the point and drape it over a camel coat for a polished winter look. The scalloped edge shows off nicely against a plain background, so a solid-colour coat is the best partner.
For a dressier mood, wear it as a shoulder wrap over a satin slip dress or a simple black evening outfit. The sparkle in the yarn picks up the light without looking flashy. It also works well with a crisp white shirt, where the lace adds a touch of softness to a sharp collar.
In spring, loosen the fold and let the point hang low across the back. A chambray shirt and light jeans become a little more romantic with that single piece of handmade lace. Pin it with a small brooch if it slides, because fine yarn tends to slip on smooth fabrics.
Tips Before You Begin
Make a swatch of one full motif first. It shows you whether your hook size gives the right drape and whether your puff stitches stand tall enough. If the swatch feels stiff, go up half a size. If the lace looks holey and loose, go down.
Keep your tension relaxed but consistent, especially in the puff clusters. If your hands tighten as you concentrate, take a short break and shake them out. Uneven tension is the most common reason a lace scarf looks lumpy.
Weave in ends as you go whenever a ball runs out, since lace shows every tail. Hide them along the dense wedge sections, where there is more fabric to anchor them. If you wait until the end, a long row of loose tails is a tedious job.
A Delicate Handmade Accent
This crochet triangle scarf is a lesson in how a few simple stitches can turn into something that looks like heirloom lace. Puff flowers, rounded fans and a scalloped edge combine into a piece that feels both romantic and wearable.
Three things decide how it turns out: a fine yarn with gentle shimmer, a hook small enough to give the lace structure, and a thorough blocking at the end. Take your time with the puffs, watch the video closely at the turning points, and the rows will build into a soft, glowing wrap.
Finish it, pin it out, and let it dry.
Video tutorial for this crochet triangle scarf by Crochet Knitting Sort.
VIDEO
Follow us on Pinterest and subscribe to the Newsletter so you don’t miss a thing!
Tutorial and photos of this triangle scarf by: Crochet Knitting Sort.