
A crochet granny square handbag turns one of the oldest motifs in the craft into a small, sturdy tote with a bright, patchwork heart and a rounded handle you can slip over your wrist.
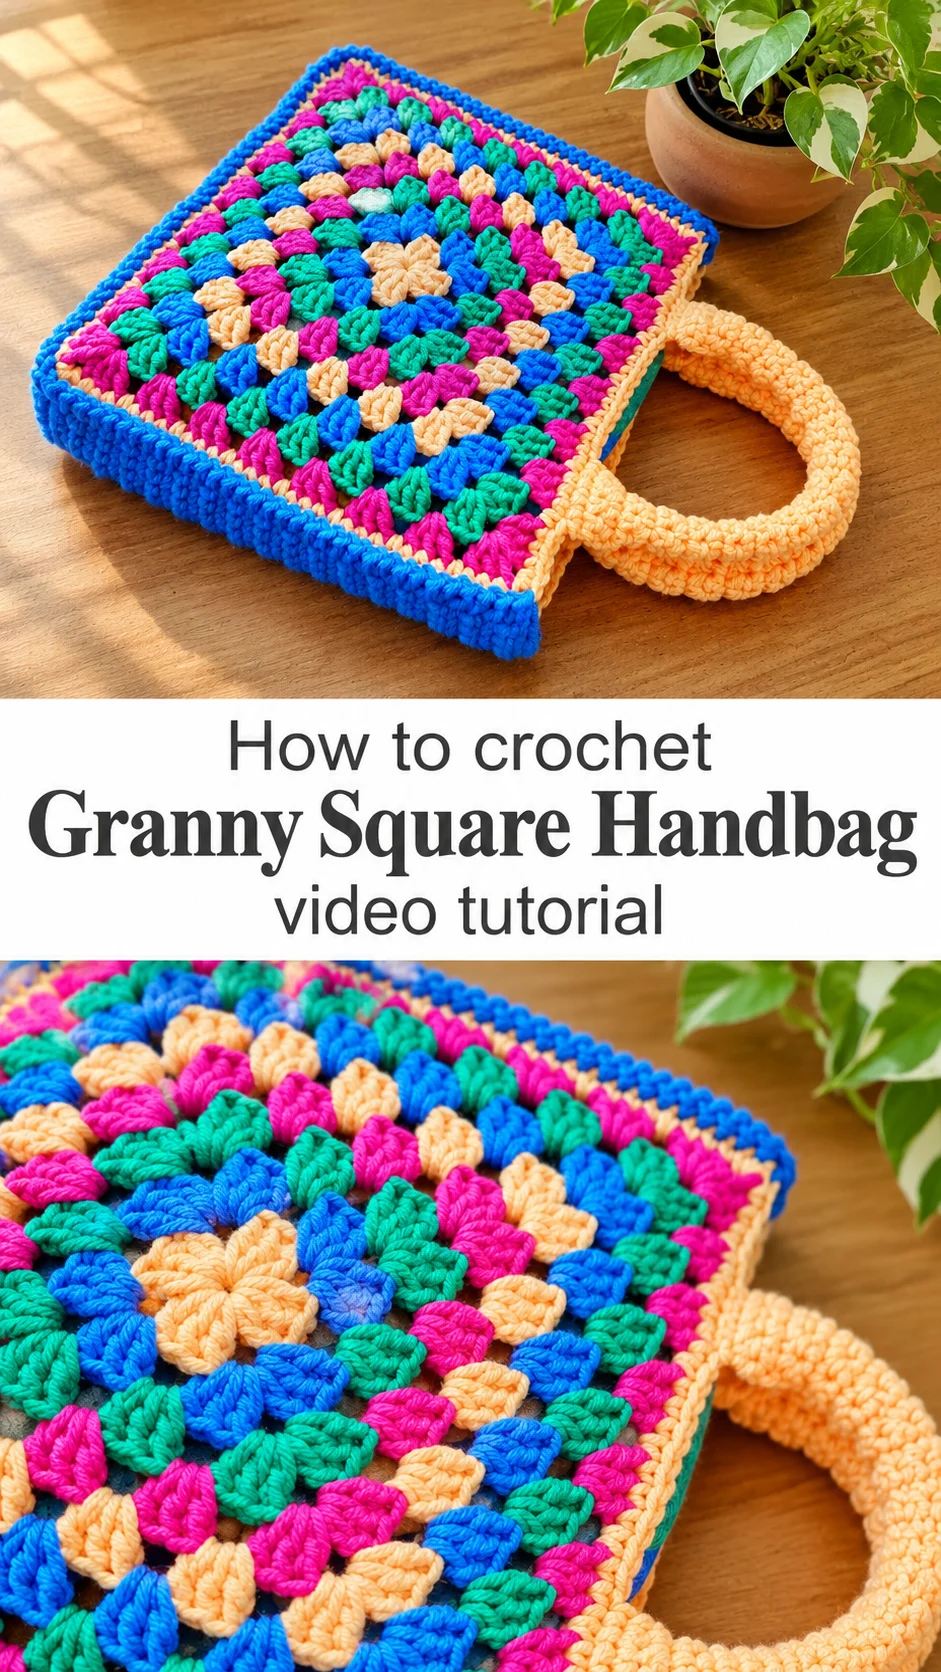
The Crochet Granny Square Handbag
This crochet granny square handbag is built around a single large square worked in rounds from a center. The middle is a pale orange flower, and the rounds that follow step through magenta, royal blue and emerald green before repeating. Each round is made of classic granny clusters, so the face of the bag reads as a set of nested diamonds. A narrow orange border sits between the colorful square and a deep blue edging. The sides are worked in dense single crochet, which gives the bag a firm, boxy body. Two chunky orange handles, stitched in a tight rounded tube, finish the top. It is a bag for market mornings, library trips and any outfit that needs a pop of color.
It also makes a thoughtful handmade gift. The motif is familiar, the palette is cheerful, and the finished piece has a proper structured shape rather than a floppy pouch look. Making it builds skill in color changes, even corners and clean edging. The square is the easy part. The shaping comes after.
Square Handbag Related Posts:
- Crochet Tote Bag: A Chic and Functional Everyday Bag
- Crochet Square Basket: A Charming Yarn Storage Essential
- Crochet Textured Beanie: A Warm Winter Essential
- Crochet Bunny Ear Beanie: A Whimsical Winter Delight
Materials
The crochet granny square handbag works best in a smooth, medium-weight acrylic or cotton-blend yarn with a slightly matte finish, which is what the photos suggest. You need four main colors: orange, magenta, royal blue and emerald green, plus extra blue and orange for the edging and handles. A hook in the 3.5 to 4 mm range is a sensible starting point for this yarn weight, though your own gauge decides. Choose a hook that gives dense, closed-up clusters, because gaps would let the lining show and weaken the shape. A lining fabric is worth having. The bag appears to have one in a muted green, and it stops keys and phones from poking through the open spaces of the granny rounds. You will also need a tapestry needle for weaving in ends and sewing the lining, and a small amount of sewing thread to match. Stitch markers help at the corners. Cotton gives the cleanest stitch definition, while acrylic is lighter and easier to wash.
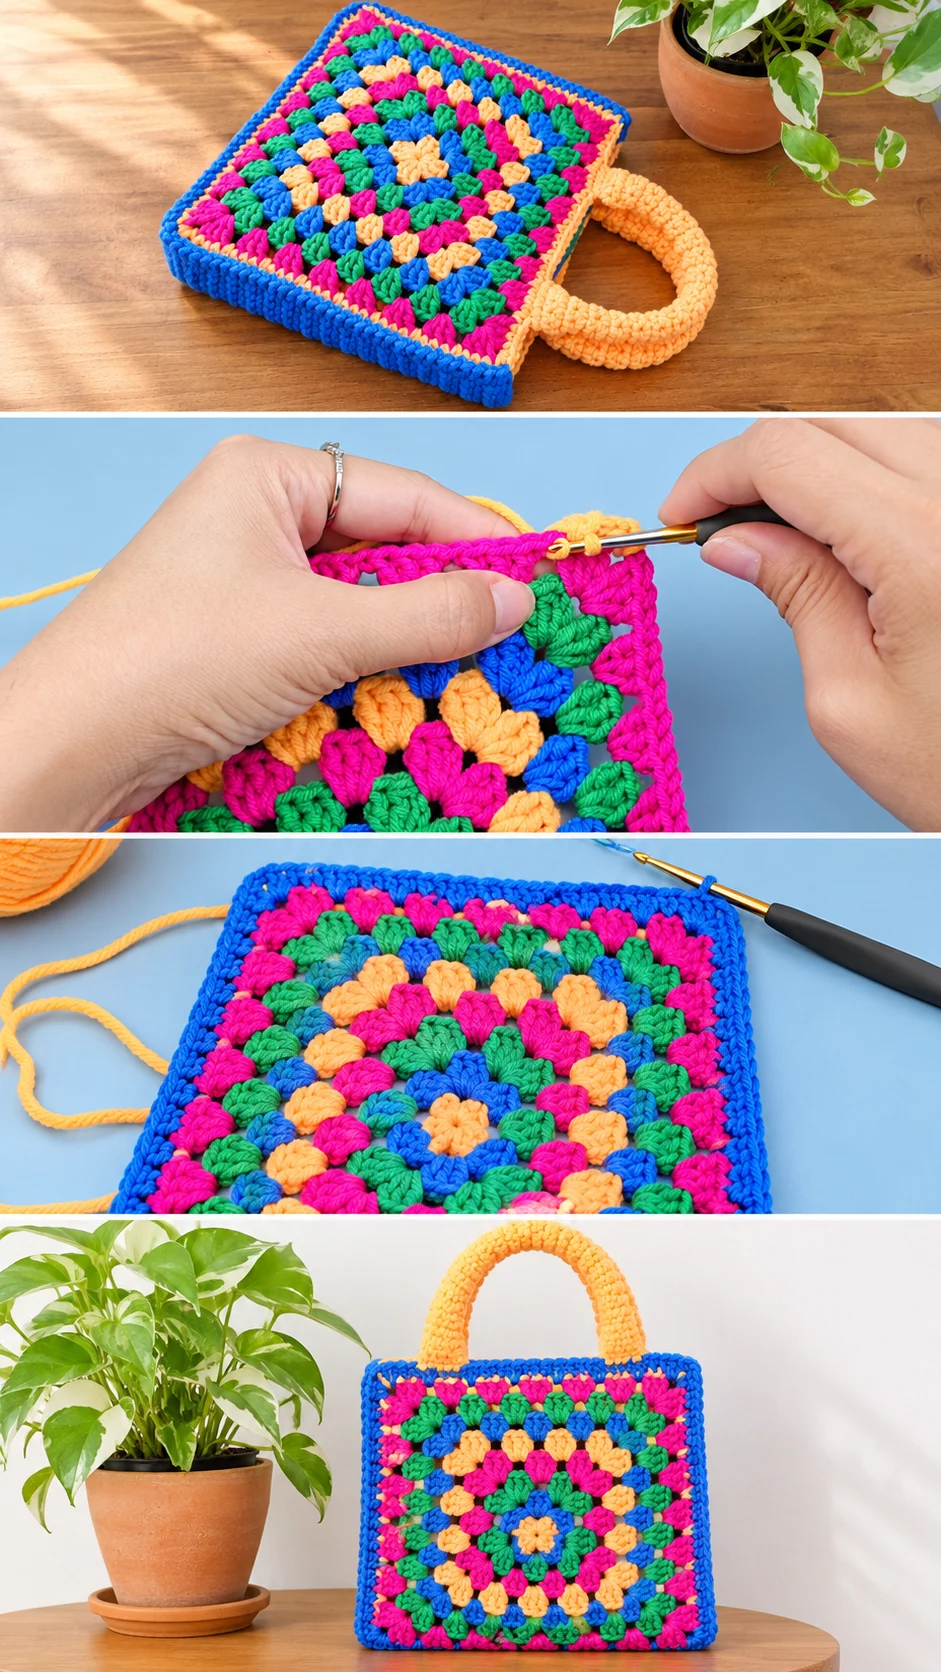
Understanding the Bag’s Structure
The bag has a clear sequence. First comes the granny square, which becomes the front. A second matching square forms the back, or the same square can be repeated. Between them runs a side band in dense single crochet, which creates depth and gives the bag its box shape. The handles are made separately and attached at the top edge.
Because the squares are worked from the center outward, the corners need attention. Each corner holds a cluster group with a chain space, and these must stay identical from round to round. If one corner has a different count, the square turns into a lopsided diamond.
The shape in the photos is flat and slightly rectangular rather than perfectly square, so the side band likely adds height at the top. That is a useful clue. If you want a taller bag, add rows to the band rather than rounds to the square.
Granny Clusters and Color Rounds
Granny clusters are groups of double crochet worked into the chain spaces of the previous round. They look like little fans or leaves, and in this bag each one sits in a contrasting color to its neighbors. That is what produces the lively checkerboard effect.
Color order matters more than it seems. The pattern in the photos moves from orange to blue to green to magenta in steady rotation, so no two touching rounds share a hue. Plan your yarn ends before you start. Carrying yarn up the edge is not practical for a square that changes color every round, so cut and weave in as you go.
If your clusters look loose, drop your hook size. If they look tight and the square starts to cup, go up. A flat square is the goal, and you can check it by laying the piece on a table after every few rounds.
Keeping the Corners Sharp
Each corner is where most beginners lose the shape. Work the same cluster and chain group in every corner, and use a stitch marker to mark the corner space so you never skip it. Count your clusters along each side at the end of a round. They should match on all four sides.
Borders and the Dense Side Band
After the granny rounds, the square is framed by rows of single crochet. In the photos this edging appears in orange first, then in blue. The single crochet rows tidy the lacy outline and give the sides something solid to join to. One stitch in each stitch, with extra stitches at the corners, keeps the frame flat.
The blue side band is worked in a tight, ridged single crochet that stands upright. It is this dense fabric that holds the box shape without any plastic canvas or card. Keep your tension firm here. A relaxed hand will make the sides sag and the bag will lean when set down.
If the band ripples at the corners, you are adding too many stitches there. If it pulls inward, you are adding too few. Adjust by one stitch at a time and check the flatness before moving on.
Handles That Hold Their Shape
The orange handles look thick, rounded and slightly padded. They are probably worked in tight single crochet rounds over a short foundation, creating a tube. This construction is comfortable in the hand and stays rounded even with a heavy load.
Fill the handle with a strip of batting or a few strands of spare yarn if you want extra cushioning. Skip this if the bag will carry only light things. Position both handles at the same distance from the side edges, and sew them on with several passes of yarn so they do not pull away.
Pay attention to attachment points. A handle that is crocheted well but sewn on lightly will tear the top edge. Reinforce the join with a small rectangle of stitching, not a single line.
Adding a Lining
A lining makes this bag far more practical. The open spaces between granny clusters are small, but pens and coins can find them. A cotton fabric cut slightly larger than the inside, turned under at the top and hand sewn to the final round, hides the interior neatly.
Choose a color that complements the main palette. The photos suggest a soft green or teal behind the clusters, and it shows through the gaps like a quiet background. A strong contrast color would make the open spaces look busy, so keep the lining calm.
Sew the lining by hand with small stitches along the inside of the border. Machine stitching on a crocheted edge can distort it.
How to Style a Crochet Granny Square Handbag
The bag is bold, so let the rest of the outfit stay quiet. A plain white tee, straight jeans and canvas sneakers let the colors do the talking. In the photos it rests on a wooden table beside a trailing green plant, and that natural, warm setting suits it well.
For summer, carry it with a linen dress in cream or sage. For autumn, pair it with a camel coat, where the blue and magenta become a surprising accent. It also works as a project bag for knitting or reading, since the structure holds paperbacks upright.
For a gift, tuck a small notebook or a pair of reading glasses inside. A handmade bag filled with something thoughtful always feels special.
Following the Tutorial
The video tutorial shows the rounds in real time, and a few moments are worth pausing for. Watch how the maker joins each new color at a corner and how the yarn tail is hidden. Replay the single crochet border rounds to see where extra stitches are added at the corners.
Pay close attention to the hand position during the dense side band. The tension looks tight but not strangled, and copying that rhythm will help your fabric stay even. When the handles appear, pause again to see how they are formed and joined.
Work in this order: the square first, the borders second, the side band third, the handles and lining last. Finishing each part before starting the next keeps the project manageable.
Tips for a Neat Finish
Weave in ends as you go. A granny square with many color changes has dozens of tails, and leaving them all to the end is a chore that can spoil the pleasure of finishing. Weave each tail along a cluster in two directions so it cannot work loose.
Block the square lightly before adding the borders. A gentle steam or a damp press flattens any waviness and evens the corners. Do not press hard on acrylic, which can lose its bounce.
If the finished bag leans, stuff it with tissue paper or a folded towel overnight. If the handles twist, undo the seam and reattach them aligned. Small fixes make a large difference.
A Cheerful Handmade Carryall
This crochet granny square handbag combines a classic motif with a modern, structured shape. Four things decide how well it turns out: even corners, firm tension in the side band, secure handle attachment and a tidy lining.
Take your time with the color rounds and let the square reveal itself. The reward is a bag that looks cheerful on any arm.
Pick your colors. Start the center.
Follow us on Pinterest and subscribe to the Newsletter so you don’t miss a thing!
Tutorial and photos of this granny square handbag by: ViVi Berry Crochet.