
This crochet bracelet pattern creates a vintage-style wrist cuff with three-dimensional roses, delicate lace mesh, and pearl accents. You will use size 10 crochet thread, a 1.65 mm steel hook, and basic stitches including double crochet and single crochet. The finished piece measures approximately 6.5 inches long and fits wrists from 6 to 7 inches with an adjustable clasp.
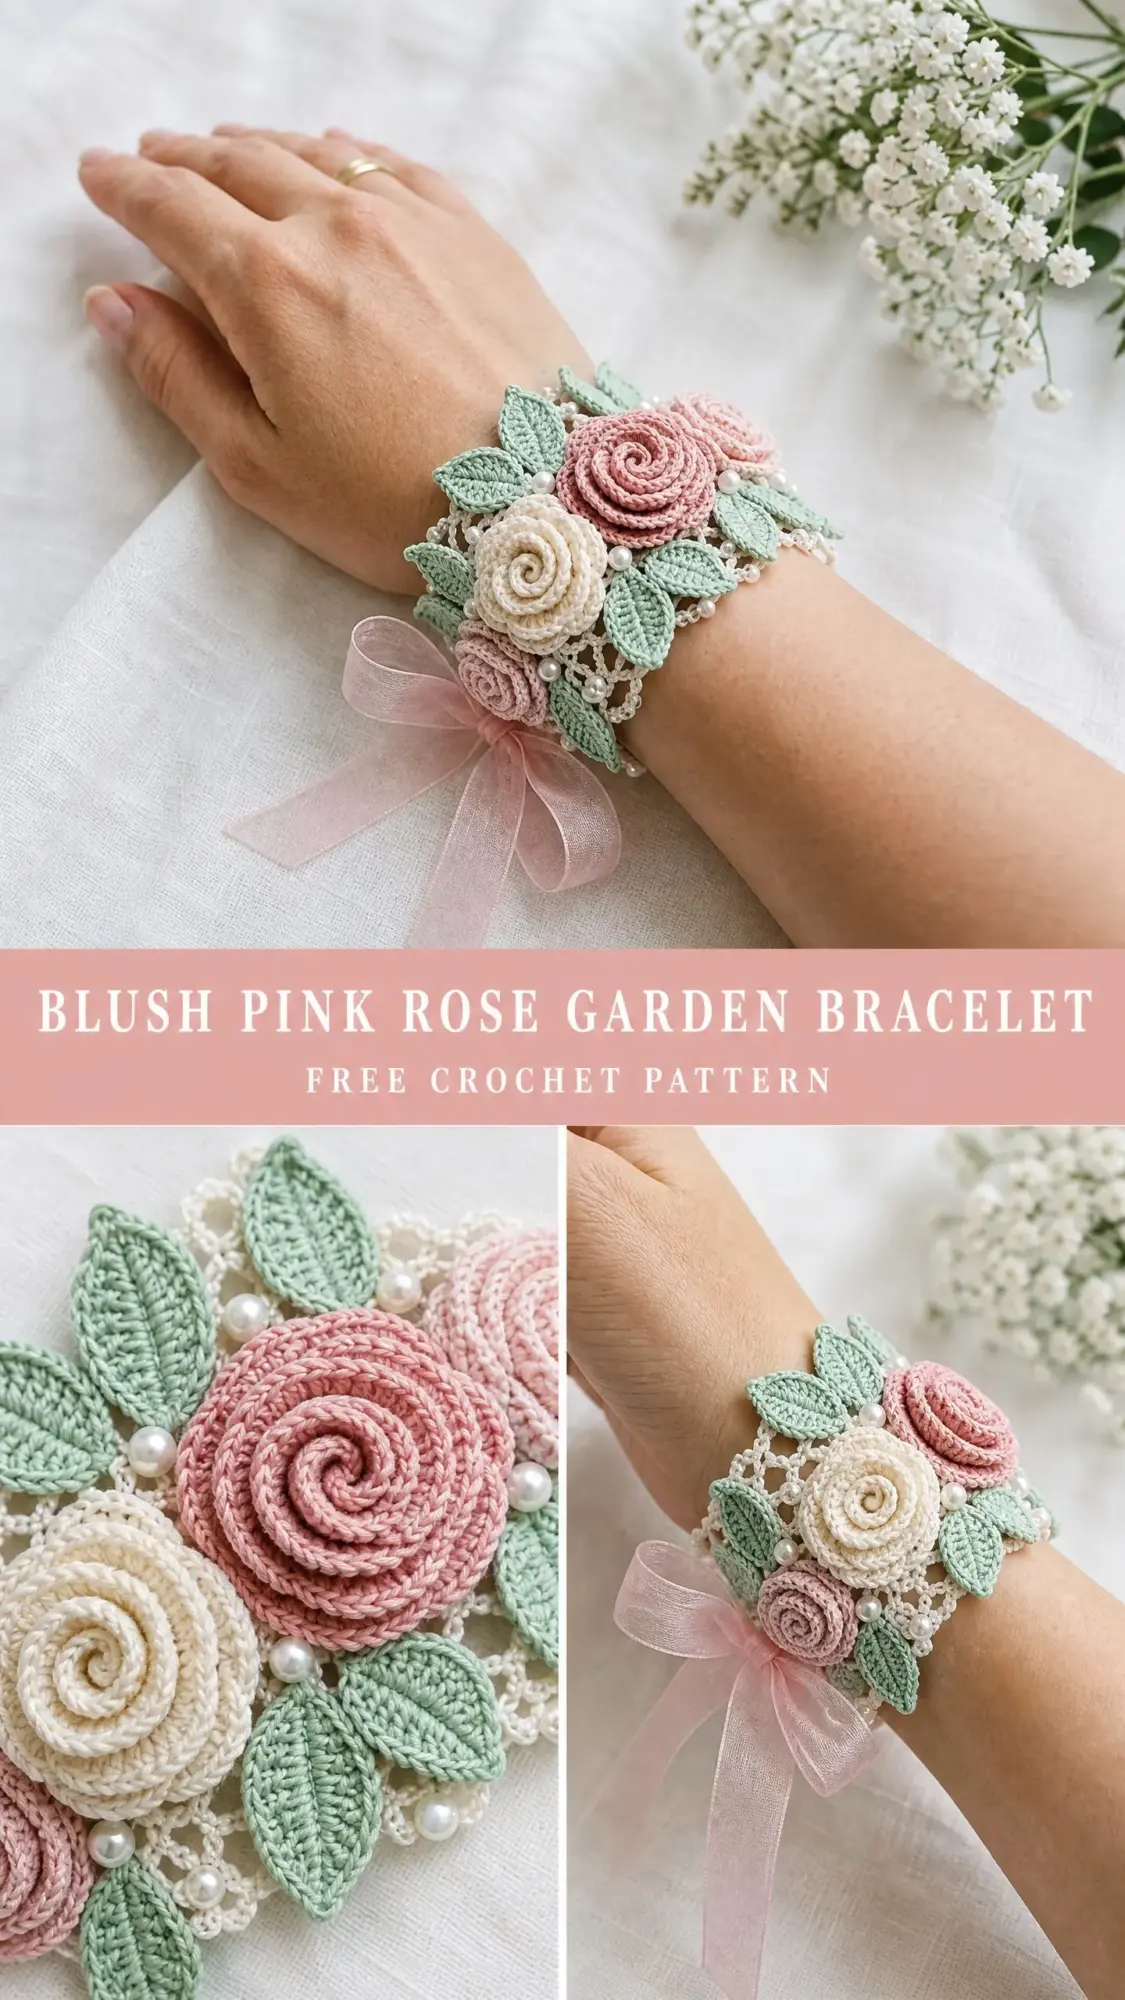
If you have been wanting to try thread crochet or lace work, this is a beautiful project to build those skills. The roses are easier than they look. They are simply rolled strips that create that gorgeous spiral effect naturally.
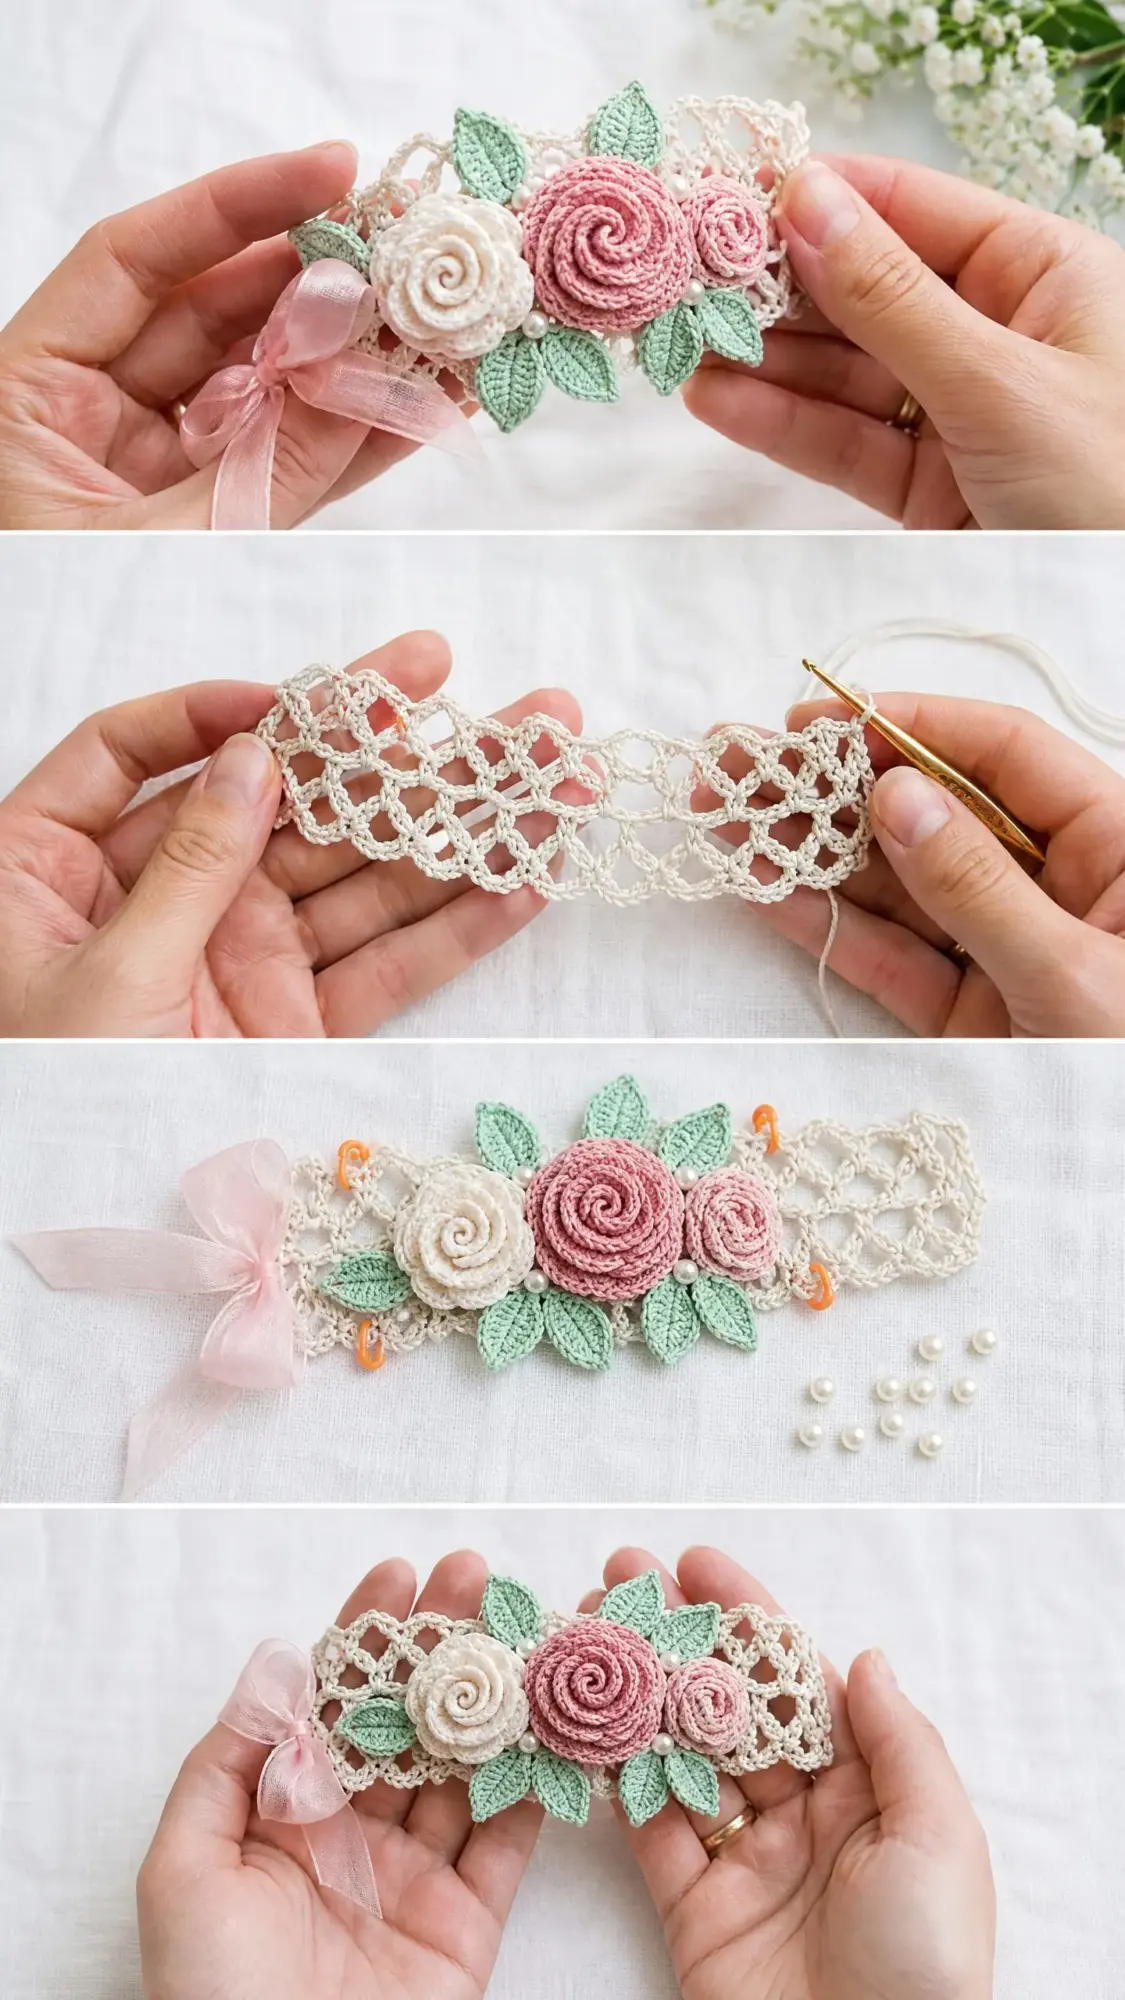
I will walk you through every step, from the filet mesh band to the leaf motifs to the final assembly with pearl beads and an organza ribbon bow.
Why You Will Love This Crochet Bracelet Pattern
This wrist cuff makes a stunning alternative to a traditional corsage. It works beautifully for weddings, proms, garden parties, or any formal occasion where you want something delicate and romantic on your wrist.
The construction is satisfying because you create individual components and then bring them together. You will make the lace band first, then the roses, then the leaves. Finally, you assemble everything with pearl beads and a soft pink ribbon. Each piece is small and manageable, so you never feel overwhelmed.
The finished bracelet looks intricate and heirloom-quality, but the techniques are straightforward once you understand them. If you can work a double crochet and follow a simple repeat, you can absolutely make this.
Skill Level
Intermediate to Advanced. This pattern requires comfort with chain spaces, filet mesh construction, and working in fine thread. The three-dimensional rose motifs involve working into the front loop only and spiraling without a visible seam. You will also need basic bead sewing skills for the finishing.
If you are new to thread crochet, take your time with the lace band first. Practice on a small swatch before committing to the full project. The tiny hook and fine thread feel different than worsted weight yarn, but you will adjust quickly.
Time Estimate
Plan for 4 to 6 hours if you are experienced with thread crochet. First-time thread crocheters may need 8 to 10 hours to complete all components and assembly.
Finished Measurements
Materials Needed for This Crochet Rose Bracelet
Crochet Thread
You will need size 10 crochet thread (also labeled as bedspread weight or cotton crochet thread) in three colors:
Recommended Thread Brands
Lizbeth Size 10 Crochet Cotton by Handy Hands (100% Egyptian cotton, 122 yards per ball): Try Natural White (601), Antique Pink (603), and Sage Green (694). This thread has a tightly twisted finish that gives crisp stitch definition ideal for lace.
Aunt Lydia’s Classic Crochet Thread Size 10 (100% mercerized cotton, 350 yards per ball): Available in Cream (226), Dusty Rose (775), and Mint Green (661). This widely available thread is smooth and consistent with excellent sheen.
DMC Petra Size 5 Crochet Cotton (100% mercerized cotton, 437 yards per ball): For a slightly thicker, more structured result, use with a size 5 (1.9 mm) steel hook. This produces a firmer band with slightly larger dimensions.
Substitution note: Use any 100% cotton crochet thread in size 10. Avoid synthetic blends for the band as they lack the body needed for lace blocking. For the roses and leaves, slightly heavier thread (size 5) can add sculptural dimension if desired, but adjust your hook size accordingly. Stitch counts remain the same.
Hook
Steel crochet hook, size 7 (1.65 mm)
Additional Supplies
Gauge
For the lace band: 20 dc (double crochet) = 2 inches / 5 cm; 10 rows = 2 inches / 5 cm in filet mesh pattern using size 10 thread and size 7 (1.65 mm) steel hook, after blocking.
For the roses: Large rose = approximately 1 inch / 2.5 cm diameter after shaping and light steam block.
Gauge matters here. The finished band must comfortably encircle the wrist without pulling or gaping. Work a small swatch before beginning.
Abbreviations Used in This Crochet Pattern
All instructions use US crochet terms.
Special Stitches and Techniques
Picot
Chain 3, then slip stitch into the first chain made. This creates a small decorative loop used along the band edge. Think of it as a tiny bump that adds texture to your border.
Shell
Work 5 double crochet into the same stitch or space. This stitch is used in the band border to create a scalloped effect.
Filet Mesh Open Space
Double crochet into next stitch, chain 2, skip 1 stitch, double crochet into following stitch. This creates an open square in the mesh and gives the band its lacy, vintage appearance.
Spiral Rose Petal Strip
This technique forms the petals of the rose by creating an undulating strip that you then roll into a bloom. Here is how it works:
1. Chain the foundation number stated in the rose instructions.
2. Row 1: Work 1 sc in 2nd ch from hook and in each ch across.
3. Row 2: Chain 1, turn. Work 2 sc into the first stitch, then 2 sc into each stitch across. This doubles your stitch count.
4. Row 3: Chain 2, turn. Work 1 hdc into first st, 2 hdc into next st. Alternate 1 hdc and 2 hdc across to create a gentle wave.
5. Row 4: Chain 3, turn. Work 1 dc into first st, 2 dc into each of the next 2 sts, 1 dc into next st. Repeat this grouping across.
6. Do not fasten off after the last row. The resulting strip will ruffle naturally. Roll from one short end to form a rose bud shape and secure the base with the yarn tail using a tapestry needle, taking several stitches through all layers. The center forms a tight bud and the outer edge creates loose petal ruffles.
Leaf
The leaf is worked back and forth on a chain foundation with increases at the tip:
1. Chain 9.
2. Row 1: Sc in 2nd ch from hook, hdc in next ch, dc in next 3 ch, hdc in next ch, sc in next ch, ch 1, do not turn. Rotate work and work along the opposite side of the foundation chain: sc in first ch, hdc in next ch, dc in next 3 ch, hdc in next ch, sc in next ch, sl st to first sc to close. (16 sts around plus ch-1 tip)
3. Fasten off, leaving a 6-inch tail for attachment. The leaf has a natural pointed tip at the chain-1 space and a rounded base at the sl st join.
Pattern Notes Before You Begin
Step by Step Crochet Instructions
Section 1: Lace Band
The band is worked in Color A (cream/natural white). The construction is lengthwise, meaning you chain across the width of the band first, then work rows that build the band length.
Foundation Chain: Using Color A and size 7 (1.65 mm) steel hook, chain 30.
Row 1 (RS): Dc in 4th ch from hook (counts as first dc plus ch-1), ch 1, sk 1 ch, dc in next ch. [Ch 1, sk 1 ch, dc in next ch] repeat across to last ch, dc in last ch. Turn. (15 dc, 13 ch-1 sps)
Note: The 4th ch from hook counts as dc plus ch-1. You will have dc, [ch-1, sk 1, dc] repeated, ending with a dc into the final chain.
Row 2 (WS): Ch 4 (counts as dc plus ch 1), turn. Dc in first ch-1 sp, [ch 1, dc in next ch-1 sp] repeat across, ending dc in top of turning ch. Turn. (15 dc, 13 ch-1 sps)
Row 3: Repeat Row 2. (15 dc, 13 ch-1 sps)
Rows 4 through 25: Repeat Row 2 for each row. Work a total of 25 rows from the foundation chain. (15 dc, 13 ch-1 sps each row)
Checkpoint: After Row 25, the band (not including clasp) should measure approximately 5.5 inches / 14 cm long and 1.5 inches / 3.8 cm wide when lightly blocked. If your band is shorter, add 2-row increments until you reach this measurement. If longer, remove rows accordingly.
Band Edging
Do not fasten off after Row 25. You will now work an edging around the entire perimeter of the band.
Setup: At end of Row 25, rotate work 90 degrees to begin working along the long side edge.
Long Side Edge (Row-End Edge): Ch 1. Work 1 sc into each row-end dc post along the edge, placing picots evenly as follows: [sc in next 2 row-end posts, picot] repeat across the long edge. You will work approximately 25 sc with 8 picots evenly spaced (roughly every 3rd sc). Continue to the corner.
Short End (Foundation Chain End): At corner, ch 1, sc in corner st, picot, [sc in next 2 sts, picot] 4 times, sc in last st.
Second Long Side Edge: Mirror the first long side edge, working [sc in next 2 row-end posts, picot] across, approximately 25 sc with 8 picots.
Second Short End (Row 25 End): At corner, ch 1, sc in corner st, picot, [sc in next 2 sts, picot] 4 times, sc in last st.
Sl st to first sc to close edging round. Fasten off. Weave in ends.
Checkpoint: The edged band should have a neat picot border on all four sides. Picots should be evenly spaced and lie flat. If any picots pull or pucker, lightly block before continuing.
Section 2: Large Rose (Make 2 in Color B, dusty rose)
The large rose uses the Spiral Rose Petal Strip special stitch explained above.
Foundation Chain: Using Color B, chain 26.
Row 1: Sc in 2nd ch from hook and in each ch across. Turn. (25 sc)
Row 2: Ch 1, turn. 2 sc in first st, [2 sc in next st] repeat across. Turn. (50 sc)
Row 3: Ch 2, turn. Hdc in first st, 2 hdc in next st, [1 hdc in next st, 2 hdc in next st] repeat across. Turn. (75 hdc)
Row 4: Ch 3, turn. Dc in first st, 2 dc in next st, 2 dc in next st, 1 dc in next st, [1 dc in next st, 2 dc in next st, 2 dc in next st, 1 dc in next st] repeat across. (approx 100 dc, strip is fully ruffled)
Fasten off, leaving a 12-inch tail.
Assembly: Roll the strip tightly from one short end. The Row 4 edge faces outward and creates the outer petals. The Row 1 edge forms the base. Thread the tail onto a tapestry needle and stitch through the base layers in a spiral, catching every layer, to secure. Do not cut tail; use it for attaching the rose to the band.
Finished large rose diameter: approximately 1 inch / 2.5 cm.
Section 3: Small Rose (Make 1 in Color B, dusty rose)
Foundation Chain: Using Color B, chain 16.
Row 1: Sc in 2nd ch from hook and in each ch across. Turn. (15 sc)
Row 2: Ch 1, turn. 2 sc in first st, [2 sc in next st] repeat across. Turn. (30 sc)
Row 3: Ch 2, turn. Hdc in first st, 2 hdc in next st, [1 hdc in next st, 2 hdc in next st] repeat across. Turn. (45 hdc)
Row 4: Ch 3, turn. [1 dc, 2 dc, 1 dc, 2 dc] across in the same alternating pattern, allowing the strip to ruffle. (approx 56 dc)
Fasten off, leaving a 12-inch tail.
Assembly: Roll and secure same as large rose. This rose forms a tighter bud shape.
Finished small rose diameter: approximately 0.6 inch / 1.5 cm.
Section 4: Cream Rose (Make 1 in Color A, cream)
Work same as Large Rose instructions above using Color A.
Finished cream rose diameter: approximately 1 inch / 2.5 cm.
Section 5: Leaf (Make 8 in Color C, mint green)
Using Color C, chain 9.
Row 1 (first half): Sc in 2nd ch from hook (1 sc), hdc in next ch (1 hdc), dc in next 3 ch (3 dc), hdc in next ch (1 hdc), sc in next ch (1 sc), ch 1 at tip. (7 sts plus ch-1 tip)
Row 1 (second half, working along opposite side of foundation chain): Without turning, rotate work. Sc in first available ch loop (1 sc), hdc in next ch loop (1 hdc), dc in next 3 ch loops (3 dc), hdc in next ch loop (1 hdc), sc in next ch loop (1 sc). (7 sts)
Sl st to first sc of Row 1 to close leaf. (14 sts around perimeter plus ch-1 tip)
Fasten off, leaving an 8-inch tail for attachment.
Make 8 leaves total.
Section 6: Assembly and Finishing
Step 1: Blocking the band.
Wet the lace band thoroughly. Pin to foam blocking board to measurements: 5.5 inches / 14 cm long by 1.5 inches / 3.8 cm wide. Allow to dry completely before removing pins. Do not block the roses or leaves; they are best left unblocked to retain dimension.
Step 2: Clasp attachment.
Using sewing needle and white thread, securely stitch one half of the barrel clasp to each short end of the blocked band at the center of the edge, just inside the picot border. Attach the extension chain to one half of the clasp so the finished bracelet is adjustable between 6 and 7 inches / 15 to 18 cm.
Step 3: Arrange and attach roses.
Position the 3 roses on the front center of the band as follows: one large dusty rose at top center, the cream rose at middle center slightly below and to the right, and the small dusty rose bud at lower left, slightly tucked beneath the cream rose. This creates a triangular cluster. Using the attachment tails threaded onto a tapestry needle, stitch each rose firmly to the band, taking stitches through the base of the rose and through the lace mesh. Pull snugly so each rose sits flat and does not shift.
Step 4: Arrange and attach leaves.
Tuck leaves around and between the roses as follows: 2 leaves pointing upward behind the large pink rose, 2 leaves pointing left behind the cream rose, 2 leaves pointing right and slightly downward, and 2 smaller leaves tucked at the front lower sides. Adjust placement to fill gaps and create a full, layered garden effect. Stitch each leaf base to the band using its tail, taking 3 to 4 stitches through the leaf base and band mesh. Weave in all ends on the wrong side of the band.
Step 5: Pearl bead attachment.
Thread a sewing needle with white thread doubled. Scatter pearl beads among the roses and leaves, placing approximately 2 to 3 beads between each flower and leaf group. Stitch each bead individually through the lace, knotting on the wrong side after each bead. Place approximately 6 beads along each long picot edge of the band, spacing them approximately 0.75 inch / 2 cm apart. Use approximately 28 to 30 beads total.
Step 6: Ribbon bow.
Cut the organza ribbon to 20 inches / 51 cm. Thread it through the lace mesh at the lower front of the band, centering it. Tie in a soft bow. Trim ribbon ends at a diagonal to prevent fraying. The ribbon can be removed and replaced as needed.
Size Customization Tips
To make the band longer: Add 2-row repeats to Section 1. Each pair of rows adds approximately 0.4 inch / 1 cm. For a 7-inch wrist without any extension chain adjustment, add 4 additional rows (Rows 26 through 29) for a total of 29 rows, giving approximately 5.9 inches / 15 cm of band plus 0.75 inch clasp.
To make the band wider (covering more of the wrist): Add more foundation chains in multiples of 2 (for example, chain 34 instead of 30). Each additional 2-chain increment adds approximately 0.2 inch / 0.5 cm to the width. A chain of 38 produces a cuff approximately 2 inches / 5 cm wide. Scale the number of roses and leaves accordingly.
To make the band narrower: Chain 22 for a narrower band of approximately 1 inch / 2.5 cm. This version fits a more delicate wrist and suits a smaller rose cluster of 2 roses and 4 leaves.
Blocking Recommendations
Wet blocking is strongly recommended for the lace band. Spray blocking is acceptable as an alternative. Do not block the assembled bracelet once motifs, beads, and ribbon are attached. Block only the bare band before assembly.
Steam blocking is not recommended as it may damage organza ribbon. If you must steam, remove the ribbon first.
Care Instructions
Hand wash gently in cool water with mild soap or delicate textile wash. Do not wring or twist. Roll in a clean towel to remove excess water. Reshape and allow to dry flat on a towel away from direct sunlight.
Remove organza ribbon before washing. Reattach and retie after drying.
Store flat in a fabric pouch or jewelry box to protect delicate petals and beads. Do not machine wash or tumble dry.
Final Thoughts on This Crochet Rose Bracelet Pattern
Thank you so much for choosing this pattern. I hope you enjoy creating something truly special, whether it is for yourself, a bride, a daughter heading to prom, or anyone who deserves a little handmade beauty on their wrist.
I would absolutely love to see your finished bracelet. Tag me on Instagram or share a photo in my Facebook group. Seeing your creations is one of my favorite parts of designing patterns.
If you found this crochet tutorial helpful, save it to your Pinterest boards so you can find it again when you are ready to make another. And please leave a comment below if you give this rose garden bracelet a try. I read every single one and love hearing how your projects turn out.
You Might Also Like
- Lavender Lace Baby Dress Free Crochet Pattern
- Mint and Peach Baby Dress Free Crochet Pattern
- Sage Green Mesh Tie Cardigan Free Crochet Pattern
- Sunflower Granny Square Bucket Bag Free Crochet Pattern