
Lace crochet scares a lot of people. I get it. All those chains and fans and "work into the center of the ch-5 loop" instructions can feel overwhelming before you even pick up your hook. But here is the truth about this lavender lace baby dress crochet pattern: if you can single crochet, double crochet, and count to five, you can absolutely make this.
The bodice is just rows of single crochet with some simple shaping. That is it. The lace skirt looks intricate, but it is really just the same fan stitch repeated over and over in a rhythm you will memorize after two rounds. I promise you, this is not as hard as it looks.
Whether you are an advanced beginner ready to level up or an experienced crocheter looking for a beautiful baby gift project, this dress meets you where you are. The construction is logical, the stitch counts are verified, and I will walk you through every single step.
Why This Baby Dress Pattern Works
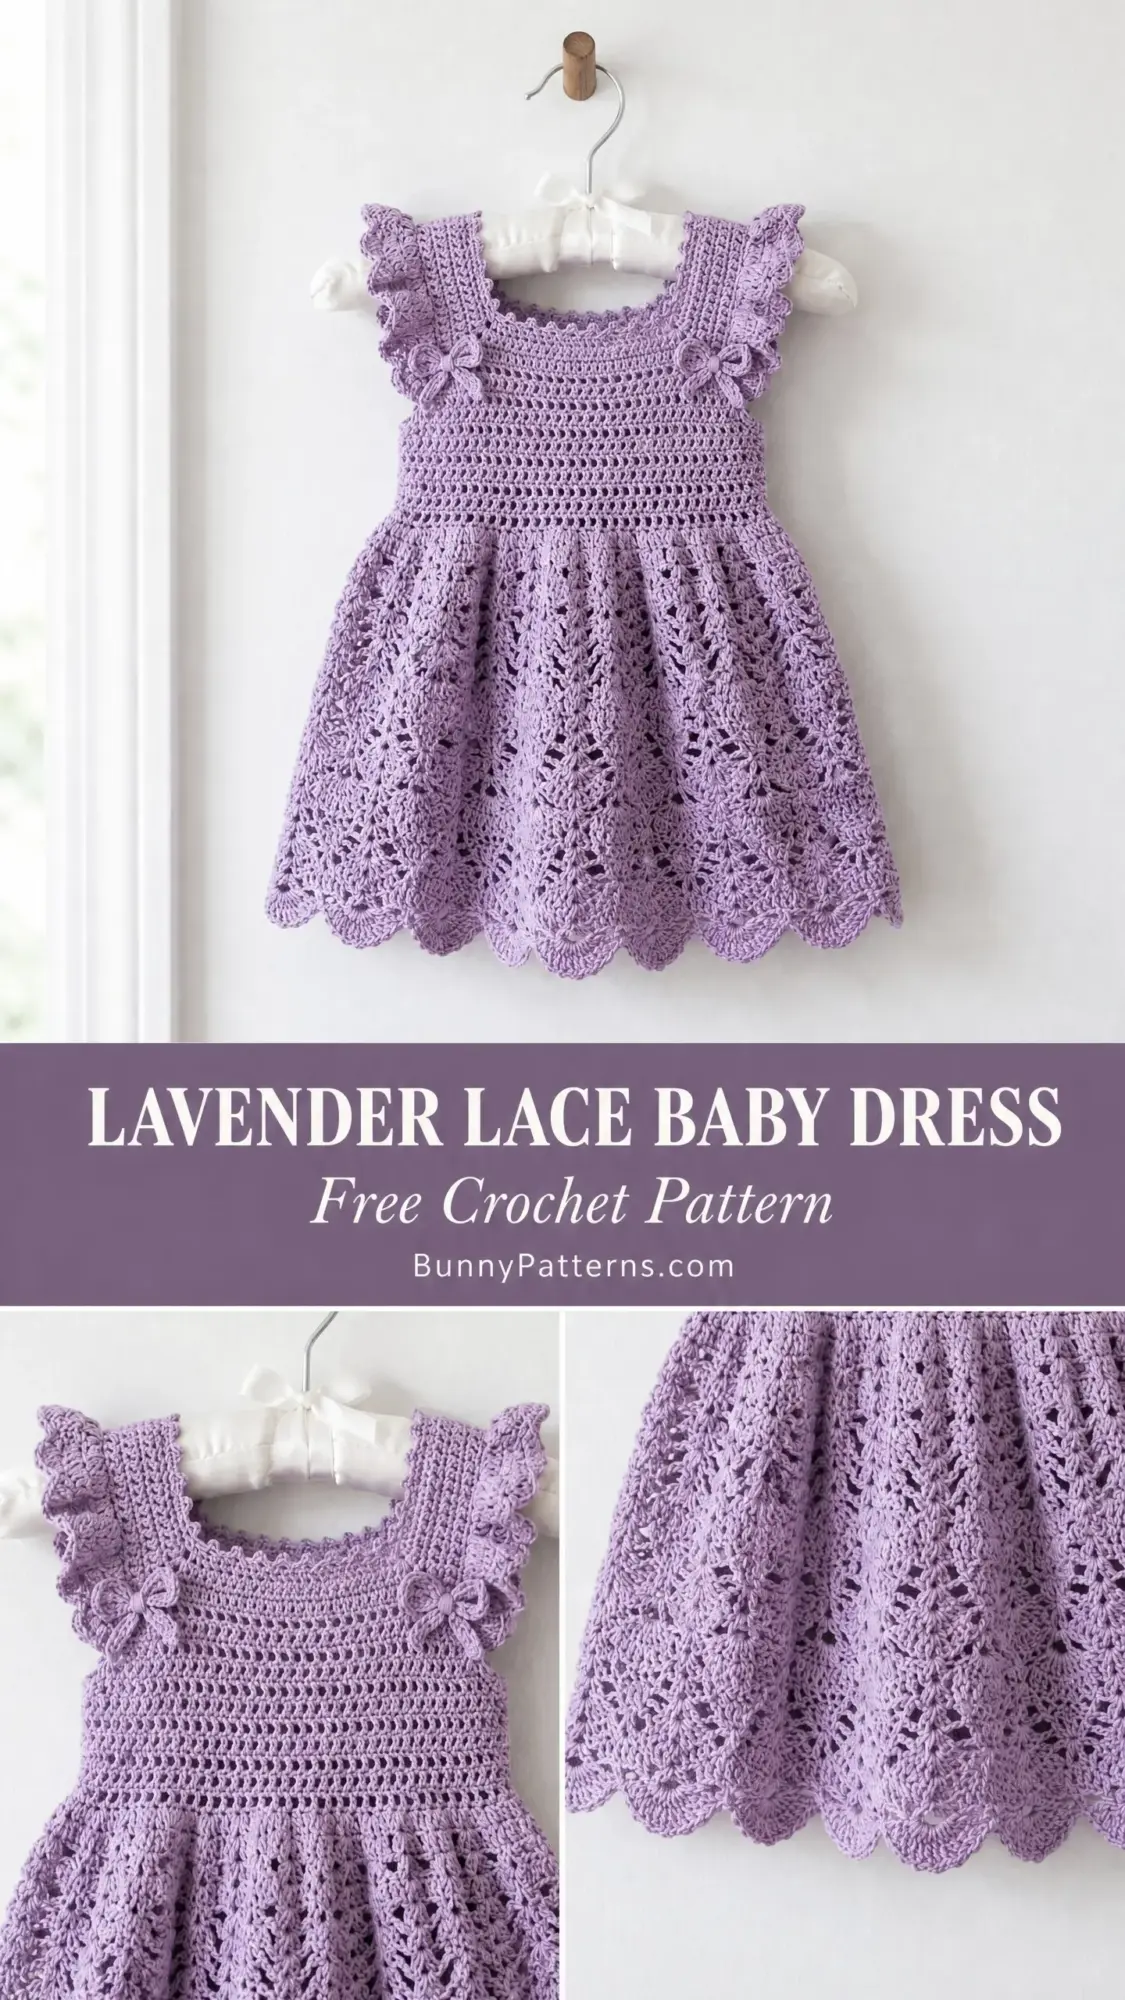
This heirloom-quality baby dress features a structured square-neck bodice worked flat from the top down. The bodice transitions to a full lace skirt worked in the round. Flutter sleeves edged with picot trim and tiny crocheted bows accent each shoulder. The skirt uses a repeating fan-and-shell lace motif that fans outward naturally through built-in increases, finishing with a scalloped picot hem.
The entire dress is worked in a single soft lavender color throughout. The back bodice closes with tie cords at the neckline that form a sweet bow. This pattern is written for size 12 months with size customization notes provided at the end.
Skill Level: Advanced Beginner to Intermediate
Time Estimate: 12 to 18 hours total. Allow 6 to 8 hours for the bodice, 4 to 6 hours for the skirt, and 1 to 2 hours for finishing details.
Finished Measurements
Materials Needed for This Crochet Baby Dress
Yarn: Approximately 400 yards / 366 meters of DK weight (light weight, #3) yarn in lavender
Hook: US size E-4 / 3.5 mm crochet hook, or size needed to meet gauge
Notions:
Yarn Suggestions
Option 1: Paintbox Yarns Simply DK in Dusty Lilac. This yarn has excellent stitch definition, is machine washable, and holds the lace motifs crisp after blocking. It is widely available and budget-friendly.
Option 2: Scheepjes Catona 50g in Lilac Mist (520). A mercerized cotton DK-weight yarn that gives gorgeous drape and stitch clarity. The slight sheen elevates the lace to a truly heirloom look. Ideal for warmer climates or summer wear.
Option 3: WeCrochet Capra DK in Lavender. A wool-cotton blend that offers a beautiful balance of drape and structure. Blocks beautifully and gives the lace sections excellent definition.
Substitution Note: Choose any smooth DK weight yarn with good stitch definition. Avoid fluffy, bouclé, or highly textured yarns, as the lace motifs will not be visible. Cotton and cotton blends will produce the crispest lace effect after blocking.
Gauge
18 stitches x 22 rows = 4 inches / 10 cm in single crochet (sc), worked flat, after blocking.
One full fan-lace repeat (12 stitches wide) = approximately 2.5 inches / 6.4 cm wide and 2 rows tall = approximately 1 inch / 2.5 cm, after blocking.
Gauge is essential for a fitted garment. Please swatch and adjust hook size accordingly.
Abbreviations and Stitch Definitions
Let me break down every stitch you will use in this crochet tutorial. If you are new to any of these, take a moment to practice before starting.
Special Stitches for the Lace Baby Dress Pattern
Fan Stitch (fan): Work 5 dc in the same stitch or space. This creates one fan unit. Think of it like a little shell that fans outward.
Shell Stitch (shell): Work (2 dc, ch 2, 2 dc) all in the same stitch or space. This creates one shell unit with a center chain-2 arch.
Picot: Chain 3, slip stitch into the first chain of the chain-3 just made. One picot completed. This creates a tiny decorative bump.
Scallop: Work (sc, hdc, 3 dc, hdc, sc) all in the same stitch or space. This creates one scallop unit for the hem edging.
Crocheted Bow: Chain 20. Slip stitch to the first chain to form a loop. Chain 15. Slip stitch in same first chain. Pull the two loops together at the center and wrap yarn 4 times around the center. Fasten off, leaving a 6-inch / 15 cm tail for sewing.
Important Pattern Notes Before You Begin
1. The bodice is worked flat in rows, producing a front bodice panel and a back bodice panel separately, then joined at the sides.
2. The skirt is worked in rounds, joined to the lower edge of the joined bodice.
3. Turning chains count as follows: ch 1 at the beginning of a sc row does NOT count as a stitch. Ch 2 at the beginning of a hdc row does NOT count as a stitch. Ch 3 at the beginning of a dc row DOES count as the first dc.
4. Stitch counts are given in parentheses at the end of each row or round.
5. The lace skirt repeat is a multiple of 12 stitches plus 6. Do not alter this count mid-skirt.
Step by Step Crochet Pattern Instructions
Front Bodice Panel
The front bodice is worked from the top neckline downward in rows. This is the easy part, I promise.
Foundation Chain: Chain 44.
Row 1 (WS): Starting in the 2nd chain from hook, sc across. Turn. (43 sc)
Row 2 (RS): Ch 1, sc in each st across. Turn. (43 sc)
Row 3: Ch 1, sc in each st across. Turn. (43 sc)
Row 4 (Neckline shaping): Ch 1, sc in first 2 sts, inc in next st, sc to last 3 sts, inc in next st, sc in last 2 sts. Turn. (45 sc)
Row 5: Ch 1, sc in each st across. Turn. (45 sc)
Row 6: Ch 1, sc in first 2 sts, inc in next st, sc to last 3 sts, inc in next st, sc in last 2 sts. Turn. (47 sc)
Row 7: Ch 1, sc in each st across. Turn. (47 sc)
Row 8: Ch 1, sc in first 2 sts, inc in next st, sc to last 3 sts, inc in next st, sc in last 2 sts. Turn. (49 sc)
Row 9: Ch 1, sc in each st across. Turn. (49 sc)
Row 10: Ch 1, sc in first 2 sts, inc in next st, sc to last 3 sts, inc in next st, sc in last 2 sts. Turn. (51 sc)
Rows 11 through 14: Ch 1, sc in each st across. Turn. (51 sc each row)
Row 15 (Waist definition, decrease row): Ch 1, sc in first 2 sts, dec over next 2 sts, sc to last 4 sts, dec over next 2 sts, sc in last 2 sts. Turn. (49 sc)
Row 16: Ch 1, sc in each st across. Turn. (49 sc)
Row 17: Ch 1, sc in first 2 sts, dec over next 2 sts, sc to last 4 sts, dec over next 2 sts, sc in last 2 sts. Turn. (47 sc)
Row 18: Ch 1, sc in each st across. Turn. (47 sc)
Row 19: Ch 1, sc in first 2 sts, dec over next 2 sts, sc to last 4 sts, dec over next 2 sts, sc in last 2 sts. Turn. (45 sc)
Rows 20 through 24: Ch 1, sc in each st across. Turn. (45 sc each row)
Row 25 (Waist accent, textured band): Ch 2, hdc in each st across. Turn. (45 hdc)
Row 26: Ch 2, hdc in each st across. Turn. (45 hdc)
Row 27: Ch 1, sc in each st across. Turn. (45 sc)
Do not fasten off. Set aside. This is the front bodice panel.
Checkpoint: After completing Row 27, the piece should measure approximately 6 inches / 15 cm tall from the top chain edge to the last row.
Back Bodice Panel
The back bodice panel is worked identically to the front panel through Row 27, with one modification at Row 1 for the center back opening.
Foundation Chain: Chain 44.
Row 1 (WS): Starting in the 2nd chain from hook, sc in first 20 sts, ch 3, sk 3 sts, sc in remaining 20 sts. Turn. (40 sc plus ch-3 loop = 43 working positions)
The ch-3 gap forms the button or tie loop at the center back neckline. On subsequent rows, work into the 3 chains of the loop as regular stitches so the stitch count restores to 43.
Row 2 (RS): Ch 1, sc across all 43 sts including the 3 chain sts of the loop. Turn. (43 sc)
Rows 3 through 27: Work exactly as Rows 3 through 27 of Front Bodice Panel. Turn after each row. Stitch counts are identical to the front panel throughout.
After Row 27, fasten off. Weave in ends on the back panel only at this point.
Joining the Bodice Panels
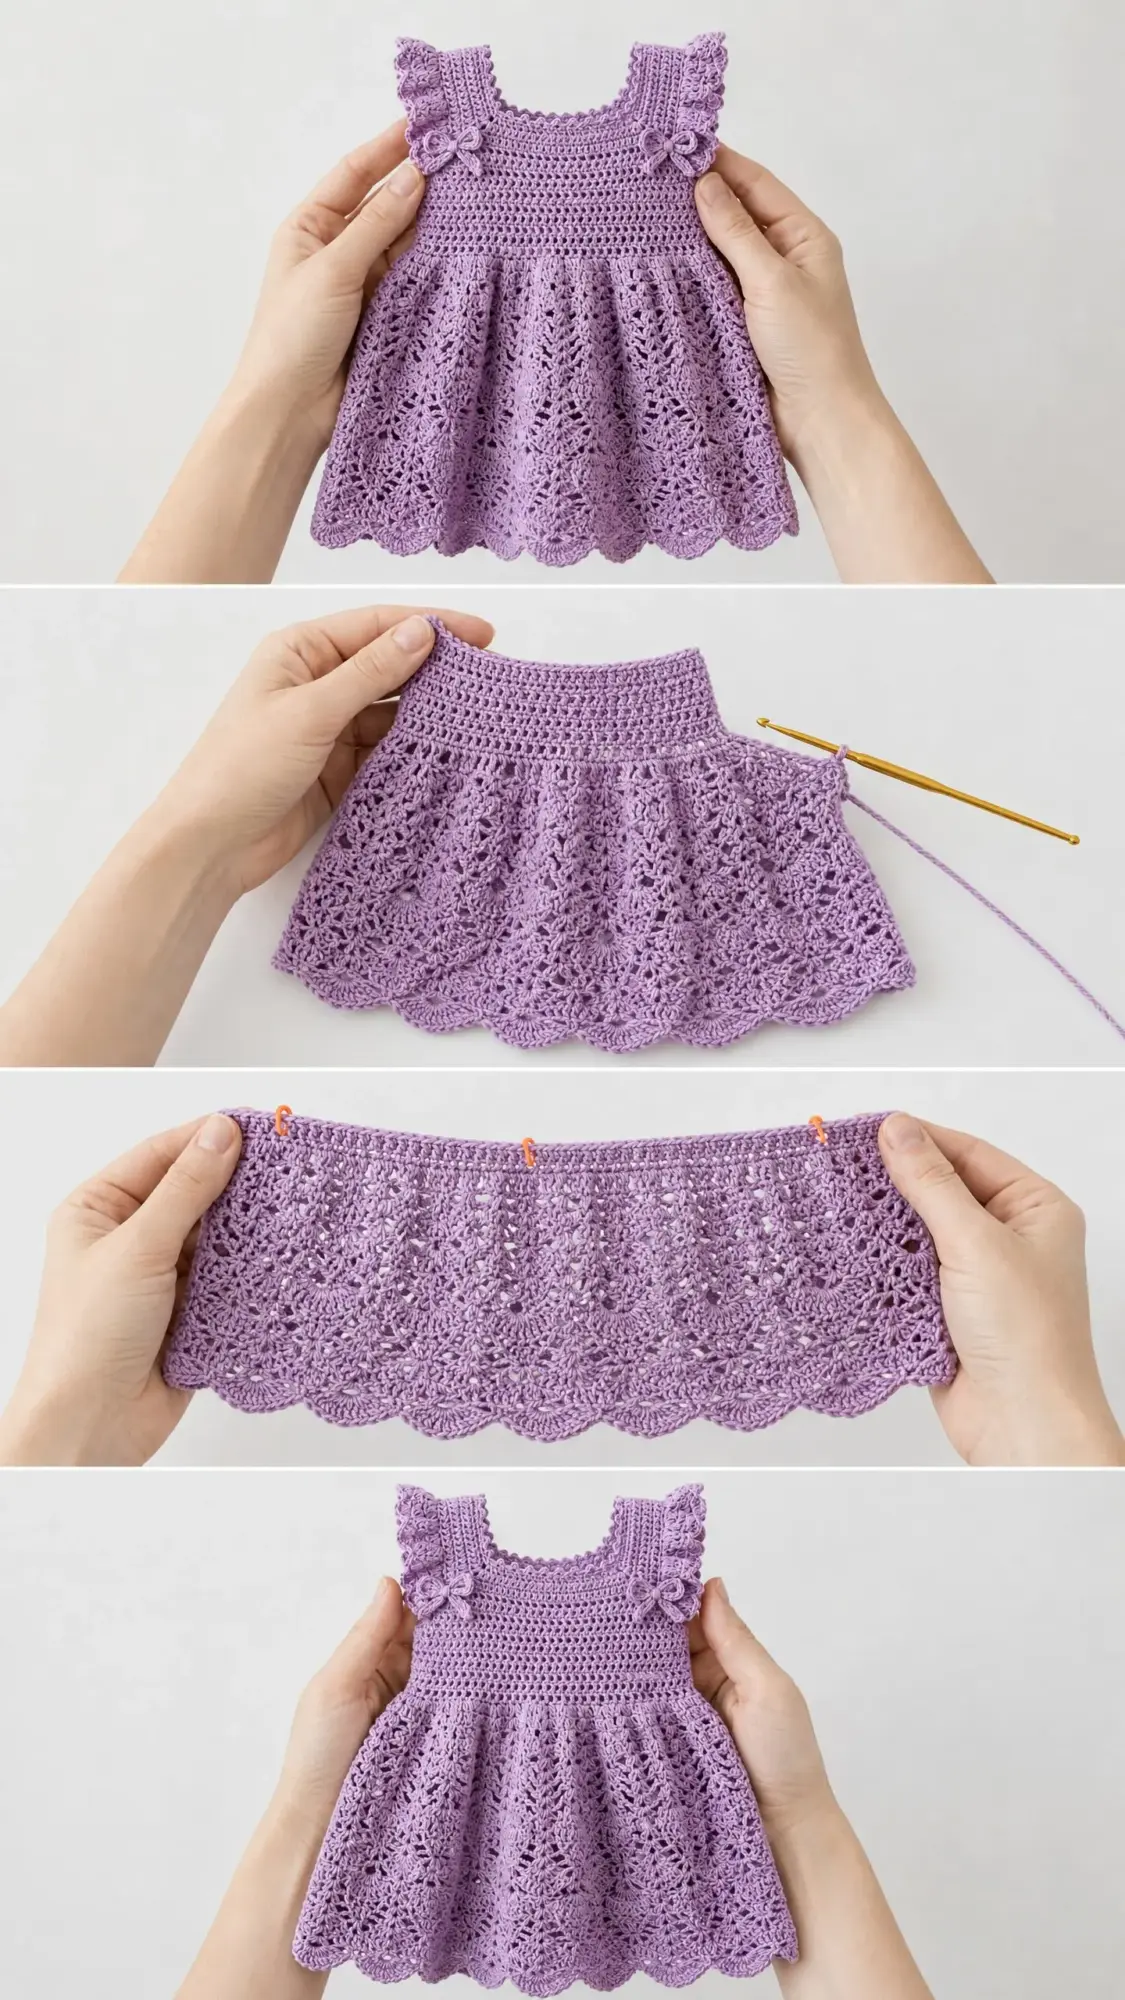
Hold front and back panels with wrong sides facing each other. Using a length of yarn threaded on a tapestry needle, whipstitch the side edges together: join right side seam by aligning the row ends of Rows 1 through 27 on both panels and whipstitching through both layers. Repeat for the left side seam. Do not join the top edges (neckline) or the bottom edges (skirt will be attached here).
Checkpoint: After joining, the bodice tube should measure approximately 9.5 inches / 24 cm in circumference at the widest point. The bottom opening should count 90 stitches total around (45 sts front plus 45 sts back).
Skirt
The skirt is worked in rounds, beginning at the bodice waist and working downward. You will work into the bottom edge of the joined bodice.
Set-Up Round: With RS facing, attach yarn to any st at the lower edge of the bodice. Ch 1, sc in each st around the full lower edge of both front and back panels. Join with sl st to first sc. (90 sc)
Increase Round 1: Ch 3 (counts as dc), dc in same st as join, [dc in next 2 sts, 2 dc in next st] rep around, end dc in last 1 st as needed to complete round. Join with sl st to top of ch-3. (120 dc)
Increase Round 2: Ch 3 (counts as dc), dc in same st as join, [dc in next 3 sts, 2 dc in next st] rep around. Join with sl st to top of ch-3. (150 dc)
Increase Round 3 (transition to lace multiple): Ch 3 (counts as dc), dc in next 4 sts, 2 dc in next st, [dc in next 24 sts, 2 dc in next st] 5 times, dc in remaining sts to end of round. Join with sl st to top of ch-3. (156 dc)
Transition Round (creates foundation arches for lace): Ch 4 (counts as dc plus ch 1), sk 1 st, [dc in next st, ch 1, sk 1 st] rep around. Join with sl st to 3rd ch of beg ch-4. (78 dc, 78 ch-1 spaces = 156 working positions)
Lace Skirt Rounds
Here is where the magic happens. Take a deep breath. You are just repeating the same moves over and over.
Lace Round 1: Ch 1, sc in same st as join. Working across the transition round: [sk next ch-1 sp, 5 dc (fan) in next dc, sk next ch-1 sp, sc in next dc, ch 5, sk next 2 dc and their ch-1 sps, sc in next dc] rep 13 times around, ending last rep without final sc. Join with sl st to first sc. (13 fans, 26 sc, 13 ch-5 loops)
Lace Round 2: Sl st to center dc of first fan, ch 1, sc in center dc of fan. [Ch 5, sc in center ch of ch-5 loop, ch 5, sc in center dc of next fan] rep 12 times. Ch 5, sc in center ch of last ch-5 loop. Ch 5. Join with sl st to first sc. (26 sc, 26 ch-5 loops)
Lace Round 3: Ch 3 (counts as dc), 4 dc in same sc (half fan to start), sc in center ch of next ch-5 loop. [Ch 3, sc in center ch of next ch-5 loop, 5 dc (fan) in next sc, sc in center ch of next ch-5 loop] rep 12 times. Ch 3, sc in center ch of last ch-5 loop. Join with sl st to top of ch-3. (13 fans, 26 sc, 13 ch-3 loops)
Lace Round 4: Ch 1, sc in same st as join. [Ch 3, sc in center dc of next fan, ch 3, sc in center ch of next ch-3 loop] rep 12 times. Ch 3, sc in center dc of last fan. Ch 3. Join with sl st to first sc. (26 sc, 26 ch-3 loops)
Lace Round 5 (expansion round): Ch 3 (counts as dc), 4 dc in same sc. [Sc in center ch of next ch-3 loop, ch 5, sc in center ch of next ch-3 loop, 5 dc (fan) in next sc] rep 12 times. Sc in center ch of next ch-3 loop, ch 5, sc in center ch of last ch-3 loop. Join with sl st to top of ch-3. (13 fans, 26 sc, 13 ch-5 loops)
Rounds 6 through 7: Rep Lace Rounds 2 and 3 above.
Round 8: Rep Lace Round 4.
Round 9 (second expansion round): Rep Lace Round 5, but substitute ch 7 wherever ch 5 is indicated. (13 fans, 26 sc, 13 ch-7 loops)
Round 10: Ch 1, sc in same st as join. [Ch 4, sc in center dc of next fan, ch 4, sc in center ch of next ch-7 loop] rep 12 times. Ch 4, sc in center dc of last fan. Ch 4. Join with sl st to first sc. (26 sc, 26 ch-4 loops)
Round 11: Ch 3 (counts as dc), 4 dc in same sc. [Sc in center ch of next ch-4 loop, ch 5, sc in center ch of next ch-4 loop, 5 dc (fan) in next sc] rep 12 times. Sc in center ch of next ch-4 loop. Ch 5. Sc in center ch of last ch-4 loop. Join with sl st to top of ch-3. (13 fans, 26 sc, 13 ch-5 loops)
Round 12: Rep Lace Round 2. (26 sc, 26 ch-5 loops)
Round 13: Rep Lace Round 3. (13 fans, 26 sc, 13 ch-3 loops)
Round 14: Rep Lace Round 4. (26 sc, 26 ch-3 loops)
Round 15 (third expansion round): Ch 3 (counts as dc), 4 dc in same sc. [Sc in center ch of next ch-3 loop, ch 7, sc in center ch of next ch-3 loop, 5 dc (fan) in next sc] rep 12 times. Sc in center ch of next ch-3 loop. Ch 7. Sc in center ch of last ch-3 loop. Join with sl st to top of ch-3. (13 fans, 26 sc, 13 ch-7 loops)
Round 16: Ch 1, sc in same st as join. [Ch 4, sc in center dc of next fan, ch 4, sc in center ch of next ch-7 loop] rep 12 times. Ch 4, sc in center dc of last fan. Ch 4. Join with sl st to first sc. (26 sc, 26 ch-4 loops)
Round 17: Ch 3 (counts as dc), 4 dc in same sc. [Sc in center ch of next ch-4 loop, ch 5, sc in center ch of next ch-4 loop, fan in next sc] rep 12 times. Sc in center ch of next ch-4 loop. Ch 5. Sc in center ch of last ch-4 loop. Join with sl st to top of ch-3. (13 fans, 26 sc, 13 ch-5 loops)
Round 18: Rep Lace Round 2. (26 sc, 26 ch-5 loops)
Round 19: Rep Lace Round 3. (13 fans, 26 sc, 13 ch-3 loops)
Round 20: Rep Lace Round 4. (26 sc, 26 ch-3 loops)
Checkpoint: After Round 20, the skirt section should measure approximately 10 to 11 inches / 25.5 to 28 cm from the first lace round.
Scalloped Hem
Hem Round 1 (foundation for scallops): Ch 1, sc in same st as join. [5 sc in next ch-3 loop, sc in next sc] rep 12 times. 5 sc in last ch-3 loop. Join with sl st to first sc. (78 sc total)
Hem Round 2 (scallop points): Ch 1, sc in first sc. [Sk 1 sc, 5 dc in next sc, sk 1 sc, sc in next sc, sk 1 sc, 5 dc in next sc, sk 1 sc, sc in next sc] rep 12 times adjusting as needed to complete round. Join with sl st to first sc.
Hem Round 3 (picot edging): Ch 1, sc in first dc of any scallop. [Picot, sc in next dc] rep across entire round, working sc into each dc and sc of the scallop round, and working picot between each. Join with sl st to first sc. Fasten off.
Flutter Sleeve Ruffle
Work along each armhole opening. The armhole is the open edge at the top of each side panel.
Sleeve Round 1: With RS facing, attach yarn at the bottom of one armhole opening at the side seam. Ch 1, work 2 hdc in each row end around the full armhole opening (approximately 26 row ends = approximately 52 hdc). Join with sl st to first hdc. (52 hdc)
Sleeve Round 2: Ch 1, (sc, ch 2, sc) in each hdc around. Join with sl st to first sc. (52 sc, 52 ch-2 arches)
Sleeve Round 3 (picot ruffle finish): Ch 1, sc in first sc. [Picot, sc in next sc] rep around. Join with sl st to first sc. Fasten off. (52 picots)
Repeat for second armhole.
Neckline Edging
Neckline Round 1: With RS facing, attach yarn at the center back opening. Ch 1, sc evenly around the full neckline edge. Work 1 sc per st across the top chains and 1 sc per row end along any vertical edges. Join with sl st to first sc. Target count: 56 sc around the neckline.
Neckline Round 2: Ch 1, sc in first sc. [Sk 1 sc, 3 dc in next sc, sk 1 sc, sc in next sc] rep around. Join with sl st to first sc. (14 small shell units)
Neckline Round 3: Ch 1, sc in same st. [Picot, sc in center dc of next 3-dc group, picot, sc in next sc] rep around. Fasten off. (28 picots)
Crocheted Bow Embellishments
Make 2 bows as described in the Special Stitches section. Sew one bow to the front of each strap, centered at the point where the strap meets the neckline, approximately 1 inch / 2.5 cm from the neckline edge on each side.
Back Closure Tie Cords
Make 2 tie cords: Chain 40. Slip stitch back down the entire chain to form a firm, rounded cord. Fasten off, leaving a 4-inch / 10 cm tail.
Attach one cord to each side of the center back neckline opening, sewing securely at the topmost corner of each back panel.
Finishing and Blocking Your Baby Dress
Step 1: Weave in all remaining loose ends using the tapestry needle. Pull ends through at least 1 inch / 2.5 cm in two different directions to secure.
Step 2: For wet blocking (recommended for cotton or cotton blend yarns): Submerge the finished dress in cool water. Gently press out water without wringing. Roll in a clean dry towel and press to remove excess moisture. Lay flat on the blocking board. Pin the skirt lace points gently outward to open the fan lace motifs. Pin the scallop hem points to emphasize the shape.
Step 3: For steam blocking (recommended for wool or wool blend yarns): Lay the dress flat on the blocking board. Hold a steam iron or handheld steamer 1 to 2 inches above the surface. Do not press the iron onto the yarn.
Step 4: Allow the dress to dry completely flat before unpinning, usually 12 to 24 hours.
Care Instructions
Machine wash on delicate cycle in cold water inside a mesh laundry bag, if the yarn label permits. Otherwise, hand wash in cool water with a mild wool wash or baby-safe detergent. Do not wring or twist. Lay flat to dry away from direct sunlight.
Size Customization Tips
To size down to 6 months (chest approximately 17 inches / 43 cm): Work the foundation chain as chain 40 for both panels. Work only 2 increase rows in the bodice instead of 4. Begin the skirt set-up round with 84 sts, increase to 144 sts. Work 16 lace rounds instead of 20.
To size up to 18 months (chest approximately 21 inches / 53 cm): Work the foundation chain as chain 48. Work 5 increase rows in the bodice. Begin the skirt set-up round with 96 sts, increase to 168 sts. Work 22 to 24 lace rounds.
To size up to 24 months / 2T (chest approximately 22 inches / 56 cm): Work the foundation chain as chain 52. Work 6 increase rows. Begin the skirt set-up round with 104 sts, increase to 180 sts. Work 26 lace rounds.
General Rule: The skirt stitch count must always be a multiple of 12 before beginning the lace rounds.
You Did It!
Thank you so much for choosing this pattern for your next project. I truly hope this lavender lace baby dress brings joy to both you and the lucky little one who gets to wear it. This is the kind of piece that becomes a keepsake, passed down and treasured.
If you make this dress, I would absolutely love to see it! Tag me on Instagram or share your finished piece in our Facebook group. Seeing your creations is honestly the best part of designing patterns.
If you loved this crochet pattern, save it to your Pinterest boards so you can find it again later. And please drop a comment below if you make one. I read every single comment, and your feedback helps other crocheters know what to expect. Happy hooking!
You Might Also Like
- Blush Pink Crochet Mini Backpack Free Pattern
- Lavender Daisy Granny Square Bag Free Crochet Pattern
- Mint Daisy Spring Barrel Handbag Free Crochet Pattern
- Blush Pink Shell Clutch with Pearl Accents Free Crochet Pattern