
This bag is SUCH a showstopper, and I cannot wait for you to make it! Seriously, the Blush Pink Tassel Tote looks like something you would find in a boutique, but it works up in just 8 to 11 hours using bulky cotton cord and simple stitches.
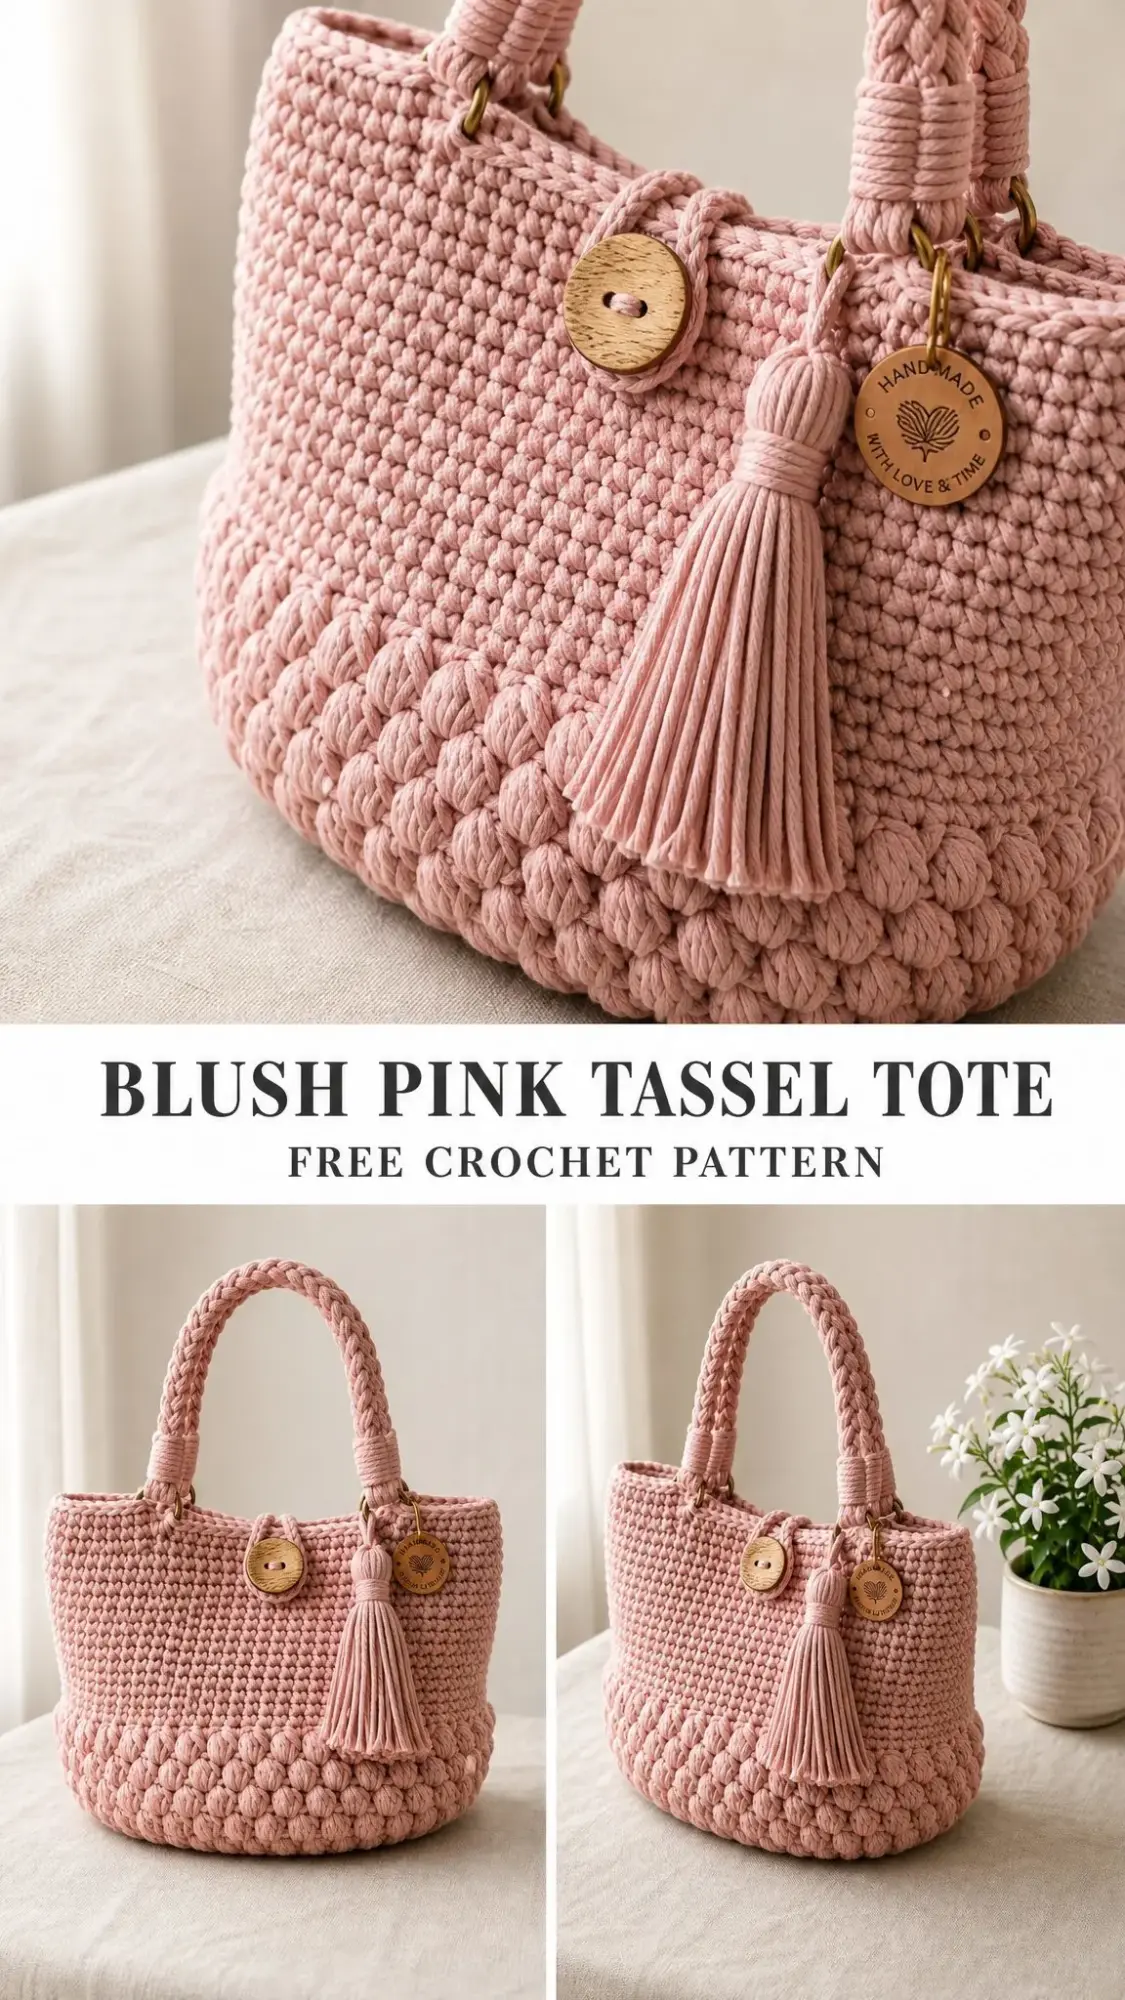
The textured bobble base gives it that sculptural, high-end look while the smooth single crochet body keeps things easy and satisfying. Whether you are treating yourself or making the perfect handmade gift, this tote delivers maximum impact for surprisingly little effort.
I designed this pattern with advanced beginners in mind. If you can single crochet in the round and follow stitch counts, you have got this. The braided handles, wooden button closure, and tassel details are easier than they look, and I will walk you through every single step.
Why You Will Love This Crochet Tote Bag Pattern
The Blush Pink Tassel Tote hits that sweet spot between practical and pretty. At 11 inches wide and 8 inches tall (excluding handles), it is the perfect size for daily carry. Think farmers market runs, beach days, or just looking adorable while grabbing coffee.
What makes this bag special is the combination of textures. The bobble band around the base creates a staggered pebble effect that catches the light beautifully. Then the walls transition to clean single crochet rows that let the yarn shine. The chunky braided handles add a handcrafted artisan touch, and that wooden button closure? Chef’s kiss.
Because you are working with bulky weight cotton cord, this tote has structure. It stands up on its own without flopping over. No lining required, though you could certainly add one if you wanted an extra polished finish.
Finished Size
Here are the dimensions you will end up with:
Materials Needed
Yarn: Approximately 350 to 430 yards (320 to 395 meters) of bulky weight cotton cord or recycled t-shirt yarn (Weight 5 to 6) in soft blush pink. A firm, round cord gives the crispest bobbles.
Recommended yarn options:
Hook: 6.0 mm (J-10) crochet hook, or size needed for gauge
Notions:
Gauge
11 sc × 12 rounds = 4 inches (10 cm) in single crochet with cord and a 6.0 mm hook.
Make a flat swatch before starting and adjust your hook size if needed. Gauge controls the finished width and how upright your bag stands. This is one pattern where checking gauge really matters!
Abbreviations and Special Stitches
This pattern uses US crochet terminology. If you are a UK crocheter, read every "sc" as a UK double crochet (dc). Stitch heights and counts stay exactly the same.
Special Stitches Explained
Bobble (MB): This stitch creates the puffy texture around the base. Here is how to work it: [Yarn over, insert hook in stitch, pull up a loop, yarn over and draw through 2 loops] 4 times in the same stitch, keeping the last loop of each on the hook (5 loops on hook), then yarn over and draw through all 5 loops. Push the bobble to the front (right side) of your work.
Do not worry if bobbles feel awkward at first. They get easier with practice, and the chunky cord makes them quite forgiving.
Invisible decrease: Insert hook in front loops of next 2 stitches, yarn over, pull through both, complete as one sc. This is only used when shaping the upper edge.
Pattern Notes
Before you start, here are a few things to keep in mind:
Step-by-Step Crochet Tote Pattern Instructions
The Oval Base
Foundation: Ch 19. (19 ch)
Rnd 1: Starting in 2nd ch from hook, sc in next 17 ch, 3 sc in last ch; rotate to work the underside, sc in next 17 ch, 3 sc in last ch; join into spiral. (40 sc)
Rnd 2: Sc 17, [inc] 3 times, sc 17, [inc] 3 times. (46 sc)
Rnd 3: Sc 17, [sc 1, inc] 3 times, sc 17, [sc 1, inc] 3 times. (52 sc)
Rnd 4: Sc 17, [sc 2, inc] 3 times, sc 17, [sc 2, inc] 3 times. (58 sc)
Rnd 5: Sc evenly around, adding 2 evenly spaced inc. (60 sc)
Rnd 6: Working in BLO, sc in each st around. This sets the wall upright. (60 sc)
Take a moment here to admire your work! The back loop only round creates a crisp edge where the base meets the walls. This is where your bag starts to take shape.
Bobble Band
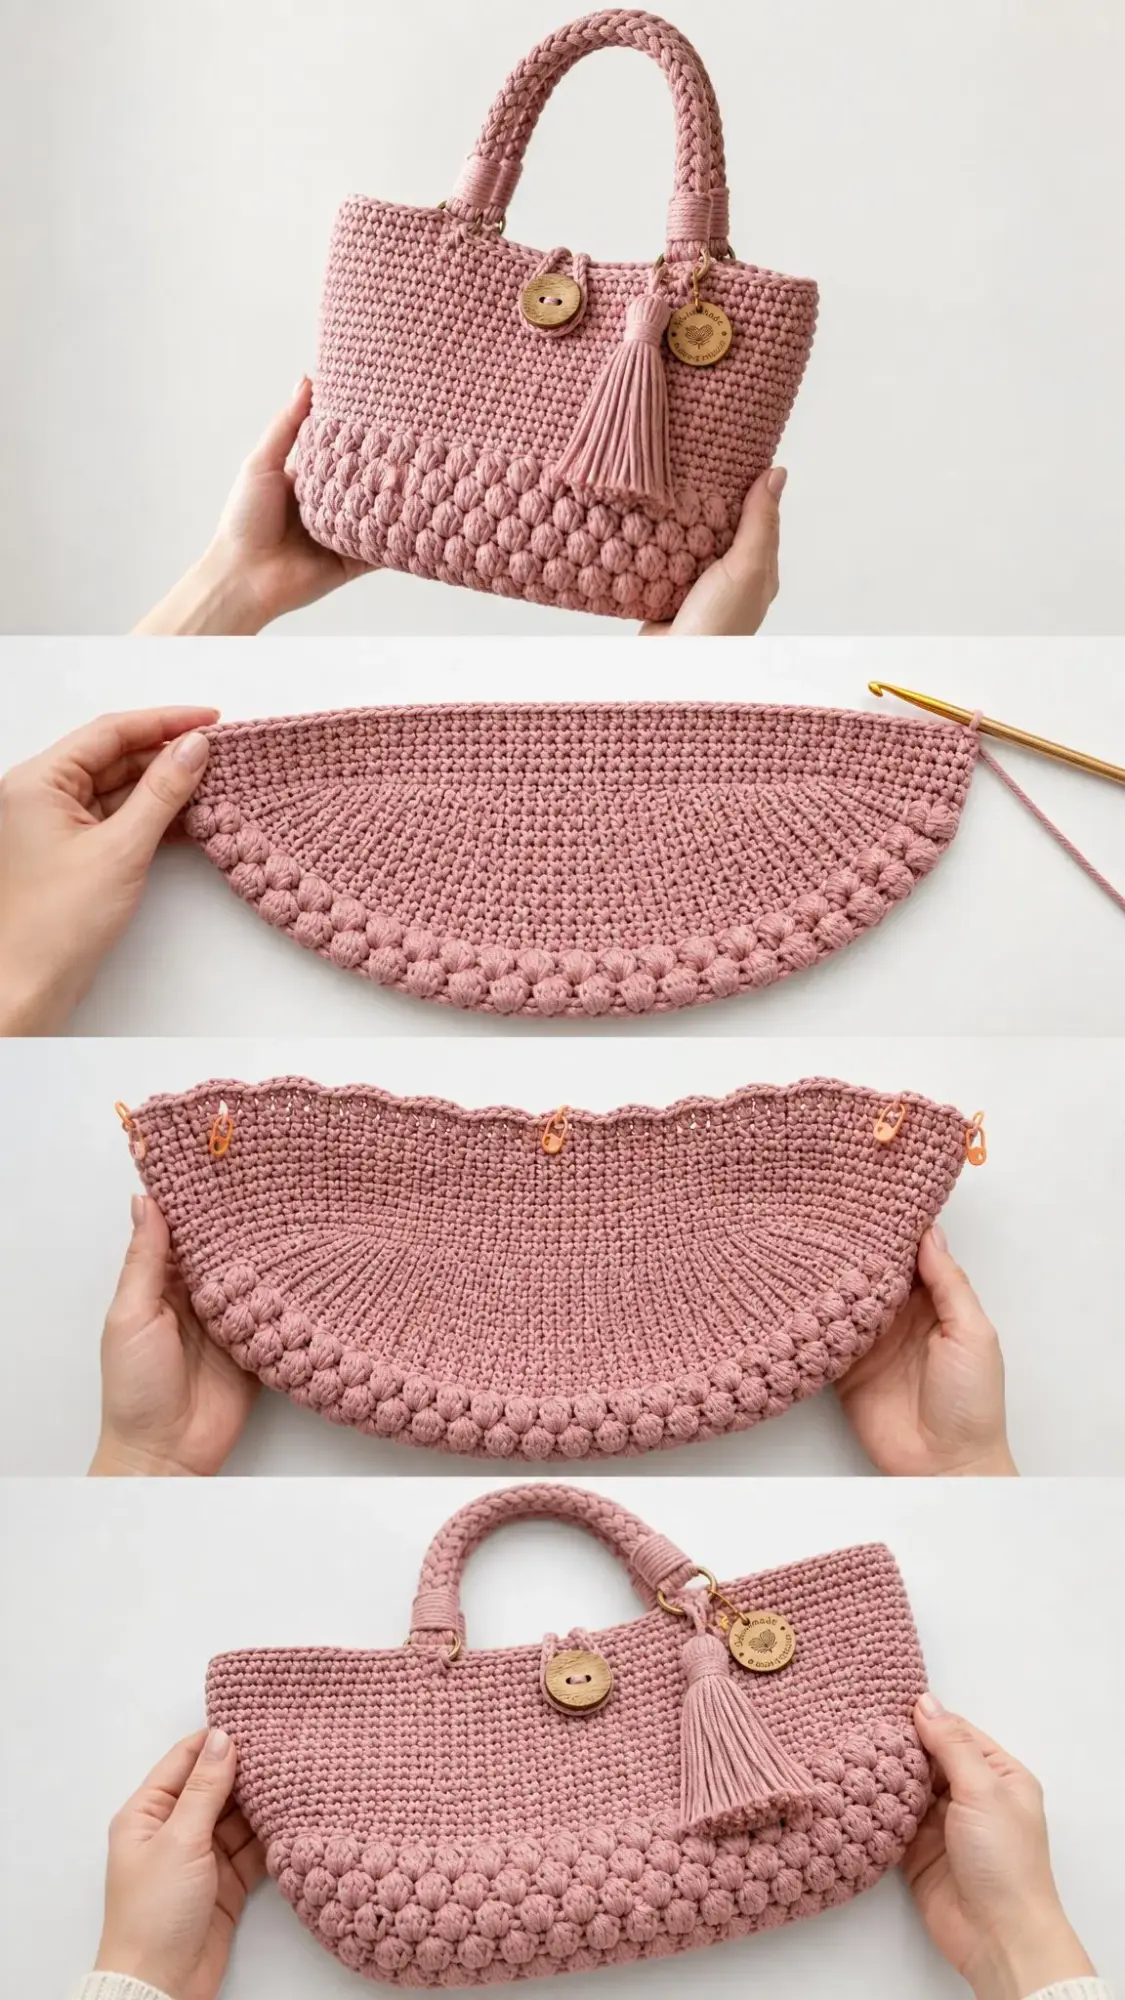
Rnd 7: [Sc 1, MB in next st] around. (30 sc & 30 bobbles, 60 sts)
Rnd 8: Sc in each st around. (60 sc)
Rnd 9: [MB in next st, sc 1] around (offsetting bobbles). (30 bobbles & 30 sc, 60 sts)
Rnd 10: Sc in each st around. (60 sc)
Pro tip: Offsetting the bobbles in Round 9 creates that gorgeous staggered pebble texture you see in the photos. It makes such a difference!
Smooth Single Crochet Body
Rnds 11 through 24: Sc in each st around (14 rounds). (60 sc each round)
Rnd 25: Sc in each st around; place a marker at each side, 30 sts apart, to mark handle centers. (60 sc)
If you want a taller tote, add or remove rounds here in pairs to keep the side markers balanced. Each added round raises the bag by about ⅓ inch (0.8 cm).
Upper Edge
Rnd 26: Sc in each st around. (60 sc)
Rnd 27: Sl st loosely in each st around to firm the rim; sl st to join. Fasten off and weave in the end. (60 sl st)
Button Loop
Join cord at the center front, ½ inch below the rim. Ch 9, sl st back into the same area to form a loop sized to your button; fasten off and secure the ends inside. (1 loop)
Test the loop with your button before weaving in the ends completely. You want it snug but not so tight that closing the bag becomes frustrating.
Braided Handles (Make 2)
The handles are easier than they look! Here is how to make them:
1. Cut 6 lengths of cord, each 30 inches (76 cm). Knot together at one end. (6 strands)
2. Group into 3 pairs and braid firmly to a finished length of about 13 inches (33 cm); knot the second end. (2 braids)
3. Thread each braid end through a D-ring, fold back 1½ inches (4 cm), and wrap tightly with matching cord to bind it; secure. (4 wrapped ends)
Attaching the Handles
Sew each D-ring to the inside top edge at your side markers, about 5 inches (13 cm) apart, front and back, so the handles mirror each other.
Reinforce each ring with several passes of cord and weave ends in. This is what will carry the weight of your belongings, so do not skimp here!
Button and Tassel
Button: Sew the wooden button to the center front so it meets the loop when closed. Position it carefully before stitching so everything lines up perfectly.
Tassel: Wrap cord around a 5 inch (13 cm) piece of cardboard 18 to 20 times. Tie a strand through the top loops, slide off the cardboard, bind ¾ inch (2 cm) below the top with more cord, and trim the ends even.
Hang the tassel (and optional wooden charm) from one D-ring with a short cord loop. This finishing touch adds so much personality!
Finishing Your Crochet Tote Bag
Almost done! Here is how to give your tote that professional finish:
Customization Ideas
Want to make this pattern your own? Here are some ideas:
Caring for Your Tote
Your handmade tote will last for years with proper care:
Final Thoughts on the Blush Pink Tassel Tote Crochet Pattern
I hope you love making this tote as much as I loved designing it! The combination of textures, the satisfying heft of cotton cord, and those gorgeous braided handles make this a project you will be proud to carry everywhere.
This crochet tote bag pattern is perfect for anyone ready to level up from basic projects without diving into anything too intimidating. The bobble stitch adds visual interest without complicated techniques, and working in the round means no seaming at the end.
Thank you so much for choosing this pattern! I would absolutely love to see your finished totes. Tag me on Instagram or share in the comments below. There is nothing better than seeing these designs come to life in different colors and yarns.
If this pattern brought you joy, save it to your Pinterest boards so you can find it easily when you are ready to make another one (or three). And please drop a comment letting me know how your tote turned out. Happy hooking!
You Might Also Like
- Terracotta Desert Shell Purse Free Crochet Pattern
- Ocean Wave Hexagon Throw Free Crochet Pattern
- Lavender Butterfly Baby Dress Free Crochet Pattern
- Pink Rose Garden Crochet Vase Free Crochet Pattern