
This structured tote bag features 18 three-dimensional African Flower motifs arranged in a checkerboard grid. The raised petal centers pop against alternating cream and coral backgrounds. Bamboo handles and brass hardware give it a polished finish.
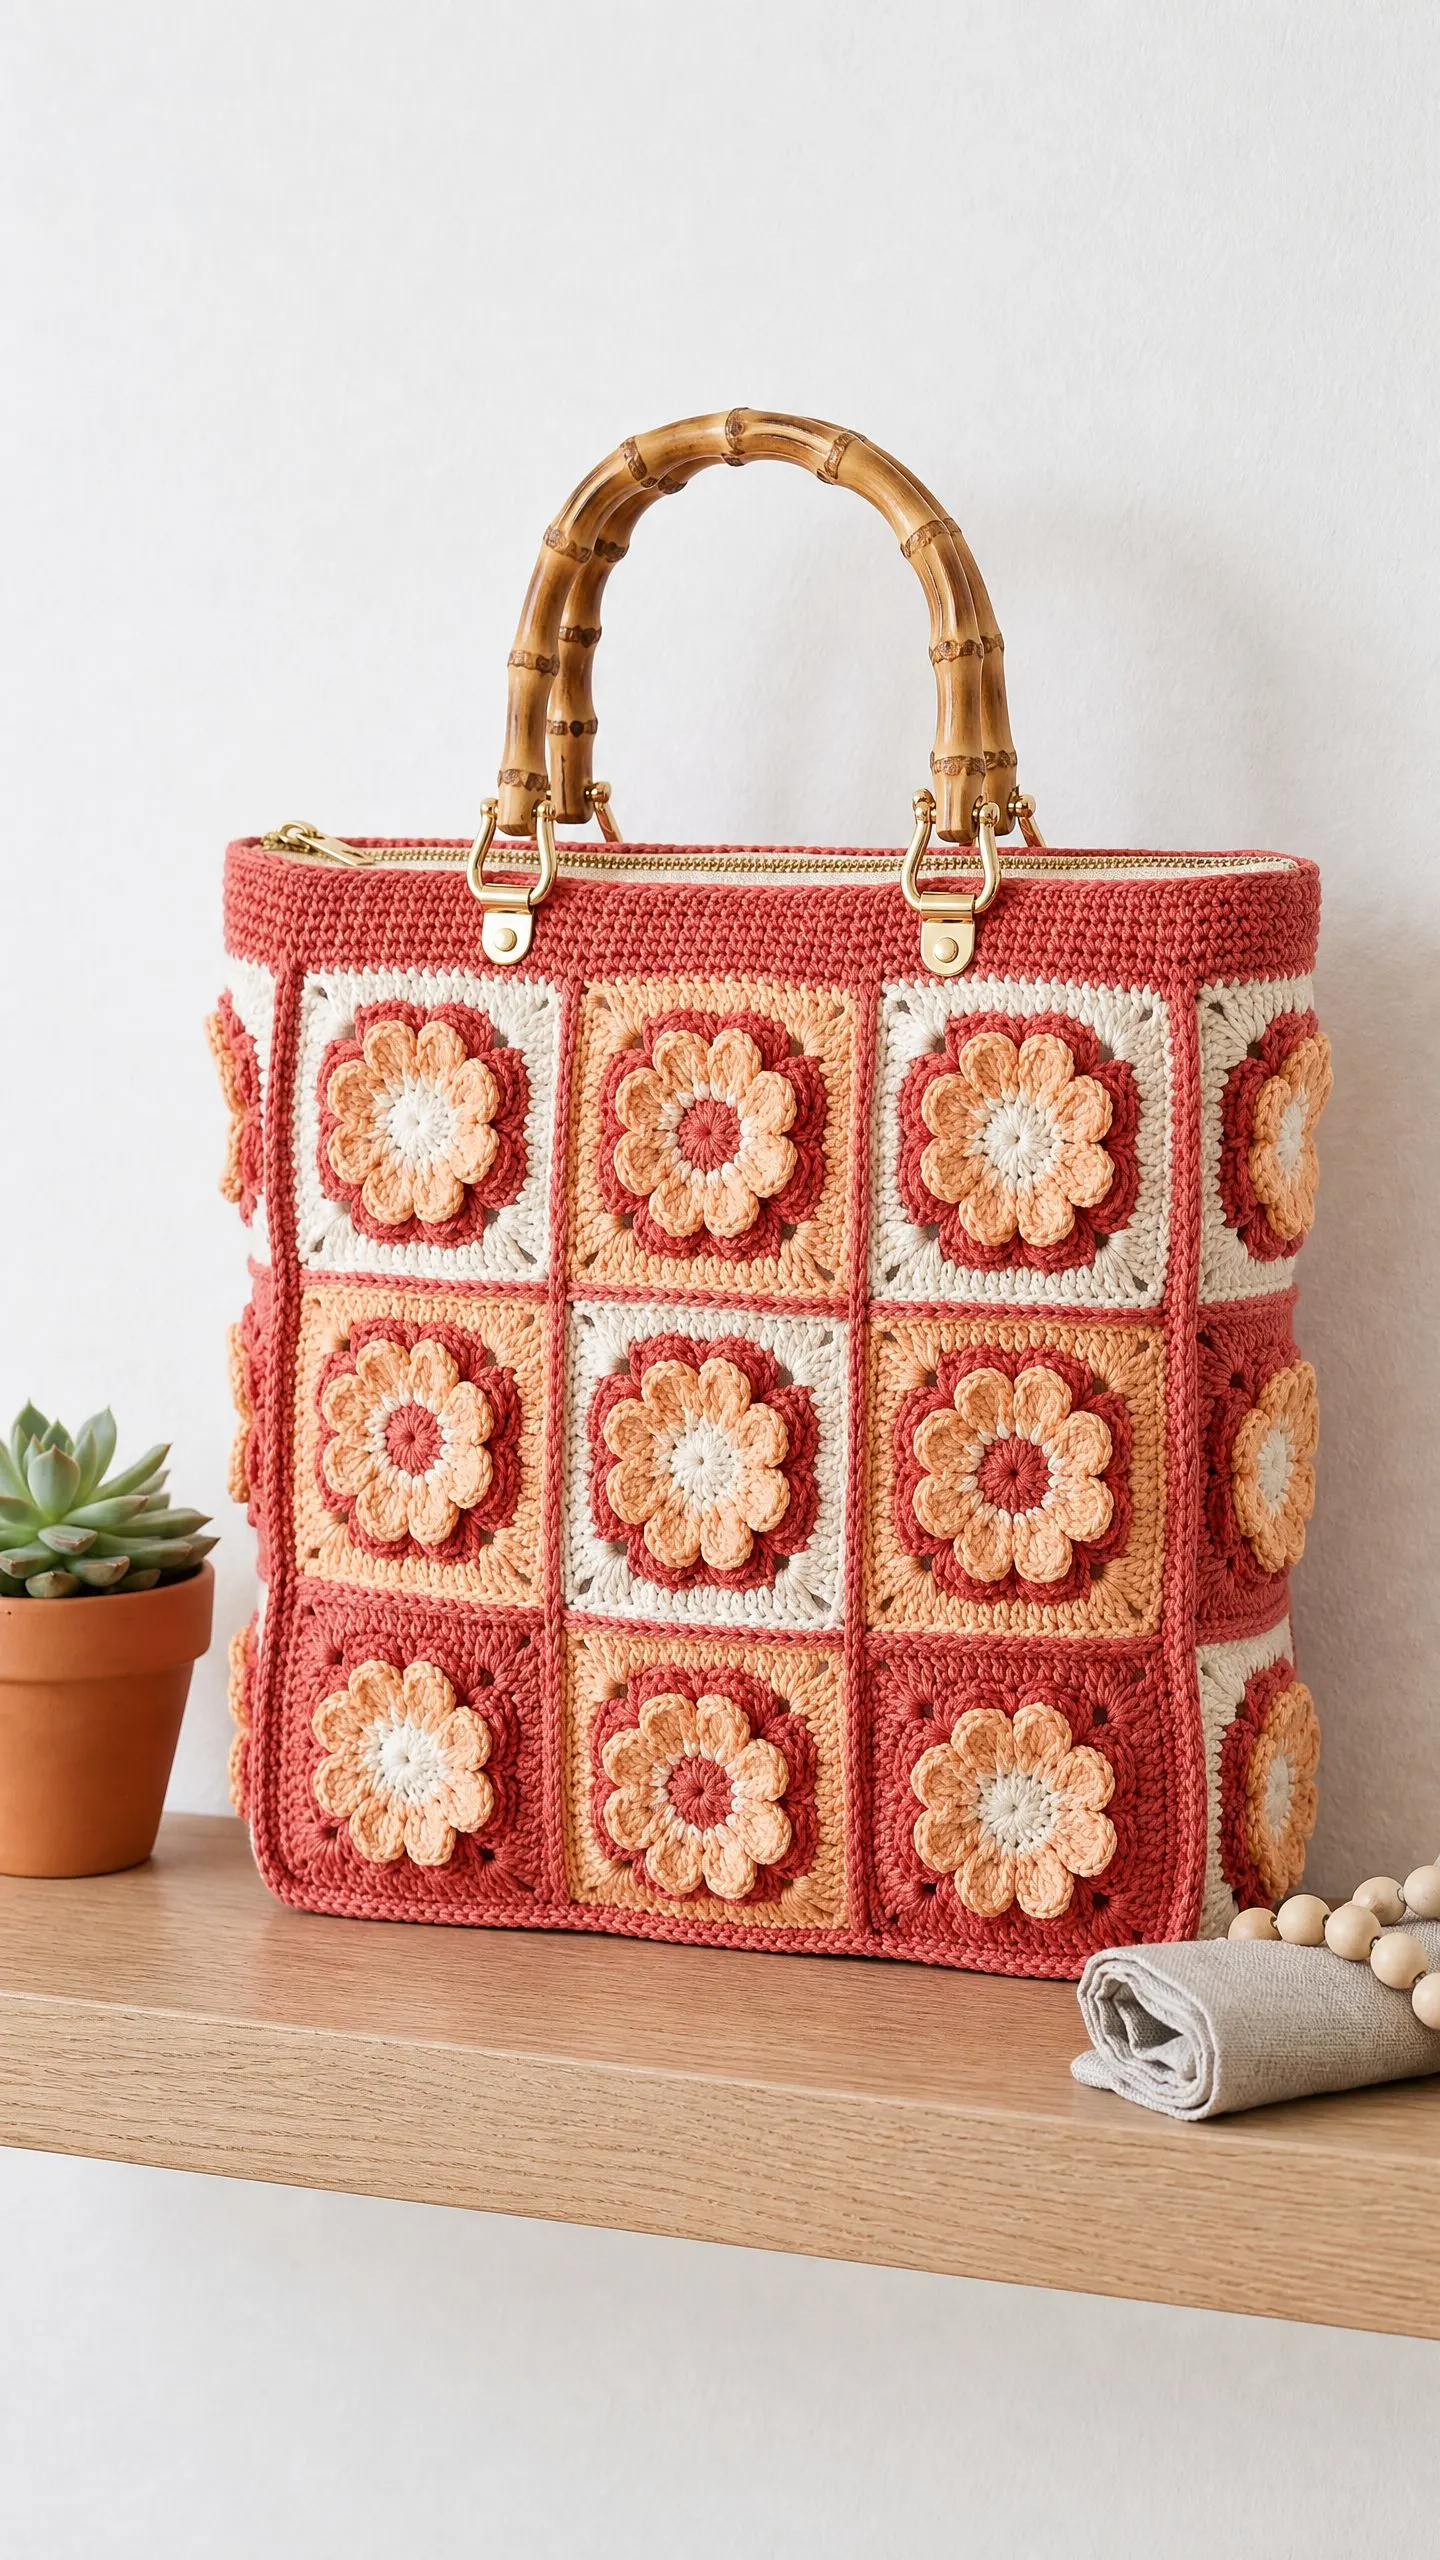
If you have been wanting to try the African Flower stitch but felt intimidated, this bag is your perfect excuse to learn. The motifs work up quickly once you get the rhythm. And the color changes keep things interesting from start to finish.
The finished bag measures 13.5 inches wide by 12 inches tall with a 3.5 inch gusset. It is roomy enough for everyday essentials and sturdy enough for market runs or beach trips. Let me walk you through everything you need to know.
Why You Will Love This African Flower Tote Crochet Pattern
The construction is simpler than it looks. You make 18 identical square motifs, join them into two flat panels, add a gusset strip for depth, and finish with a zipper and handles. Breaking a big project into small repeatable pieces makes the whole thing feel manageable.
The color palette moves through dusty coral, warm peach, cream, and soft terracotta. These warm sunset tones work beautifully together and look stunning against the natural bamboo handles. You can absolutely swap in your own colors if you prefer something different.
This pattern sits at an intermediate to advanced skill level. You should be comfortable working in joined rounds, changing colors frequently, and reading stitch counts carefully. If you have made basic granny squares before, you are ready to tackle the raised petal technique with a little practice.
Materials You Will Need
Yarn (DK weight, CYCA 3):
Hook: US size E-4 (3.5 mm) crochet hook
Notions:
Recommended Yarn Brands:
Paintbox Yarns Simply DK works wonderfully here. It has excellent stitch definition, washes well, and comes in perfect shade matches for this coral and peach palette.
Drops Safran or Lion Brand 24/7 Cotton are great alternatives if you prefer cotton. The mercerized finish gives a subtle sheen that enhances the warm tones, and cotton holds its shape better under weight than acrylic.
Avoid yarns with heavy halo like mohair blends. The fuzzy fibers will obscure your beautiful raised petals.
Gauge (Very Important)
One completed African Flower motif measures 4.25 inches by 4.25 inches after light blocking.
In single crochet (sc) for the gusset: 20 sc and 22 rows equals 4 inches.
Gauge matters a lot here. Because the bag is assembled from a fixed grid of motifs, even a quarter inch difference per motif adds up to over 2 inches across the full panel. Crochet a complete sample motif and block it before starting all 18 motifs. Adjust your hook size up or down as needed.
Abbreviations and Stitch Definitions
Let me explain every stitch you will encounter in this pattern.
ch = chain: Wrap yarn over hook, pull through loop on hook.
sl st = slip stitch: Insert hook, yarn over, pull through stitch and loop on hook in one motion.
sc = single crochet: Insert hook, yarn over, pull up a loop (2 loops on hook), yarn over, pull through both loops.
dc = double crochet: Yarn over, insert hook, yarn over, pull up a loop (3 loops), yarn over, pull through 2 loops, yarn over, pull through remaining 2 loops.
MR = magic ring: An adjustable loop that closes tightly at the center of a motif.
sk = skip: Pass over the indicated stitch without working into it.
sp = space: The gap created by a chain between stitches.
RS = right side: The front of your work, the side that faces outward.
WS = wrong side: The back of your work, the side that faces inward.
Special Techniques
3D African Flower Petal (Raised Petal)
This stitch creates the sculptural flower center that makes these motifs so gorgeous. The petal sits proud of the background fabric by working into a skipped stitch from a previous round.
Step 1: Identify the unworked sc from Round 2 that corresponds to the petal position.
Step 2: Yarn over, insert hook into that sc from front to back.
Step 3: Yarn over, pull up a loop to double crochet height. You now have 3 loops on hook.
Step 4: Yarn over, pull through 2 loops. You now have 2 loops on hook.
Step 5: Yarn over, insert hook into the SAME stitch again.
Step 6: Yarn over, pull up a loop to double crochet height. You now have 4 loops on hook.
Step 7: Yarn over, pull through 2 loops. You now have 3 loops on hook.
Step 8: Yarn over, pull through all 3 remaining loops. One raised petal complete.
The key is pulling your loops up to a consistent height. If you work too loosely, the petal will look flat instead of raised. Practice on a swatch motif before starting the bag.
Flat Join (Join As You Go)
This joining method creates an almost invisible seam on the right side of your work.
Step 1: Hold two completed motifs with wrong sides facing together.
Step 2: With Color A, insert hook through the corresponding stitches of both motifs at once.
Step 3: Slip stitch through both layers.
Step 4: Continue slip stitching across the entire shared edge.
If your join puckers, work more loosely. If it gaps, work more firmly.
Standing Single Crochet
This technique lets you join a new color without a visible starting chain.
Step 1: Make a slip knot in the new color and place it on your hook.
Step 2: Insert hook into the designated stitch.
Step 3: Yarn over, pull up a loop. Two loops on hook.
Step 4: Yarn over, pull through both loops. One standing sc complete.
African Flower Motif Instructions
You will make 18 motifs total: 10 Type 1 (cream background) and 8 Type 2 (coral background).
Motif Type 1 (Cream Background, Peach Petals)
Make 10 of these motifs.
Color sequence: Center in Color D (terracotta), Petals in Color B (peach), Background in Color C (cream), Border in Color A (coral).
Round 1 (Color D): Make a magic ring. Ch 1. Work 8 sc into the ring. Join with sl st to first sc. Pull tail to close ring. (8 sc)
Round 2 (Color B): Join Color B with standing sc in any sc. Work 1 sc in same st. Work 2 sc in each remaining sc around. Join with sl st to first sc. (16 sc)
Round 3 (Color B): Ch 1. Work 1 sc in first sc. Skip next sc. Work 1 sc in next sc. Skip next sc. Continue alternating around. Join with sl st to first sc. (8 sc worked, 8 sc skipped)
Round 4 (Color B): Ch 1. Work 1 sc in first sc from Round 3. Work 1 Raised Petal into the skipped sc from Round 2. Work 1 sc in next sc from Round 3. Work 1 Raised Petal into next skipped sc. Continue around. Join with sl st to first sc. (8 sc, 8 Raised Petals)
Round 5 (Color C): Join Color C with standing sc in any sc from Round 4. Ch 2 (counts as first dc), work 2 dc in same sc (3 dc shell made). Ch 1. Work 3 dc in next sc. Ch 1. Repeat around all 8 sc. Ch 1. Join with sl st to top of ch 2. (8 shells of 3 dc each, 8 ch 1 spaces)
Round 6 (Color C): Sl st into next 2 dc and into ch 1 sp. This is your first corner.
In corner sp: work 3 dc, ch 2, 3 dc.
Ch 1.
In next ch 1 sp (side): work 3 dc.
Ch 1.
In next ch 1 sp (corner): work 3 dc, ch 2, 3 dc.
Ch 1.
In next ch 1 sp (side): work 3 dc.
Ch 1.
In next ch 1 sp (corner): work 3 dc, ch 2, 3 dc.
Ch 1.
In next ch 1 sp (side): work 3 dc.
Ch 1.
In next ch 1 sp (corner): work 3 dc, ch 2, 3 dc.
Ch 1.
In last ch 1 sp (side): work 3 dc.
Ch 1.
Join with sl st to top of beginning ch 3. (4 corner shells, 4 side shells, 36 dc total)
Round 7 (Color A): Join Color A with standing sc in any corner ch 2 sp. Work 2 more sc in same corner sp (3 sc corner). Work 1 sc in each dc and 1 sc in each ch 1 sp around, working 3 sc in each corner ch 2 sp. Join with sl st to first sc. Fasten off, leaving an 8 inch tail. (56 sc total, with 3 sc at each corner and 11 sc per side)
Motif Type 1 complete. Should measure 4.25 inches square after blocking.
Motif Type 2 (Coral Background, Mixed Petals)
Make 8 of these motifs.
Color sequence: Center in Color D, Petals in Color A, Background in Color A, Border in Color A.
Work Rounds 1 through 4 substituting:
Work Rounds 5, 6, and 7 using Color A throughout, following the same stitch instructions as Type 1.
Motif Type 2 complete.
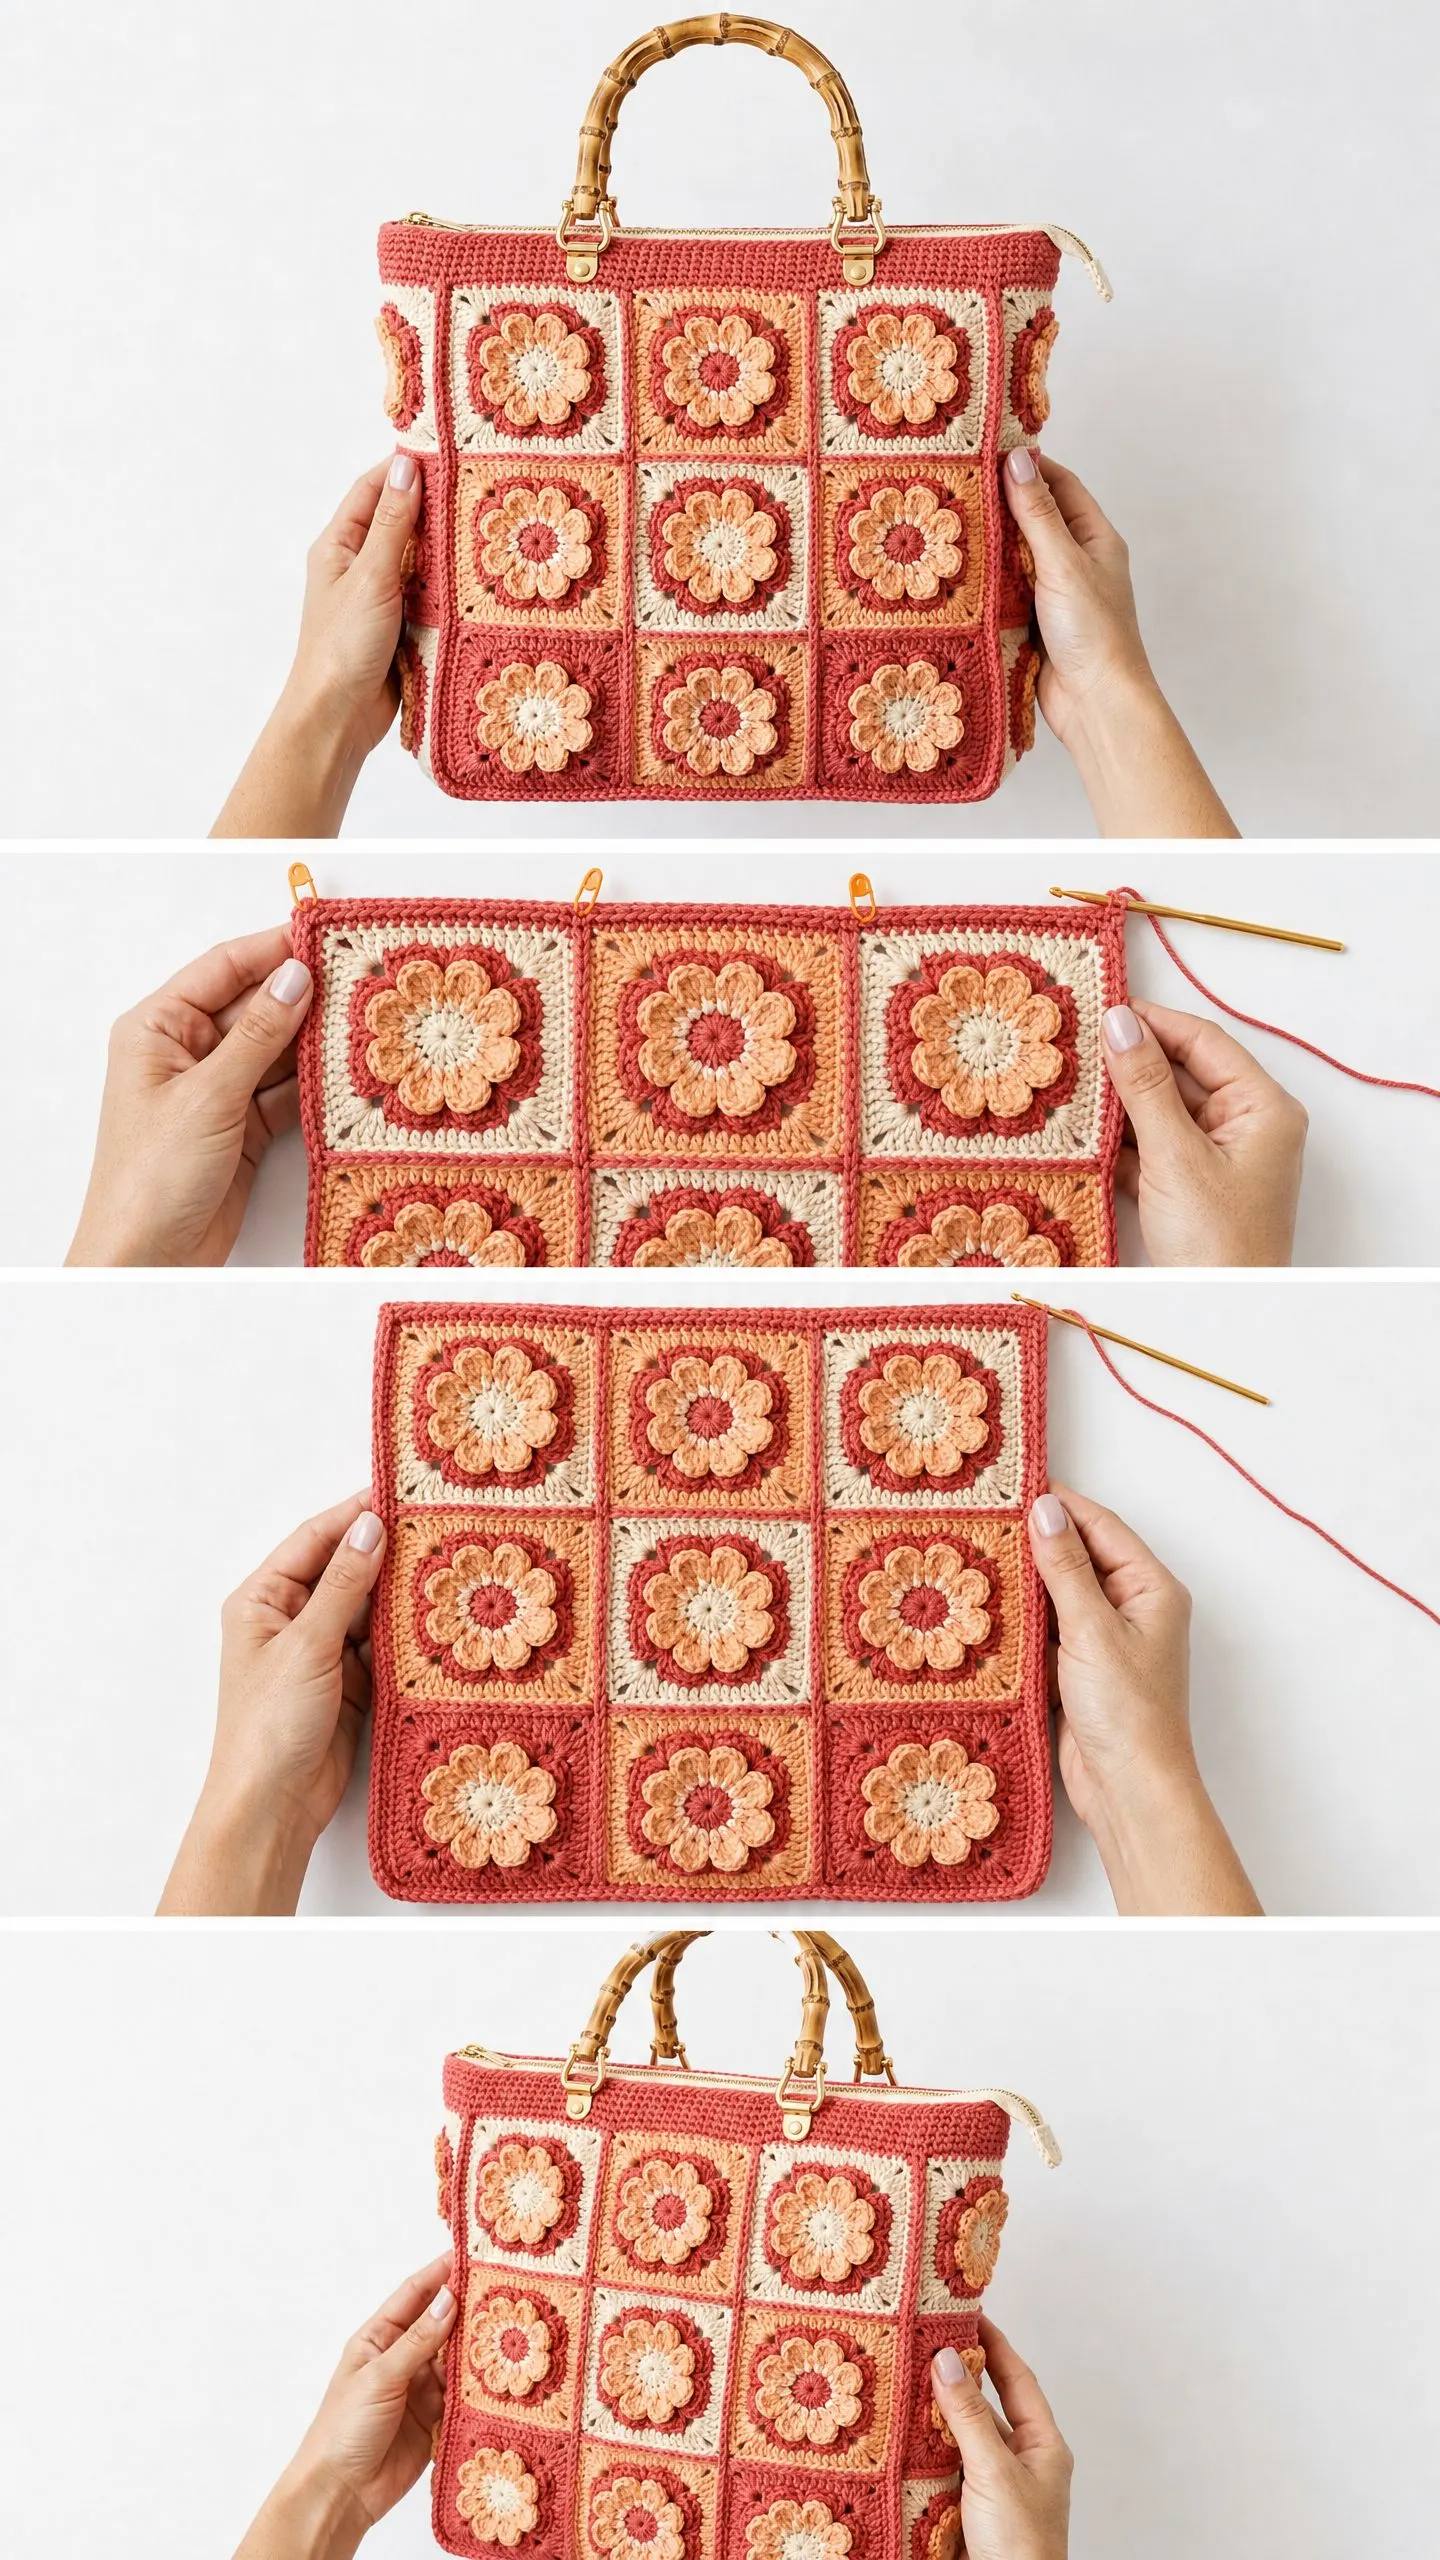
Assembling the Front Panel
Arrange 9 motifs in a 3 by 3 grid:
Row 1: Type 1, Type 2, Type 1
Row 2: Type 2, Type 1, Type 2
Row 3: Type 1, Type 2, Type 1
This creates the alternating checkerboard pattern visible in the finished bag.
Step 1: Join Row 1 motifs horizontally using the Flat Join method with Color A. Work 13 sl sts across each shared edge (11 side stitches plus 2 corner stitches).
Step 2: Repeat for Row 2 and Row 3.
Step 3: Join the three rows vertically. Hold Row 1 strip and Row 2 strip with wrong sides together. Flat join across the full bottom edge of Row 1 to the top edge of Row 2.
Step 4: Join Row 2 to Row 3 the same way.
Front Panel Border
Round 1 (Color A): Join Color A with standing sc at top right corner. Work 3 sc in corner. Along each side edge, work 1 sc in each sc (11 sc per motif edge, plus 1 sc at each interior junction point). Work 3 sc at each outer corner. Join with sl st to first sc. (152 sc)
Round 2 (Color A): Ch 1. Work 1 sc in each sc around, working 3 sc in each corner sc. Join with sl st to first sc. Fasten off. (160 sc)
Front panel should measure approximately 13.5 inches square.
Repeat the entire assembly process for the Back Panel using the remaining 9 motifs in the same arrangement.
Gusset Strip
The gusset provides the bag’s 3.5 inch depth.
Foundation Chain (Color A): Ch 16.
Row 1: Sc in second ch from hook and in each ch across. Turn. (15 sc)
Row 2: Ch 1. Sc in each sc across. Turn. (15 sc)
Repeat Row 2 until the strip measures approximately 38 inches long (about 210 rows total).
Gusset Border (Color A): Without turning, work 1 sc evenly along each long edge (1 sc per row end), 1 sc in each sc across short ends, and 3 sc at each corner. Join with sl st to first sc. Fasten off. (458 sc around perimeter)
The finished gusset should measure 3.5 inches wide by 38 inches long.
Attaching the Gusset to Panels
Pin the gusset to the three outer sides of the front panel (bottom and both side edges). Leave the top edge open for the bag opening.
With Color A, work a Flat Join slip stitch seam across the bottom edge, then up the right side to the top opening. Return to the bottom and join up the left side to the top opening.
Attach the back panel to the other long edge of the gusset in the same manner, matching corners carefully.
Finishing
Zipper Installation: Hand sew the 14 inch brass zipper to the inside of the top opening. Use a sharp needle and strong thread, stitching through the top border stitches.
Handle Attachment: Cut two fabric tabs from your coordinating cotton fabric. Thread each tab through a D ring and fold in half. Sew the tabs securely to the top corners of the bag, stitching through the border fabric. Attach the bamboo handles to the D rings using the swivel snap hooks (or sew them directly if you prefer fixed handles).
Blocking: Give the finished bag a final light blocking to smooth all the seams and help the motifs lay flat.
Time and Skill Considerations
This crochet tutorial takes approximately 20 to 28 hours for an experienced crocheter. Each motif takes about 25 to 35 minutes. If this is your first time working raised petals, budget extra time for practice and expect 30 to 40 hours total.
The step by step construction keeps things organized. Focus on making beautiful motifs first. The joining and finishing come together quickly once all your squares are ready.
Tips for Success
Block each motif individually before joining. Pin to the gauge measurement and mist lightly with water. This makes joining much easier and produces cleaner seams.
When changing colors at the end of a round, work the final yarn over of your last stitch in the new color before closing with a slip stitch. This prevents a visible color jog.
If your flat join puckers or gaps, adjust your tension. A perfect join should look nearly invisible on the right side.
Take breaks between motifs if you need to. This is a larger project, and steady progress beats burnout every time.
I hope you absolutely love making this Coral Sunset African Flower Tote. The raised petals and warm color palette make it such a satisfying project, and the finished bag is genuinely useful. Thank you for trusting me to guide you through it.
If you make this tote, I would love to see it! Tag me on Instagram or share a photo in our Facebook group. Seeing your finished projects honestly makes my whole day.
Save this pattern to your Pinterest boards so you can find it when you are ready to start. And if you have any questions along the way, drop a comment below. I am always happy to help!
You Might Also Like
- Ocean Breeze Granny Tote Bag Free Crochet Pattern
- Pink Valentine Highland Cow Amigurumi Free Crochet Pattern
- Dusty Rose Floral Granny Square Tote Free Crochet Pattern
- Lavender Butterfly Baby Dress Free Crochet Pattern