
A handmade bag can carry so much more than your everyday essentials. It holds the warmth of handcrafted work, the cheerfulness of a sunny design, and the satisfaction of making something truly useful with your own two hands.
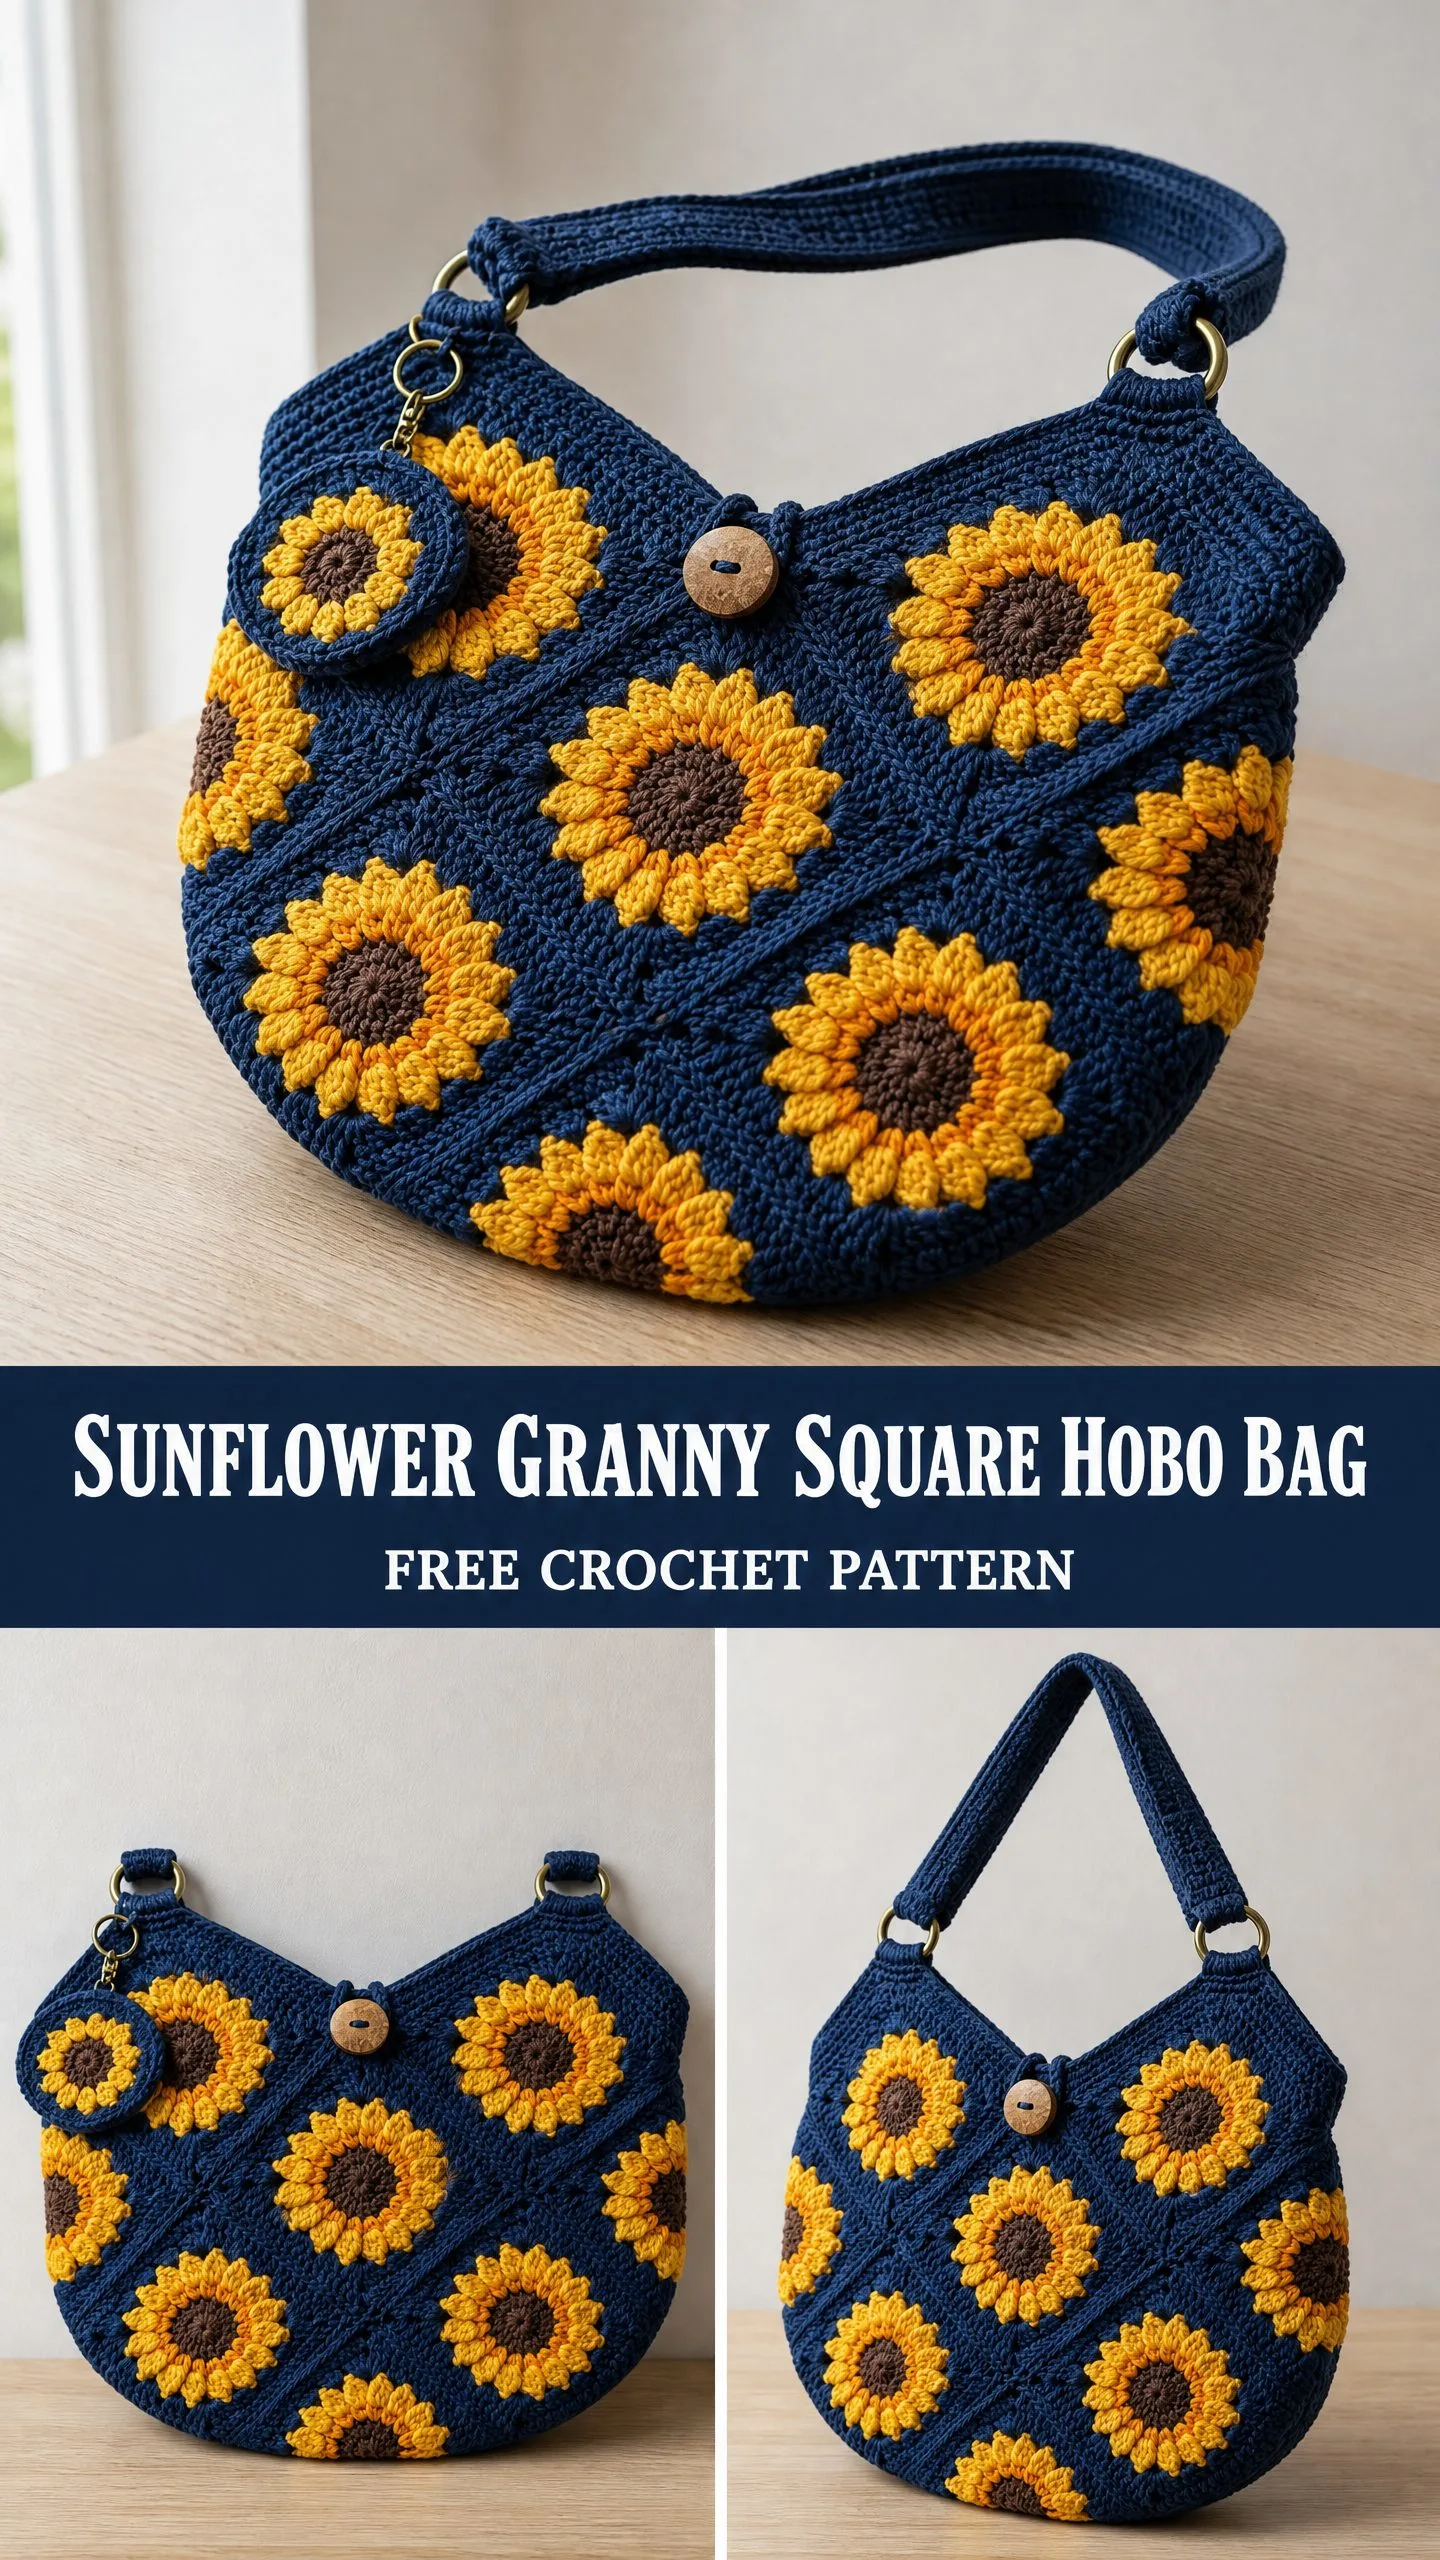
This sunflower granny square hobo bag combines classic granny square construction with raised floral motifs that practically glow against a deep navy background. The finished bag works up to a generous 14 inches wide by 12 inches tall. That is plenty of room for your wallet, phone, keys, a small project, and whatever else you need for a day out.
Whether you are looking for a thoughtful handmade gift, a market bag with personality, or a summer accessory that turns heads, this crochet tutorial walks you through every stitch. The project uses beginner-friendly techniques like the magic circle, double crochet, and granny square joining. If you have made a few granny squares before and feel comfortable changing colors, you are ready for this one.
Why You Will Love This Crochet Pattern
This bag hits all the right notes for an intermediate project. You get the meditative rhythm of making twelve identical squares, the satisfaction of watching them come together into something three-dimensional, and a finished piece that actually gets used.
The sunflower motifs feature raised puff stitch centers in dark brown surrounded by golden yellow petals. Against the navy blue background, the effect is striking without being complicated. Each square takes about 45 minutes to an hour once you get into the flow.
The hobo silhouette gives the bag a relaxed, casual shape that drapes nicely over your shoulder. A flat strap threads through two D-rings at the top corners, and a wooden toggle button keeps everything secure. There is even a bonus mini sunflower coin purse that clips to one of the D-rings. It is the kind of project that makes people ask where you bought it, and then their eyes go wide when you say you made it yourself.
Materials You Will Need
Gather these supplies before you start:
Yarn (Worsted Weight):
Hook: US size H-8 / 5.0 mm crochet hook
Notions:
Yarn Suggestions
Lion Brand Pound of Love works beautifully here. The stitch definition is excellent for granny squares, and the high yardage per skein keeps costs reasonable.
Paintbox Yarns Simply DK used doubled creates a slightly softer fabric with gorgeous color saturation. Look for "Daffodil Yellow" and "Sailor Blue" for perfect color matches.
WeCrochet Wool of the Andes Worsted produces a more structured bag that holds its shape without a liner. It blocks like a dream but requires hand washing.
Any smooth worsted weight yarn that achieves gauge will work. Avoid fluffy or highly textured yarns since they will obscure the sunflower details.
Gauge
With H-8 / 5.0 mm hook in double crochet: 14 dc x 8 rows = 4 inches x 4 inches (10 cm x 10 cm)
One completed and blocked sunflower granny square = 4.5 inches x 4.5 inches (11.5 cm x 11.5 cm)
Gauge matters here. If your squares come out smaller, go up one hook size. If larger, go down one hook size. Since the bag is made from joined squares, your finished dimensions depend entirely on individual square gauge.
Finished Dimensions
Abbreviations (US Terms)
Before we dive into the step by step instructions, here are all the abbreviations you will encounter:
Special Stitches Explained
Sunflower Petal Cluster (SPC)
This stitch creates one raised petal. Insert hook into the designated stitch or chain space, yarn over and pull up a loop to the height of a treble crochet (approximately 0.75 inch), yarn over and draw through 2 loops, yarn over and draw through remaining 2 loops. This produces a long, slightly elevated double crochet that mimics a sunflower petal. In this pattern, SPC is always worked as a group of 3 into the same space to form one full petal.
Puff Stitch Center (PSC)
This creates the dimensional brown sunflower center. Insert hook into stitch, yarn over and pull up a loop. Repeat (yarn over, insert hook into same stitch, yarn over, pull up a loop) twice more until you have 6 loops on hook. Yarn over and draw through all 6 loops, then chain 1 to close. The result is a small raised bump.
Standing Double Crochet (StDC)
This lets you begin rounds cleanly without a starting chain. Make a slip knot and place it on the hook. Yarn over, insert hook into the designated stitch or space, yarn over and draw up a loop (3 loops on hook), yarn over and draw through 2 loops, yarn over and draw through remaining 2 loops. This counts as a dc.
Sunflower Granny Square Pattern (Make 12)
Each square is worked in 5 rounds. Take your time with the first couple of squares until the rhythm clicks.
Round 1 (Color C, Dark Brown)
Begin with MC. Ch 1 (does not count as stitch throughout). Work 12 PSC into the ring. After each PSC, ch 1. Sl st to first PSC to join. Pull ring closed. (12 PSC, 12 ch-1 spaces)
Round 2 (Color B, Golden Yellow)
Sl st into first ch-1 sp. Ch 1. Work 1 sc into same ch-1 sp. Work 3 SPC into next ch-1 sp (petal made), sc into next ch-1 sp. Rep from 5 more times. Work 3 SPC into last ch-1 sp, sl st to first sc to join. Fasten off Color B. (6 sc, 6 petal groups of 3 SPC each = 24 SPC total, forming 6 petals)
Round 3 (Color B, Golden Yellow)
This round converts your circular petal ring into a square.
Join Color B with StDC in any sc between petals. Ch 2. Dc in same sc (this creates first corner). Sk 3 SPC, sc in next sc between petals, sk 3 SPC, (dc, ch 2, dc) in next sc between petals (corner made). Rep from 2 more times. Sk 3 SPC, sc in next sc between petals, sk 3 SPC. Sl st to top of StDC to join. Fasten off Color B. (4 corners each with dc-ch2-dc, 4 sc on sides = 12 dc, 4 sc, 4 ch-2 corner spaces)
Round 4 (Color A, Navy Blue)
Join Color A with StDC in any corner ch-2 sp. Work (dc, ch 2, dc, dc) in same corner sp. Dc in next dc, dc in next sc, dc in next dc, (dc, dc, ch 2, dc, dc) in next corner ch-2 sp. Rep from 2 more times. Dc in next dc, dc in next sc, dc in next dc. Sl st to top of StDC to join. (36 dc total, 4 ch-2 corner spaces)
Round 5 (Color A, Navy Blue)
Sl st to corner ch-2 sp. Ch 3 (counts as dc). Work (dc, ch 2, dc, dc) in same corner sp. Dc in each of next 7 dc across side, (dc, dc, ch 2, dc, dc) in next corner ch-2 sp. Rep from 2 more times. Dc in each of next 7 dc. Sl st to top of ch-3 to join. Fasten off Color A. (44 dc total, 4 ch-2 corner spaces)
Checkpoint: After blocking, each square should measure 4.5 x 4.5 inches. If any square is off by more than 0.25 inch, re-block with more aggressive pinning or adjust your hook size.
Square Assembly
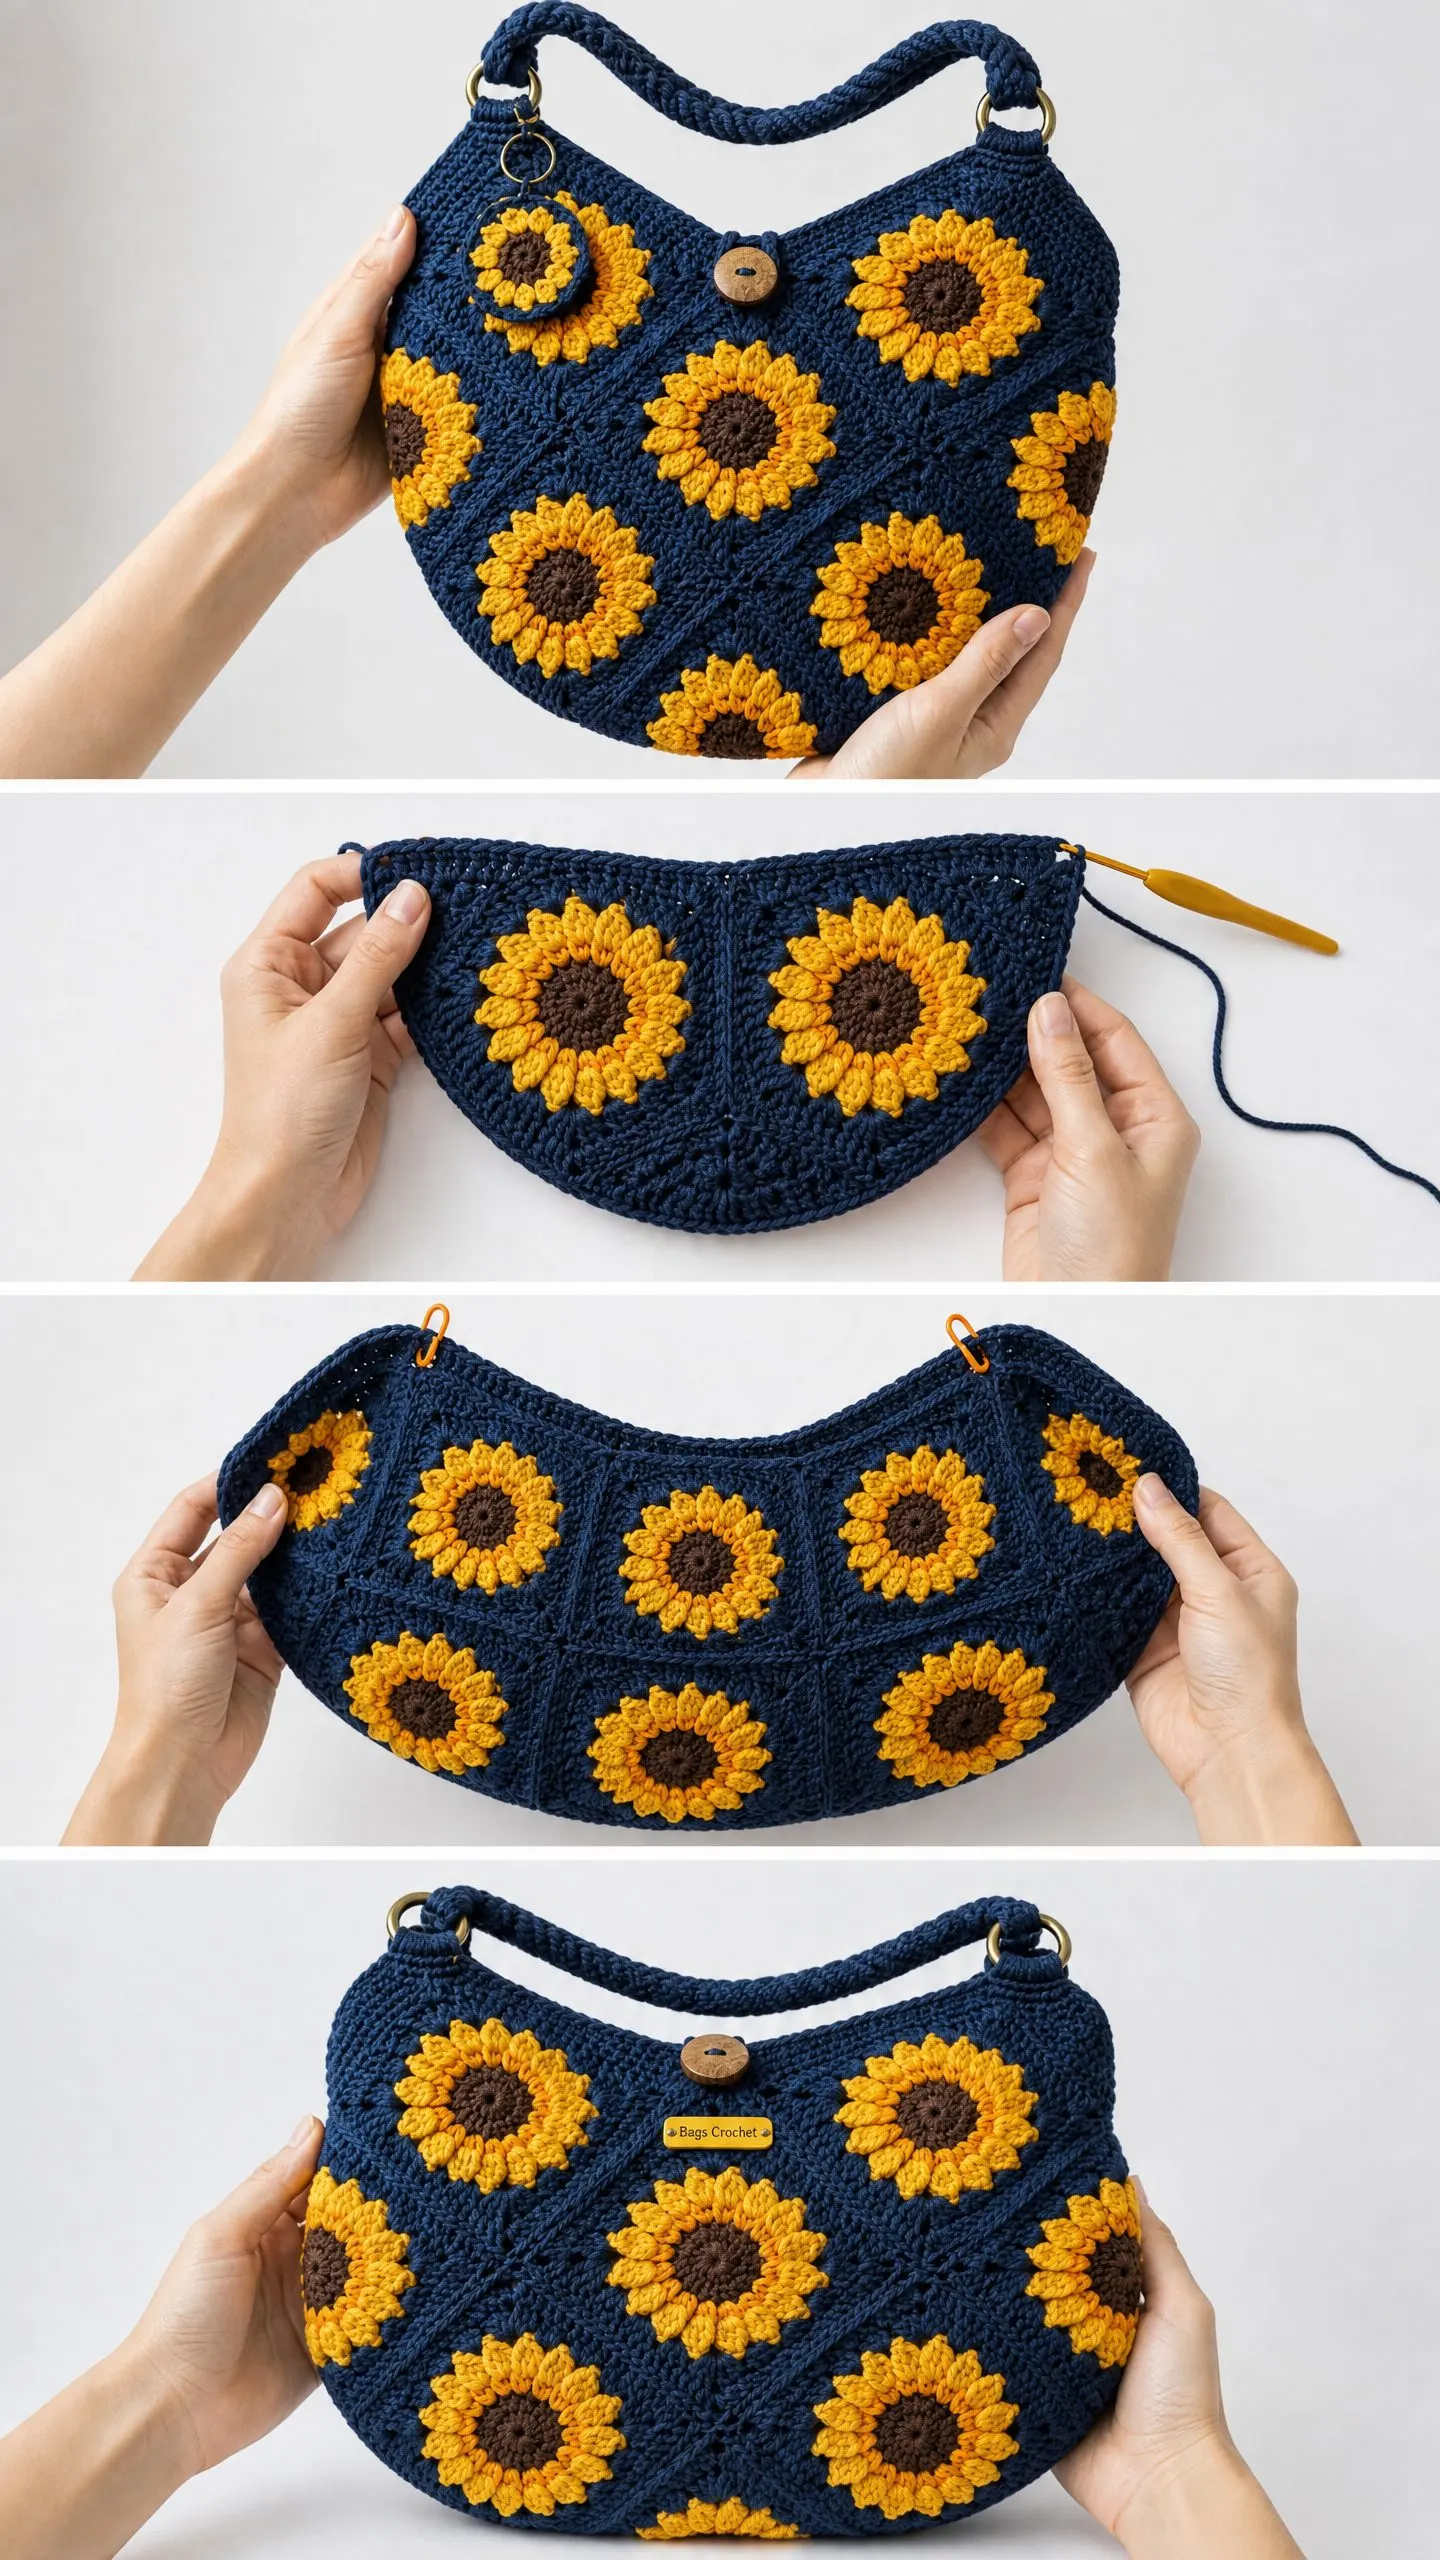
Arrange all 12 squares in a 3-wide by 4-tall grid on a flat surface, right side up:
Horizontal Joins
Place Square 1 and Square 2 with right sides facing up, adjacent edges touching. With Color A and yarn needle, use a flat mattress stitch or whip stitch through the back loops of the outermost round only. Work from top corner to bottom corner, matching stitch for stitch. Keep the seam as flexible as the crocheted fabric. Repeat to join Square 2 to Square 3, then complete Rows B, C, and D.
Vertical Joins
Join Row A to Row B along the entire horizontal seam, matching stitch for stitch. Join Row B to Row C, then Row C to Row D.
After all joins, you have a flat panel measuring approximately 13.5 inches wide by 18 inches tall.
Shaping the Bag Body
Fold the panel in half horizontally so Row A meets Row D. The fold line runs through the middle of the panel. You now have a 13.5-inch wide by 9-inch tall folded piece.
Join the left and right side edges using the same seam method, working through both layers from the fold (bottom) upward to the open top edge.
Creating the Rounded Bottom
At the bottom two corners, pinch the fabric inward about 1.5 inches from each corner and tack with a few overhand stitches using Color A. This creates the characteristic rounded drop-bottom shape. The tacking stitches should be hidden inside the bag.
After shaping, the bag body should measure approximately 14 inches wide at the top and 12 inches tall from the top edge to the lowest point of the curved base.
Bag Body Edging
With Color A, join yarn at the top right corner of the bag opening with a sl st. Work 1 round of sc evenly around the entire top opening edge. Work approximately 1 sc per dc stitch and 1 sc per seam junction. Place a stitch marker approximately 1.5 inches from each top corner to mark D-ring attachment points. Sl st to first sc to join. (Approximately 80 to 84 sc)
Round 2: Sl st in each sc around. Fasten off.
D-Ring Attachment
At each marked position, cut a 12-inch length of Color A. Thread the length through the flat bar of one D-ring. Fold the yarn in half so both ends are even. Using a yarn needle, stitch this folded loop through the adjacent sc stitches of the top edging, going in and out 3 to 4 times to secure. Knot securely on the wrong side and trim. Repeat for the second D-ring.
Strap
With Color A, ch 7.
Row 1: Sc in second ch from hook and in each ch across. Turn. (6 sc)
Row 2: Ch 1, sc in each sc across. Turn. (6 sc)
Repeat Row 2 until strap measures 20 inches total length. Fasten off leaving a 10-inch tail.
Thread one end of the strap through one D-ring, fold the end back 1 inch, and whip stitch the fold securely to the back of the strap. Repeat on the opposite end with the second D-ring.
Button Loop
With Color A, join yarn at the center top edge of the bag opening on the front panel with a sl st. Ch 12. Sl st into the same joining stitch to form a loop. Sl st back along the chain (12 sl sts). Sl st to base of loop. Fasten off.
Test that the wooden button passes through this loop with slight resistance. If too loose, redo with ch 10. If too tight, redo with ch 14.
Sew the wooden button to the back panel at the corresponding center position, approximately 1 inch down from the top edge.
Mini Sunflower Coin Purse
Make 2 circles (front and back):
Round 1 (Color C)
MC. Ch 1. Work 12 PSC into ring. Ch 1 after each PSC. Sl st to first PSC. Pull ring closed. (12 PSC, 12 ch-1 spaces)
Round 2 (Color B)
Sl st into first ch-1 sp. Ch 1. 3 SPC in next ch-1 sp (petal), sc in next ch-1 sp. Rep from around. Sl st to first sc. Fasten off Color B. (6 petals, 6 sc between petals)
Round 3 (Color A)
Join Color A in any sc between petals. Ch 1. Sc in sc, 2 sc over each SPC of next petal (6 sc over 3-SPC petal), sc in next sc. Rep from around. Sl st to first sc. Do not fasten off on the front piece. Fasten off on the back piece. (42 sc)
Hold both circles with wrong sides together. With front circle yarn still attached, work 1 sc through both layers simultaneously around approximately 75% of the circumference (about 32 stitches), leaving roughly 10 stitches open as the coin purse opening. Sl st to first joining sc.
Work 1 round of sl st around the opening edge only through both layers. Fasten off. Attach a key ring or swivel clip through any stitch on the edge, then clip the coin purse to one of the bag’s D-rings.
Care Instructions
For acrylic yarn: Machine wash on a gentle cycle in cold water inside a mesh laundry bag. Tumble dry on low or lay flat to dry.
For wool yarn: Hand wash in cool water with gentle wool wash. Press water out gently, roll in a towel, reshape and lay flat to dry.
For cotton yarn: Machine wash warm on gentle cycle. Lay flat to dry to prevent stretching.
Store your bag stuffed with tissue paper to maintain the hobo silhouette between uses.
Tips for Success
Block your squares before assembly. This step takes patience but makes joining so much easier and gives your finished bag clean lines.
Weave in ends as you go. With twelve squares and multiple color changes, the ends add up fast. Dealing with them after each square keeps the task manageable.
Test your gauge on one complete square before committing to all twelve. It is much easier to adjust your hook size early than to discover sizing issues halfway through.
If you are new to granny squares, practice the sunflower motif once or twice with scrap yarn. The puff stitch center and petal clusters feel unfamiliar at first but become second nature quickly.
I hope you love making this sunflower granny square hobo bag as much as I loved designing it. There is something deeply satisfying about watching those cheerful sunflowers bloom one by one, then seeing them come together into a bag you will actually use every day.
If you make this pattern, I would absolutely love to see your finished bag. Tag me on Instagram or share a photo in our Facebook group. And if this pattern is calling your name but today is not the right time to start, go ahead and pin it to your Pinterest boards so you can find it when you are ready. Drop a comment below if you have questions or just want to say hello. Happy crocheting!
You Might Also Like
- Pink Rose Garden Table Runner Free Crochet Pattern
- Dusty Rose Belted Crochet Romper Free Crochet Pattern
- Boho Rainbow Granny Square Tote Free Crochet Pattern
- Ocean Blue Ombre Crochet Platform Wedge Sandals Pattern