
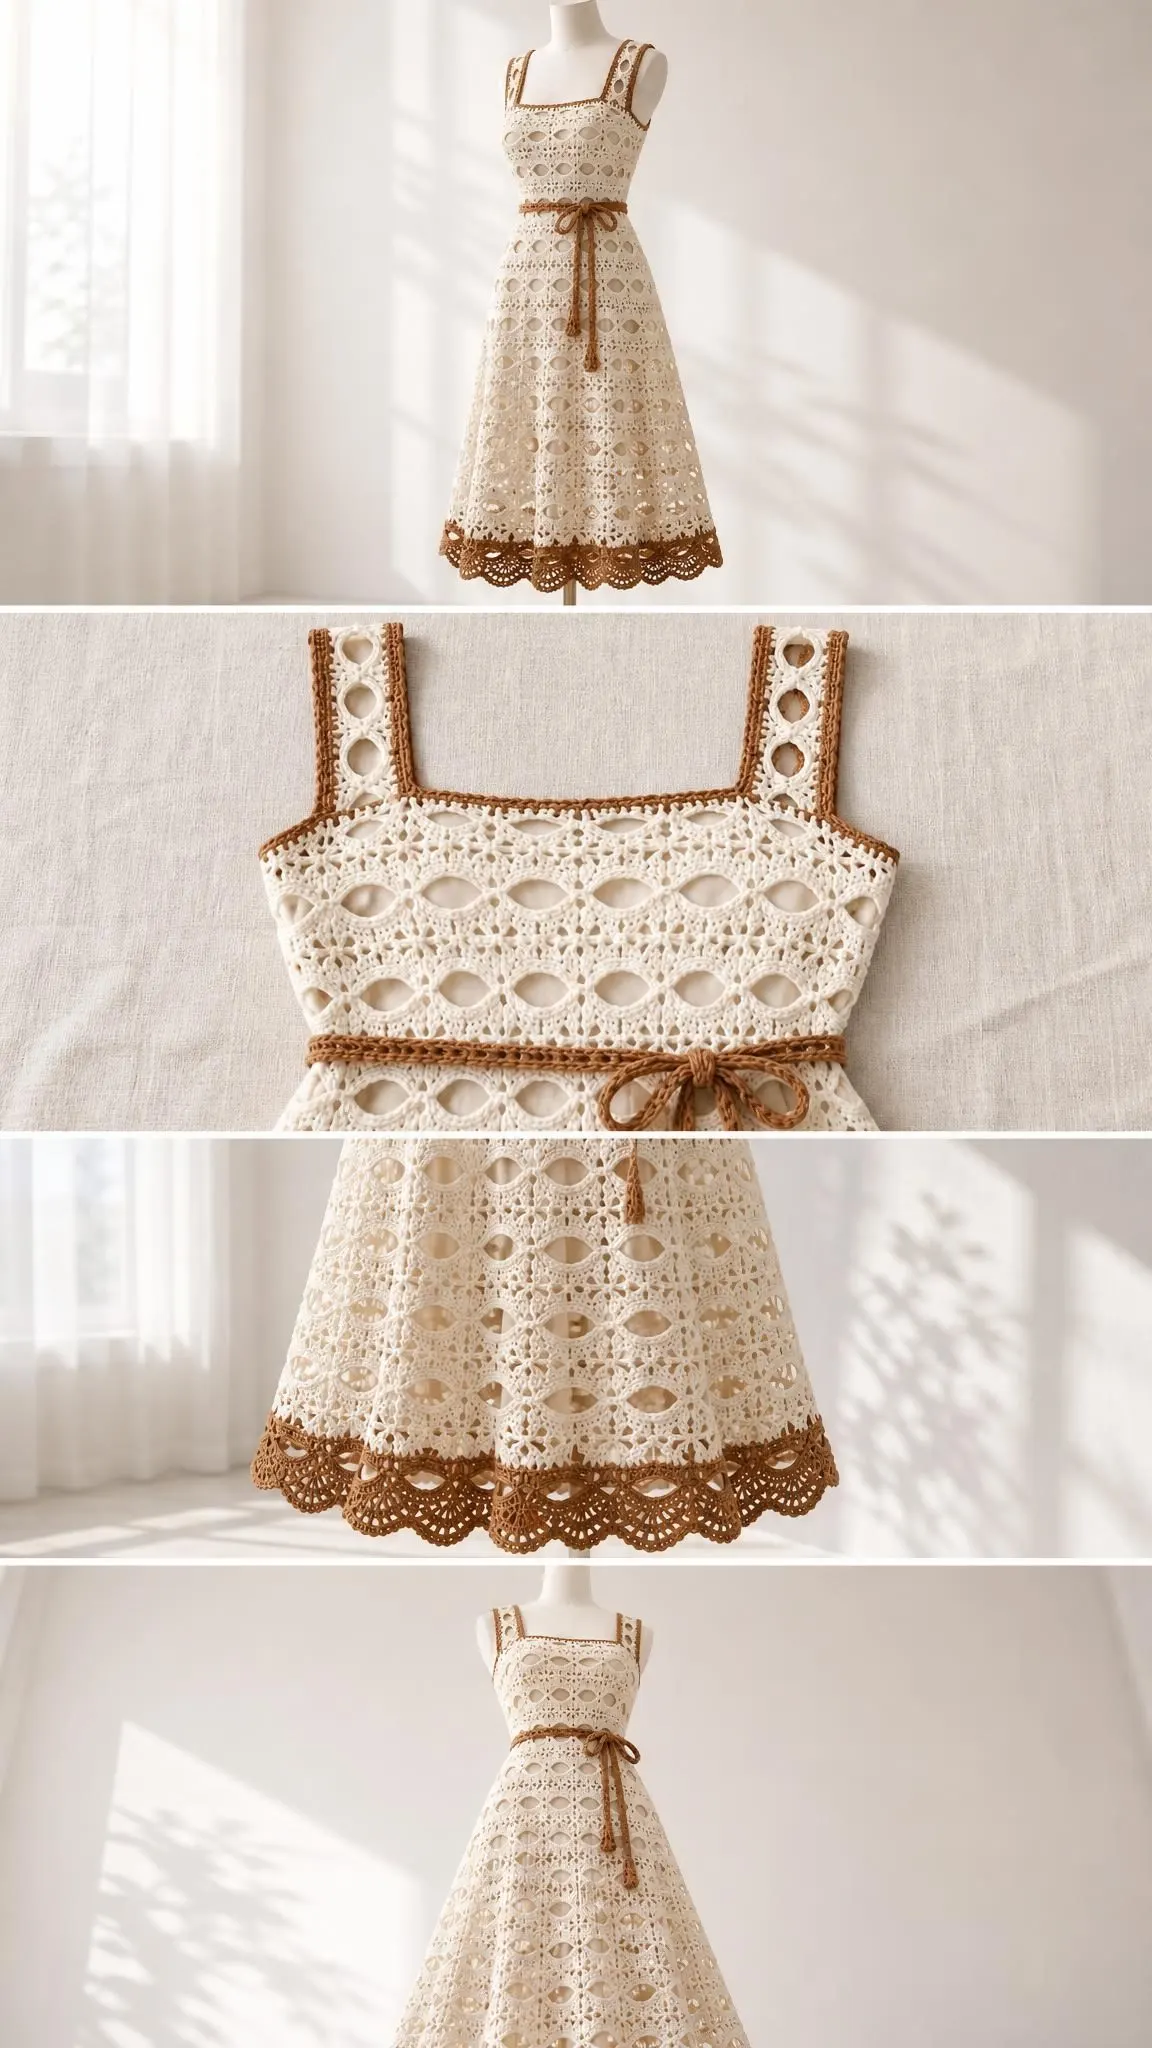
If you’ve been searching for a standout crochet dress pattern that balances elegance with wearability, this cream ribbon lace midi dress deserves a spot at the top of your project list. The oval eyelet lace creates a stunning visual rhythm throughout the entire garment, while the caramel accents at the neckline, straps, waist, and hem tie everything together with warmth and sophistication.
Get the Ad-Free PDF Pattern
Scroll down for the full pattern, or get the ad-free printable PDF from the shop.
Get the Printable PDF →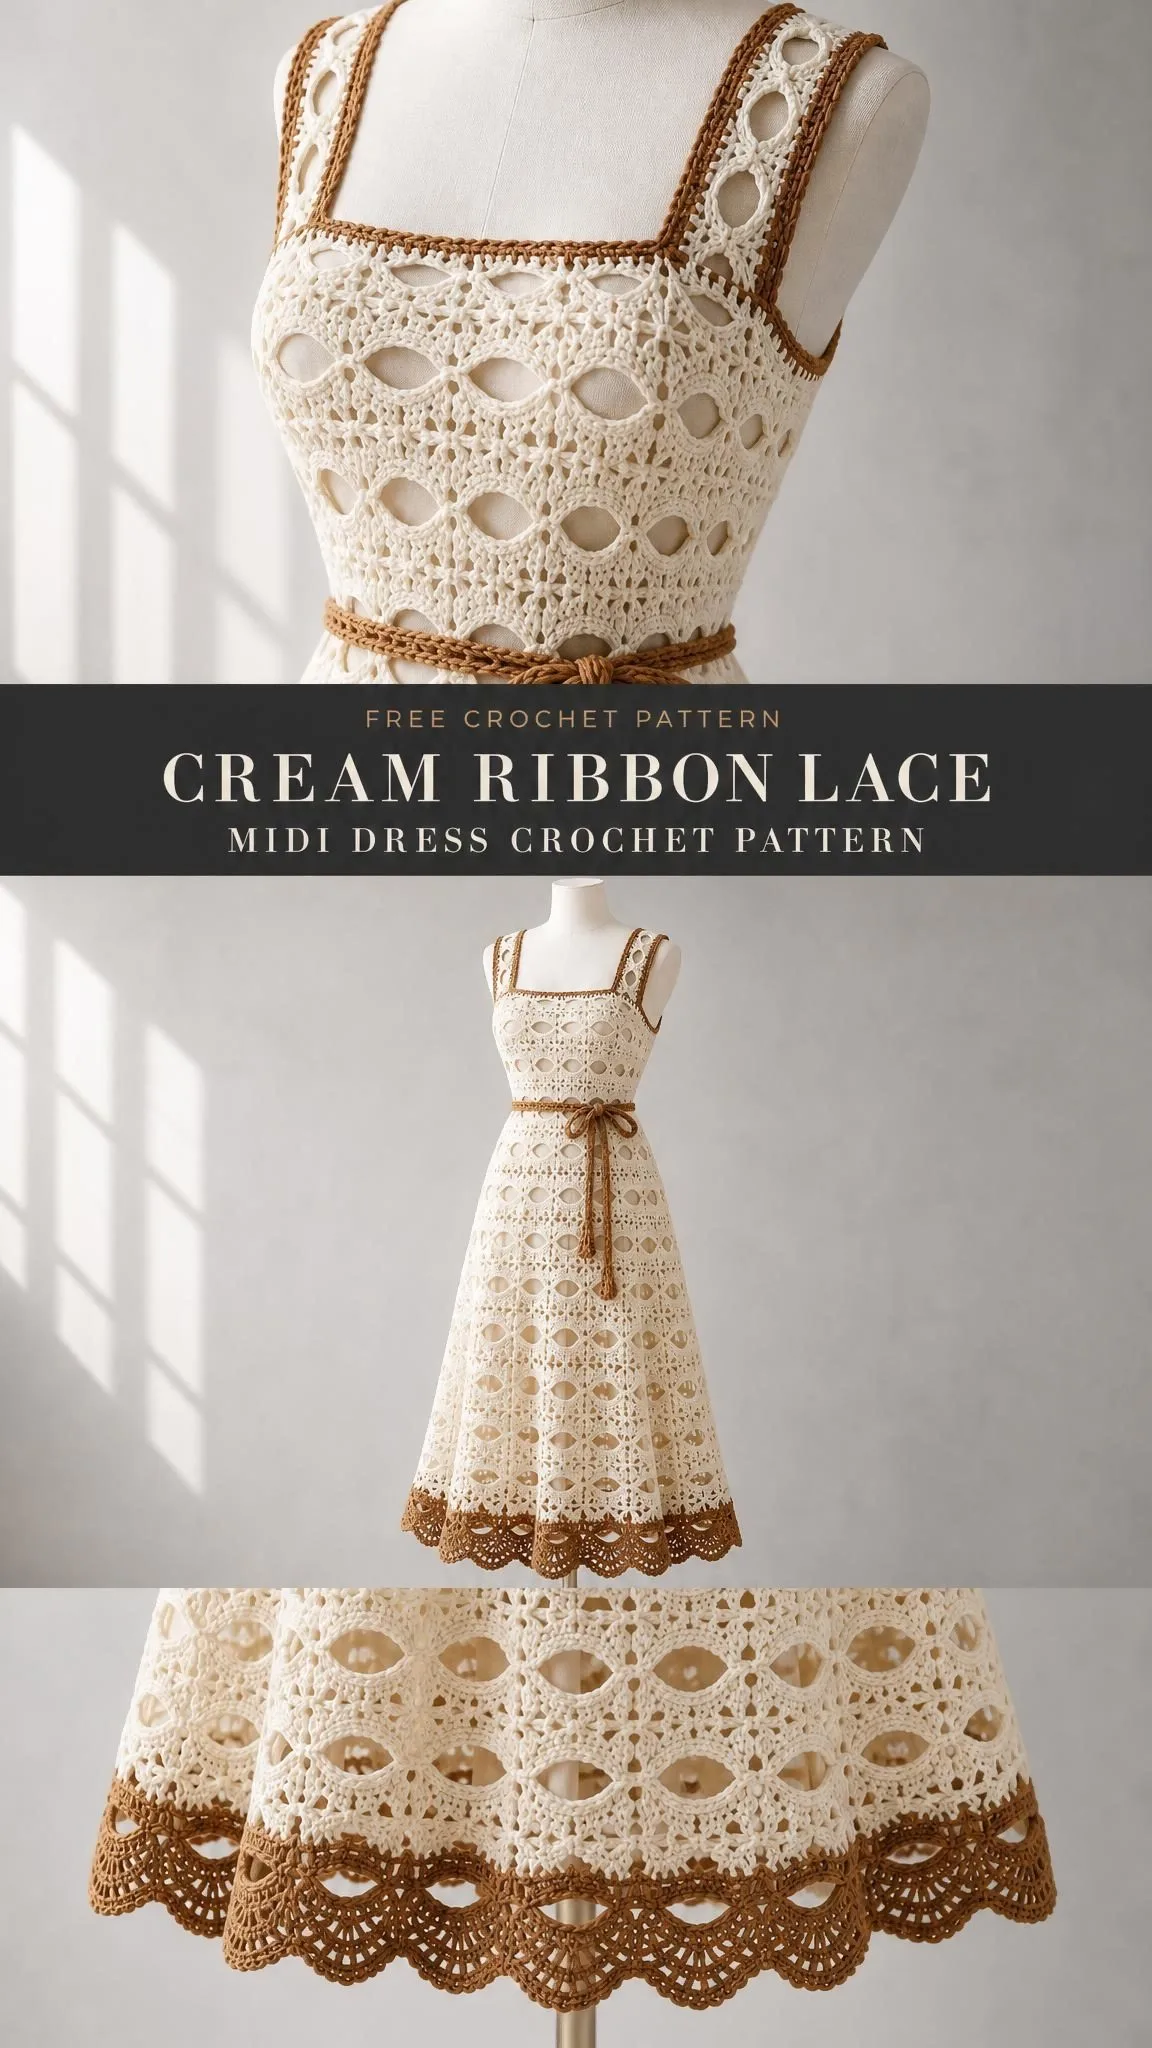
What makes this design particularly special is its thoughtful construction. Two flat bodice panels join to a gradually widened A-line skirt, giving you that classic feminine silhouette without complicated shaping. The broad straps and square neckline keep it modern and flattering, while the removable waist tie lets you adjust the fit to your preference.
Whether you’re planning this for a summer garden party, a beach vacation, or simply because you deserve something beautiful on your hook, this pattern delivers. The tea-length skirt hits at that perfect midi point, and the open lace work makes it surprisingly comfortable even in warmer weather. Let’s walk through everything you need to bring this gorgeous dress to life.
Understanding the Design and Finished Measurements
Before you dive into your yarn stash, take a moment to review the finished dimensions. This pattern produces one adult worked size, so checking your measurements against the schematic is essential for a great fit.
Finished Measurements:
- Bust / Upper Waist: 100 cm / 100 cm
- Suggested Body Bust: 88-94 cm
- Waist with Removable Tie: 80-94 cm
- Hip / Hem Circumference: 120 cm / about 140 cm
- Shoulder to Waist: 40 cm
- Waist to Hem: 70 cm
- Upper Arm Circumference: 40 cm before edging
The waist tie creates that lovely fitted appearance you see in the photos. Keep in mind that the untied opening must pass comfortably over the bust, so the garment dimensions listed are after blocking but before any wear stretch. If your hip measurement exceeds 112 cm, the pattern includes adjustment guidance for increasing the middle and lower panel widths before starting.
Materials and Tools You’ll Need
Gather these supplies before casting on your foundation chain. Having everything ready makes the process so much smoother.
Yarn:
- Smooth sport-weight cotton or cotton blend, approximately 300 m per 100 g
- Total Yarn Needed: 600 g / 1800 m (including swatching and finishing reserve)
- Main Color (Cream): 450 g / 1350 m
- Accent Color (Caramel): 150 g / 450 m
Use one consistent yarn weight for all colors. The smooth cotton gives excellent stitch definition for the lace pattern and blocks beautifully.
Hooks:
- 3.5 mm crochet hook (or size needed to achieve gauge) for main body
- 3 mm crochet hook for firm edgings and waist tie
Notions:
- Tapestry needle
- Scissors
- 12 removable stitch markers
- Tape measure
- Blocking mats and rustproof pins
- Optional: 6 mm clear elastic, cut to comfortable waist plus 2 cm overlap
- Matching sewing thread and needle (if using elastic)
For Modest Wear: Use a separate opaque slip with a neckline at least as high as the dress and a hem reaching the crochet hem. The slip is a styling layer, not an additional crochet project. Do not rely on open lace for coverage.
Gauge Information
Getting gauge right is crucial for garment fit. Take time with your swatch, and you’ll thank yourself later.
Foundation and Dense Trim: 20 single crochet (sc) and 24 sc rows = 10 x 10 cm
Lace Gauge: The lace must block to 5 cm per ten-stitch repeat. Filet mesh must block to 10 spaces across 10 cm.
Oval Gauge: 12 complete two-row repeats = 10 cm high
How to Swatch: Chain 42, work 41 sc, then 24 oval rows. The four repeats should measure 20 cm across. Block the chain arches into horizontal ovals without stretching the dense bars. Wash and dry the swatch exactly as you will the finished dress.
If your swatch is too wide, go down a hook size. If it’s too narrow, go up a hook size. Adjust row count separately for height. All length-based measurements take priority over sample row estimates. Hang your blocked swatch for 24 hours and note any growth before choosing your final dress length.
Abbreviations and Special Stitches
This pattern uses US crochet terminology. Here’s everything you need to know:
- ch = chain
- st/sts = stitch/stitches
- sl st = slip stitch
- sc = single crochet (insert hook, yarn over, pull up a loop, yarn over, pull through both loops)
- hdc = half double crochet
- dc = double crochet (yarn over, insert hook, pull up a loop, yarn over, pull through 2 loops twice)
- tr = treble crochet
- sp = space
- RS/WS = right side/wrong side
- rep = repeat
A number after a stitch means work that many stitches. Brackets enclose instructions to repeat.
Special Stitches:
sc2tog (single crochet two together): Insert hook into next stitch and draw up a loop, repeat in following stitch, yarn over and draw through all three loops. This creates a decrease.
Picot: Ch 3, sl st in the third chain from hook. Creates a decorative bump.
Fan F: [dc, ch 1] four times, then dc, all in the same stitch. Each fan contains 5 dc and four ch-1 spaces.
Joining Seam: With RS together, pass a tapestry needle under corresponding edge loops on both pieces, one pair at a time, without pulling tight.
Weaving Ends: Weave a yarn end back and forth through dense stitches for at least 5 cm, reversing direction twice.
Pattern Notes Before You Begin
Understanding these construction details will help everything make sense as you work.
Work flat, turning at the end of every row unless instructed to work a round. Ch 1 for sc and ch 2 for dc do not count as stitches. Work the first actual stitch in the first stitch. Join rounds with sl st to the first actual stitch. Joining sl sts do not count. Keep a marker in each edge stitch throughout.
The sample uses 101 foundation stitches per bodice panel and 10 lace repeats. In the instructions, n means the number of repeats in the current piece or skirt level. The extra stitch closes the final repeat and forms the seam edge.
Counts given for lace rows distinguish stitches, arches, and motifs. Do not treat chain spaces as single stitches unless instructed.
Construction Overview
Here’s the roadmap for building your dress:
- Make and block the swatch
- Make front and back bodice panels from waist upward
- Add shoulder straps
- Make two skirt panels, widening at two level changes
- Block, seam, add waist tie and trim, then finish
Shared Lace Rows (The Oval Eyelet Pattern)
This two-row repeat creates the signature oval eyelet lace throughout the dress.
Foundation: Ch (10 x number of repeats + 2). Sc in second ch from hook and each ch across. Turn. [10 x repeats + 1 sc]
Row A (Open Row): Ch 1, sc in first sc; ch 7, skip 7 sc, sc in each of next 3 sc across. Turn. [n arches, 3n+1 sc]
Row B (Filled Row): Ch 1, sc in first sc; 7 sc into ch-7 arch, sc in each of next 3 sc across. Turn. [10n+1 sc]
Repeat Rows A and B. The ch-7 arch forms the bottom of each oval, and the seven sc form its upper edge. Do not work into individual chains on Row B. End after Row B whenever a solid foundation is needed.
Bodice Front and Back
Make the front and back identically for the straight neckline.
Ch 102 and work the foundation, then work 10 repeats of oval lace until each panel measures 30 cm tall, ending with Row B. This is approximately 70 lace rows plus the foundation. Measure your blocked work to confirm. [101 sc on final row]
Shoulder Straps (Make 2)
Using main color and the 3 mm hook:
Ch 13.
Strap Row 1: Sc in second ch from hook and each ch across. Turn. [12 sc]
Strap Rows 2-48: Ch 1, sc in every sc. Turn. Stop at 20 cm or your fitted strap length. Make both straps equal. [12 sc per row]
With each bodice panel laid flat, mark the outermost 12 stitches at each side edge. These are the strap attachment zones, with the outer strap edge flush with the panel side. The 20 cm straps fold over the shoulders, raising the 30 cm panels to approximately 40 cm shoulder-to-waist length. Check armhole comfort before permanent attachment.
Two Skirt Panels
Make two identical panels from waist downward.
Target Level Heights (including dense transition rows and final edging allowance):
- Upper: 19.6 cm
- Middle: 23.8 cm
- Lower: 26.6 cm
Reserve 2 cm of the final level for the hem. Total finished skirt length is 70 cm.
Upper Level
Foundation: Ch 102; sc in second ch and across. Work shared lace over 10 repeats to upper-level height, ending on a conversion-ready row. Convert if required. [101 sc / 10 repeats]
Increase Row 1
Ch 1, sc in first sc; sc in next 4 sc, 2 sc in next sc 20 times. Turn. [121 sc]
Middle Level
Restart the lace setup with 12 repeats. Work to middle-level height, ending on a conversion-ready row. Convert if required. [121 sc / 12 repeats]
Increase Row 2
Ch 1, sc in first sc; sc in next 5 sc, 2 sc in next sc 20 times. Turn. [141 sc]
Lower Level
Restart the lace setup with 14 repeats. Work to lower-level height less the hem allowance. Finish on a conversion-ready row; convert if required. [141 sc / 14 repeats]
Block both panels to equal level heights before joining. Level joins are narrow structural bands, not added ruffles. If the skirt reaches the desired length early, shorten the lower level but do not remove the hip-width increase.
Color Placement: Use main color (cream) for bodice and skirt. Use the accent color (caramel) for waistband/tie and final hem trims. Cut and weave ends at each color change. Do not carry unused color across open mesh.
Armhole Preparation
No sleeves are made for this design. Mark the top 20 cm of each front and back side edge as the armhole. These sections remain unseamed. The armhole edging is added after side seams are complete.
Assembly
You’ll Need: Main color yarn, tapestry needle, and removable markers. Use the 3 mm hook only if you prefer slip-stitch seams; keep them loose enough to lie flat. Pre-block all pieces to the schematic measurements.
Pass 1: Join front and back shoulders, matching one front stitch/space to its back counterpart. For the strap version, sew each strap end to its marked attachment zone, keeping the straps untwisted. [2 shoulders or 4 strap-end seams]
Pass 2: Seam bodice sides from waist upward for 20 cm, leaving the upper 20 cm on each full-height panel open for armholes. On the 30 cm strap bodice, seam the lower 20 cm: the two remaining 10 cm side edges plus the 20 cm strap form each armhole. [2 side seams; 2 armholes of 40 cm perimeter]
Pass 3: Check that both armholes lie evenly and the shoulder pieces support the bodice without twisting. [2 open armholes]
Pass 4: Seam the two skirt panels along both long edges, matching both widening bands exactly. Keep hem level. [2 skirt seams]
Pass 5: Join skirt upper edge to bodice foundation with RS together. Match 101 stitches to 101 stitches on each panel, aligning side seams. Do not cinch this seam. [202 stitch pairs joined]
Assembly Checkpoint
Untied bust and waist approximately 100 cm; hip 120 cm; hem 140 cm. Skirt length including planned trim 70 cm. Both armholes are even, side seams hang vertically, and the dress passes over the bust without forcing the yarn.
Edgings and Details
You’ll Need: 3 mm hook; main color (cream) and accent color (caramel). Tapestry needle, tape measure, and markers. Optional soft waist elastic and matching sewing thread.
Waist Edging and Tie
Waist Round 1: With RS facing, work 100 sc evenly over the front waist seam and 100 sc over the back. Join. Do not turn. [200 sc]
Waist Round 2: Ch 1, sc in every sc. Join. [200 sc]
Waist Round 3: Ch 1, sc in first 2 sc; ch 2, skip 2 sc, sc in next 2 sc 49 times; ch 2, skip last 2 sc; join. [100 sc, 50 eyelets]
Waist Round 4: Ch 1, sc in each sc and 2 sc in each ch-2 space. Join. [200 sc]
Waist Round 5: Ch 1, sc in every sc. Join and fasten off. [200 sc]
Waist Tie
Tie Row 1: Ch 301; sl st in second ch from hook and every ch across. Fasten off. Block to approximately 150 cm; add/remove chains to achieve this length. [300 sl sts for sample]
Tie Pass 2: Weave through all waist eyelets, bringing both ends out at center front. Tie a bow without distorting the mesh. [50 eyelets threaded]
If using waist elastic, measure a comfortable loop on the wearer, overlap ends by 2 cm and sew securely. Tack inside the waistband at side seams and center back. Keep the crochet waistband stretchy enough to pass over the bust; omit fixed elastic if it would prevent dressing.
Neckline Edging
Neck Round 1: Sc evenly around the neck edge at 2 sc per cm, putting 3 sc in each square corner or sc2tog at the bottom of a V. Adjust by at most 2 stitches to a multiple of 6; record the resulting number as E. Join. [E sc, E divisible by 6]
Neck Round 2: Skip 2 sc, 5 dc in next sc, skip 2 sc, sc in next sc around. Join and fasten off. [E/6 shells]
Hem Edging
Hem Round 1: Work 140 sc across each skirt panel, omitting the seam-edge surplus stitch from each panel. Join. [280 sc]
Hem Round 2: Sc in first sc; ch 3, skip 4 sc, 7 dc in next sc, ch 3, skip 4 sc, sc in next sc 27 times; ch 3, skip 4 sc, 7 dc in next sc, ch 3, skip last 4 sc; join to first sc. [28 fans, 28 sc anchors, 56 ch-3 arches]
Hem Round 3: Sl st into first ch-3 arch; 3 sc in side arch, sc in each of 7 dc with a picot after the 4th sc, 3 sc in next side arch, sl st in anchor around. Join and fasten off. [28 picots, 364 sc]
Armhole Edging (Each Armhole)
Armhole Round 1: Work 80 sc evenly around the 40 cm perimeter. Join. [80 sc]
Armhole Round 2: Ch 1, sc in each sc. Join and fasten off. [80 sc per armhole]
Edging Checkpoint
Waist tie slides through all 50 eyelets. Neck and armhole edges lie flat. Hem repeats are evenly spaced. Count both armholes and compare. The final length must agree with the schematic.
Finishing Your Dress
You’ll Need: Main-color yarn tails, tapestry needle, 3 mm hook for any dropped edging loop, blocking mats, rustproof pins, mild wool/cotton wash, and clean towels.
Pass 1: Inspect every seam, tie end, and attachment point. Weave all yarn tails through dense stitches in three directions; trim only after secure anchoring. [0 loose ends]
Pass 2: Soak according to yarn label, press out water in towels without wringing, and lay flat to schematic dimensions. Pin lace points without forcing the openings. [1 complete dress blocked]
Pass 3: Dry completely, remove pins, rest flat overnight, then hang briefly to check length. Adjust tie and confirm the opaque slip reaches the hem for worn styling. [1 finished dress]
Final Checkpoint
Confirm bust about 100 cm, skirt 70 cm, and total shoulder-to-hem approximately 110 cm. Allow small differences from lace blocking. Record your actual finished measurements and hook size for future reference.
Care Instructions
Follow the yarn label for best results. Hand wash cool with mild detergent if the yarn permits, support the wet garment fully, reshape, and dry flat. Do not hang for storage, as long crochet dresses can grow under their own weight. Keep away from direct heat and snagging jewelry.
This is an adult garment. Secure all attachments and keep the waist cord tied and away from machinery. Check that long hems do not trail or cause trips. Stop wearing if a strap, seam, or neckline becomes overstretched.
Tips for Success
Block generously. The oval eyelet lace really opens up and shows its best face after a good wet blocking. Take your time pinning those arches into proper ovals.
Measure as you go. The pattern gives you specific length targets for each skirt level. Trust those measurements over row counts, as your gauge may vary slightly from the sample.
Try it on before finishing. Once the bodice and skirt are joined but before you add the edgings, slip it over your head and check the fit. Adjustments are much easier at this stage.
Use the right slip. An opaque slip in a complementary color (cream, nude, or even a contrasting shade) transforms this dress from "lovely on a mannequin" to "ready to wear anywhere."
This cream ribbon lace midi dress is the kind of project that feels like an accomplishment from the very first row. The oval eyelet pattern is rhythmic and meditative once you get into the flow, and watching those elegant ovals stack up is genuinely satisfying. The caramel accents bring just enough contrast to make the design pop without overwhelming the delicate lace.
Save this pattern to your Pinterest boards so you can find it when you’re ready to start. And if you make this dress, please leave a comment below. Seeing your finished projects is always the best part.
Want a Quick & Easy Printable Version?
Get a clean, beautifully formatted PDF of this pattern — easy to follow step by step, ready to print or save on any device. No scrolling, no distractions, just the pattern.
Get the Printable PDF →You Might Also Like
- Mint Sage Gradient Bow Sweater Free Crochet Pattern
- Sage Garden Lace Cardigan Free Crochet Pattern
- Lemon Daisy Garden Dress Crochet Pattern
- Blush Peony Lace Shawl Crochet Pattern