
I’ve been looking for a statement piece that walks the line between delicate and dramatic, and this Blush Peony Lace Shawl is my new favourite find. The layered shell fans, pearl-tipped fringe, and that gorgeous three-dimensional peony flower come together in a way that feels romantic without being over the top.
Get the Ad-Free PDF Pattern
You can find the free pattern below, or you can purchase the ad-free printable PDF from my shop.
Get the Printable PDF →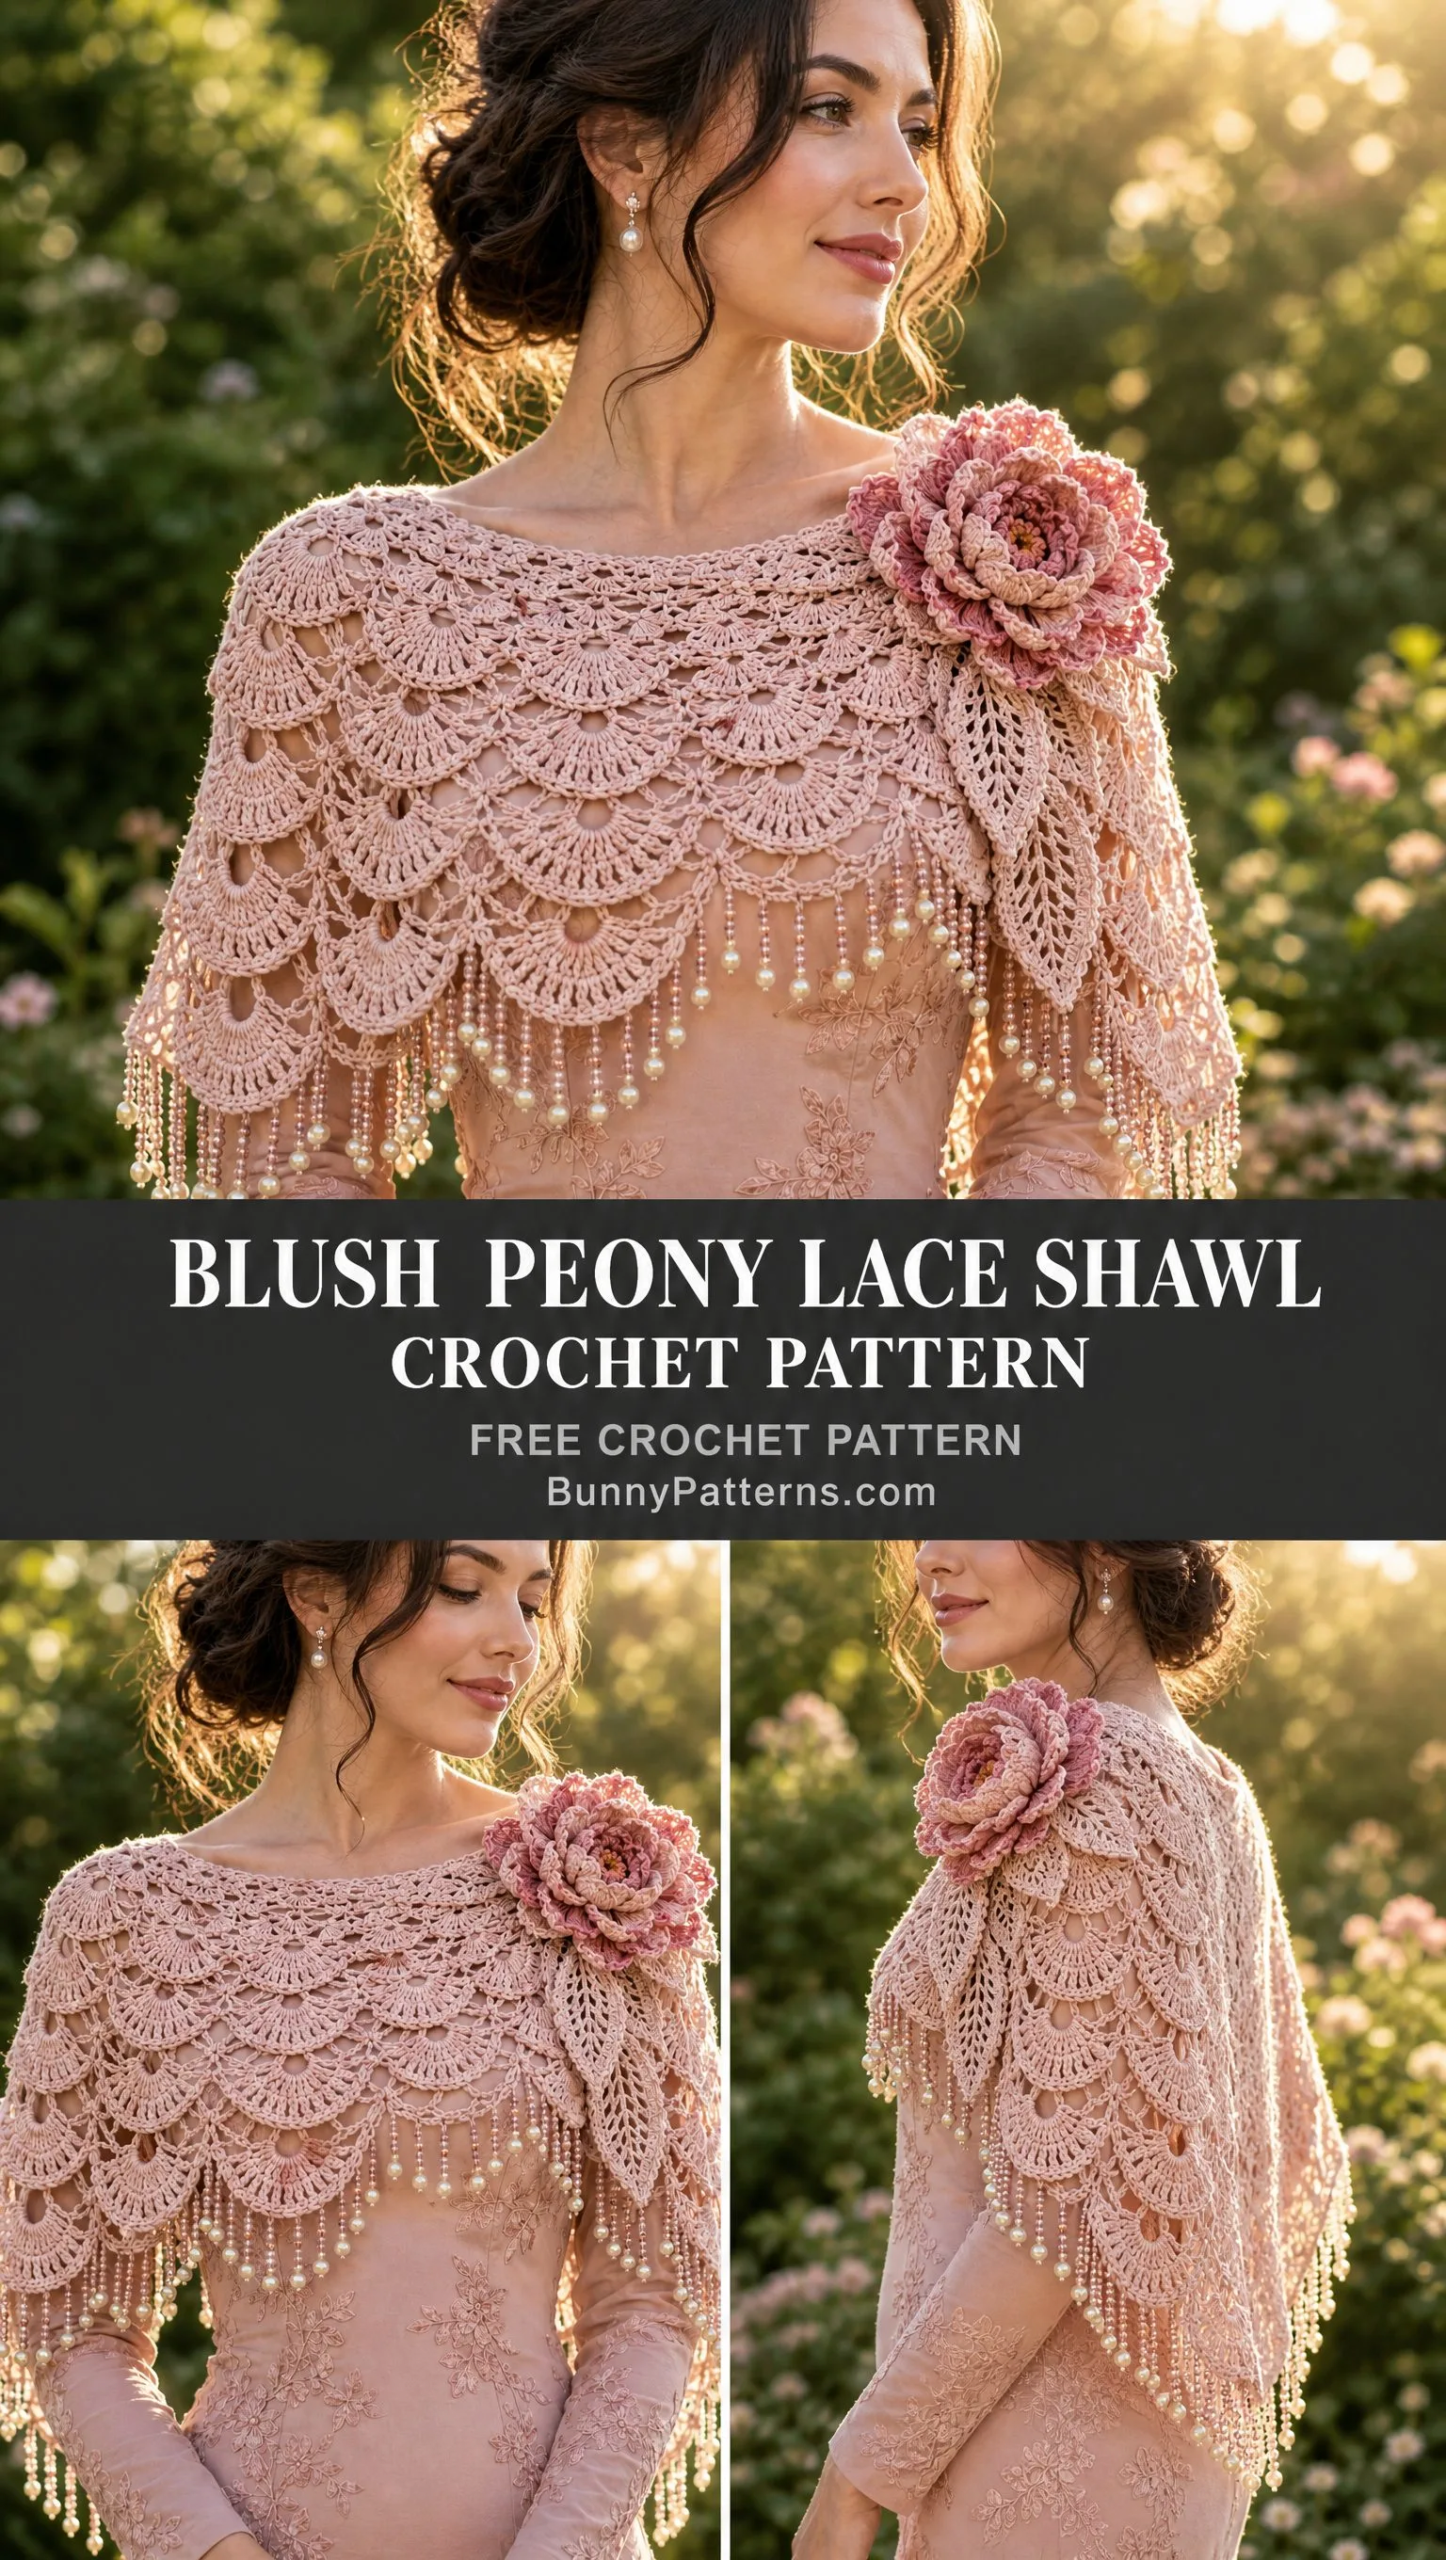
Whether you’re dressing up for a garden party, a spring wedding, or just want something beautiful draped over your shoulders on a cool evening, this capelet delivers. The mercerized cotton gives it that silky drape you want for occasion wear, and the construction is more approachable than it looks.
I rounded up all the details you need to make your own, straight from the official pattern. Let’s dive in.
Why This Lace Shawl Pattern is Worth Your Time
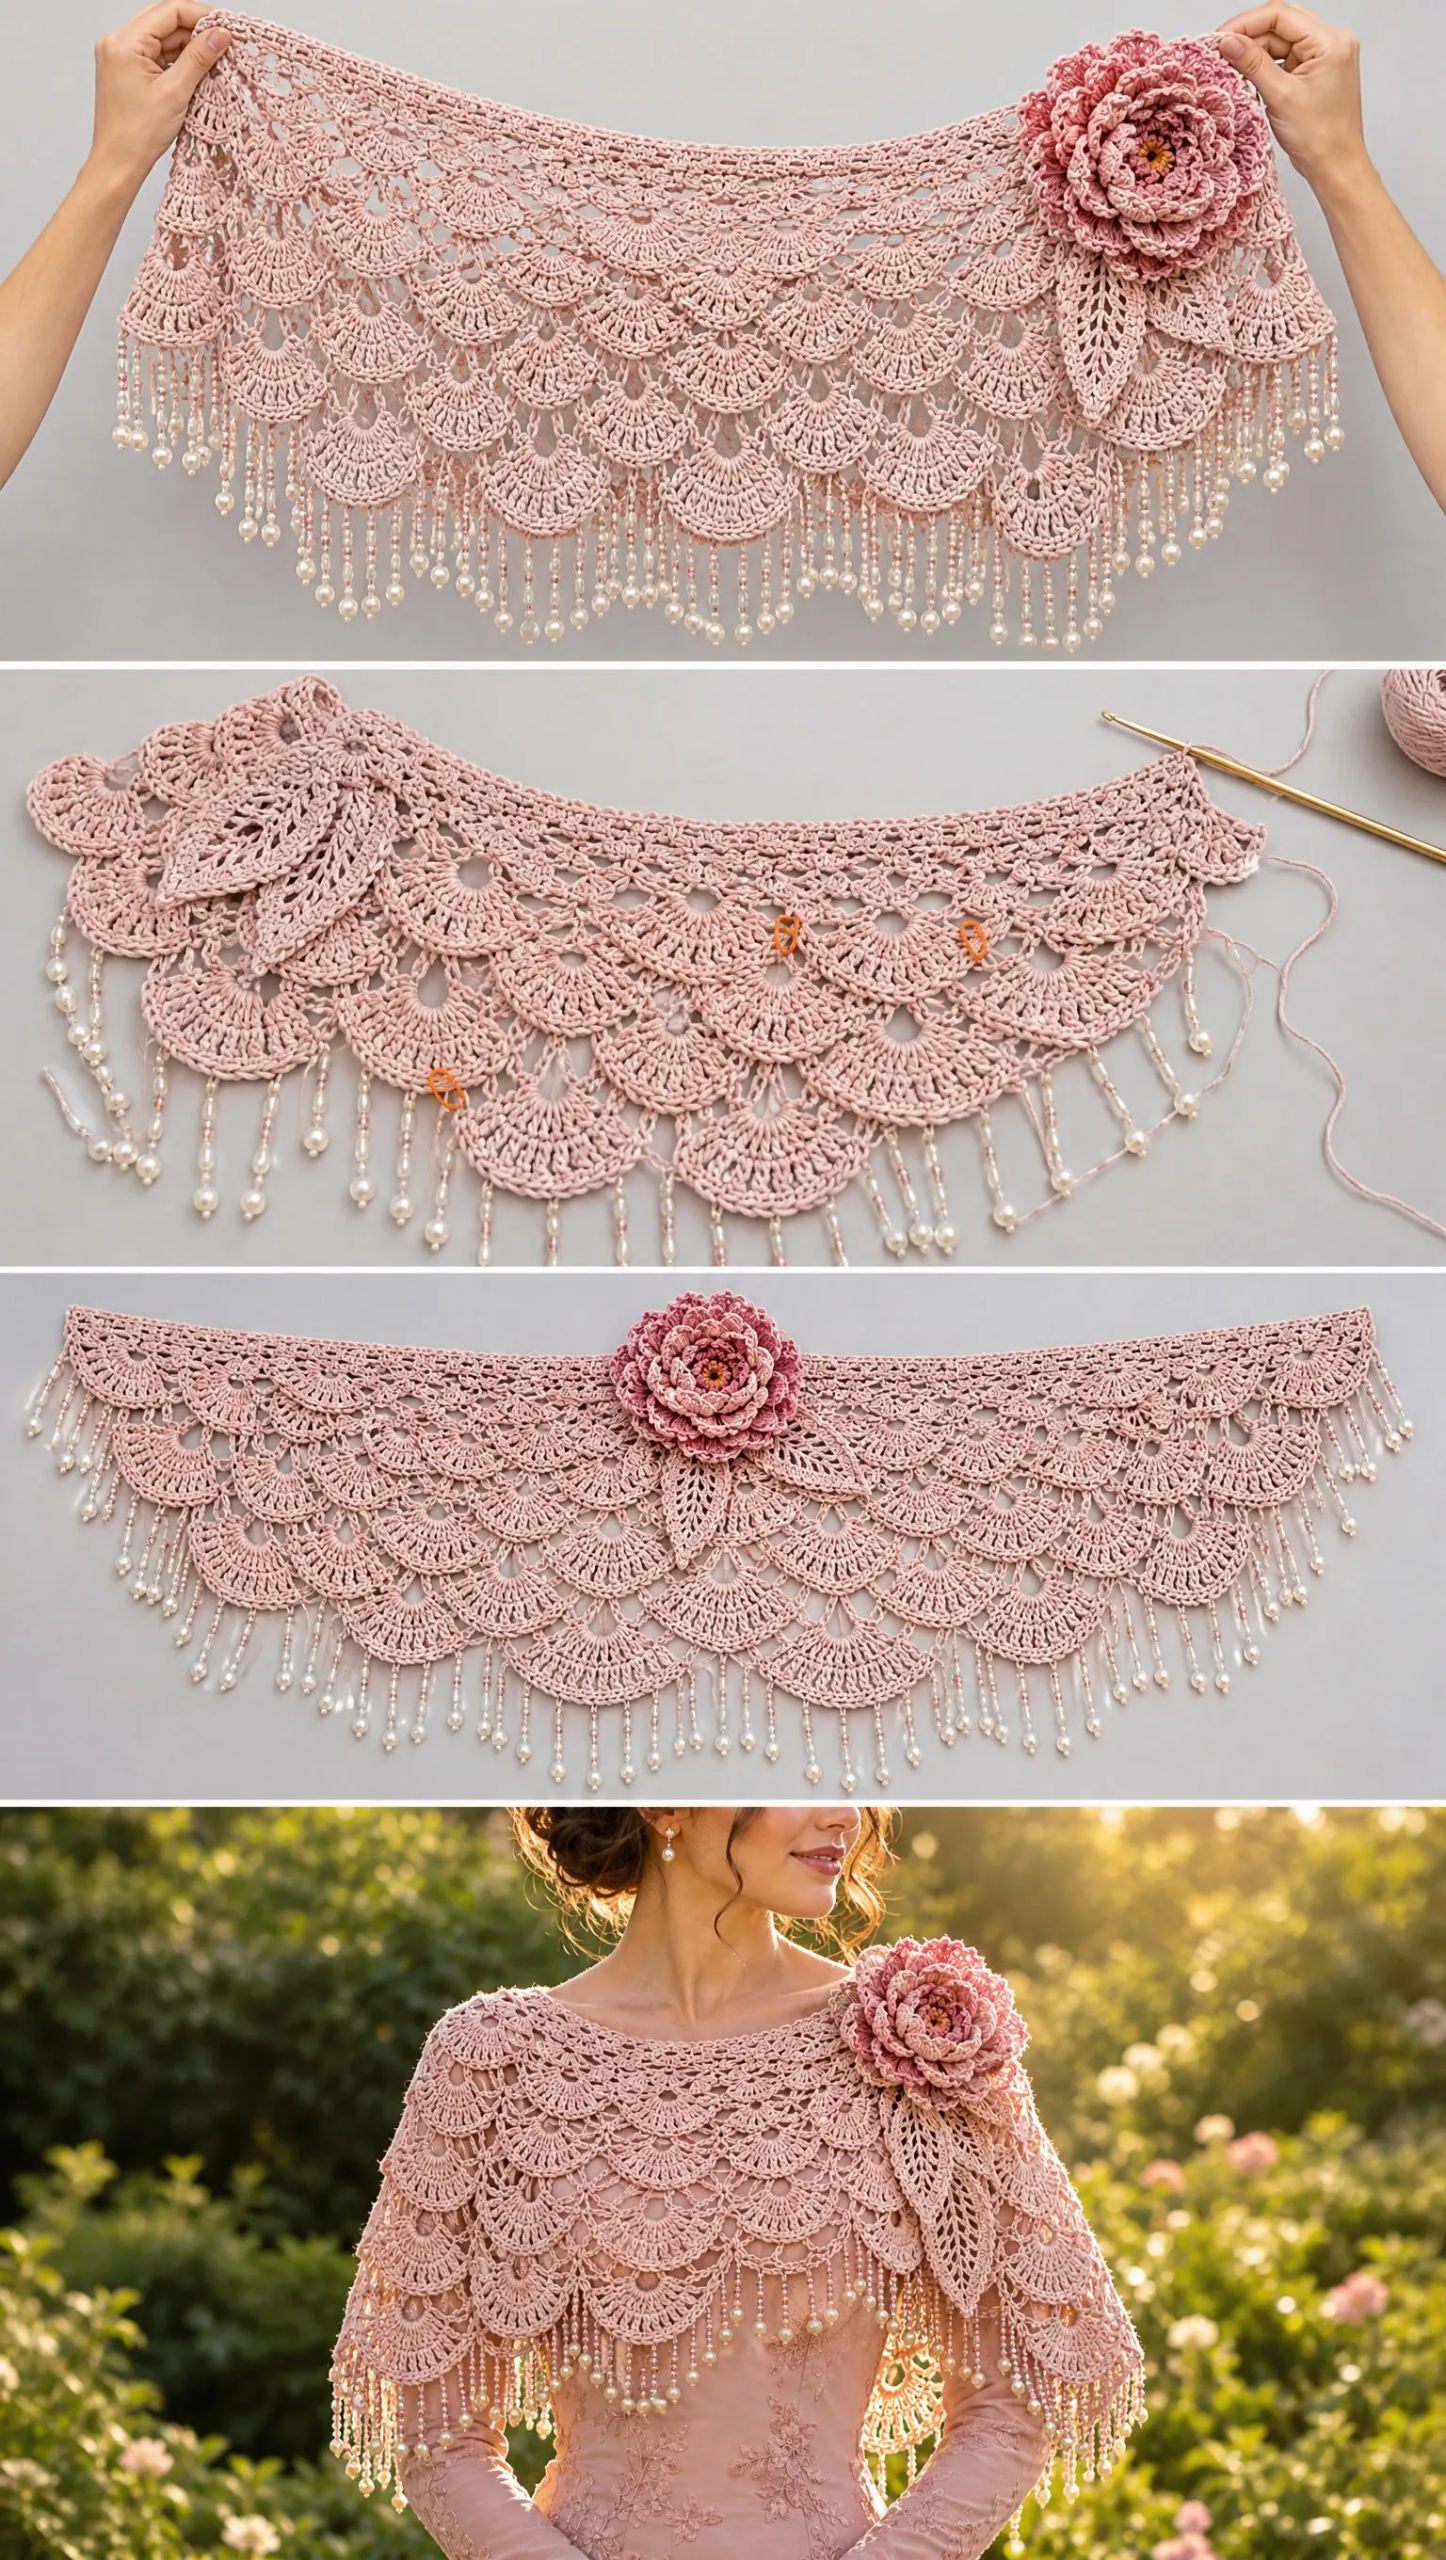
This isn’t your average rectangular wrap. The Blush Peony Lace Shawl is a shaped shoulder capelet that sits beautifully across your collarbone and drapes elegantly down your arms. The shorter center front keeps it out of your way while the longer side panels give you that flowing, romantic silhouette.
What makes this design special is the combination of classic shell fan stitches with open chain bridges that create genuine lace texture. Add in the scalloped border, delicate pearl-tipped fringe, and that show-stopping peony flower appliqué, and you’ve got a piece that looks like it belongs in a bridal boutique.
The skill level sits at intermediate. You’ll need to be comfortable reading pattern repeats, working increases, and assembling dimensional elements. But don’t let that intimidate you. If you’ve made a granny square blanket and maybe tried a simple shawl before, you have the foundation to tackle this project.
Materials You’ll Need
Gathering your supplies before you start makes the whole process smoother. Here’s everything the pattern calls for:
Yarn:
Hooks:
Notions:
Suggested Yarns:
The mercerized cotton is key here. It has a slight sheen and beautiful stitch definition that makes lace patterns pop. Regular cotton will work, but you won’t get quite the same elegant finish.
Gauge Information
Getting your gauge right ensures your finished shawl matches the intended dimensions.
Main lace gauge: 4 shell fans equals approximately 10 cm or 4 inches wide.
If your shells are coming out larger, try dropping down a hook size. If they’re smaller and the fabric feels stiff, go up a size. You want a flexible lace fabric that drapes well, not something that stands up on its own.
Finished Measurements
The completed Blush Peony Lace Shawl measures:
The pattern is adjustable. You can add or remove shell repeats to customize the size for different body types.
Abbreviations and Special Stitches
Let me walk you through every stitch you’ll encounter. Even if you know these already, a quick refresher never hurts.
Standard Abbreviations:
Special Stitches:
Shell Fan: Work 7 double crochet stitches into the same stitch or chain space. This creates the signature fan shape that defines the lace pattern. All seven stitches share the same base, spreading out like a shell at the top.
Picot: Chain 3, then slip stitch into the first chain you made. This creates a small decorative bump that adds texture to your edging.
Chain Bridge: These are chain spaces that connect shell motifs together, creating the open lace sections between fans.
Construction Notes
Understanding how this shawl comes together helps you visualize the finished piece as you work.
The shawl is worked from the neckline outward. You start with a foundation chain that forms the upper edge, then build downward row by row. The upper edge is shaped with gradual increases that create the curved capelet silhouette.
Shell rows alternate with chain bridge rows, creating that beautiful layered lace effect. Fringe is added after blocking, so save that step for the very end.
Step-by-Step Pattern Instructions
Main Shawl Body
Row 1:
Chain 160 loosely. Double crochet into the 4th chain from the hook, then double crochet across the entire row. This creates your foundation neckline edge.
A tip for beginners: when the pattern says to start in the 4th chain from the hook, those first 3 skipped chains count as your first double crochet. Keep your tension relaxed on this foundation chain so the neckline doesn’t pull or pucker.
Row 2:
Turn your work. Chain 3 (this counts as your first double crochet). Work shell fans evenly across the row with chain spaces between each shell.
To space your shells evenly, skip a few stitches between each shell placement. The exact spacing will depend on your gauge, but aim for consistent gaps that let the shells fan out without overlapping.
Row 3:
Turn. Chain 4. Create chain bridges between each shell fan by chaining across the gap. Work a shell fan into every previous chain space from Row 2.
This is where the lace magic happens. The shells from Row 2 sit in the chain spaces, while new chain bridges form above them. Row 3 shells nestle into those bridges, creating an offset, layered effect.
Rows 4 through 18:
Repeat the shell fan and chain bridge pattern established in Rows 2 and 3. Here’s the important shaping detail: increase at both outer edges every second row by adding one additional shell fan.
These increases are what give the shawl its curved shape. Without them, you’d end up with a straight rectangle. With them, the piece flares out to drape over your shoulders and down your arms.
Shaping the Capelet
Continue working until the shawl reaches elbow length at the sides while maintaining a shorter center front. This creates the asymmetrical hemline that defines a capelet silhouette.
Keep your shell alignment consistent and symmetrical throughout. If you notice one side getting longer than the other, count your shells and make sure your increases are balanced.
Scalloped Border
Once your main body is complete, you’ll add a decorative border along the lower edge.
Round 1:
Work shell fans along the entire lower edge of the shawl.
Round 2:
Between each shell, add picot edging. Remember, a picot is chain 3, then slip stitch into that first chain.
Round 3:
Add a final slip stitch edging for a clean, polished finish. Work one slip stitch into each stitch around.
Beaded Fringe
The fringe adds movement and sparkle. Here’s how to create it:
1. Cut equal lengths of blush thread. Plan for each strand to be roughly twice your desired finished fringe length, plus a few extra inches for knotting.
2. Attach fringe strands to each scallop point along the border. Use a simple larks head knot: fold the strand in half, insert the loop through the stitch, pull the ends through the loop, and tighten.
3. Add small blush beads by threading them onto the fringe strands.
4. Secure an ivory pearl bead at each fringe tip. You can knot below the pearl or use a crimp bead for a cleaner look.
5. Space your fringe evenly around the entire border, checking for symmetry as you go.
Peony Flower Appliqué
This dimensional flower is what elevates the shawl from pretty to stunning. Switch to your smaller 2.5 mm hook for better detail.
Foundation
Make a magic ring. If you’re not familiar with this technique, it’s a way to start crocheting in the round that leaves no hole in the center. Wrap yarn around your fingers, insert hook, pull up a loop, and chain to secure. All your first round stitches go into that ring.
Inner Petals
Round 1:
Work 12 single crochet stitches into the magic ring. Pull the tail to close the center.
Round 2:
Work small petals using half double crochet and double crochet combinations. These form the tight, curled center of your peony.
Middle Petals
Create 10 larger petals using this sequence in each stitch space: single crochet, half double crochet, 5 double crochet, half double crochet, single crochet.
Each petal starts small, builds to a peak with those 5 double crochets, then tapers back down. This creates the rounded petal shape.
Outer Petals
Create 8 oversized layered petals using taller stitches. Switch to your deeper rose yarn for the edging on these outer petals. The color gradient from blush center to rose edges mimics how real peonies look.
Petal Shaping
Lightly steam your finished flower and gently curve the petals upward with your fingers. This creates dimension and that realistic, lush peony shape. Don’t flatten the flower with heavy pressing.
Attaching the Flower
Position the completed peony diagonally on the right shoulder area of your shawl. Pin it in place first to make sure you love the placement, then sew securely using matching thread.
Leaf Lace Tabs
Make two elongated leaves to tuck beneath your flower:
1. Chain 18.
2. Work double crochet and treble crochet stitches along both sides of the chain, creating a leaf shape.
3. Add picot tips at the leaf points for detail.
4. Attach the leaves beneath the flower, angling them naturally.
Finishing Your Shawl
Almost done! These final steps make a big difference in how professional your finished piece looks.
Care Instructions
Your beautiful lace shawl deserves gentle care:
Hand wash cold with gentle detergent. Avoid twisting or wringing. Lay flat to dry on a clean towel, reshaping as needed. Store folded in a cool, dry place away from direct sunlight to prevent fading.
Troubleshooting Common Issues
If your shawl curls at the edges: Increase blocking time or try using a larger hook size. Cotton sometimes needs aggressive blocking to relax.
If your lace feels stiff: Choose a softer cotton blend for your next project, or try steam blocking which can soften fibers.
If your flower doesn’t stand out: Add extra outer petals to give it more volume and dimension.
Frequently Asked Questions
Can the size be changed?
Yes! Add or remove shell repeats to make the shawl larger or smaller. Each shell repeat adds approximately 2.5 cm or 1 inch to the width.
Can acrylic yarn be used?
Yes, but cotton gives the best drape and stitch definition for this pattern. Acrylic tends to be springier and won’t block as crisply. If you go with acrylic, look for a drapey variety.
Can the peony be made removable?
Absolutely. Instead of sewing it permanently, attach it with hidden snaps or add a pin backing to wear it as a brooch. This lets you wear the shawl plain or switch up flower placement.
Final Thoughts on the Blush Peony Lace Shawl Crochet Pattern
This Blush Peony Lace Shawl is the kind of project that reminds you why you fell in love with crochet in the first place. Yes, it takes some time and attention. But when you drape that finished capelet over your shoulders and see those shells cascading down, the pearls catching light, and that gorgeous peony sitting on your shoulder like it grew there, you’ll know every stitch was worth it.
It makes a stunning gift for a bride, a mother of the bride, or anyone who deserves something truly special. Or make it for yourself. You deserve something beautiful too.
Thank you so much for choosing this pattern. I genuinely hope you enjoy every moment of creating it.
If this pattern is calling your name, go ahead and pin it to your Pinterest boards so you can find it when you’re ready to cast on. And please, if you make one, drop a comment below. I would absolutely love to see your finished shawl and hear which color palette you chose. Happy crocheting!
Want a Quick & Easy Printable Version?
Get a clean, beautifully formatted PDF of this pattern — easy to follow step by step, ready to print or save on any device. No scrolling, no distractions, just the pattern.
Get the Printable PDF →You Might Also Like
- Daisy Granny Square Toddler Jumpsuit Free Crochet Pattern
- Sage Green Moss Stitch Baby Romper Free Crochet Pattern
- Pink Dragon Baby Swaddle Blanket Free Crochet Pattern
- Lavender Daisy Baby Sundress Free Crochet Pattern