
A crochet girls vest worked in soft oatmeal and cream stripes, with a fan-lace yoke and a delicate scalloped hem, is a small garment that feels special from the very first row.
The Crochet Girls Vest
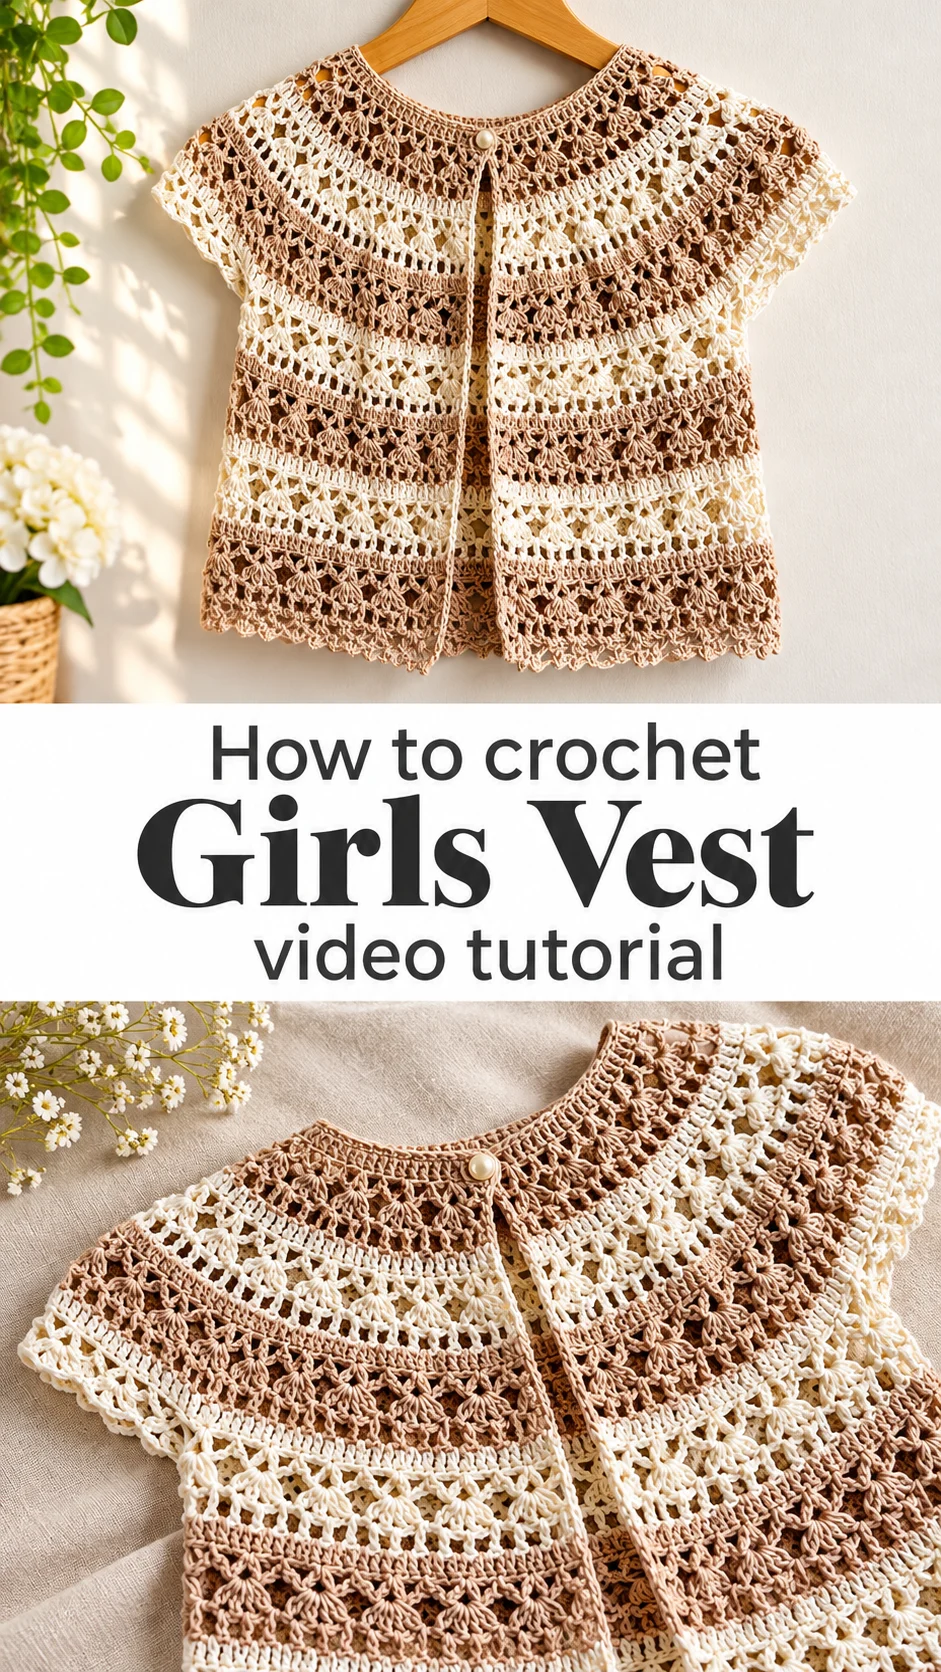
This crochet girls vest is a short, cap-sleeved cover-up built from a round yoke that widens into a gently flared body. Its stripes alternate between a warm oatmeal beige and a creamy off-white, and each band carries a slightly different lacy pattern. Shell and fan clusters sit beside open mesh rows, so the fabric looks airy yet interesting. A neat, dense neckband frames the collar, and a single pearl button holds the front closed at the neck. The hem finishes in a tiny scalloped edge that echoes the shells above it. Short lace sleeves leave the arms free, which makes the piece ideal for warm days and cool evenings alike. It is a design that looks far more complicated than it feels in the hands.
Think of it as a layering piece for spring dresses, a gift for a birthday or christening season, or a keepsake that can be handed down. It also builds skill. Stripes teach clean colour changes, and the repeating lace bands teach rhythm and tension.
Girls Vest Related Posts:
- Crochet Shell Stitch Blanket: A Timeless Textured Treasure
- Crochet Table Motif Bedspread: A Chic Timeless Accent
- Crochet Flower Granny Square: A Charming Floral Classic
- Crochet Pinwheel Square: A Vibrant and Whimsical Accent
Materials
For a crochet girls vest like this, choose a smooth, lightweight cotton or cotton blend in two colours: a cream and a warm oatmeal or latte shade. The stitches in the finished piece look crisp and well defined, which points to a mercerised or tightly spun cotton rather than a fuzzy yarn. Cotton matters here because it holds the shell shapes open and stays cool against a child’s skin, while a soft acrylic would sag in the open rows. A hook in the 3 to 3.5 mm range is a sensible starting point for a fingering or sport weight yarn, though your own gauge swatch should have the final say. You will also need a single pearl or pearl-look button, a yarn needle for weaving in ends, and a few stitch markers to keep track of the yoke sections. Pick a button with a shank or a small flat shape, because it sits right under the chin and should never scratch.
Understanding the Construction
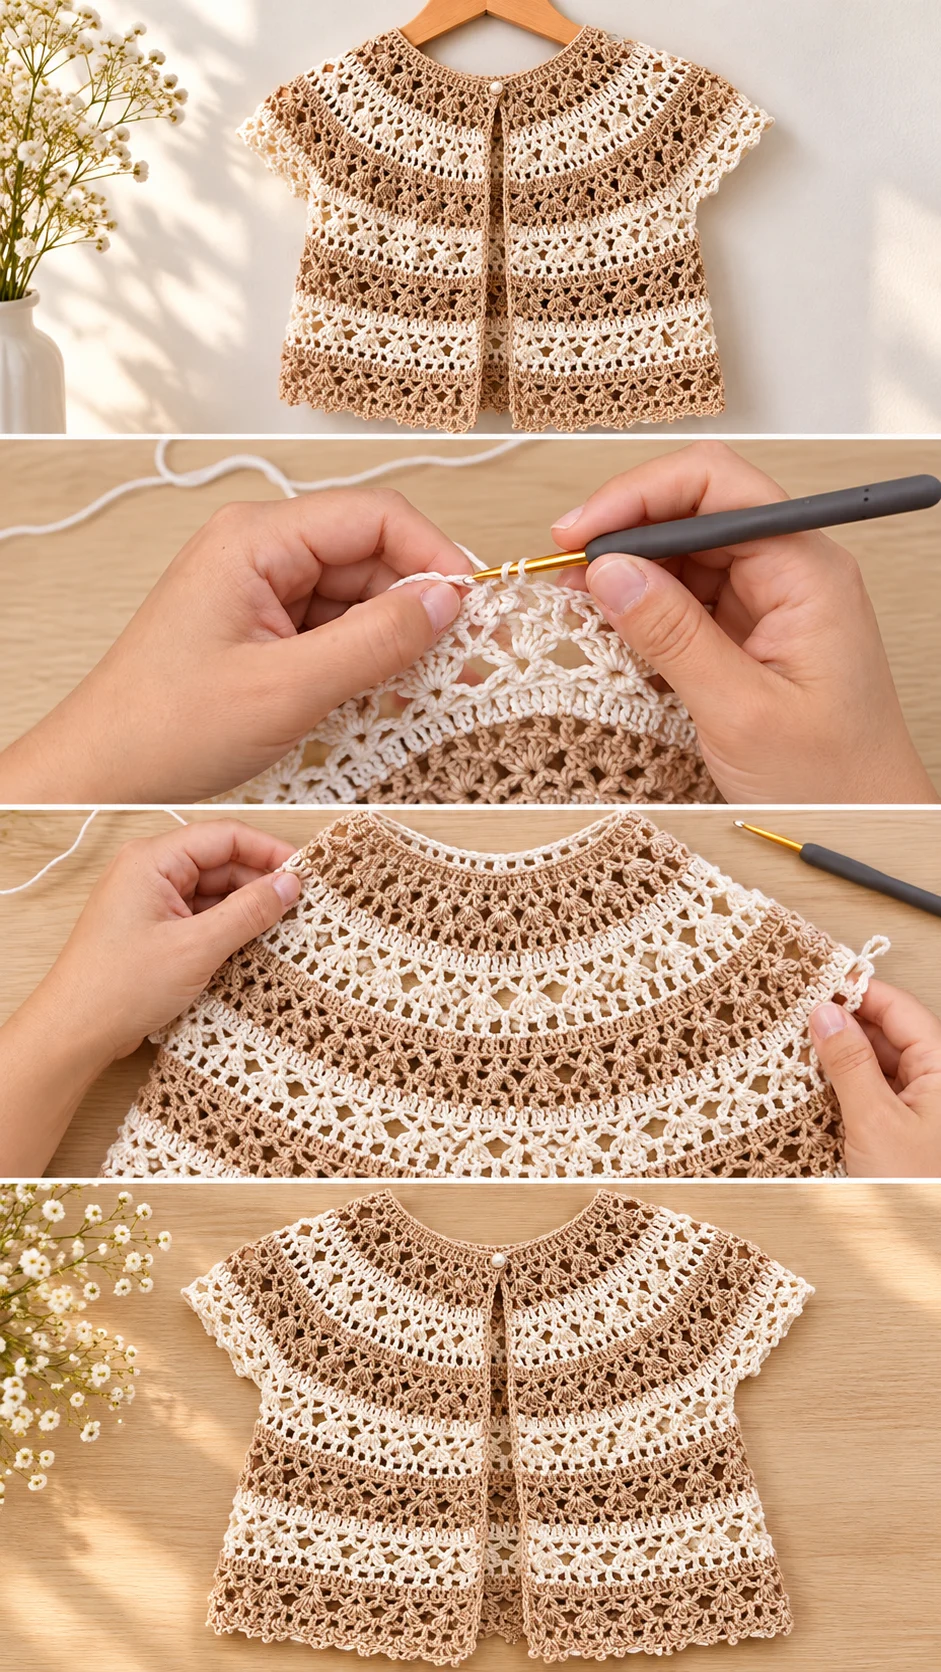
The vest appears to be worked from the neck down in one piece. The yoke begins as a small ring and grows outward in rounds or rows, with the increases hidden inside the lace pattern rather than shown as obvious wedges. That is why the stripes curve softly around the shoulders instead of running straight across.
Once the yoke is wide enough, the sleeve sections are set aside and the body continues downward. The cap sleeves are short lace edgings that grow from the armhole openings, so there are no seams to sew. This saves time and avoids bulky joins in such a delicate fabric.
The front is open at the centre, with the two edges meeting under the single button. That opening is worked as part of the body, and a narrow finished edge runs down each side. Keep that edge straight and firm, because it frames the whole garment.
The hardest part is the first few yoke rounds, when the stitch count is small and the fabric curls. Place markers at each section change and count regularly. If the yoke starts to ruffle, there are too many stitches; if it cups upward like a bowl, there are too few.
Lace Bands: The Detail That Defines the Vest
Look closely and you will see the stripes are not plain. Beige bands carry dense clusters of shells, while the cream bands mix open mesh with V-shaped groups and small fans. The result is a rhythm of heavy and light rows, which gives the fabric depth without any extra colours.
Each band is only a few rounds tall, so colour changes come often. Carry the unused colour up the edge only if the gap is short; otherwise cut and weave in later. In an open lace fabric, a long carried strand can show through the holes and spoil the airy look.
The shell clusters need consistent tension. If the stitches that make up each fan are pulled tight, the shape closes and loses its petal outline. Keep them relaxed and even, and let the chain spaces between them stay slightly loose.
When you watch the video tutorial, pause at the point where the first shell band begins. Notice where the hook goes for each cluster and how the previous row is used as an anchor. Replaying that short section will save you from the most common error, which is shifting the pattern by one stitch and finding the lace misaligned a few rows later.
Colour Changes That Stay Clean
Switch colours on the last pull-through of the final stitch in a round, so the new shade starts fresh. Join the new yarn at the same point each time, and the stripe ends will line up near the front opening where they are least visible.
Choosing the Best Yarn for a Girls Vest
Cotton is the safest choice here, and it gives the stitch clarity seen in the photos. A cotton and bamboo blend adds a gentle sheen and extra drape, which suits the flared lower body. Pure mercerised cotton gives the sharpest lace and a slight crispness that holds the scalloped hem.
Wool or a wool blend is best avoided for this pattern, because children often find it itchy against the neck and the fibres can blur the stitch definition. Very fuzzy yarns hide the shells entirely, so the lace effect disappears.
For colour, the beige and cream pairing is calm and classic. Dusty pink with ivory gives a more romantic result, soft sage with cream suits a garden-party dress, and a pale blue with white gives a fresh seaside look. Choose two shades with a clear difference in value, otherwise the stripes will vanish at a distance.
How to Style a Crochet Girls Vest
The cropped length sits around the waist, so it works best over a dress with a defined waistline or a skirt with a high band. Over a plain white cotton dress, the stripes become the focal point. With a floral print, the neutral tones let the pattern stay in front.
For cooler days, wear it above a long-sleeved cotton tee and denim. For a celebration, pair it with a pale satin skirt and ankle socks. The single button can stay fastened at the neck, or be left open for a relaxed, draped line.
Tips for a Neat Finish
Weave in every end along the same colour band, going back and forth at least twice. In open lace, a loose tail can pop out and show as a tiny loop on the right side. If an end does escape, thread it back through with the yarn needle and snip close.
Block the finished vest by pinning it gently to size on a towel and misting with water. Lace relaxes beautifully with blocking, and the scalloped hem opens into clear points. If the edges ripple, stretch them slightly while damp; if the neckband flares, shape it with your fingers and let it dry flat.
Sew the button on with matching thread, and test the loop or chain space it passes through. If it feels loose, tighten the loop with a few stitches. A secure closure at the neck matters because it carries the weight of the front edges.
Wash cool by hand or on a delicate cycle, and dry flat. Cotton shrinks a little with heat, and lace stretches out of shape when hung wet.
A Delicate Handmade Heirloom
This crochet girls vest is a gentle project: a round yoke, a lace body, a scalloped hem and one pearl button. What decides how it turns out is the yarn, the even tension in the shells, the clean colour changes and a careful blocking. Choose a smooth cotton, check your gauge, and watch the video closely at the start of each new band.
Make it once and it may become a pattern you return to, in new colours, for years to come.
Video tutorial by the original creator, who shows every stitch of this crochet girls vest step by step.
Follow us on Pinterest and subscribe to the Newsletter so you don’t miss a thing!
Tutorial and photos of this girls vest by: Realza Crochet.