
A crochet shoulder bag in warm chocolate brown looks simple, yet it carries the quiet polish of a shop-bought piece, and it works up in dense, satisfying rows that feel good in the hands.
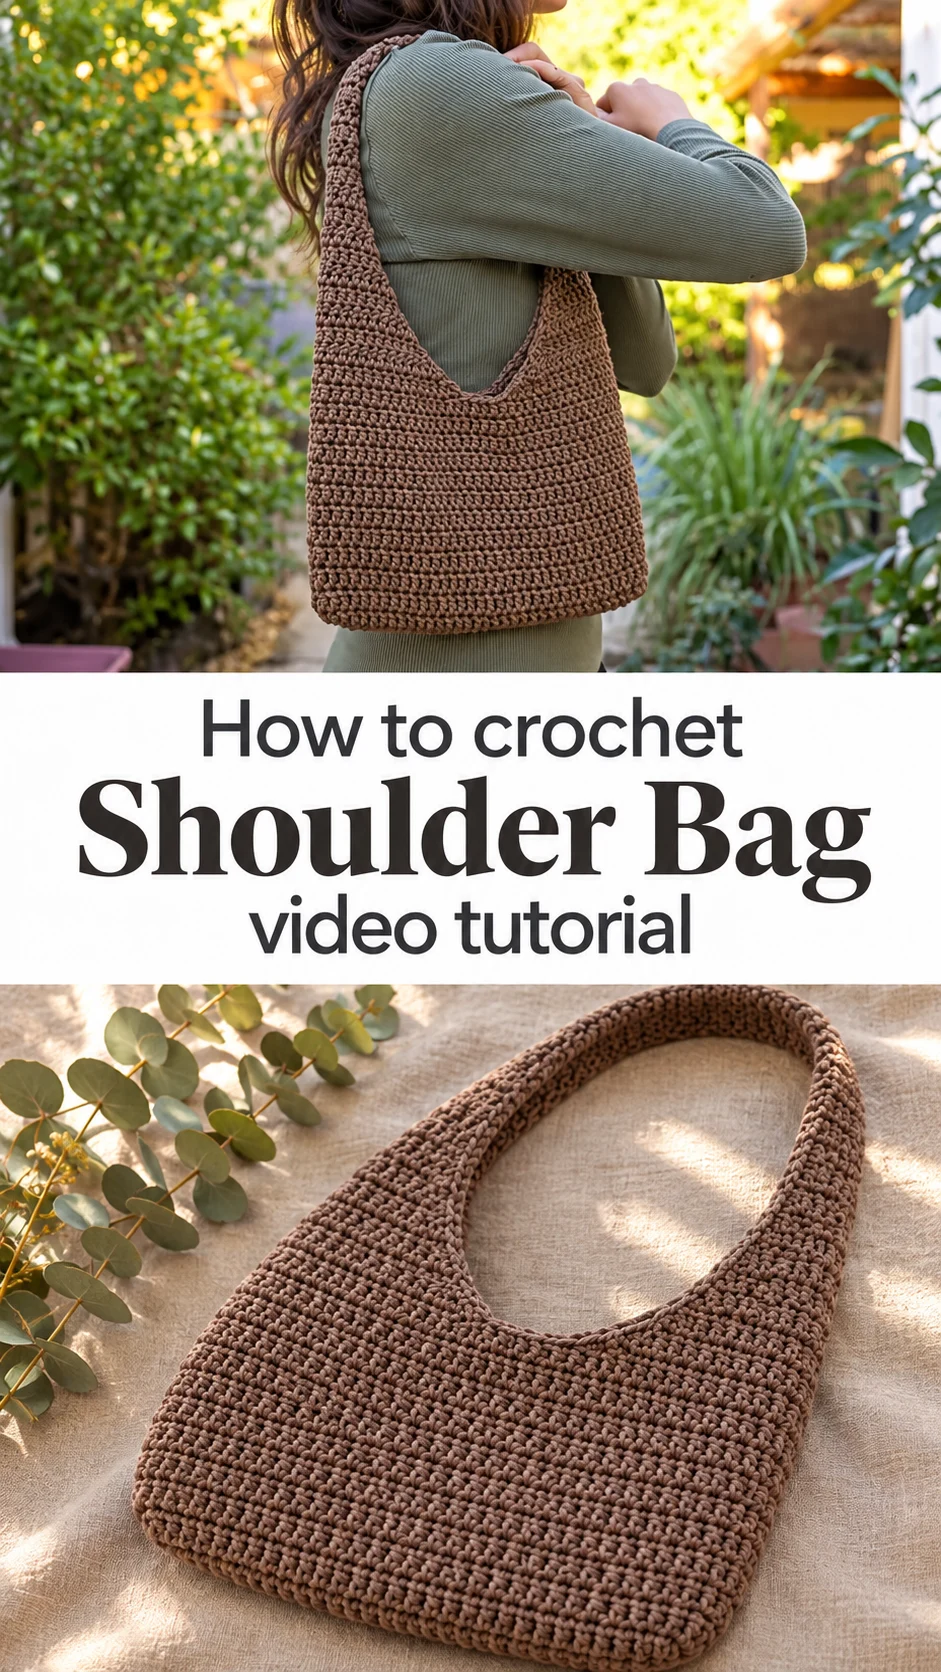
The Crochet Shoulder Bag
This crochet shoulder bag is a soft, slouchy tote with a single curved strap that flows straight out of the body. There is no separate handle sewn on at the end. The sides rise into the strap in one continuous line, so the whole bag reads as one clean shape. The fabric is dense and even, worked in a rich cocoa brown that looks almost like suede from a distance. A small scooped opening dips between the two strap ends, which gives the bag its modern, slightly architectural look. It sits close to the body when worn under the arm and hangs neatly from the shoulder. It is the kind of everyday bag that holds a phone, keys, a wallet and a paperback without any fuss.
Think of this bag as a gentle step up in skill rather than a leap. The shapes are simple, the stitches repeat, and the reward is a finished accessory you will actually reach for each morning. It also makes a thoughtful gift, since the neutral colour suits nearly anyone. Quiet, useful, and handmade.
Shoulder Bag Related Posts:
- Crochet Two-Tone Men’s Beanie: A Bold Winter Essential
- Crochet Mini Duckling: A Tiny and Charming Keepsake
- Crochet Lace Flower Motif: A Delicate Timeless Art
- Crochet Floral Clutch Bag: A Chic and Feminine Essential
Materials
For a crochet shoulder bag like this one, choose a smooth, medium-weight yarn with some body, such as a worsted cotton blend or a tightly spun acrylic-wool mix. The stitches in the bag look plump and well defined, which suggests a plied yarn that does not split. A plied yarn also resists fuzzing at the strap, where friction is highest. Pair it with a hook in the 4 to 5 mm range, and go down half a size if your fabric feels loose, because a firm gauge is what keeps the bag from stretching under weight. A tapestry needle is essential for weaving in ends and joining the seams, and stitch markers help you keep track of the strap shaping. A lining is optional, but a simple piece of cotton fabric will protect the contents and stop the stitches from catching on small items. Choose a colour with depth, such as the chocolate brown shown here, since it hides everyday wear well.
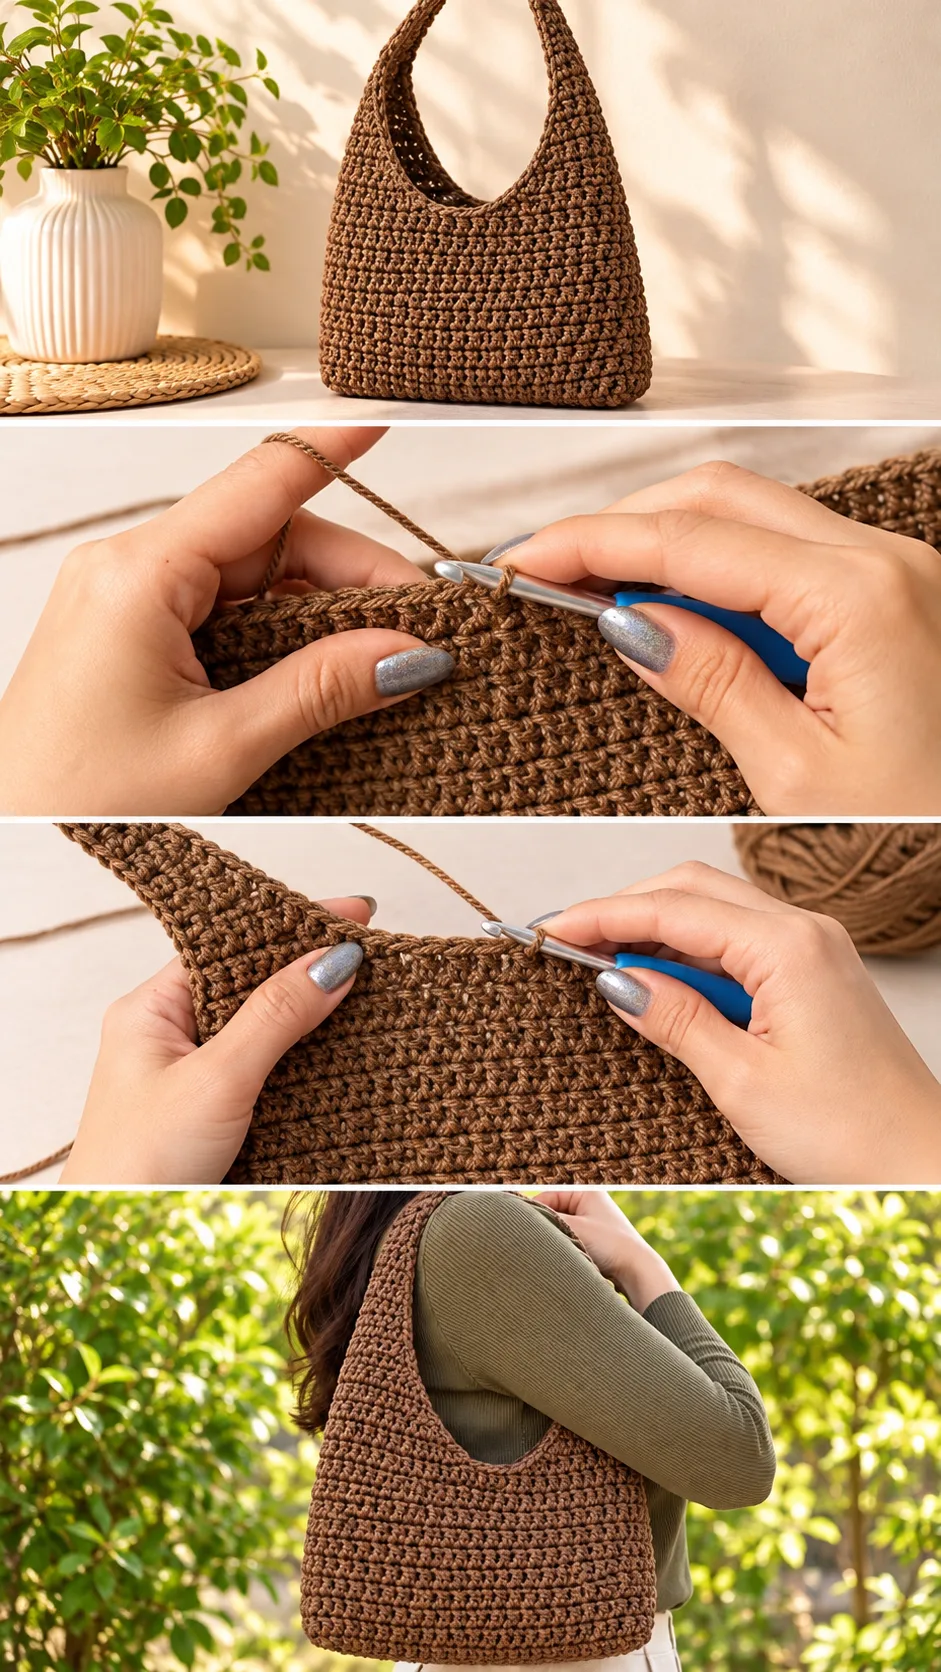
Understanding the Structure
The bag is built like a deep rectangle that narrows into a strap at the top. The body looks like a flat, rectangular piece worked in even horizontal rows, with the rows running side to side across the bag. That row direction gives the fabric its tidy, ribbed-looking lines, visible all the way down the front.
Toward the top, the sides rise into the strap section, and the centre of the bag opens into a gentle curved scoop. This is where the shaping happens. The strap is narrower than the body, so the fabric must decrease as it climbs, then continue as a slim band over the shoulder.
Because the strap and body appear to be one piece, the join at the bottom matters. The base looks squared off and firm, which suggests the sides are seamed or worked together along the bottom edge. A neat, flat seam here keeps the bag standing up when set down.
If the finished piece flops sideways, the fabric is too loose. Rework it with a smaller hook rather than trying to stiffen it afterward.
Best Stitches for a Sturdy Bag
The fabric looks like a tight, close stitch with a pronounced horizontal rib, the kind of texture you get from working a single repeating stitch through the same loop position every row. Dense stitches like this leave no gaps for keys or coins to poke through, and they hold their shape far better than open stitches.
The strong horizontal lines across the body are part of the charm. They give the bag a woven, almost basket-like surface without any fancy pattern. Keep your tension even from the first row to the last, because on a plain fabric like this every inconsistency shows.
A common problem is a fabric that grows wider as you go, usually because stitches at the row ends are accidentally doubled. If the edges start to bulge, count your stitches at the end of a row and compare it to the start. If the fabric curls inward instead, you may be working too tightly at the edges, so relax your grip slightly.
The Strap: The Detail That Defines the Bag
The strap is the signature of this design. It rises in a smooth curve from each side of the body, forming a deep V-shaped opening in the middle. Seen from the side, the bag drapes like a vest panel hanging from the shoulder, and the strap sits flat against the arm rather than twisting.
The key choice is strap width. A narrow strap looks elegant but digs into the shoulder with a heavy load, while a wider strap spreads the weight and stays comfortable. The one in the photos is moderately slim, so it suits light daily carrying. If you plan to pack more, add a few extra stitches to the strap width.
Strap length is the other decision. Try the piece on before joining the ends, since a few rows more or less changes whether the bag tucks under the arm or hangs at the hip. Mark the stitch where you want the join to fall, and measure against your body.
A strap worked in a soft yarn can stretch with use. To prevent this, keep the stitches tight in the strap section, and consider sewing a thin ribbon along the inside of the band for stability.
Choosing the Best Yarn and Colour
Yarn choice changes how the bag behaves. A cotton or cotton blend gives a matte, structured result that holds its shape and handles daily wear well, though it can feel stiff at first. A wool blend feels warmer and softer, with a slight halo, but it can stretch if overloaded. Avoid very slippery or loosely twisted yarns, since they snag easily and sag under weight.
The chocolate brown used here has a lovely depth that looks expensive and does not show dirt. If you want a different feel, try oatmeal or sand for a light, summery bag, or forest green for an autumn version. Deep neutrals like charcoal and navy also work, and they pair easily with most wardrobes.
Buy all the yarn for the project at once and check the dye lot. A slight shade change halfway up the body will show clearly across such a plain, even surface.
Following the Tutorial
The video tutorial below shows the whole bag being made, and it is worth watching the shaping closely. Pause where the sides begin to narrow toward the strap, and replay the moment the creator marks the row where the opening begins. Seeing the hook enter the edge of the fabric is much clearer in motion than in writing.
Pay attention to how the creator holds the work and keeps the tension steady across long rows. Watch the hand position near the end of the row as well, because that is where edge stitches tend to go wrong. A sensible order of work is to make the body first, shape the strap section next, then seam and finish the edges. Work a small swatch before you begin, to check that your gauge produces the firm fabric seen in the photos.
How to Style a Crochet Shoulder Bag
In the photos, the bag sits against an olive green ribbed top and sweater, and the brown and green pairing looks natural and earthy. The bag hangs at hip height with the strap resting high on the shoulder, which shows off the curved opening.
For a casual weekend outfit, try it with a white tee and wide-leg jeans, where the brown adds warmth to an otherwise plain look. For a more polished feel, carry it with a linen shirt dress and leather sandals. In cooler months, it looks equally good against a cream knit and dark trousers.
It also suits market days and café trips, since the soft fabric moulds to whatever you put inside. If you want a dressier version, add a lining and a magnetic snap at the opening.
Tips for a Neat, Lasting Finish
Weave in ends with care, running the needle along the inside of the fabric in two directions so the tail cannot work loose under the weight of the bag. On a dense fabric like this, ends buried along a row of stitches vanish completely.
Block lightly, if at all. A gentle steam or a damp press helps the rows lie flat and the strap relax, but never stretch the fabric into shape, since it may not spring back. If the strap curls, pin it flat while damp and let it dry.
Finish the top edges with a round of firm stitches to prevent rippling, and check that the edge around the scooped opening lies smooth. To care for the bag, spot clean with a damp cloth, dry flat, and store it stuffed with tissue so it keeps its shape.
A Simple Handmade Companion
This crochet shoulder bag proves that a plain stitch, a good colour and a clever shape are enough. The continuous strap, the dense fabric and the soft curved opening give it a finished, wearable look.
Success comes down to a few choices. Pick a plied yarn with some body, keep your tension firm, shape the strap with care, and finish the seams neatly.
Make it once and it will be in daily use. Brown, soft and ready for anything.
Follow us on Pinterest and subscribe to the Newsletter so you don’t miss a thing!
Tutorial and photos of this shoulder bag by: VivCrochets.