
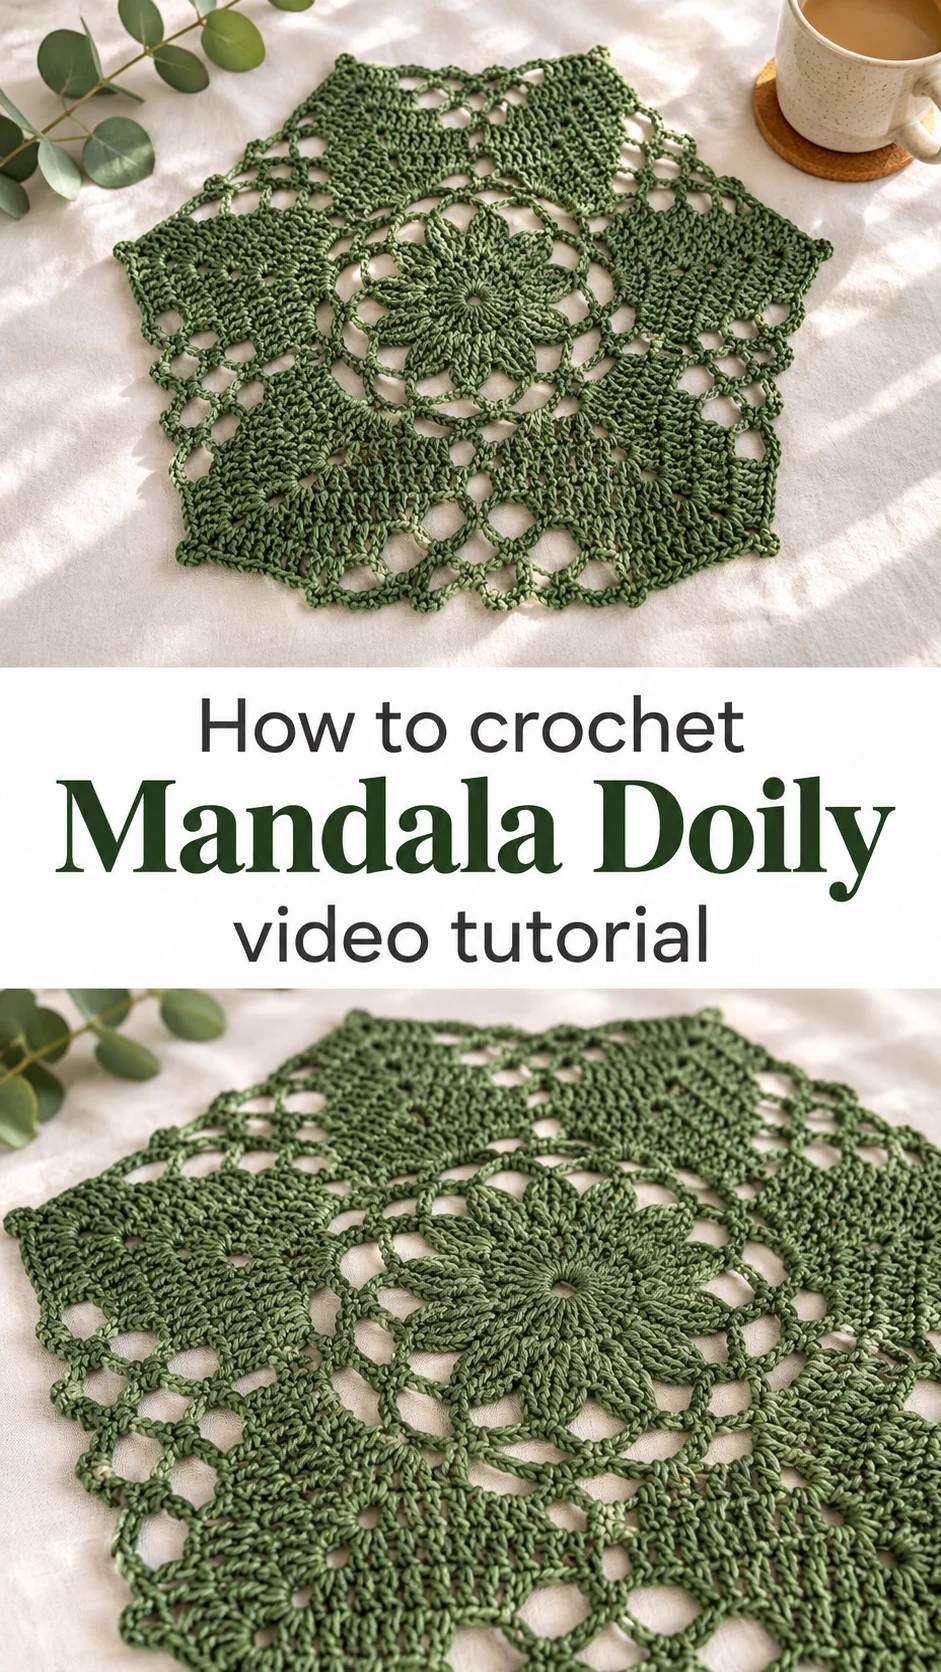
A crochet mandala doily is a small, hexagonal piece of lace that opens from a tight floral centre into airy rings and a firm, ribbed border. In forest green it feels quietly classic, the kind of handmade accent that makes a plain table look finished.
The Crochet Mandala Doily
This crochet mandala doily grows outward from a small round centre into a six-sided shape. The middle looks like a flower, with plump petal-like clusters arranged around a tiny hole. Around it sit open rings of chain loops, then a band of dense, ridged rows that give the edge real body. Each of the six corners ends in a small knob, so the outline reads almost like a star. The green is deep and leafy, somewhere between moss and forest, and the yarn looks matte and smooth. That makes every stitch easy to read. A piece like this suits a side table, a tray, a windowsill or the base of a candle. It is small enough to finish in a few sittings, yet detailed enough to feel like a proper project.
Beyond the table, a doily like this has other lives. Stitch several in matching colours and join them for a runner, or pin one under a glass vase as a gift. Making it also teaches how lace is balanced, with open sections set against solid ones. Short, satisfying, and lovely.
Mandala Doily Related Posts:
- Crochet Sunburst Tote Bag: A Vibrant Boho Essential
- Crochet Fur Tote Bag: A Chic Winter Essential
- Crochet Two-Tone Men’s Beanie: A Bold Winter Essential
- Crochet Crossbody Bag: A Chic Bohemian Essential
Materials
To make a crochet mandala doily like this one, choose a smooth, fine-to-light yarn with a tight twist. The stitches in the photos are crisp and well defined, which points to a mercerized cotton or a cotton blend rather than a fuzzy wool. The hook shown is a 2.75 mm with a gold aluminium head and a soft grip handle, a sensible size for a light yarn and a firm lace fabric. You will also need scissors, a tapestry needle for weaving in the ends, and a few pins if you plan to block the finished piece. Pins matter because the six corners and the open rings both respond well to being shaped while damp. Cotton gives the cleanest stitch definition and holds its blocked shape. A soft acrylic works too, but it can look limp in the lacy parts. Pick one colour for the classic look seen here.
Understanding the Structure
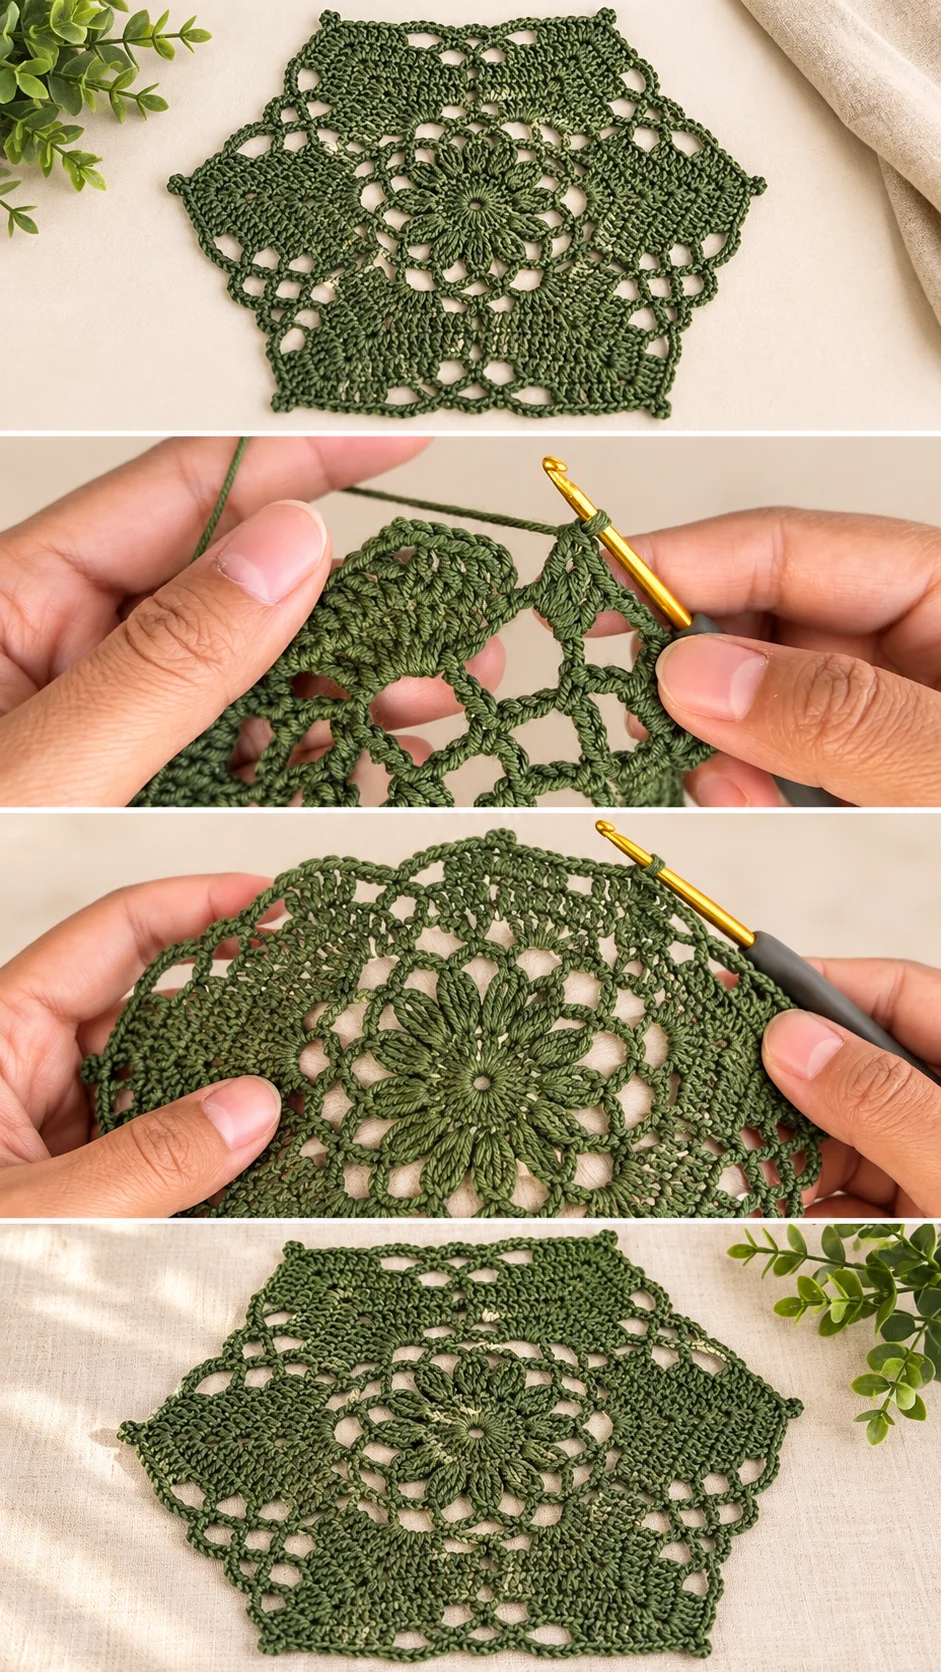
The doily is worked in the round, starting at the middle and adding rounds outward. There is no seam anywhere, and the whole thing is one continuous piece. The hexagon shape comes from adding extra stitches at six evenly spaced points on each round, which is why the corners stay sharp instead of drifting into a circle.
The centre is the flower. Its petals look like tall, slightly puffy clusters standing upright around the middle, each one separated by a small gap. Because they are bunched together, they create a raised, sculptural texture that contrasts nicely with the flat lace around them.
After the flower comes a lace round of chain loops anchored to the cluster tops. This is the airy zone. Its job is to make the centre float, and it only works if the chains are even, so every loop frames its own opening.
The outer third is the opposite. Several rounds of tall stitches are worked row on row into a dense, ridged band, and the corners are built up with extra stitches to keep each point pronounced. A last lace round of arched chains finishes the outline and ties the dense band back to the open pattern.
Ribbed Rows and Lace: The Detail That Defines It
The most distinctive thing about this doily is the contrast between its ribbed band and its open lace. The band shows clear horizontal ridges, a texture that suggests the stitches are worked into the back loops or around the post of the previous round. Watch the video closely at this point and pause to see where the hook enters each stitch.
The choice you face is how tightly to work the dense rounds. Too tight and the doily ruffles upward, since the band tries to shrink while the lace stays loose. Too loose and the ridges lose their crispness. Aim for stitches that stand firmly side by side without crowding.
The corners deserve the same care. Each one finishes with a tiny rounded knob that gives the star-like outline its character. If the knobs look uneven, check that every corner received the same number of stitches in the same place, because a single skipped stitch shifts the whole point.
Choosing the Best Yarn and Colour
Three yarn types are worth considering. Mercerized cotton gives the sharpest stitches and a slight sheen, and it blocks into a stiff, lasting shape. A cotton and acrylic blend is softer and more forgiving on the hands, though it holds blocking a little less firmly. A fine wool gives a warmer, fuzzier look, but the lace rings will blur and the chain loops lose their definition.
Avoid anything with heavy fuzz or a loose twist. Strands that split under the hook make the cluster flower look messy, and a tiny centre has nowhere to hide it.
For colour, the olive-leaf green in the photos is a good anchor, and it pairs well with white linen, light wood and plants. Cream or ecru gives the traditional heirloom look. Dusty rose or soft sage suits a gentler room, while charcoal or navy turns the same lace into something modern.
If you want more than one colour, keep it simple. Work the flower centre in a contrasting shade and carry the main colour through the rest. Anything busier fights the lace.
Skill Level and Where It Gets Tricky
This is a comfortable project for a confident beginner moving toward intermediate. The stitches themselves are basic: chains, slip stitches and tall stitches. The challenge is following a round-based lace structure without losing your place.
The slowest part is the cluster flower in the centre. Working into a very small ring with a fine yarn feels cramped, and the clusters need to be pulled up evenly. Take it gently, and use the video to watch how the loops are drawn through before closing each cluster.
The second stumbling point is the chain-loop round. If a loop comes out too short, the whole round tightens and the doily starts to cup. If it comes out too long, the lace sags. When you notice cupping, unpick back to the last good round, since blocking can only fix small differences.
Counting corners is the habit that saves the most time. Mark each of the six points with a stitch marker, and check at the end of every round that all six still look alike.
How to Style a Crochet Mandala Doily
In the photos, the doily lies flat on a pale surface beside a leafy green plant, and the colour harmony is exactly what makes it work. Try the same pairing at home: place it on a cream tablecloth or a light wooden shelf, and let a potted plant sit on top.
Other ideas follow naturally. Set a candle or small bowl in the centre so the flower shows around it. Lay one under a teapot or a vase of eucalyptus on a dining table. Use a few as coasters for a tea tray, or frame one against a dark fabric as wall decor.
Six doilies in a row, joined at the corners, would form a pretty table runner. The pointed outline makes the pieces tessellate with small gaps, and those gaps can be filled with simple chains.
As a gift, it pairs well with a small plant or a set of tea. Roll it loosely and tie it with a ribbon in a matching shade.
Tips for a Crisp Finished Doily
Weave in ends along the dense band, not through the lace. The ridged rows hide tails well, while ends buried in open chain loops tend to show and sometimes pull the lace out of shape.
Block every time. Soak the piece in cool water, press out the moisture in a towel, and pin it flat with the six corners pulled gently to points. Pin each outer arch so the scalloped edge opens out. Let it dry completely before unpinning. A light spritz of starch or a diluted sugar-and-water mix gives cotton lace extra stiffness if you want it to stand perfectly flat.
If the finished doily ripples at the edge, the outer rounds were worked slightly too loose; blocking will help, but tighten your tension next time. If the middle bulges upward, the early rounds were too tight. Both problems appear most clearly when the piece sits on a table.
For care, hand wash in lukewarm water with mild soap, reshape while damp, and dry flat. Machine agitation tangles the fine chains and can stretch the lace.
A Gentle Handmade Accent
This crochet mandala doily is a small project with a lot of character: a raised flower centre, a floating ring of lace, a ridged border and six neat corners. Whether it ends up on a side table or in a gift box, it brings a calm, leafy touch to a room.
Four things decide how well it turns out. Pick a smooth cotton yarn, keep your tension even from the first cluster to the last chain, count your six corners every round, and block it firmly. Watch the video through once before you start, then pause at the centre and the ribbed rounds.
Small stitches, quiet beauty.
Video tutorial for this crochet mandala doily by the original creator on YouTube; all pattern credit belongs to them.
Follow us on Pinterest and subscribe to the Newsletter so you don’t miss a thing!
Tutorial and photos of this mandala doily by: Knitting time🧶by Dina.