
Alright, yarn lovers, this one is for you. You know that gorgeous dusty rose skein you have been saving for "the right project"? This is it. The Dusty Rose Garden Bobble Sweater combines a seamless top-down construction with dimensional floral appliques, lantern sleeves covered in sculpted bobbles, and a romantic garden yoke that looks far more complex than it actually is. Fair warning: this is an intermediate project that will take you 26 to 36 hours total, but every single hour is worth it.
Get the Ad-Free PDF Pattern
You can find the free pattern below, or you can purchase the ad-free printable PDF from my shop.
Get the Printable PDF →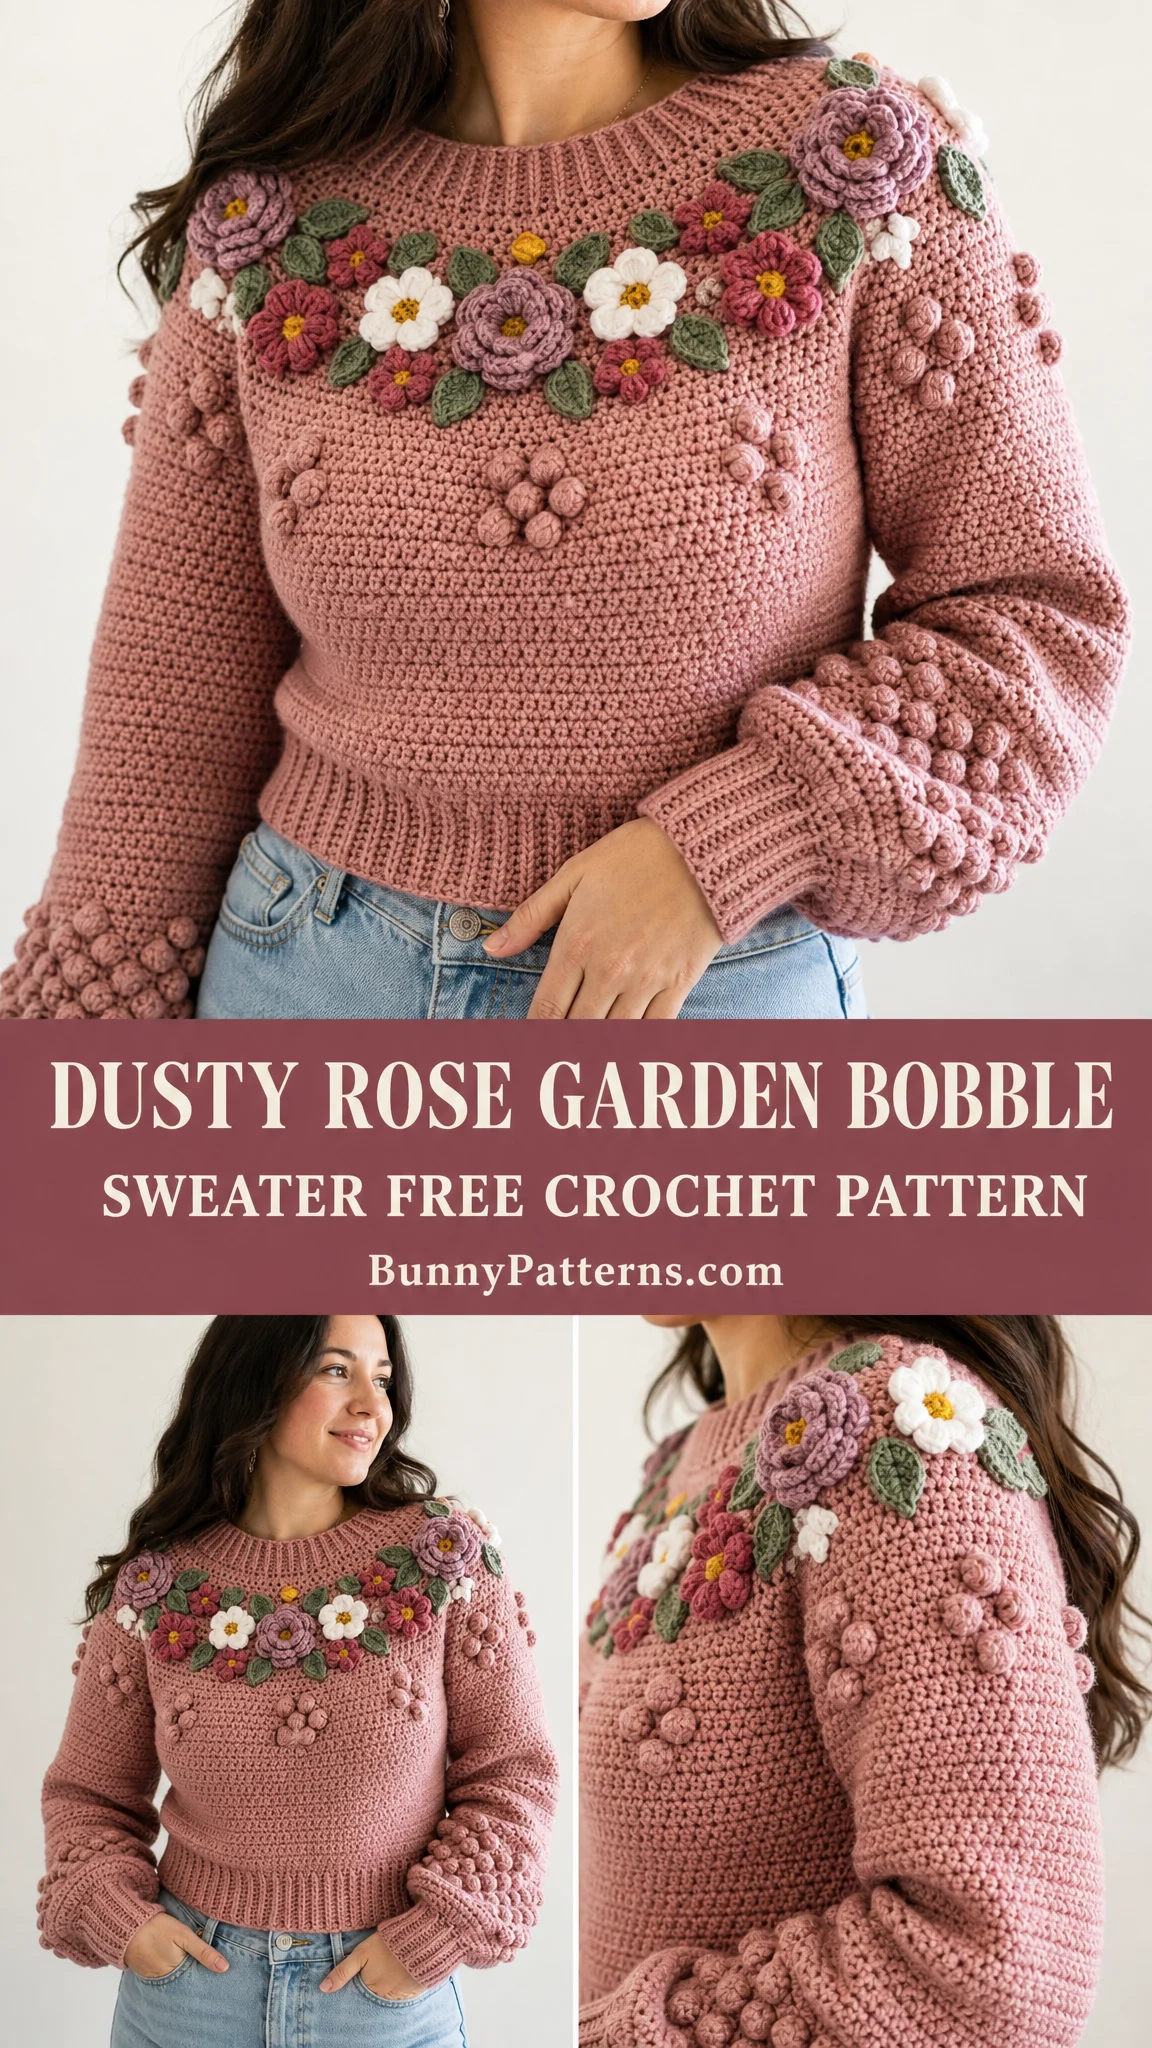
Why This Sweater is Worth Your Time
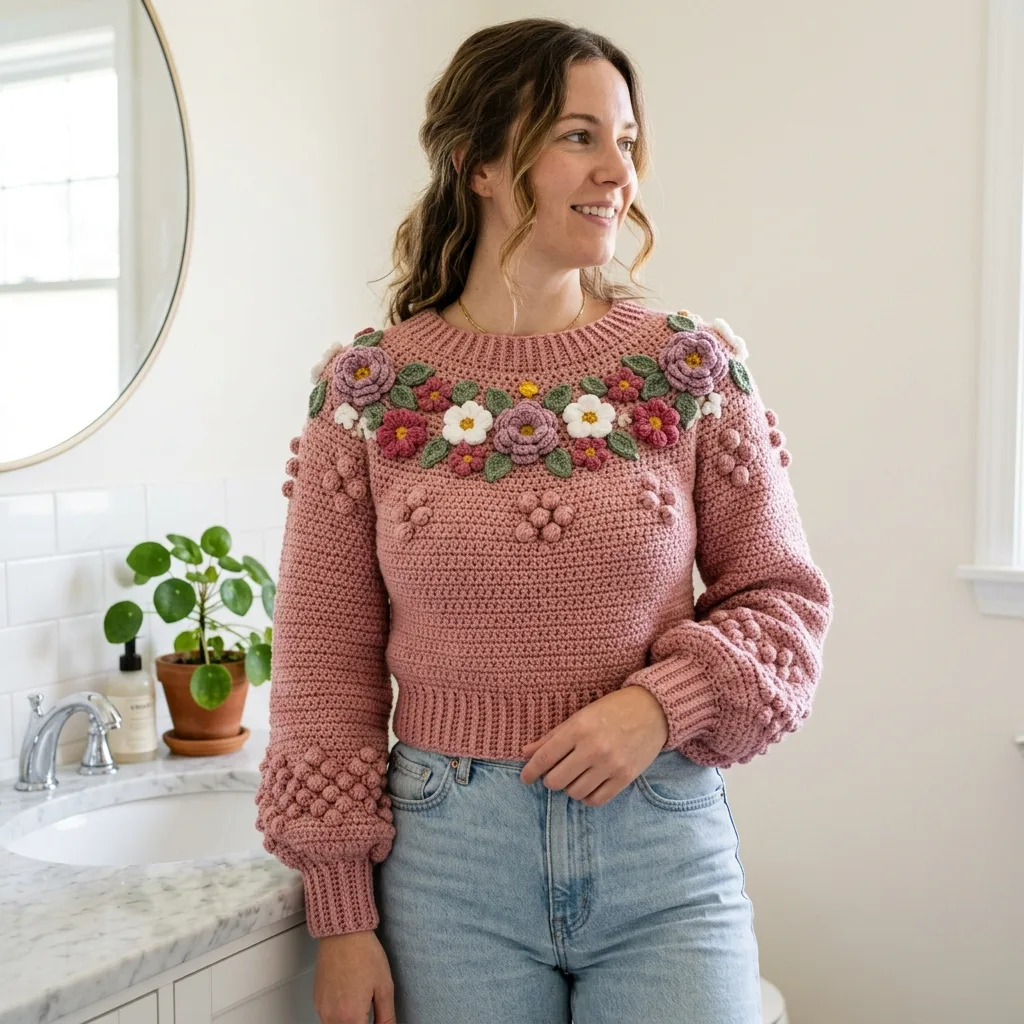
This sweater has serious statement piece energy. The yoke features hand-sewn roses, five-petal flowers, and leaves that create a lush garden across your shoulders. The body stays simple with single crochet worked in the round, while the sleeves bring texture through strategically placed bobble stitches. The gathered lantern sleeve effect comes from decreasing down to a fitted cuff with attached ribbing.
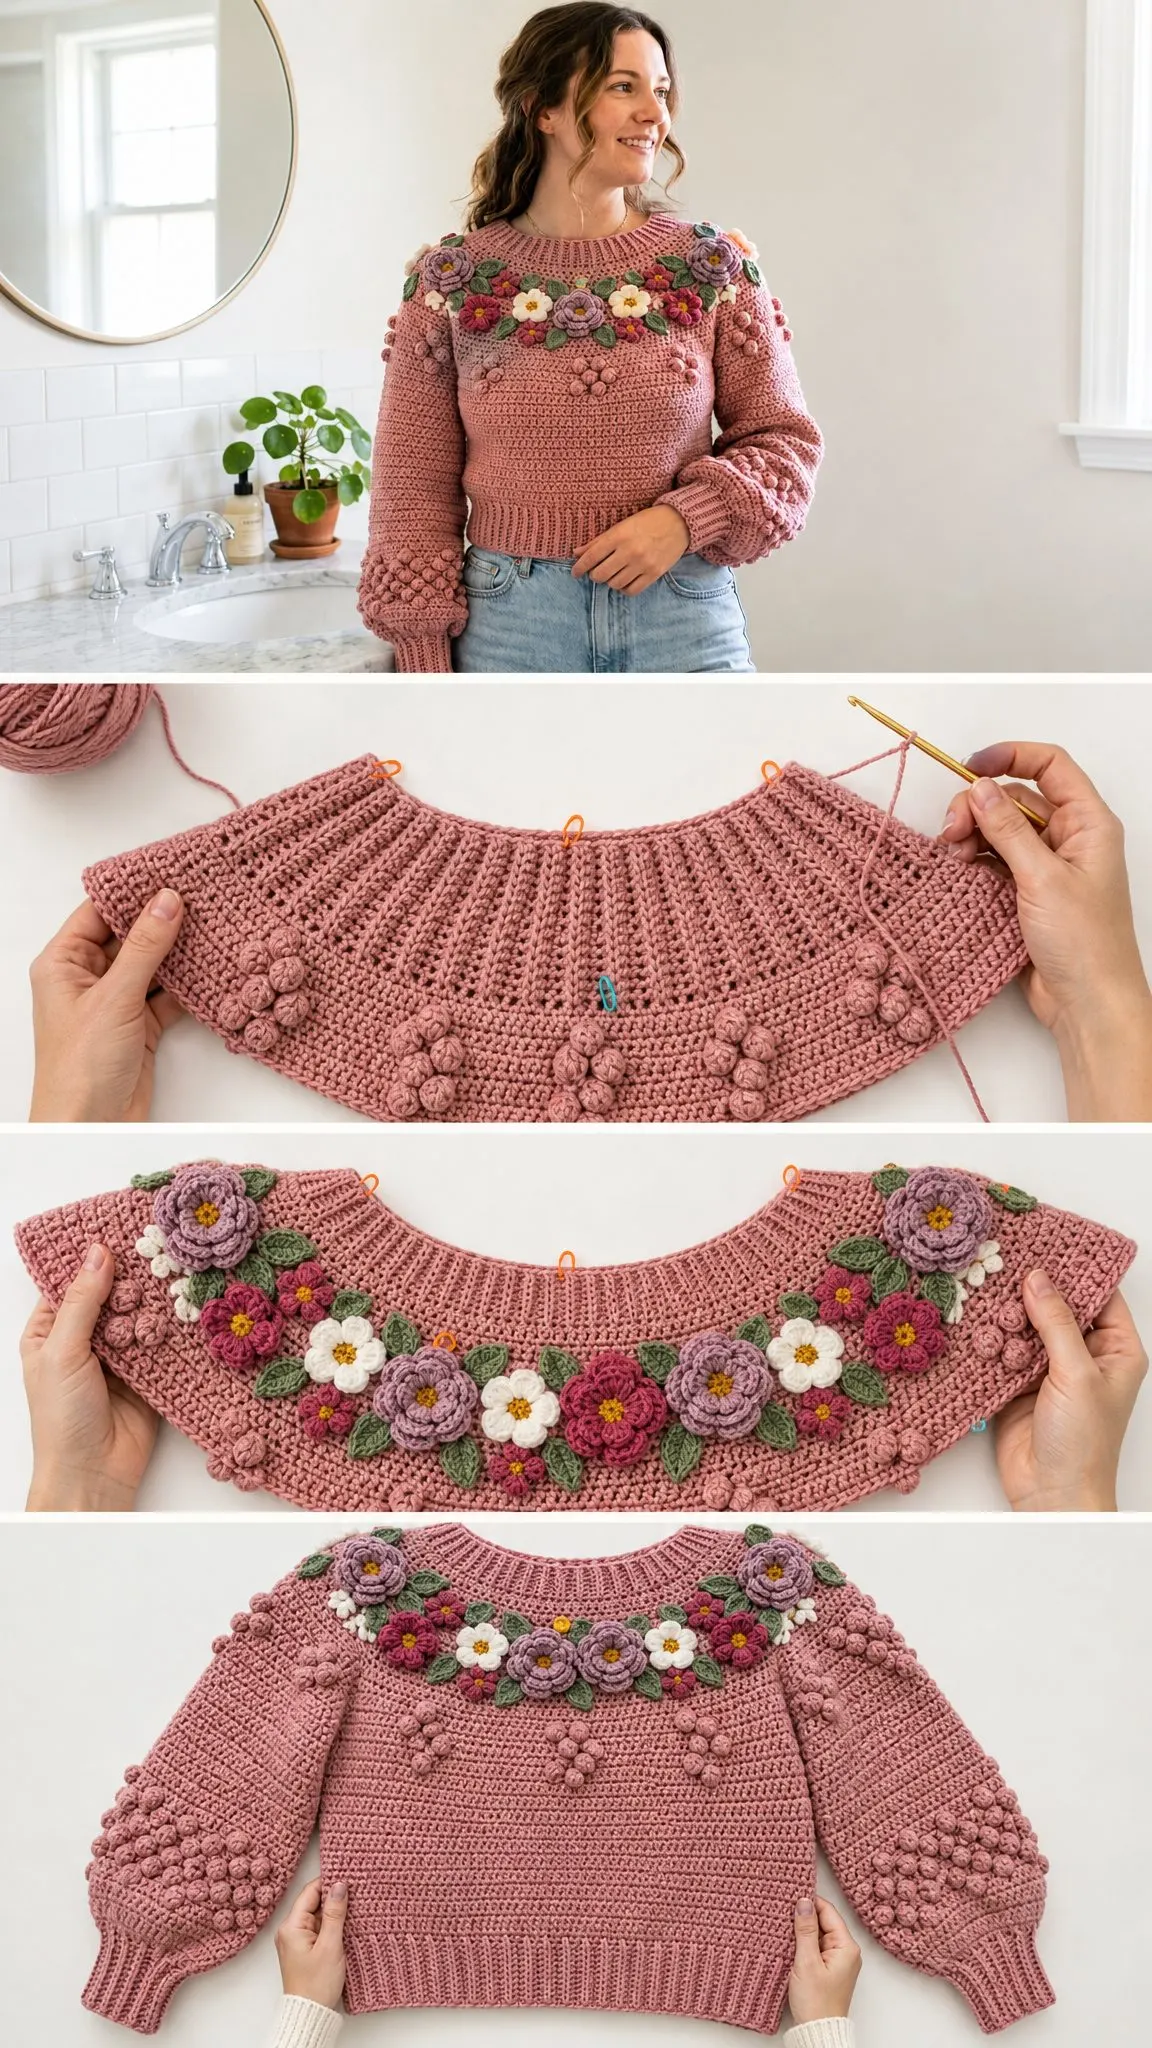
What makes this construction interesting is how everything flows together. You start with a separate ribbed collar, pick up stitches around the edge, then work the yoke seamlessly in increasing rounds. After splitting for the body and sleeves, you work straight down before adding attached ribbing at the hem. The flowers and leaves are made separately and sewn on at the end, so you can customize their placement to your taste.
Materials You Will Need
Before you start, gather everything so you are not hunting for supplies mid-project.
Yarn (Worsted/Aran Weight):
Hooks:
Notions:
Yarn Suggestions:
Lion Brand Heartland works beautifully for this project with its soft worsted weight and gentle drape. Paintbox Yarns Simply Aran offers a bright color range perfect for the florals. WeCrochet Brava Worsted is an easy-care acrylic option that gives a wool-like feel.
For substitutions, choose a smooth worsted or aran yarn that reaches the stated gauge. Wool-acrylic blends give bounce and a lighter feel, while cotton-acrylic blends provide stronger stitch definition.
Gauge
Getting gauge right is crucial for garment fit.
Main fabric gauge: 14 single crochet (sc) and 16 rounds = 4 inches (10 cm) after blocking with the 5 mm hook.
Ribbing gauge: 18 slip stitches worked in the back loop only (BLO) and 18 rows = 4 inches (10 cm).
Always make a gauge swatch before starting. If your stitches are too big, go down a hook size. If they are too small, go up a hook size.
Finished Measurements
This pattern is written for adult size M/L:
Intended ease: 4 to 6 inches (10 to 15 cm) of positive ease for a comfortable, relaxed fit.
Stitch Abbreviations and Definitions
This pattern uses US crochet terms. If you are a UK crocheter, remember that US single crochet (sc) equals UK double crochet (dc), and US double crochet (dc) equals UK treble crochet (tr).
Special Stitches
Slip Stitch BLO Rib: Chain the ribbing height. Working into the back loops only, slip stitch in each stitch across. Chain 1, turn. Keep your loops relaxed so the band stretches properly.
5-dc Bobble: Yarn over, insert hook in indicated stitch, pull up loop, yarn over and pull through 2 loops. Repeat 4 more times in the same stitch until 6 loops are on hook. Yarn over and pull through all 6 loops. Chain 1 to close. The closing chain does not count as a stitch.
Pattern Instructions
Part 1: Ribbed Collar
With your 4 mm hook and main color, chain 9.
Row 1: Slip stitch in 2nd chain from hook and each chain across. (8 sl sts)
Rows 2-72: Chain 1, turn, slip stitch BLO across.
Join the short ends with slip stitches to form a ring. Rotate to the long edge.
Round 1: Chain 1, pick up and single crochet 72 stitches evenly around the collar edge. Join. (72 sc)
Part 2: Round Yoke
Change to your 5 mm hook. The chain 1 at the start of each round does not count as a stitch. Join each round with a slip stitch to the first single crochet.
Round 2: 2 sc in next st, sc in next 5; repeat from around. (84 sc)
Round 3: Sc around. (84 sc)
Round 4: *2 sc in next st, sc in next 6; repeat around. (96 sc)
Round 5: Sc around. (96 sc)
Round 6: *2 sc in next st, sc in next 7; repeat around. (108 sc)
Round 7: Sc around. (108 sc)
Round 8: *2 sc in next st, sc in next 8; repeat around. (120 sc)
Round 9: Sc around. (120 sc)
Round 10: *2 sc in next st, sc in next 9; repeat around. (132 sc)
Round 11: Sc around. (132 sc)
Round 12: *2 sc in next st, sc in next 10; repeat around. (144 sc)
Round 13: Sc around. (144 sc)
Round 14: *2 sc in next st, sc in next 11; repeat around. (156 sc)
Round 15: Sc around. (156 sc)
Round 16: *2 sc in next st, sc in next 12; repeat around. (168 sc)
Rounds 17-19: Sc around each round. (168 sc)
Round 20: *2 sc in next st, sc in next 13; repeat around. (180 sc)
Rounds 21-24: Sc around each round. (180 sc)
Checkpoint: Your yoke should measure about 8.5 inches (21.5 cm) from the top collar edge and about 51.5 inches (131 cm) around the lower edge before the split.
Part 3: Split for Body
Split Round: Sc 54 for back, skip 36 sleeve stitches, chain 16 for underarm, sc 54 for front, skip 36 sleeve stitches, chain 16 for underarm. (140 sts)
Body Rounds 1-36: Sc around in each sc and underarm chain. (140 sc each round)
Hem Rib: Chain 8 from the body edge. Work attached slip stitch BLO rib: 7 slip stitches per row, joining one body stitch every 2 rows.
Checkpoint: Body circumference is about 40 inches (101.5 cm). Body from underarm to top of hem is about 9 inches (23 cm) before ribbing.
Part 4: Sleeves (Make 2)
Join yarn at center underarm. Work with the 5 mm hook in joined rounds. Chain 1 does not count as a stitch.
Round 1: Sc in 16 underarm chain and 36 held sleeve stitches. (52 sc)
Rounds 2-12: Sc around. (52 sc)
Round 13: *Sc2tog, sc in next 11; repeat around. (48 sc)
Rounds 14-20: Sc around. (48 sc)
Round 21: *Bobble in next st, sc in next 5; repeat around. (48 sts / 8 bobbles)
Round 22: Sc around, pushing bobbles to the right side. (48 sc)
Round 23: *Sc in next 3, bobble, sc in next 2; repeat around. (48 sts / 8 bobbles)
Round 24: Sc around. (48 sc)
Round 25: Repeat Round 21. (48 sts / 8 bobbles)
Round 26: *Sc2tog, sc in next 4; repeat around. (40 sc)
Round 27: *Sc2tog, sc in next 3; repeat around. (32 sc)
Cuff Rib: With the 4 mm hook, chain 10. Work attached slip stitch BLO rib around cuff for 32 cuff stitches. (9 sl sts per rib row)
Floral Appliques
Large Rose (Make 4)
Chain 31.
Row 1: Sc in 2nd chain and each chain across.
Row 2: *Sc, hdc, 3 dc, hdc, sc in next 5 stitches; repeat across.
Roll into a rose shape and sew through the base to secure.
Five-Petal Flower (Make 10 total: 6 berry/lavender, 4 white)
Make a magic ring. *Chain 2, 3 dc, chain 2, slip stitch into ring; repeat 5 times. Tighten the ring.
Leaf (Make 24)
Chain 8. Sc in 2nd chain, hdc, dc, dc, hdc, sc, sl st. Work down the opposite side: sc, hdc, dc, dc, hdc, sc, sl st.
Flower and Leaf Placement
Block all motifs before attaching. Pin the large roses first: one on each shoulder front and one on each shoulder back. Add berry and lavender flowers across the front yoke, then white flowers between the roses. Fill gaps with leaves, keeping the lowest motif row about 1.5 inches (4 cm) below the collar rib.
Recommended motif map: 4 large roses, 10 five-petal flowers, 24 leaves, and 10 small yellow centers.
Sew with matching yarn through the back loops of motifs only so petals remain dimensional.
Body Bobble Clusters
Make 18 loose bobbles separately for the raised flower-dot clusters on the upper body. Work one 5-dc bobble into a magic ring, fasten off, and leave a long tail. Sew in groups of 3 bobbles to form 6 tiny flower clusters across the front and sleeves. Keep clusters above the bust line and away from underarm seams.
Checkpoint: After attaching the yoke garden, the floral band should cover approximately the top 3 inches (7.5 cm) of the sweater, with the lower edge forming a gentle scalloped curve from shoulder to shoulder.
Size Customization Tips
For a smaller bust: Split at 48 back, 32 sleeve, 48 front, 32 sleeve and chain 14 under each arm for a 124-stitch body, about 35.5 inches (90 cm).
For a larger bust: Work two extra even rounds after Round 24, then split 60 back, 40 sleeve, 60 front, 40 sleeve and chain 18 under each arm for a 156-stitch body, about 44.5 inches (113 cm).
For length adjustments: Add or remove plain sc rounds before ribbing on the body or sleeves. Keep bobble sleeve rounds on a 48-stitch multiple or place bobbles by eye.
Finishing and Blocking
Weave in all ends on the wrong side. Use split plies of matching yarn for the neatest floral sewing.
Close any tiny underarm gaps with mattress stitch before weaving ends.
Steam lightly from the wrong side or wet block flat. Do not flatten bobbles or flower petals. Shape them with your fingers while damp.
Try on after blocking. If the neckline feels loose, add one round of slip stitches around the inside collar edge with the 4 mm hook.
Care Instructions
Hand wash or machine wash cold on delicate if your yarn allows. Lay flat to dry. Store folded rather than hung to preserve the shoulder and yoke shape.
Troubleshooting Common Issues
Yoke ripples: Your increases are too loose or gauge is wide. Switch to a smaller hook for two plain rounds.
Yoke cups: Your fabric is tight or row gauge is short. Add one extra plain round before the split.
Sleeves feel tight: Add 2 to 4 extra underarm chains on each side. Remember this also adds body stitches.
Bobbles sink inward: Push each bobble to the right side before making the next stitch.
Flowers feel heavy: Sew only through centers and leaf bases, then tack outer petals lightly.
Maker Checkpoints
Use these numbers to verify your work as you go:
Left-Handed Crocheters
Work the written instructions as usual. Your rounds will travel opposite the photos. Place a marker at the back neck and arrange floral motifs symmetrically from center front outward.
Thank you so much for choosing this pattern! I would absolutely love to see your finished sweaters, so please tag me on Instagram or share in my Facebook group when you complete yours. If you want to save this project for later, pin it to your favorite Pinterest board so you can find it when you are ready to cast on. And if you make this sweater, drop a comment below. I read every single one!
Want a Quick & Easy Printable Version?
Get a clean, beautifully formatted PDF of this pattern — easy to follow step by step, ready to print or save on any device. No scrolling, no distractions, just the pattern.
Get the Printable PDF →You Might Also Like
- Lavender Dream Ankle Socks Free Crochet Pattern
- Lavender Peony Bloom Crochet Dress Free Crochet Pattern
- Sage Wildflower Crochet Backpack Free Pattern
- Midnight Navy Elegant Braided Clutch Free Crochet Pattern