
I don’t know about you, but I have a hard time resisting anything with daisies on it. Add in soft pastel yarn and a tiny sundress silhouette? I’m completely done for.
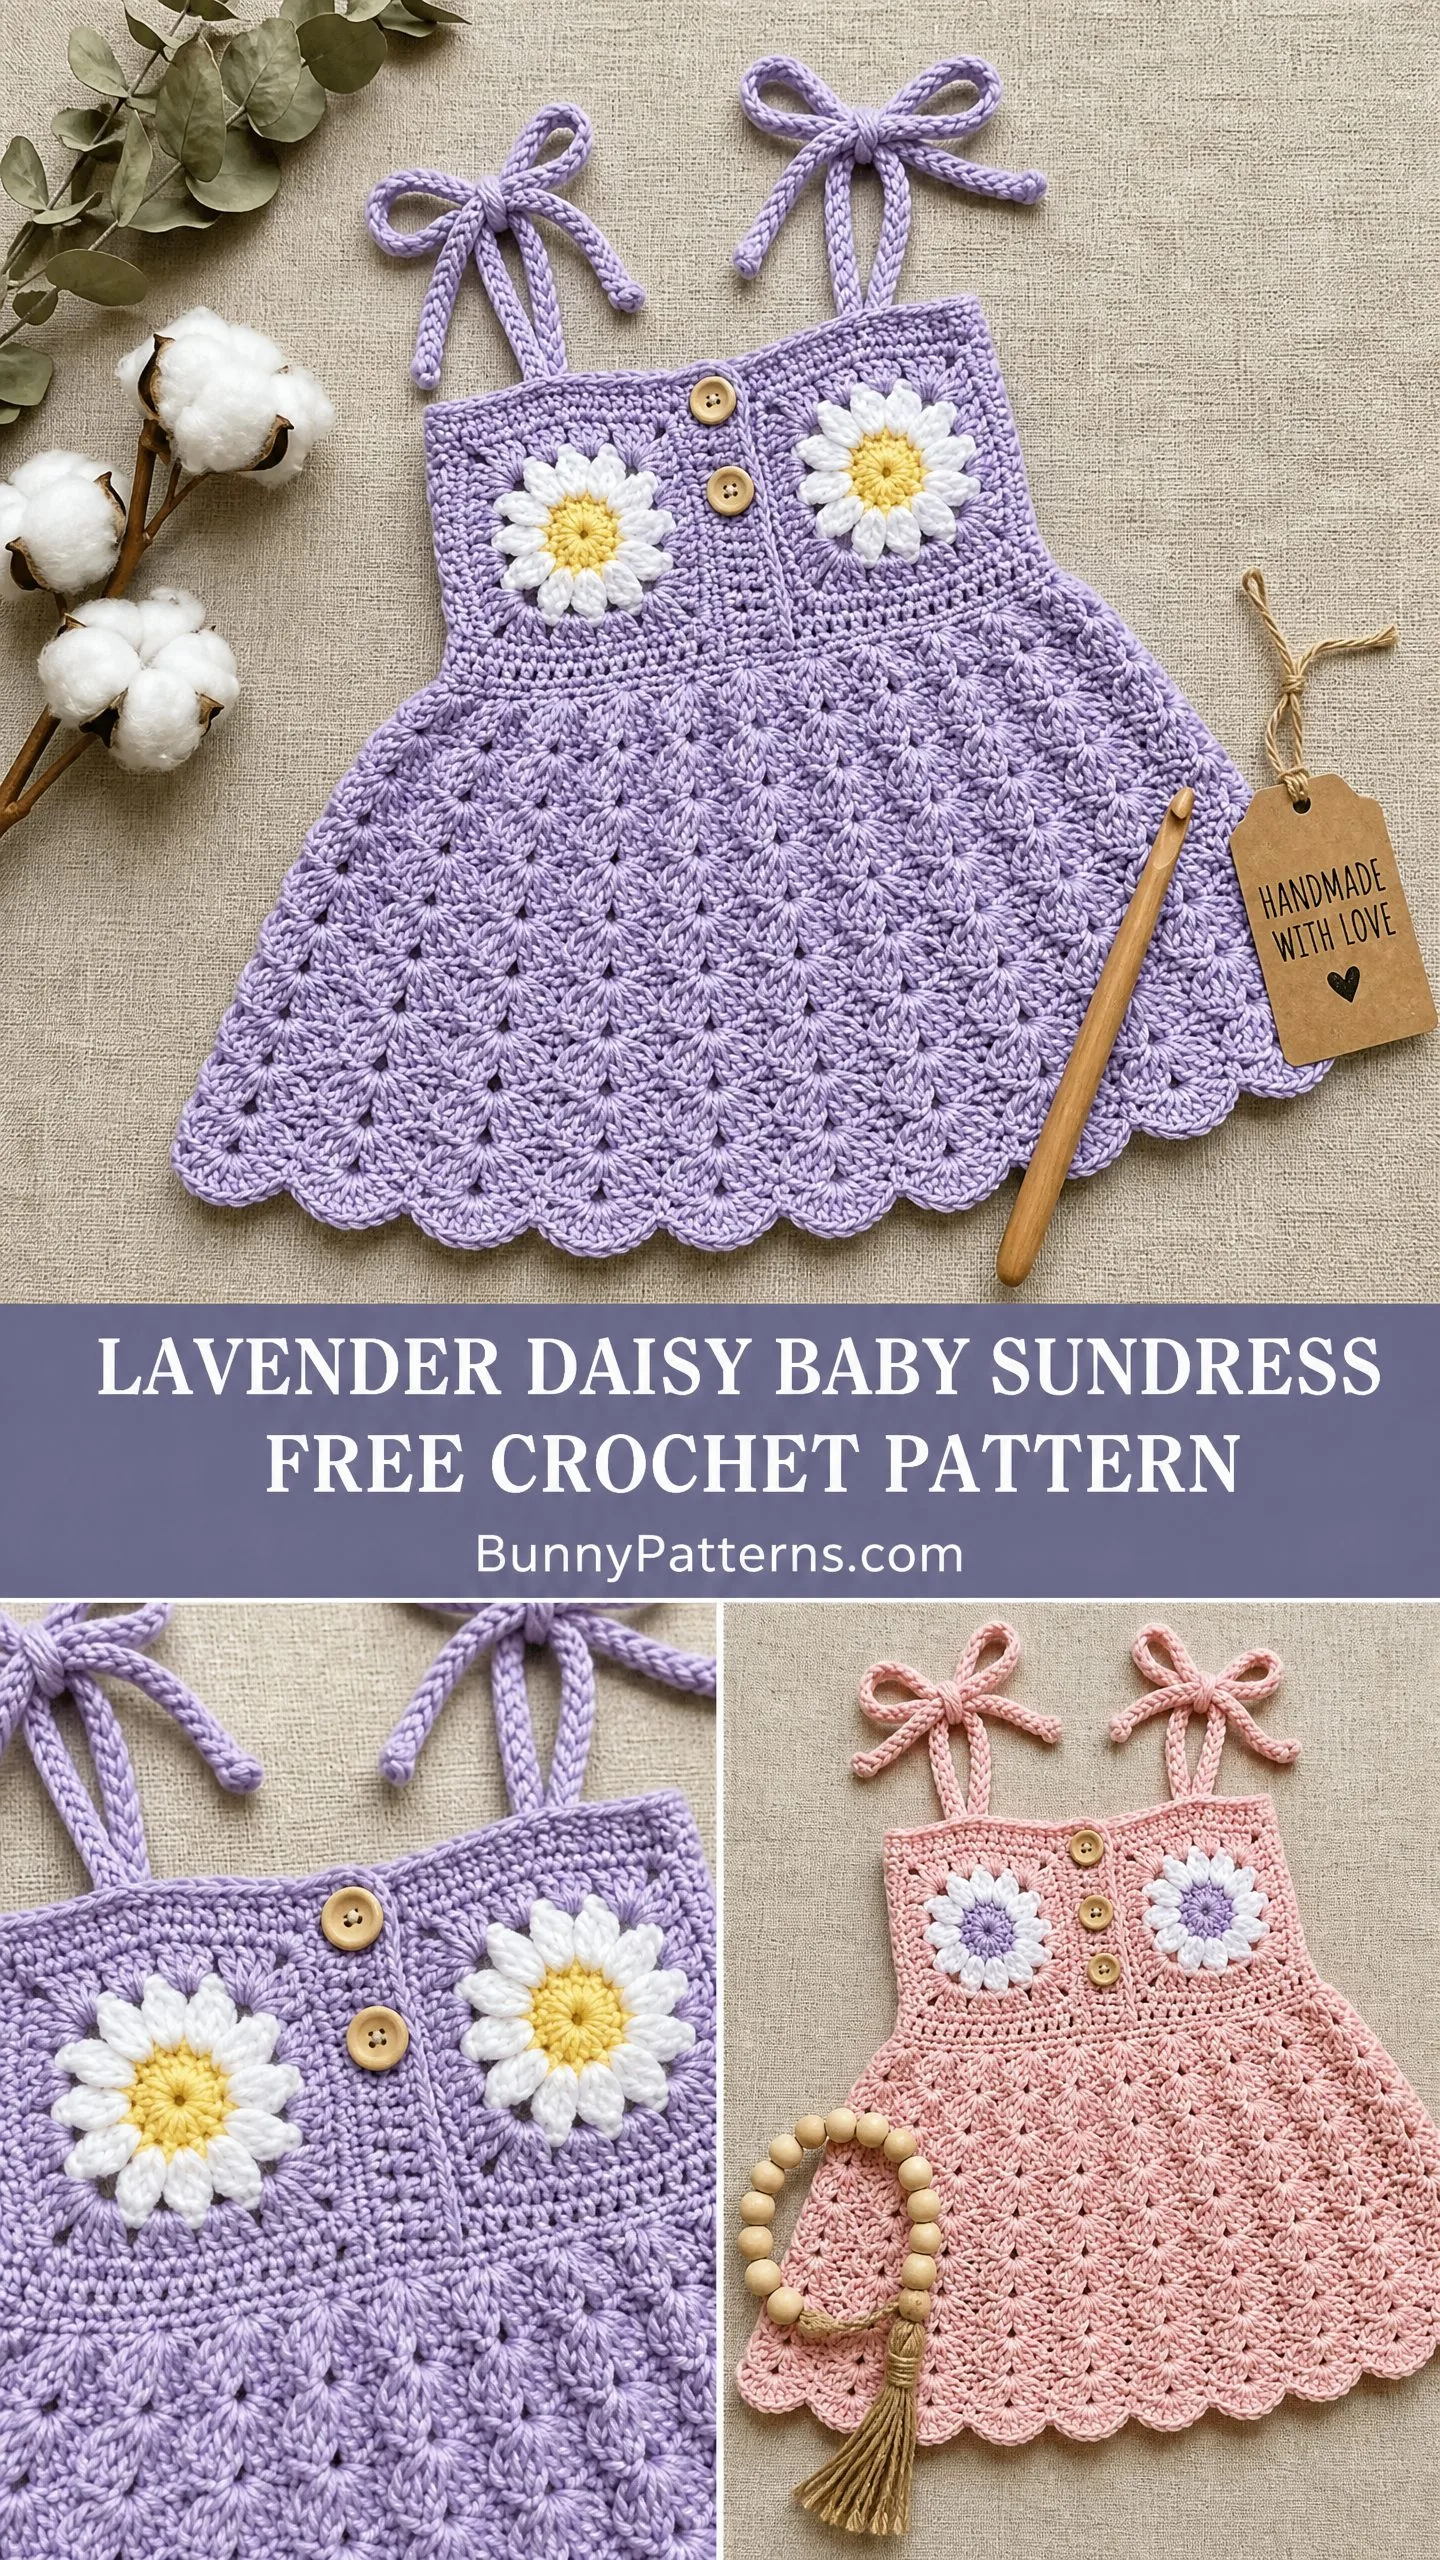
This little baby sundress has been living rent-free in my head ever since I first sketched it out. The combination of cheerful daisy granny squares, sweet tie straps that form bows at the shoulders, and that fluttery shell stitch skirt just makes my crafter heart sing.
If you’ve been waiting for the perfect project to gift a new baby or spoil your own little one, this is it. The construction is more straightforward than it looks, and I’m going to walk you through every single step.
About This Crochet Baby Dress Pattern
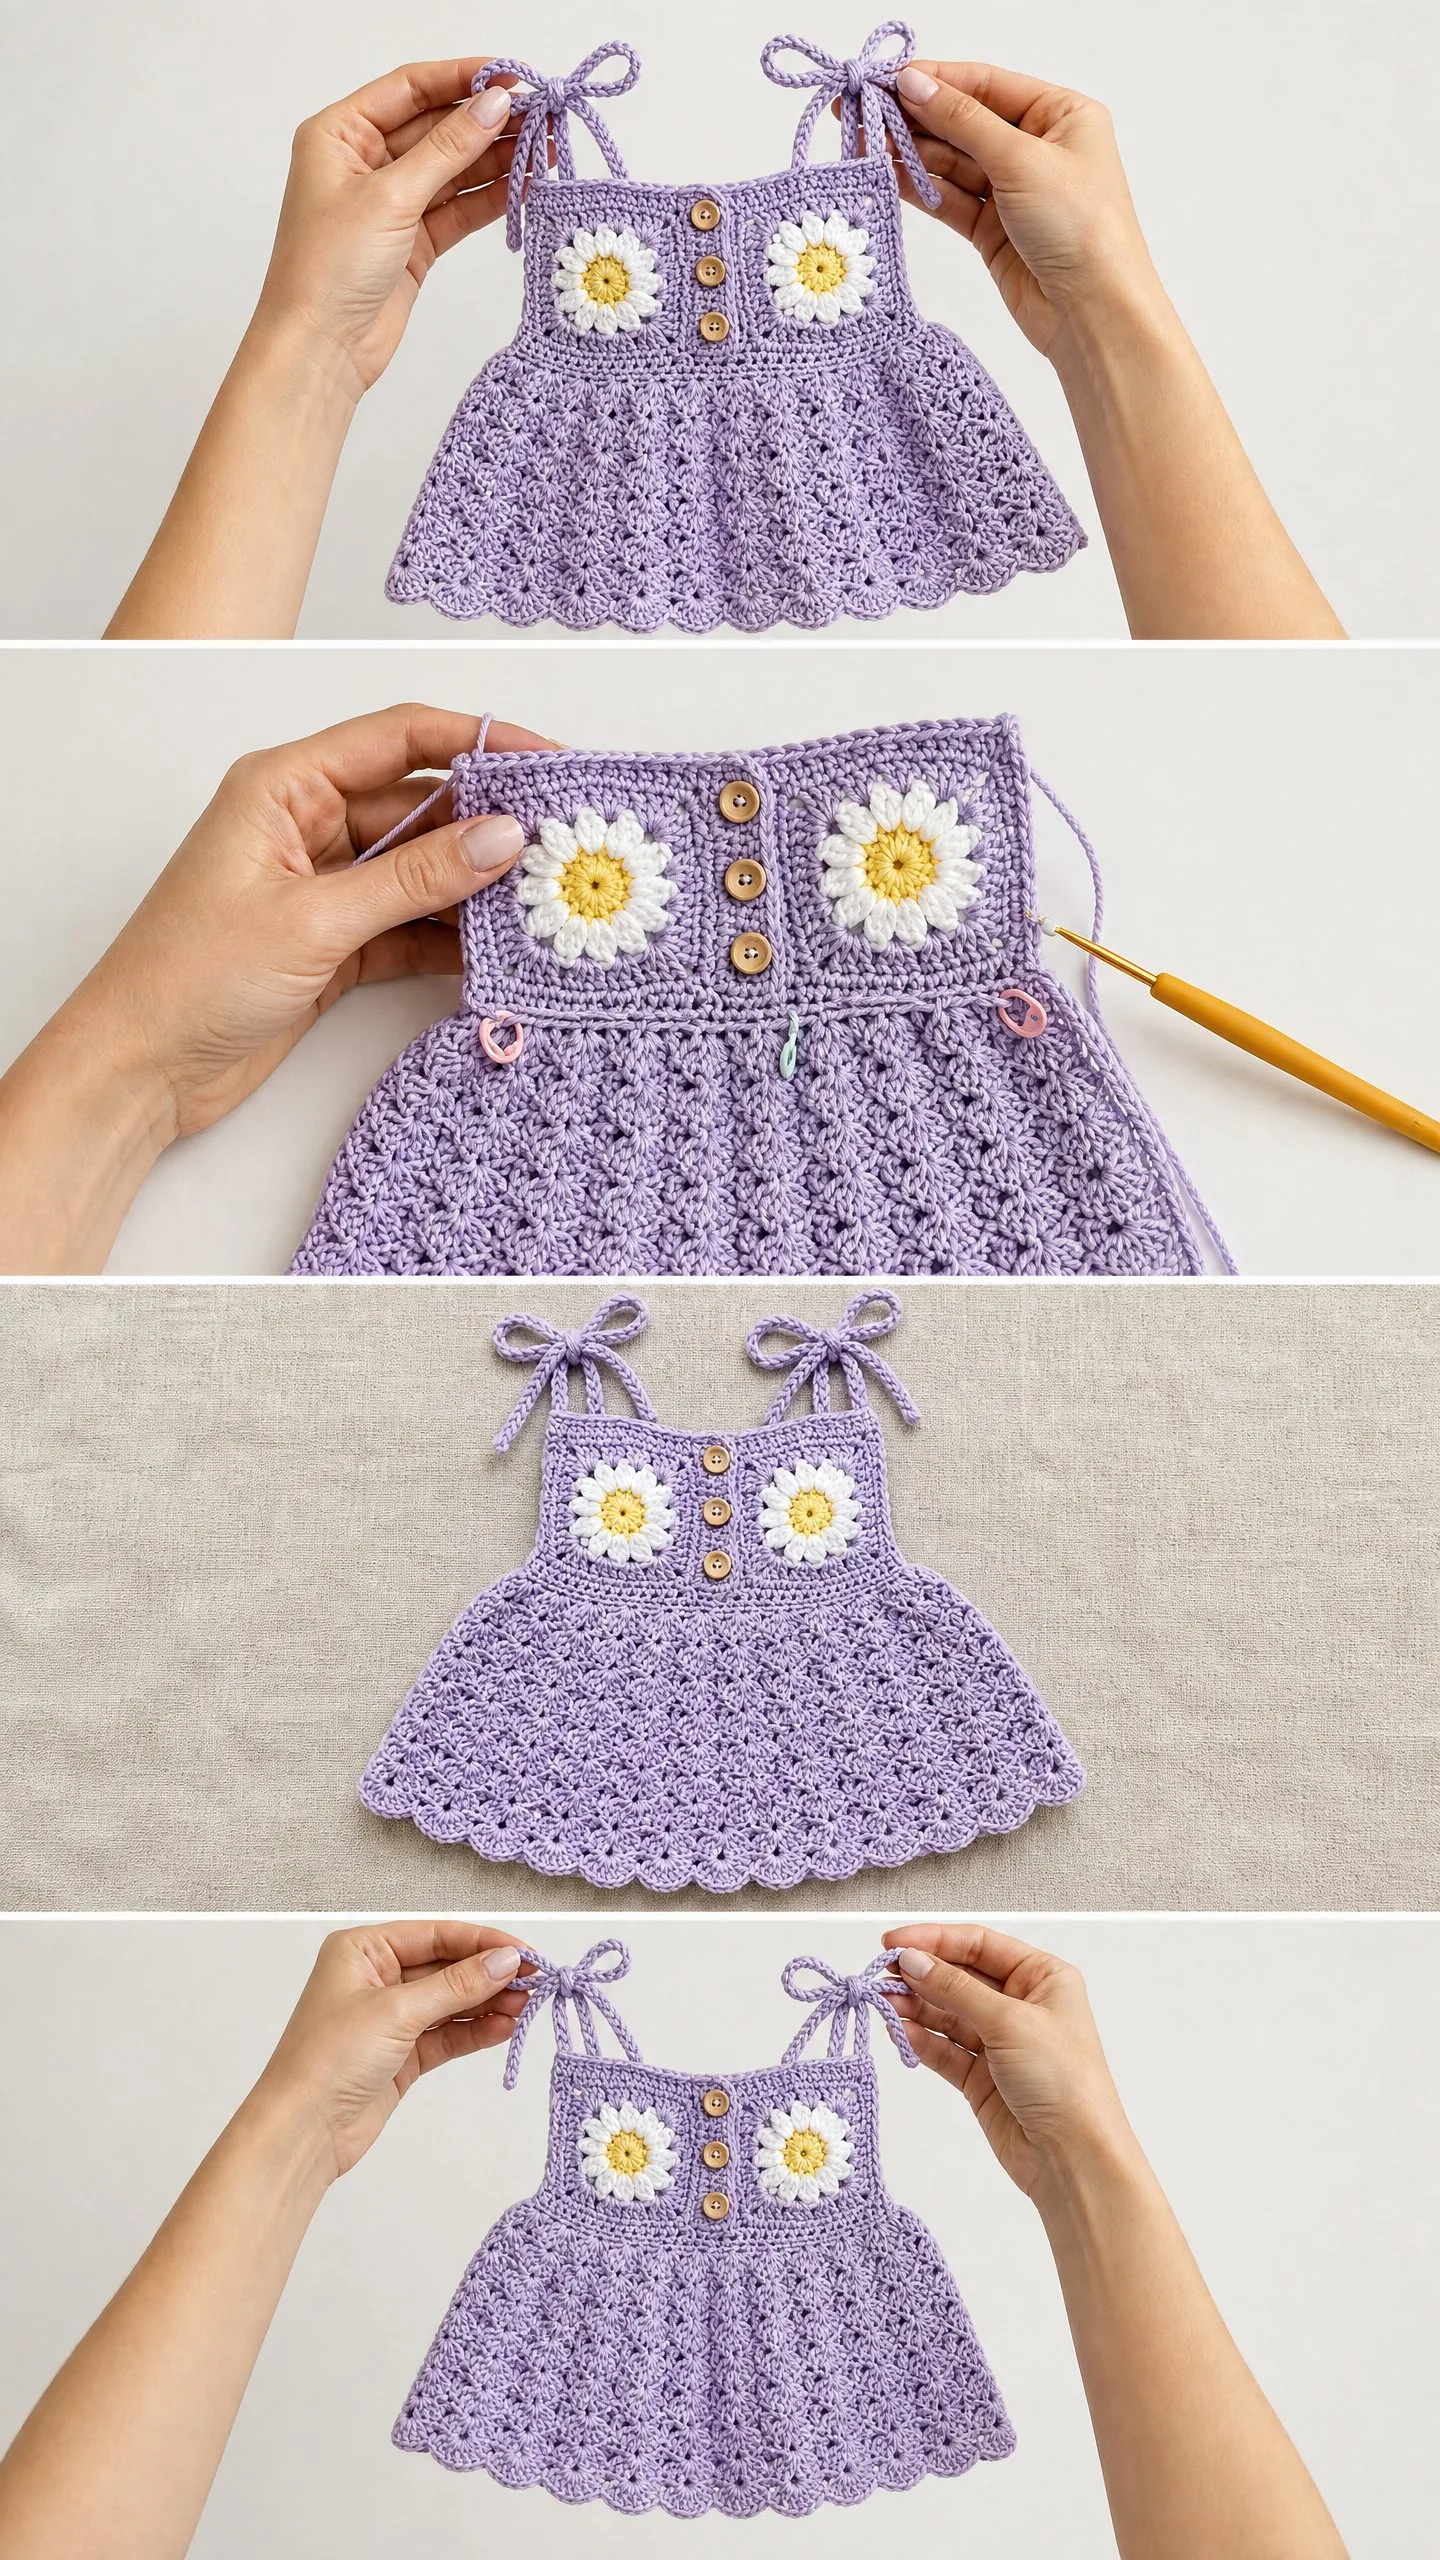
This sweet baby sundress features a structured bodice decorated with two crocheted daisy granny squares, adjustable tie straps, wooden button accents, and a beautifully flared skirt worked in a delicate shell stitch with a scalloped hem. The whole piece has a vintage-inspired, cottage-core vibe that photographs beautifully and washes like a dream.
The bodice is worked flat in rows, the skirt is worked flat in rows from the bodice waistband down, and the daisy squares are worked separately and sewn on. Don’t let that sound intimidating. Each piece is simple on its own, and by the time you assemble everything, you’ll have a stunning handmade garment that looks far more complicated than it actually is.
Skill level: Intermediate. You’ll need comfort with working granny squares, shell stitch, foundation chains, and basic seaming. If you’re a confident beginner who has completed several small projects, you can absolutely tackle this with a little patience.
Time estimate: Approximately 8 to 14 hours depending on your experience level. The daisy squares take about 30 to 45 minutes each. The bodice takes approximately 2 to 3 hours. The skirt takes approximately 4 to 6 hours. Finishing and assembly take approximately 1 to 2 hours.
Finished Sizes
This crochet pattern includes four sizes to fit babies and toddlers from 3 months through 24 months. The tie straps allow for generous length adjustment, so you have some wiggle room built right in.
Size 3-6 months: chest circumference approximately 16 in / 40.5 cm, length from strap tie to hem approximately 13 in / 33 cm
Size 6-12 months: chest circumference approximately 18 in / 45.5 cm, length approximately 14.5 in / 37 cm
Size 12-18 months: chest circumference approximately 19.5 in / 49.5 cm, length approximately 16 in / 40.5 cm
Size 18-24 months: chest circumference approximately 21 in / 53.5 cm, length approximately 17.5 in / 44.5 cm
All measurements are of the finished blocked garment laid flat and doubled for chest circumference. The skirt is intentionally flared and A-line in silhouette, which gives it that gorgeous swooshy movement.
Throughout the instructions, the primary size written is 6-12 months. Numbers for other sizes appear in parentheses in this order: (3-6 months, 6-12 months, 12-18 months, 18-24 months). When only one number appears, it applies to all sizes.
Materials Needed
Yarn: DK weight / light worsted, approximately 200 to 350 yards total depending on size
Hook: US size E-4 / 3.5 mm crochet hook (or size needed to match gauge)
Notions:
Yarn Suggestions
Paintbox Yarns Simply DK (100% acrylic, 276 yards / 252 m per 100 g ball): This yarn is machine washable, widely available, and comes in a full range of pastels including shades of lavender, soft pink, yellow, and white. The stitch definition is excellent for showing the shell stitch texture. One ball of MC plus small amounts of A and B will complete most sizes.
Lion Brand Pound of Love (100% premium acrylic, 1020 yards / 932 m per 454 g ball): An affordable, machine-washable option with a soft hand suitable for baby garments. Purchase one ball of MC and small skeins or scraps for A and B.
Cascade Yarns 220 Superwash (100% superwash merino wool, 220 yards / 201 m per 100 g skein): A luxurious machine-washable option with excellent stitch definition and beautiful drape. Slightly more expensive but worth the investment for heirloom quality.
Any smooth DK or light worsted yarn with good stitch definition will work. Avoid fuzzy or textured yarns that will obscure the shell stitch pattern. Always check that your substitute is machine washable if the garment will be laundered frequently.
Gauge
18 sc x 20 rows = 4 in / 10 cm worked flat in single crochet (sc) with MC and US E-4 / 3.5 mm hook, after blocking.
For the shell stitch skirt: 1 complete shell repeat (5 dc + 2 ch-1 gaps) = approximately 1.25 in / 3.2 cm wide; 3 shell rows = approximately 1.5 in / 3.8 cm tall.
Gauge is essential for a well-fitting garment. Please make and block a 6 in / 15 cm swatch before beginning. If your swatch is larger than gauge, go down a hook size. If smaller, go up a hook size. I know swatching isn’t the most exciting part, but trust me on this one.
Abbreviations
Special Stitches
Shell Stitch (ss)
Work 5 double crochet (dc) stitches into the same stitch or space. This creates one complete shell. A double crochet is worked by yarning over, inserting your hook into the stitch, pulling up a loop, yarning over and drawing through 2 loops, then yarning over and drawing through the remaining 2 loops. When you stack 5 of these into one stitch, they fan out into a pretty shell shape.
Shell Stitch Row Pattern
This pattern uses a specific shell arrangement. One pattern repeat = skip 2 stitches, work 5 dc in next stitch (shell made), skip 2 stitches, sc in next stitch. Each repeat spans 6 stitches of the foundation and produces 1 shell plus 1 sc.
Magic Ring
Make a loop by crossing the working yarn over the tail to form a ring. Insert hook into ring, yarn over and pull up a loop, chain 1 to secure. Work stitches into the ring and pull the tail to close the center. This gives you a tight, neat center for your daisy.
dc2tog (double crochet two together)
Yarn over, insert hook into next stitch, yarn over and pull up a loop, yarn over and draw through 2 loops on hook (2 loops remain). Yarn over, insert hook into following stitch, yarn over and pull up a loop, yarn over and draw through 2 loops on hook (3 loops remain). Yarn over and draw through all 3 loops. This counts as 1 stitch and decreases by 1.
sc2tog (single crochet two together)
Insert hook into next stitch, yarn over and pull up a loop. Insert hook into following stitch, yarn over and pull up a loop. Yarn over and draw through all 3 loops. Counts as 1 stitch, decreases by 1.
Scallop Border
Slip stitch in next stitch, chain 3, 4 dc in same stitch, slip stitch in next stitch. This is used for the hem edging. Each scallop uses 2 stitches of the previous row.
Pattern Notes Before You Begin
1. The bodice is worked flat in rows (back and forth) from the top edge downward. The RS faces you on odd-numbered rows.
2. The skirt is worked flat in rows from the bodice waistband edge downward, with increases built into the transition row to create the A-line flare.
3. The daisy squares are worked in separate rounds and sewn to the front bodice panel before the straps are attached. The squares are decorative appliques, not structural.
4. The garment is open on both sides (left and right side seams) and is designed to be worn with the bodice overlapping at the front for the button closure, similar to a pinafore style.
5. All turning chains are noted in the instructions. Ch-3 turning chains at the beginning of double crochet rows count as the first dc unless stated otherwise.
6. Buttons are sewn to the bodice front panel on the RS. Buttonholes are created naturally by working into chain spaces during the bodice construction.
7. The straps are crocheted separately as long chains of single crochet and sewn into the corners of the bodice panels.
8. When changing colors for the daisy square, drop the old color to the WS, pick up the new color, and pull through. Cut and weave in ends unless instructed otherwise.
9. Block all pieces before seaming for best results.
Step-by-Step Crochet Pattern Instructions
Daisy Granny Square (Make 2)
The finished daisy square measures approximately 3 in / 7.5 cm x 3 in / 7.5 cm after blocking. Work 2 squares for the front bodice.
With Color B (yellow), make a magic ring.
Round 1: Ch 1 (does not count as st), work 10 sc into magic ring, pull ring closed tight, join with sl st to first sc. (10 sc)
Round 2: Ch 1, work 2 sc in each st around, join with sl st to first sc. (20 sc)
Fasten off Color B. Join Color A (white) in any st.
Round 3 (Petals): Ch 10, sl st in 2nd ch from hook and in each of next 8 ch (first petal made), sl st in same st at base of ch-10; sl st in next st, ch 10, sl st in 2nd ch from hook and in each of next 8 ch (petal made), sl st in same base st; rep from 8 more times. Join with sl st to base of first petal. (10 petals)
Fasten off Color A. Join MC (lavender) in any space between two petals.
Round 4 (Square Frame): Ch 3 (counts as dc), dc in same sp, ch 1, 2 dc in same sp (corner half made); dc in each of next 2 petal bases, ch 1, (2 dc, ch 2, 2 dc) in next petal base (corner made), dc in each of next 2 petal bases, ch 1, 2 dc in next petal base, ch 1, 2 dc in next petal base; rep from 2 more times to complete the square, adjusting as needed to distribute 10 petals over 4 sides with corners; join with sl st to top of ch-3.
The goal for Round 4 is 4 corner ch-2 spaces and a roughly square silhouette approximately 3 in / 7.5 cm across. End count: approximately 40 dc plus 4 corner ch-2 sps and several ch-1 sps.
Round 5: Sl st to first ch-2 corner sp, ch 3 (counts as dc), (dc, ch 2, 2 dc) in same corner sp (corner made), dc in each st across to next corner ch-2 sp, ch 1 after any ch-1 sp mid-side to keep flat, (2 dc, ch 2, 2 dc) in corner sp; rep from around, ending dc in each st to first corner, join with sl st to top of ch-3. (approximately 48 sts plus 4 corner ch-2 sps)
Fasten off MC. Weave in all ends. Block square to 3 in / 7.5 cm x 3 in / 7.5 cm.
Checkpoint: Both daisy squares should measure approximately 3 in / 7.5 cm x 3 in / 7.5 cm after blocking. Set aside.
Bodice Front Panel
The bodice front panel is worked flat in rows of single crochet from the top edge down to the waistband.
Finished front panel dimensions: approximately (6, 7, 7.5, 8) in wide x (4, 4.5, 5, 5.5) in tall before skirt.
With MC, ch (29, 33, 37, 41).
Row 1 (RS): Sc in 2nd ch from hook and in each ch across, turn. (28, 32, 36, 40 sc)
Row 2 (WS): Ch 1, sc in each st across, turn. (28, 32, 36, 40 sc)
Row 3: Ch 1, sc in each st across, turn. (28, 32, 36, 40 sc)
Rows 4 through (20, 22, 25, 28): Rep Row 2, working sc in each st across and turning at end of each row. At end of last row, do not fasten off.
After completing the bodice front rows, do not turn. Work 1 row of sl st along the bottom edge across all sts to create a firm waistband ridge. Then turn work.
Buttonhole Row (RS): Ch 1, sc in first (2, 2, 2, 2) sts, ch 2, sk 2 sts, sc in next (8, 10, 12, 14) sts, ch 2, sk 2 sts, sc in remaining sts to end of row, turn. (24, 28, 32, 36 sc plus 2 ch-2 buttonhole spaces)
Next Row: Ch 1, sc in each st and 2 sc in each ch-2 sp across, turn. (28, 32, 36, 40 sc)
Work 2 more rows of sc even.
Fasten off. Total front bodice height: approximately (4, 4.5, 5, 5.5) in / (10, 11.5, 12.5, 14) cm.
Checkpoint: The front bodice panel should measure approximately (6.25, 7, 8, 8.75) in / (16, 18, 20.5, 22) cm wide and (4, 4.5, 5, 5.5) in / (10, 11.5, 12.5, 14) cm tall.
Bodice Back Panel
The back panel is worked identically to the front panel but is narrower.
With MC, ch (25, 29, 33, 37).
Row 1 (RS): Sc in 2nd ch from hook and in each ch across, turn. (24, 28, 32, 36 sc)
Rows 2 through (22, 24, 27, 30): Ch 1, sc in each st across, turn. (24, 28, 32, 36 sc)
At end of last row, work 1 row of sl st along bottom edge for waistband ridge.
Fasten off. Total back bodice height matches front panel.
Checkpoint: Back panel should measure approximately (5.25, 6.25, 7, 8) in / (13.5, 16, 18, 20.5) cm wide and the same height as the front panel.
Skirt
The skirt is worked as one long panel, then the side seams are sewn.
With MC, ch (109, 121, 133, 145).
Row 1 (RS): Sc in 2nd ch from hook and in each ch across, turn. (108, 120, 132, 144 sc)
Verify divisibility: All sizes are divisible by 6. This gives you (18, 20, 22, 24) shell repeats. Perfect for the shell pattern.
Row 2 (Transition to shell stitch, RS): Ch 3 (counts as first dc), sk 2 sts, work 5 dc in next st (shell made), sk 2 sts, sc in next st, sk 2 sts; rep from across to last 3 sts, work 5 dc in next st, sk 1 st, dc in last st, turn. (18, 20, 22, 24 shells; 2 edge dc)
Row 3 (Shell continuation, WS): Ch 1, sc in first dc (edge), ch 2, work 5 dc in sc between shells, ch 2, sc in center dc of shell; rep from across, ending sc in top of ch-3 turning ch, turn.
Row 4 (RS): Ch 3, work 5 dc in next sc, sc in center dc of shell; rep from across, ending dc in last sc, turn.
Rows 5 through (24, 26, 28, 30): Rep Rows 3 and 4 alternately, maintaining shell pattern. Work in MC throughout.
Skirt height at this point: approximately (8, 9, 10, 11) in / (20.5, 23, 25.5, 28) cm.
Scallop Hem Row (RS): Join MC (or work continuously from last row). Ch 1, sl st in first st, ch 3, 4 dc in same st, sl st in next st; rep from across all sts to end. Fasten off.
Checkpoint: The skirt panel should measure approximately (24, 26.5, 29, 31.5) in / (61, 67.5, 73.5, 80) cm wide and (8, 9, 10, 11) in / (20.5, 23, 25.5, 28) cm tall including the scallop hem.
Straps (Make 2)
Each strap is a long chain of single crochet that ties into a bow at the shoulder.
With MC, ch 61 (all sizes; length can be adjusted).
Row 1: Sc in 2nd ch from hook and in each ch across. (60 sc)
Fasten off, leaving a 12 in / 30.5 cm sewing tail.
The strap is approximately 13.5 in / 34 cm long. This length allows for a generous bow at the shoulder. Adjust chain by adding or removing stitches in increments of 2 if a longer or shorter strap is desired.
Assembly Instructions
Step 1: Block all pieces. Pin to measurements, spritz with water if using acrylic, or wet block if using wool. Allow to dry completely before seaming.
Step 2: Sew daisy squares to front bodice panel. Position both squares side by side on the RS of the front panel, centered horizontally, with the top edge of the squares approximately 0.5 in / 1.3 cm below the top edge of the bodice. Sew around all 4 edges of each square using MC and a yarn needle with a whip stitch or mattress stitch through the outer loops.
Step 3: Sew buttons. Position 2 wooden buttons between the two daisy squares, spaced evenly vertically. Position the remaining 2 buttons on the corresponding side (the buttons line up with the buttonholes on the other panel). Sew securely with a length of yarn or strong thread.
Step 4: Join bodice to skirt. With MC and yarn needle, use a mattress stitch or whip stitch along the WS to sew the top edge of the skirt panel to the bottom edge of the combined bodice panels. The skirt panel is wider than the bodice combined; ease the skirt in evenly across the bodice bottom edge by working small pleats or gathers and securing with pins before sewing.
Step 5: Sew side seams. Fold the assembled dress so that the side edges of the skirt and bodice panels meet. Using MC and mattress stitch, sew the side seams from the hem upward. Stop approximately 1 in / 2.5 cm below the bodice armhole to leave a small opening for the armhole.
Step 6: Attach straps. Fold each strap in half to find the center. Align one end of each strap to the RS of the front bodice top corners (one corner each), and the other end to the corresponding back bodice top corners. Sew each end securely in place using the yarn tail and a yarn needle, working several passes through the strap and bodice for strength. The long middle section of each strap loops over the shoulder and can be tied into a bow at the top.
Finishing and Blocking
Before assembly, wet block all crochet pieces if using wool or lightly steam block if using acrylic. Use a cloth between your iron and yarn, and never place the iron directly on acrylic. Pin each piece to a blocking board to the stated finished measurements and allow to dry fully. After assembly, lightly steam the seams from the WS to flatten them. Weave in all ends securely, working each end in two different directions for security.
Color Variation Notes
The pattern shown includes lavender, pink, and yellow colorways. For the pink version, simply substitute your pink yarn for MC and use white petals with a purple center. For the yellow version, use yellow as your MC and white petals with a purple center. The construction remains exactly the same for all colors.
Care Instructions
Machine wash cold on gentle cycle if using acrylic or superwash wool yarn. Lay flat to dry; do not tumble dry. Do not wring or twist. If using non-superwash wool, hand wash in cool water with a small amount of wool wash, squeeze gently without wringing, and lay flat to dry. Remove buttons before washing if they are not sewn very securely, or use a mesh laundry bag to protect them.
Size Customization Tips
To make the dress larger or smaller, adjust the foundation chain of the bodice panels by increments of 4 stitches (2 stitches per panel). Adjust the skirt foundation chain by increments of 6 stitches (one shell repeat) to maintain the pattern divisibility. Add or remove skirt rows in pairs (one Row 3 plus one Row 4) to adjust the skirt length. The strap length can be extended by adding 6 chains per additional 1.5 in / 3.8 cm of strap length.
Final Thoughts on This Baby Sundress Crochet Pattern
This little sundress is one of those projects that feels like a gift to make. Every time I work through the shell stitch rows or attach those sweet daisy squares, I find myself smiling. It’s the kind of handmade piece that gets passed down, photographed at every family gathering, and treasured for years.
Whether you’re making this for your own little one, a baby shower gift, or that special niece or granddaughter, I hope you enjoy every stitch. The construction is forgiving, the result is stunning, and you’ll feel like a crochet rockstar when you see it all come together.
Thank you so much for choosing this pattern. I genuinely appreciate you being here and trusting me with your crafting time. If you make this sundress, I would absolutely love to see it! Tag me on Instagram or share in my Facebook group. Nothing makes my day quite like seeing your finished projects.
If you loved this crochet baby dress pattern, go ahead and save it to your Pinterest boards so you can find it whenever you’re ready to start. And please drop a comment below if you make one. I’d love to hear which color you chose!
You Might Also Like
- Teal Ocean Wave Crochet Robe Free Pattern
- Pink Ombre Granny Square Purse Free Crochet Pattern
- Lavender Sunflower Granny Square Baby Blanket Free Pattern
- Lavender Sunflower Drawstring Backpack Free Crochet Pattern