
This dress is STUNNING. I mean, look at it. The cascading wisteria flowers, the fitted bodice, that gorgeous shell ruffle at the hem. This is one of those projects that looks like it belongs in a couture fashion house, but you can absolutely make it yourself with fine cotton yarn and some patience.
Get the Ad-Free PDF Pattern
You can find the free pattern below, or you can purchase the ad-free printable PDF from my shop.
Get the Printable PDF →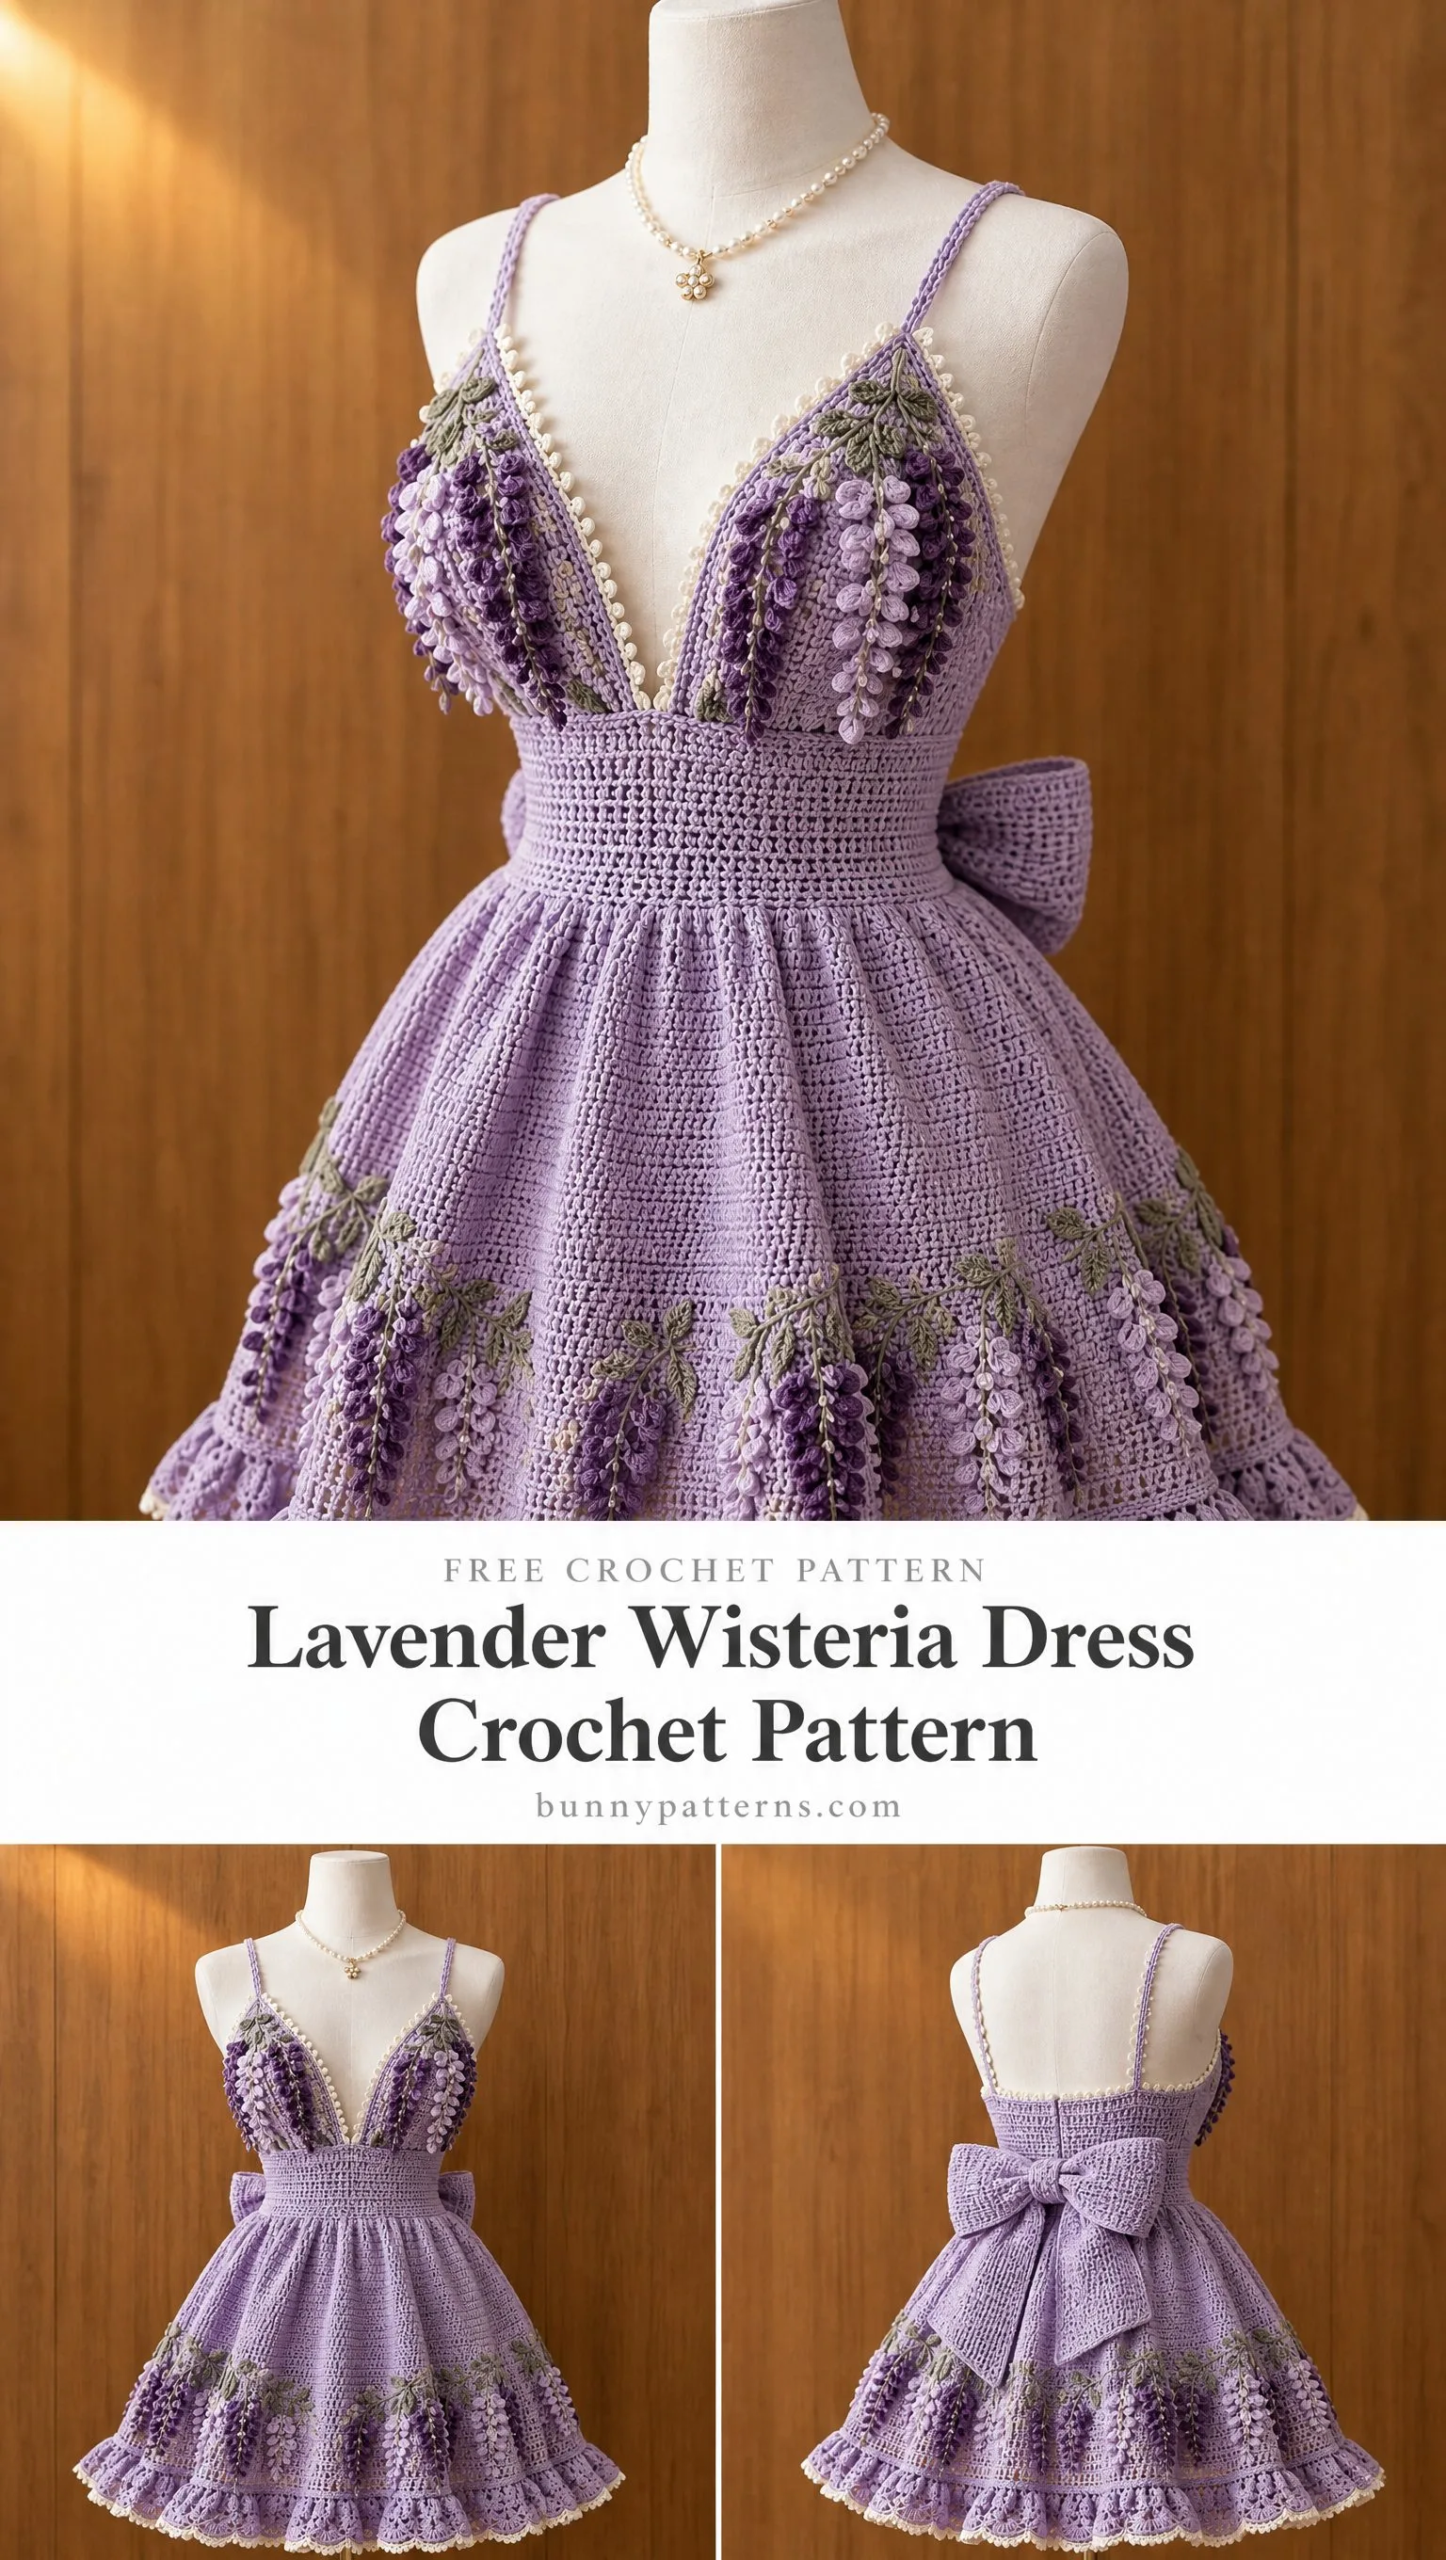
I know what you might be thinking. A fitted crochet dress with appliqué flowers? That sounds intimidating. But here is the thing. Every single element of this dress uses stitches you probably already know. Half double crochets. Double crochets. Chains. Slip stitches. The magic is in how they all come together.
If you have been craving a project that truly shows off your skills, this is your moment. This Lavender Wisteria Dress is the kind of piece people will ask about for years. Wedding guest outfit? Garden party showstopper? Romantic date night look? Yes to all of it. Let me walk you through every step.
About This Pattern
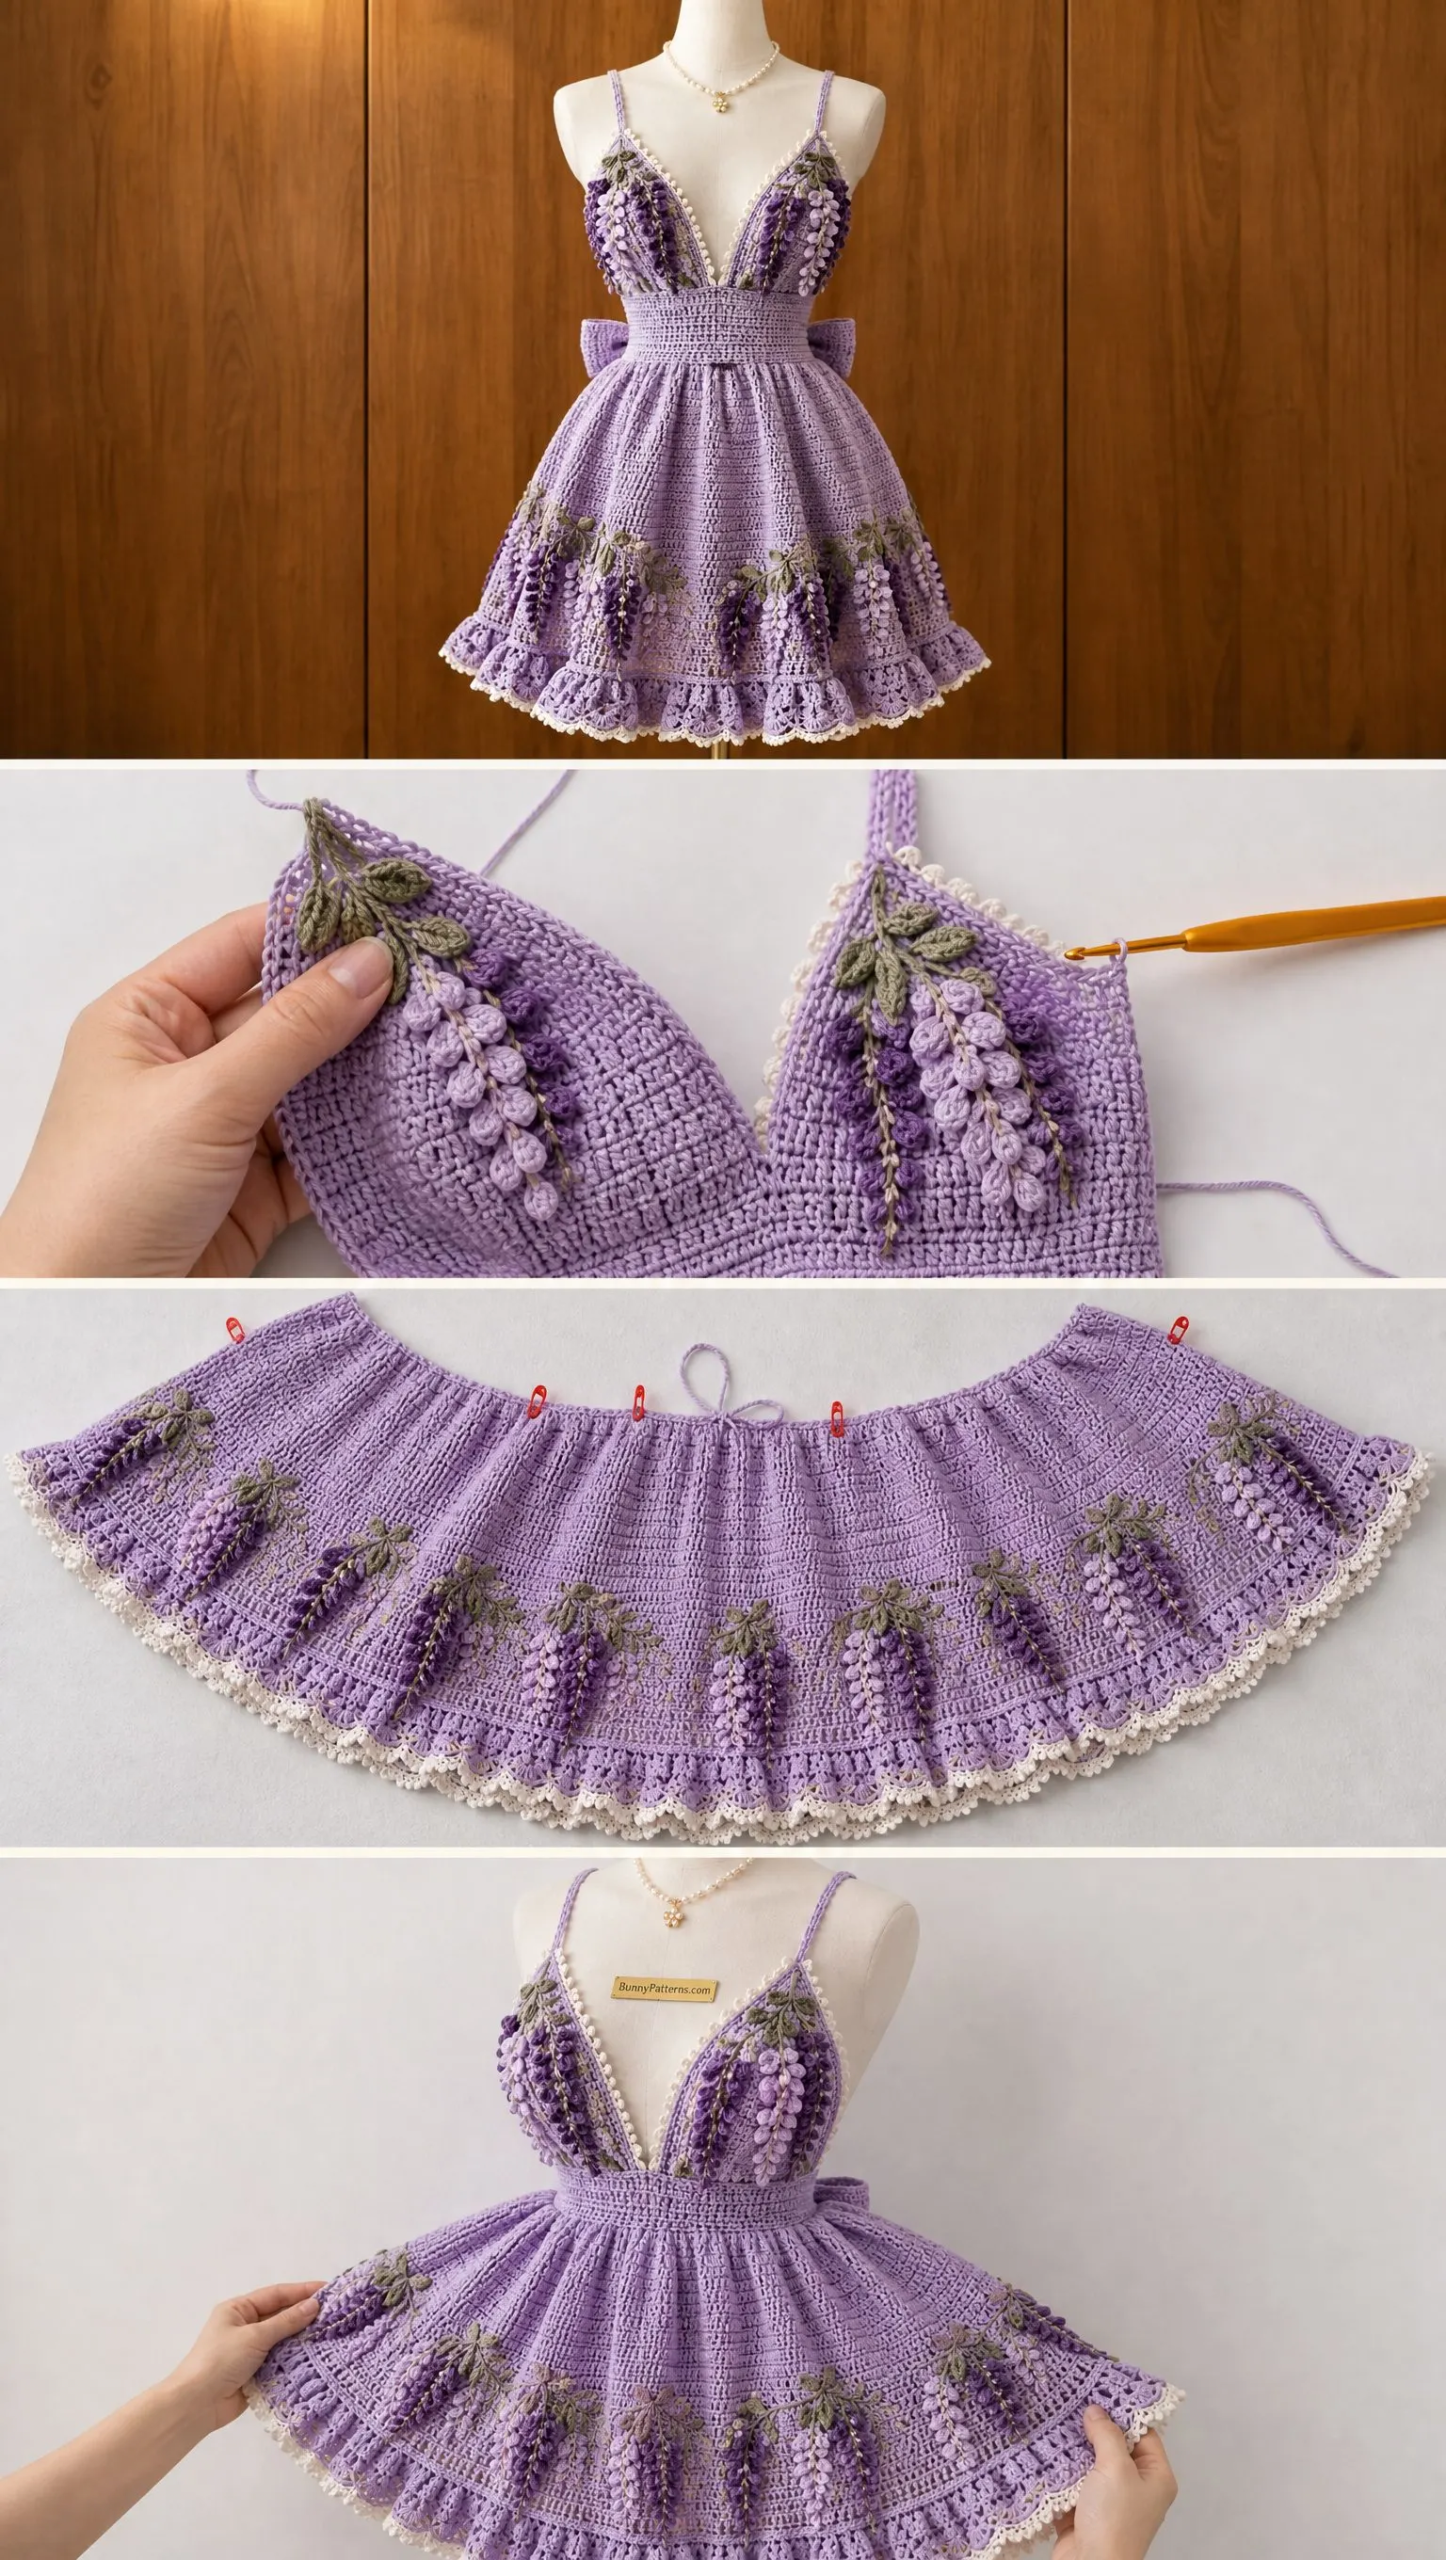
This fitted adult crochet sundress features slim shoulder straps, triangular cups with a deep V neckline, a wide ribbed waistband, and a gathered skirt that falls just above the knee. The crowning glory is the hand crocheted wisteria flower trails that cascade down the bodice and lower skirt, finished with a lavender shell stitch ruffle and delicate ivory picot edging.
The skill level is intermediate to advanced crochet. You should be comfortable with shaping, working in the round, and attaching appliqués. But do not let that scare you off if you are a confident beginner ready for a challenge. I will explain everything as we go.
Materials You Will Need
Before you start, gather all your supplies. Having everything ready makes the process so much smoother.
Fine cotton yarn in the following colors:
Crochet hooks:
Additional tools:
The different hook sizes are important here. They help create the right density for each section. The bodice needs to be firm and supportive with the smaller hook. The skirt should drape nicely. The ruffle needs to be loose and flowy with the larger hook.
Gauge
Your gauge for this pattern is approximately 24 half double crochet stitches (hdc) and 18 rows per 10 cm square using the 2.5 mm hook.
Always, always swatch first. I know it feels tedious, but with a fitted garment like this, gauge matters enormously. If your gauge is off, your dress will not fit properly. Take the time to check and adjust your hook size if needed.
Abbreviations
Let me define all the stitches you will use in this pattern:
Bodice Construction
The bodice is the foundation of this dress, so take your time here. We will build it piece by piece.
Step 1: Triangular Cups
You will make two identical cups using your 2.5 mm hook and lavender yarn.
Foundation:
Chain 18.
Row 1:
Half double crochet (hdc) in the second chain from your hook and across the entire row. Turn your work.
Row 2:
Chain 1, hdc across, placing 2 hdc in the center stitch to create your increase. Turn.
Continue repeating these rows, increasing one stitch at the center edge every row until the cup reaches the desired bust width. The gradual increase creates that beautiful triangular shape you see in the photos.
Creating the picot border:
Switch to your ivory yarn. Single crochet (sc) around the entire edge of each cup. Then work the picot edging as follows:
Chain 3, slip stitch into the first chain (this creates the little picot bump), single crochet into the next stitch. Repeat this sequence all around the cup edge.
This ivory picot border is what gives the cups that delicate, finished look you see cascading down the neckline.
Step 2: Join Cups and Create V Neckline
Position your two finished cups with a deep V opening between them. The inner edges should meet at a point below where you want your neckline to sit.
Join the inner edges together using slip stitches. Be careful to keep the V shape open and symmetrical.
Work several rows of hdc across the upper bodice section, maintaining that open neckline shape. This creates the structure that connects your cups and provides anchor points for your straps.
Attaching the slim straps:
Chain approximately 45 to 55 stitches for each strap, depending on your desired length. Work two rows of single crochet to create a slim, sturdy strap. Sew the straps securely to the outer cup corners using your tapestry needle and matching yarn.
Waistband
Step 3: Ribbed Waist Band
This waistband is worked vertically in lavender yarn, which creates that beautiful ribbed texture you see in the photos.
Chain a number equal to your desired waistband depth (typically 3 to 4 inches when measured).
Row 1:
Single crochet (sc) in the second chain from your hook and across the entire row. Turn.
Row 2:
Chain 1, work back loop only single crochet across the entire row. Turn.
Working in the back loop only is what creates that distinctive ribbed texture. It also gives the waistband some stretch, which helps the dress fit comfortably.
Repeat Row 2 until the waistband wraps comfortably around your waist. Join the ends together to form a tube.
Attach the bodice to the top of the waistband using slip stitches, making sure everything is centered and aligned properly.
Skirt
Step 4: Gathered HDC Skirt
Switch to your 3.0 mm hook for the skirt section.
Round 1:
Join your lavender yarn at the bottom edge of the waistband. Work hdc stitches evenly around the entire waistband.
Round 2:
Increase evenly around to begin creating those gentle gathers. The increases add fullness without making the skirt too poufy.
Continue working tightly packed hdc rounds until your skirt reaches above knee length. The key word here is "tightly packed." You want the fabric to be dense and opaque, not see through.
For additional fullness:
Increase evenly every 8 to 10 rounds. This gradual increase is what creates that lovely A line shape with soft gathers.
Shell Ruffle
Step 5: Lavender Shell Hem
Switch to your 3.5 mm hook for the ruffle. This larger hook size helps the ruffle lay beautifully and creates that flowing, feminine movement.
Round 1:
Single crochet around the entire bottom edge of your skirt.
Round 2:
Skip 2 stitches, work 5 double crochets into the next stitch (this is your shell), skip 2 stitches, slip stitch into the next stitch. Repeat this pattern all the way around.
Round 3:
Work larger shells between the previous shells to add even more fullness and drama.
Finish the ruffle with ivory picot edging, using the same technique you used on the cups: chain 3, slip stitch into first chain, sc into next stitch. This ties the whole design together beautifully.
Wisteria Flower Appliqués
Step 6: Crochet Wisteria Clusters
This is where the magic happens. These little flowers are what transform a pretty lavender dress into a true wearable art piece.
Using your 2.5 mm hook, make many small petals in all three purple shades: plum, violet, and pale lilac.
For each petal:
Chain 4. Work 3 double crochets into the first chain. Chain 2. Slip stitch back into the base.
Create lots of these little petals. You will need quite a few to build up those gorgeous hanging clusters. Layer your petals together, mixing the three purple shades to create realistic wisteria color gradation. Real wisteria flowers are darker at the top and lighter at the tips, so keep that in mind as you arrange them.
Attach your completed clusters concentrated on the outer cup edges and the lower skirt panels, as shown in the reference photos.
Vines and Leaves
Step 7: Embroidered Details
Using sage green yarn and your tapestry needle, embroider slender vines using chain stitch. The chain stitch creates a natural, slightly curved line that looks just like a real vine.
For the leaves:
Chain 5. Then work the following stitches back along your chain: sc, hdc, dc, hdc, sc. This creates a small pointed leaf shape.
Make several leaves and attach them beside your embroidered vines to complete the wisteria effect.
Waist Bow
Step 8: Creating the Back Bow
This oversized bow at the back waist is such a romantic finishing touch.
For the center piece:
Chain 12. Work hdc rows until a small rectangle forms.
For the loops:
Create two larger rectangles using the same technique. Gather each rectangle at the center and pinch to create the bow loop shape.
Sew all the pieces together: center piece wrapped around the gathered loops. Attach long side loops (or tails) at the back waistband.
Finishing Your Dress
Almost there! These final steps make all the difference in how professional your finished dress looks.
Care Instructions
Your finished dress deserves gentle care:
Pattern Notes and Customization Tips
Adjusting the cup size: Add or remove increase rows in Step 1 to make the cups larger or smaller.
Adjusting the skirt length: Add or remove hdc rounds in Step 4 to make the skirt longer or shorter.
The finished dress should have: natural drape, visible stitch definition, and that soft cotton weight that moves beautifully when you walk.
You Did It!
This Lavender Wisteria Dress crochet pattern is genuinely one of the most beautiful projects you can make with a hook and some yarn. Yes, it takes time. Yes, it requires attention to detail. But when you slip it on and see those wisteria flowers cascading down, you will know every single stitch was worth it.
Thank you so much for choosing this pattern. I would absolutely love to see your finished dress! Tag me on Instagram or share your photos in my Facebook group. Seeing your creations is honestly the best part of designing patterns.
If you loved this project, save it to your Pinterest boards so you can find it easily when you are ready to start. And please drop a comment below if you make this dress. I want to hear all about your color choices, your wisteria flowers, and how stunning you look wearing it!
Want a Quick & Easy Printable Version?
Get a clean, beautifully formatted PDF of this pattern — easy to follow step by step, ready to print or save on any device. No scrolling, no distractions, just the pattern.
Get the Printable PDF →You Might Also Like
- Ocean Blue Highland Cow Amigurumi Free Crochet Pattern
- Blush Pink Striped Baby Romper Set Free Crochet Pattern
- Blush Pink Ruffle Peplum Crochet Cardigan Pattern
- Ocean Blue Granny Square Tote Free Crochet Pattern