
Last summer, I was getting ready for a garden party when I realized my hair was doing that thing where it looks fine from the front but absolute chaos from the back. I grabbed an old silk scarf, tied it on, and spent the whole afternoon adjusting it because it kept sliding off. That frustrating afternoon stuck with me. I kept thinking there had to be a better way to keep hair back while still looking put together.
Get the Ad-Free PDF Pattern
You can find the free pattern below, or you can purchase the ad-free printable PDF from my shop.
Get the Printable PDF →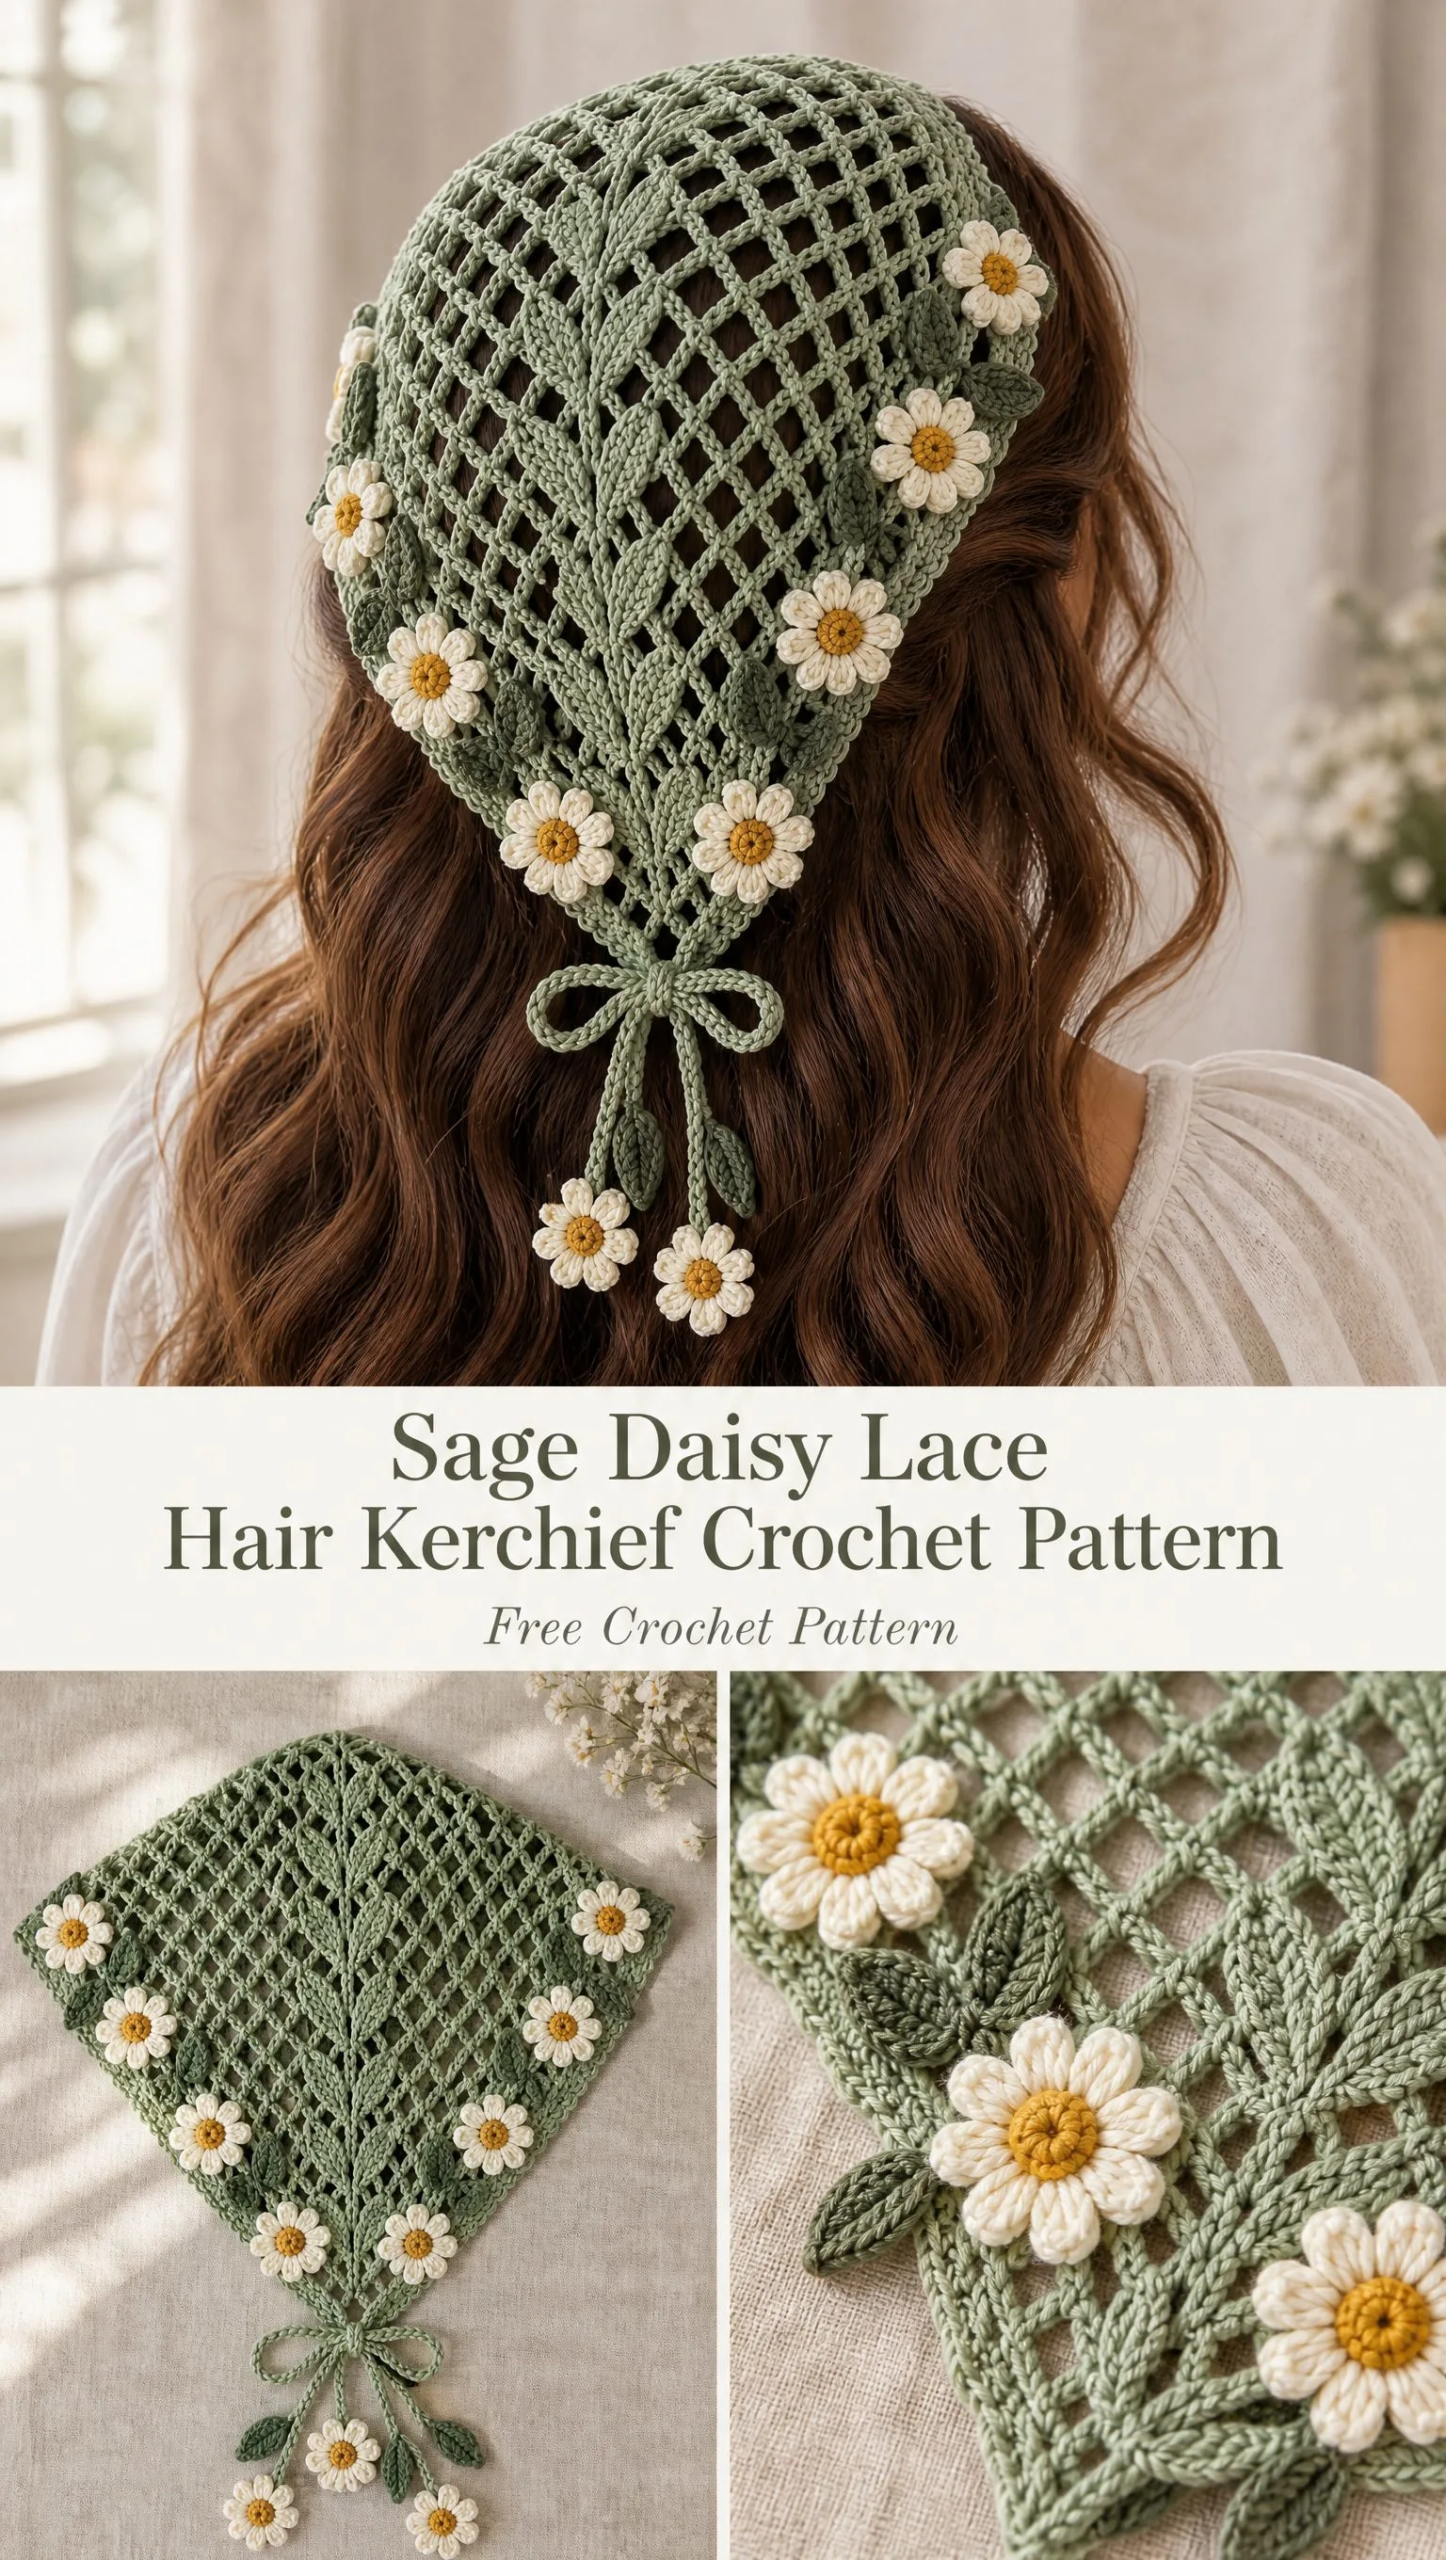
So I designed this kerchief. It ties securely, breathes beautifully in warm weather, and honestly just makes me feel like I stepped out of a cottagecore dream. The sage green with those sweet little daisies scattered along the edges? It is the kind of accessory that gets compliments from strangers.
If you have been looking for a wearable crochet project that is both practical and pretty, this one is for you. The lace mesh works up faster than you might expect, and those little flowers are so satisfying to make. Let me walk you through everything you need to know.
What Makes This Hair Kerchief Special
This triangular lace hair kerchief combines an airy open mesh body with delicate daisy flower appliques along the borders. The construction starts from the center top and works outward, creating that classic pointed silhouette that drapes beautifully over your hair.
The sage green color gives it a natural, earthy vibe, while the cream and yellow daisies add a cheerful pop. Long tie cords with tiny leaf shapes at the ends let you secure it comfortably around your head, whether you wear it as a headband style or full coverage.
What I love most is how lightweight it feels. The lace mesh pattern creates an open diamond texture that lets your scalp breathe on hot days. No more sweaty head under a heavy bandana.
Finished Size and Fit
The completed kerchief measures approximately:
These measurements are adjustable. Want a longer kerchief? Just keep repeating the lace rows. Need it smaller? Stop a few rows earlier. The pattern is flexible enough to customize for your preference.
Skill Level
This pattern is rated intermediate. You should be comfortable with:
If you have made a basic granny square shawl or any lace project before, you have the skills for this.
Materials You Will Need
Gather these supplies before you start:
Cotton yarn is ideal here because it blocks beautifully, holds its shape, and feels cool against your skin. Look for a sport weight with good stitch definition so your lace pattern shows clearly.
Gauge Information
Work 20 double crochet stitches across 10 rows to create approximately a 10 x 10 cm / 4 x 4 inch square.
Here is the good news: gauge is not critical for this project. If your fabric feels too stiff, go up a hook size. If it feels too loose and floppy, go down. You want a nice drapey fabric that still holds the lace pattern clearly.
Abbreviations and Stitch Definitions
Let me break down every stitch you will use:
Special Stitches
Two special stitch combinations make this pattern work:
Lace Mesh Space
Work (dc, ch 2, dc) into the same stitch or space. This creates the open diamond texture throughout the body of the kerchief.
Daisy Petal
Work (sc, ch 2, 2 dc, ch 2, sc) into a flower center stitch. This forms one complete petal of your daisy applique.
Construction Notes
Understanding how this kerchief comes together will help everything make sense. The piece is worked from the center top outward. Each row increases the width while maintaining a center spine, which creates the triangle shape naturally.
The lace pattern builds the open diamond texture. After completing the body and blocking, you add the daisy flowers as appliques. This means you sew them on rather than crocheting them directly into the fabric.
Step by Step Pattern Instructions
Main Kerchief Body
Row 1:
Chain 5. Join with a slip stitch to form a ring.
Chain 3 (this counts as your first double crochet). Work 2 dc, ch 2, 3 dc into the ring.
Turn your work.
Row 2:
Chain 3, work 2 dc in the first stitch, ch 2, work (3 dc, ch 2, 3 dc) into the center space, ch 2, 3 dc in the last stitch.
Turn.
Row 3:
Chain 3, work 2 dc in the first stitch.
Work lace mesh spaces across to the center. Remember, each lace mesh space is (dc, ch 2, dc) worked into a space from the previous row.
In the center space, work (dc, ch 2, dc, ch 2, dc). This maintains your center spine while continuing the increase.
Continue working lace mesh spaces to the last stitch.
Work 3 dc in the last stitch.
Turn.
Rows 4 through 22:
Repeat Row 3.
Each row increases the triangular width while maintaining the center spine. You will see the piece growing wider and longer with each pass.
Continue until you reach your desired kerchief length. The pattern calls for 22 rows total, but you can add or remove rows to customize.
Lace Border
Now you will work around all three edges to create a finished border.
Round 1:
Join yarn at one side corner.
Work single crochet evenly around all three edges. When you reach the point corner at the bottom, place 3 sc into that corner stitch to turn smoothly.
Join with a slip stitch.
Round 2:
Chain 3, skip 2 stitches, work 5 dc into the next stitch, skip 2 stitches, slip stitch into the next stitch.
Repeat this shell edging pattern around the entire kerchief. The shells create a scalloped edge that looks delicate and feminine.
Round 3:
Add small picot details between selected shell peaks.
To make a picot: work (sc, ch 3, slip stitch into the first chain).
Place these between the shell peaks wherever you want extra decoration. You do not need to put one between every shell. Space them out for a more natural look.
Daisy Flowers
Make 5 to 7 small daisies. These get sewn on after blocking.
Flower Center:
Using yellow yarn, make a magic ring.
Work 8 sc into the ring.
Join with a slip stitch.
Petals:
Change to cream yarn.
For each stitch around the center, work the daisy petal stitch: (sc, ch 2, 2 dc, ch 2, sc) into the same stitch.
This creates 8 petals around your yellow center.
Join and fasten off, leaving a tail for sewing.
Flower Placement:
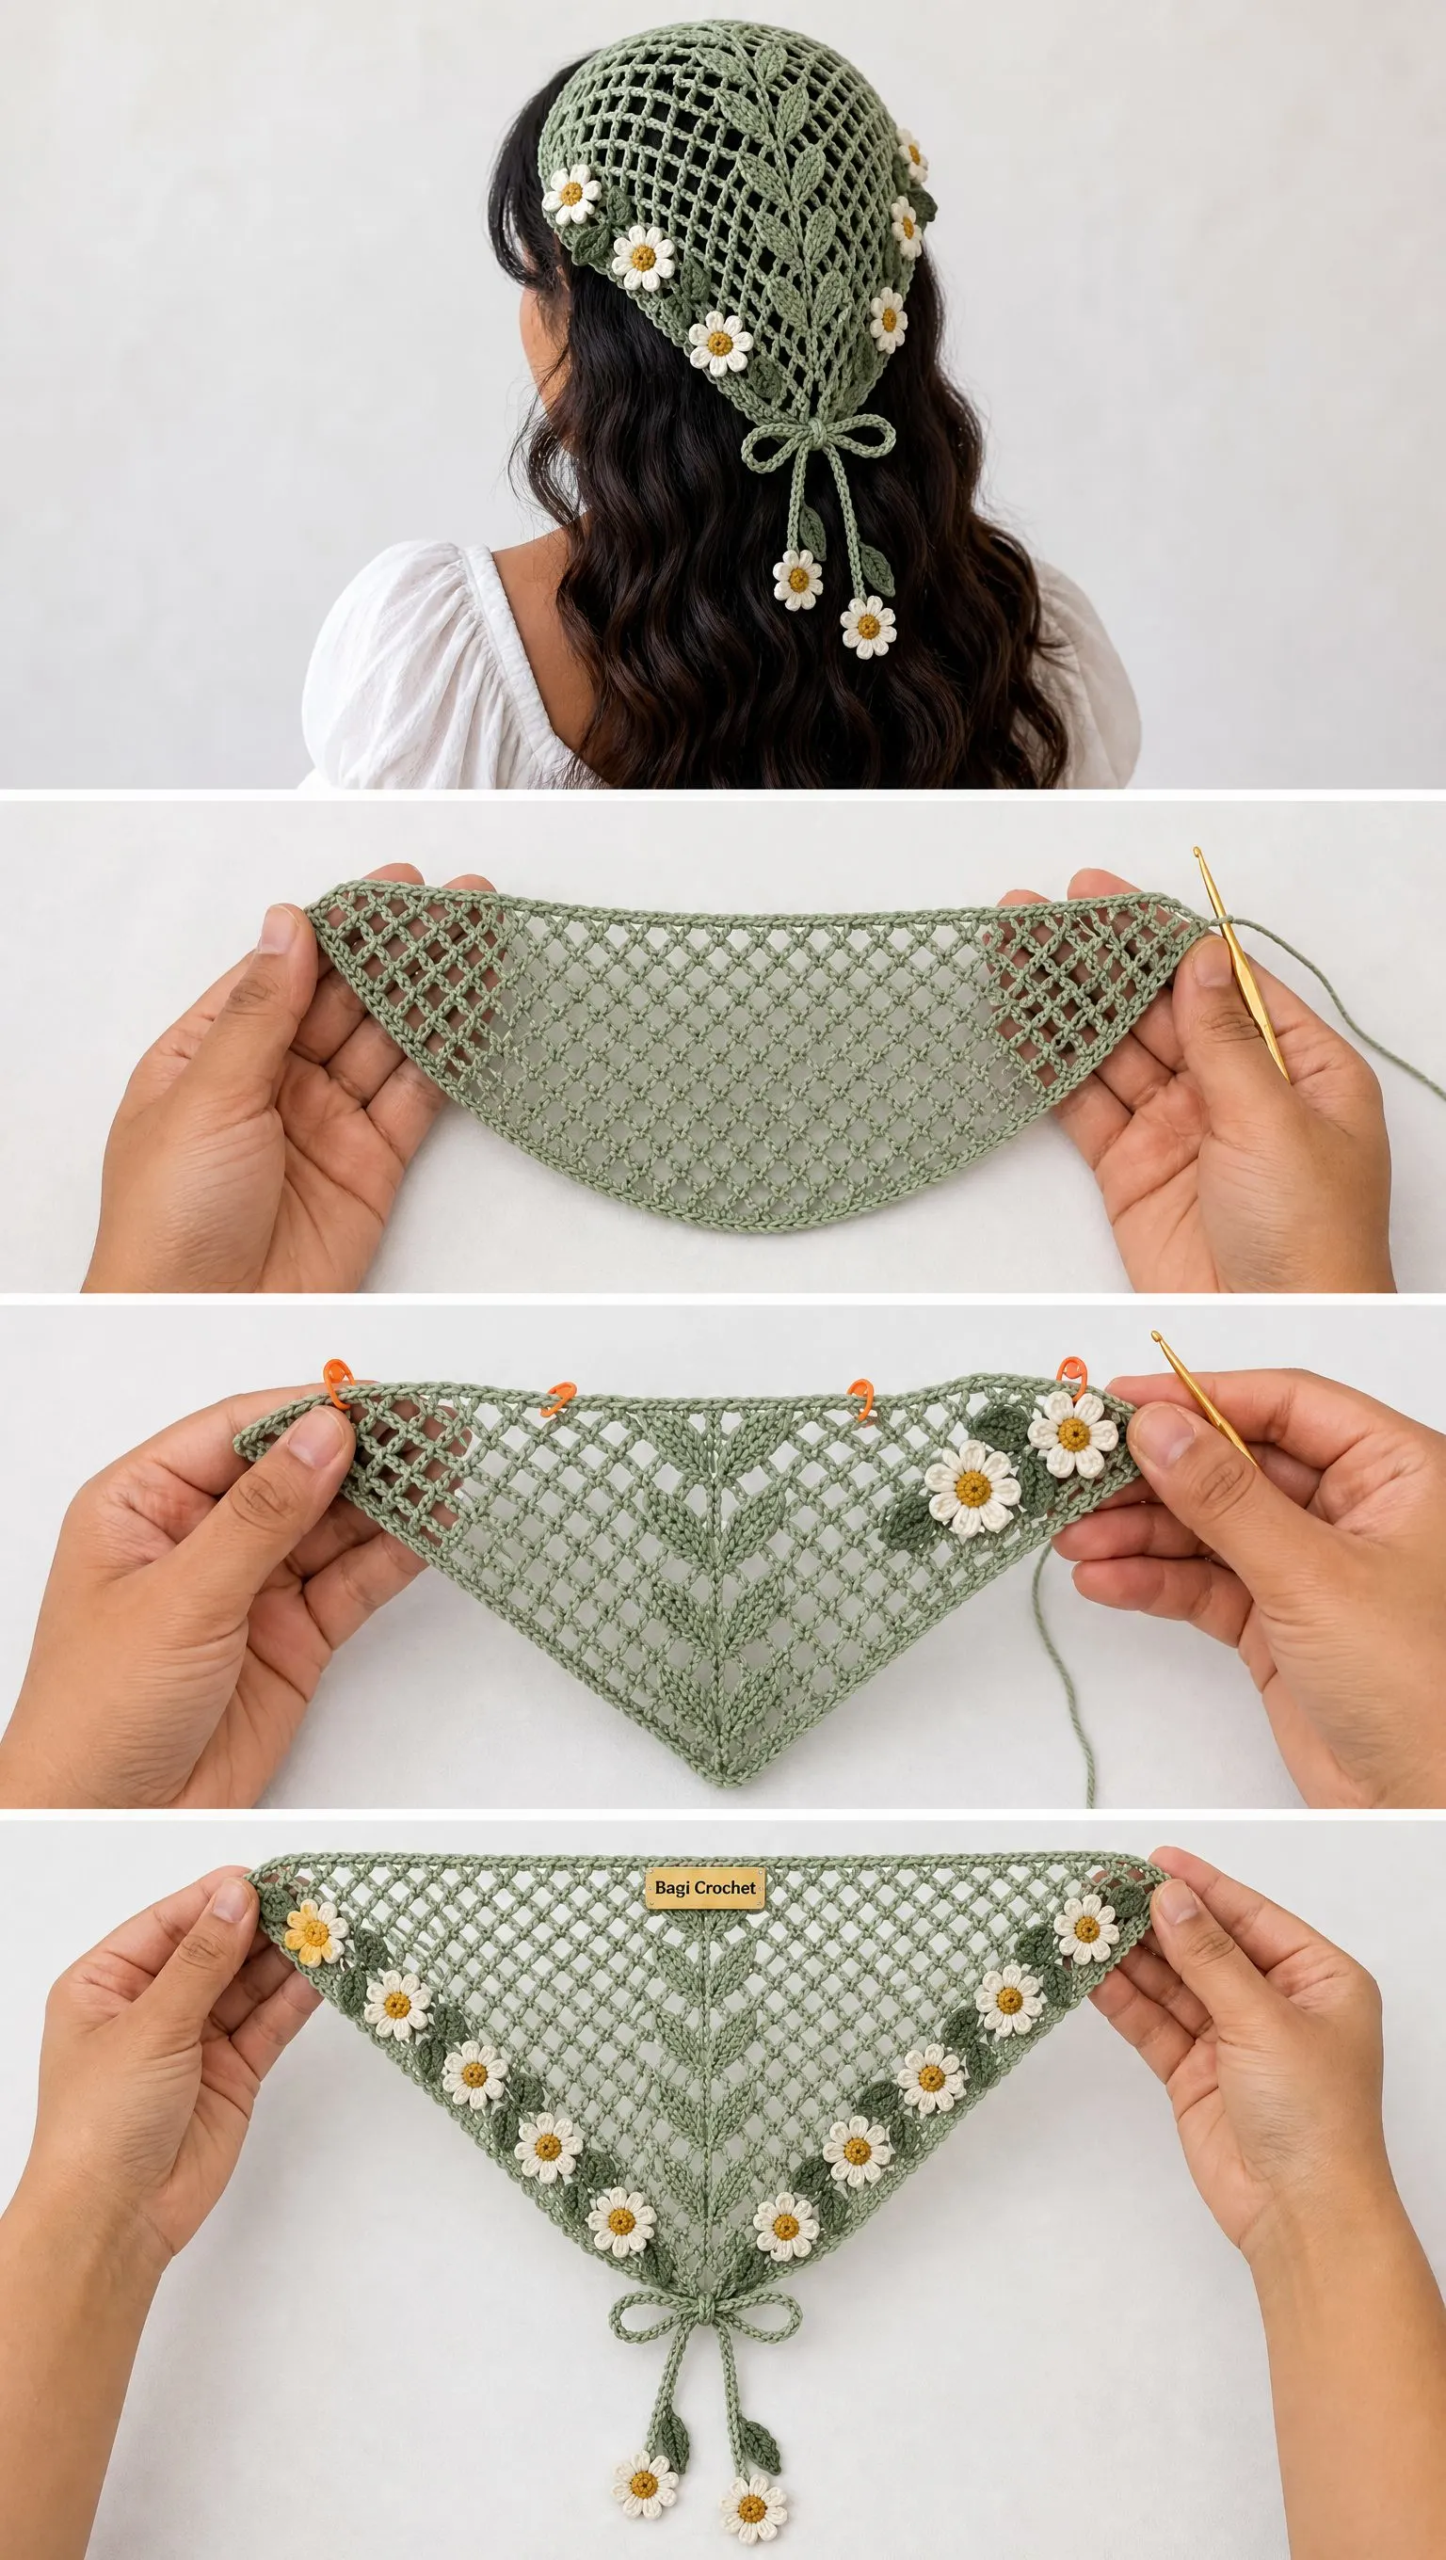
Sew daisies along both diagonal borders and near the lower point. Look at your kerchief and place them where they look balanced. I like clustering a few near the point and spacing others along the edges.
Add small sage green leaf stitches between flowers if desired. These are optional but add a nice finishing touch.
Leaf Tie Cords
These cords let you tie the kerchief securely around your head.
Attach sage green yarn to one top corner.
Chain 35 to 45 stitches, depending on how long you want your ties.
Work back along the chain with slip stitches. This creates a sturdy cord.
At the end, make a small leaf shape:
Chain 6. Starting in the second chain from hook, work: sc, hdc (half double crochet), dc, hdc, sc.
Fasten off and weave in the end.
Repeat for the second tie cord on the other top corner.
Blocking Your Kerchief
Blocking transforms this project from good to gorgeous. Do not skip this step.
Wet block the kerchief gently by soaking it in cool water for about 15 minutes. Gently squeeze out excess water without wringing.
Lay it flat on a blocking mat or towel. Stretch the triangle shape evenly, pulling out the point and the two top corners.
Pin the edges in place. Use rust-proof pins and pin generously along the border to open up those shell stitches.
Allow to dry completely before removing pins. This might take 24 hours depending on humidity.
Finishing Touches
Once everything is dry and blocked:
Care Instructions
To keep your kerchief looking beautiful:
Avoid hanging it wet, as this can stretch out the lace pattern.
Troubleshooting Common Issues
If the kerchief curls at the edges:
Block it firmly with plenty of pins. If curling persists, add an extra border round of single crochet before the shell edging.
If the fabric feels too stiff:
Use a larger hook size or switch to a softer cotton yarn. Some cotton yarns have more drape than others.
If the triangle is too short:
Continue repeating the lace rows beyond row 22. Each additional row adds length and width.
If your daisies look wonky:
Make sure you are working the petal stitch into each of the 8 single crochets evenly. Pull your magic ring closed tightly before starting the petals.
Styling Your Finished Kerchief
Wear this kerchief several ways:
The long leaf-ended ties give you plenty of room to adjust the fit and create different looks.
Final Thoughts on the Sage Daisy Lace Hair Kerchief Crochet Pattern
This Sage Daisy Lace Hair Kerchief is one of those projects that looks far more complicated than it actually is. The lace mesh builds quickly once you get the rhythm, and those little daisies are the perfect way to use up small amounts of contrast yarn.
Whether you are making this for yourself or as a gift, it is the kind of handmade accessory people actually use. Practical, pretty, and packed with personality.
Thank you so much for choosing this pattern. I hope you love making it as much as I loved designing it. If you finish one, I would absolutely love to see it. Tag me on Instagram or share a photo in my Facebook group. Seeing your makes genuinely brightens my day.
Save this pattern to your Pinterest boards so you can find it when you are ready to cast on. And if you make this kerchief, please drop a comment below. I love hearing how projects turn out and seeing the color combinations you choose. Happy crocheting!
Want a Quick & Easy Printable Version?
Get a clean, beautifully formatted PDF of this pattern — easy to follow step by step, ready to print or save on any device. No scrolling, no distractions, just the pattern.
Get the Printable PDF →You Might Also Like
- Strawberry Bat Amigurumi Free Crochet Pattern
- Lavender Garden Crochet Shorts Free Crochet Pattern
- Mint and Lavender Bunny Baby Blanket Free Crochet Pattern
- Sunset Ombre Floral Square Poncho Free Crochet Pattern