
You know that gorgeous skein of DK cotton sitting in your stash? The one that’s too pretty to use on just anything? This is the project worthy of it.
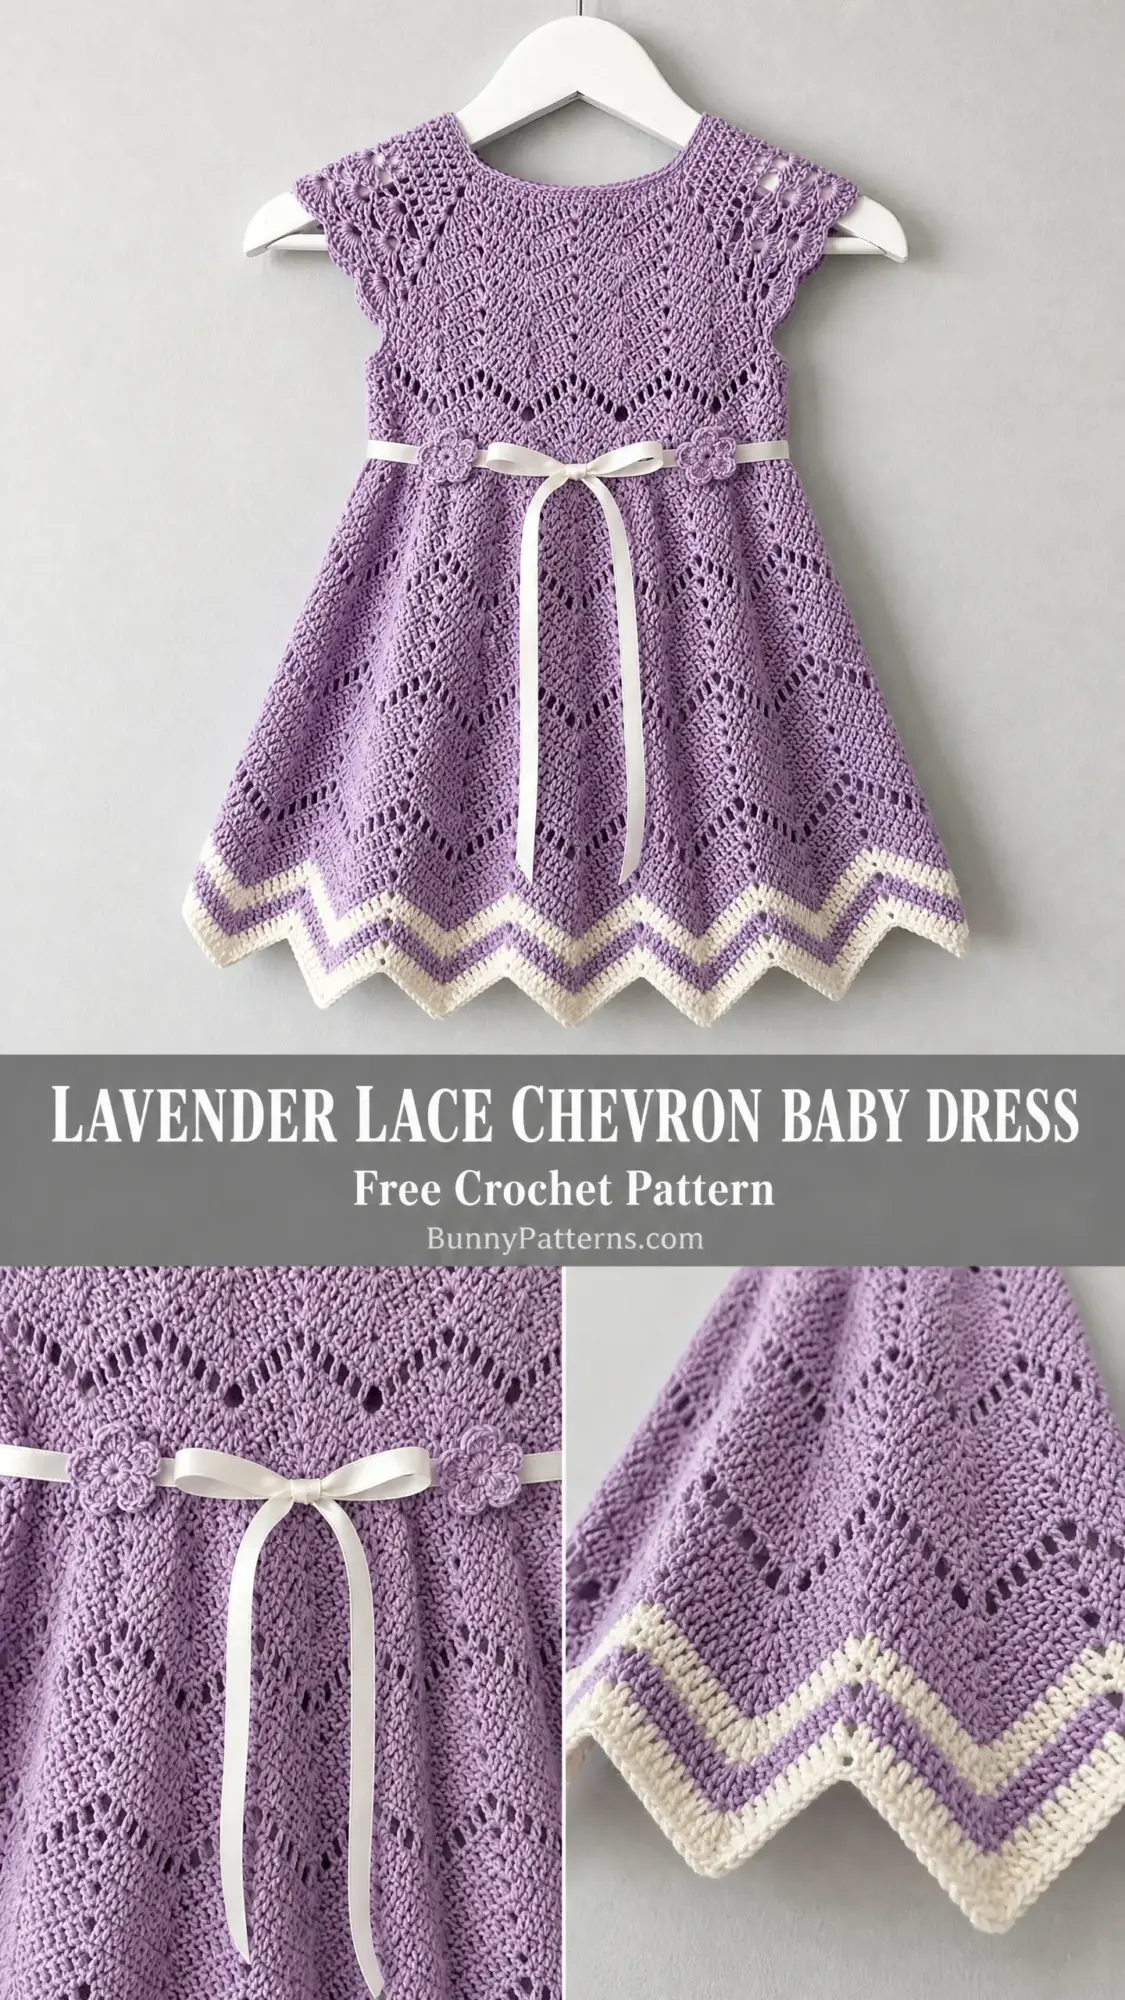
This lavender lace chevron baby dress combines delicate fan stitch lace with a showstopping zigzag border that will have everyone asking if you bought it from a boutique. The construction is clever too. You start at the neckline and work your way down in joined rounds, which means minimal seaming and a satisfying flow from yoke to skirt. The top-down approach also makes it easy to try the dress on as you go if you have a little one nearby.
Fair warning: this is an intermediate to advanced project. If you’ve never made a garment before, I’d suggest trying a simpler baby sweater first. But if you’ve got a couple of wearables under your belt and you’re ready for something special, grab your hook and let’s make something beautiful.
Why This Crochet Pattern Works So Well
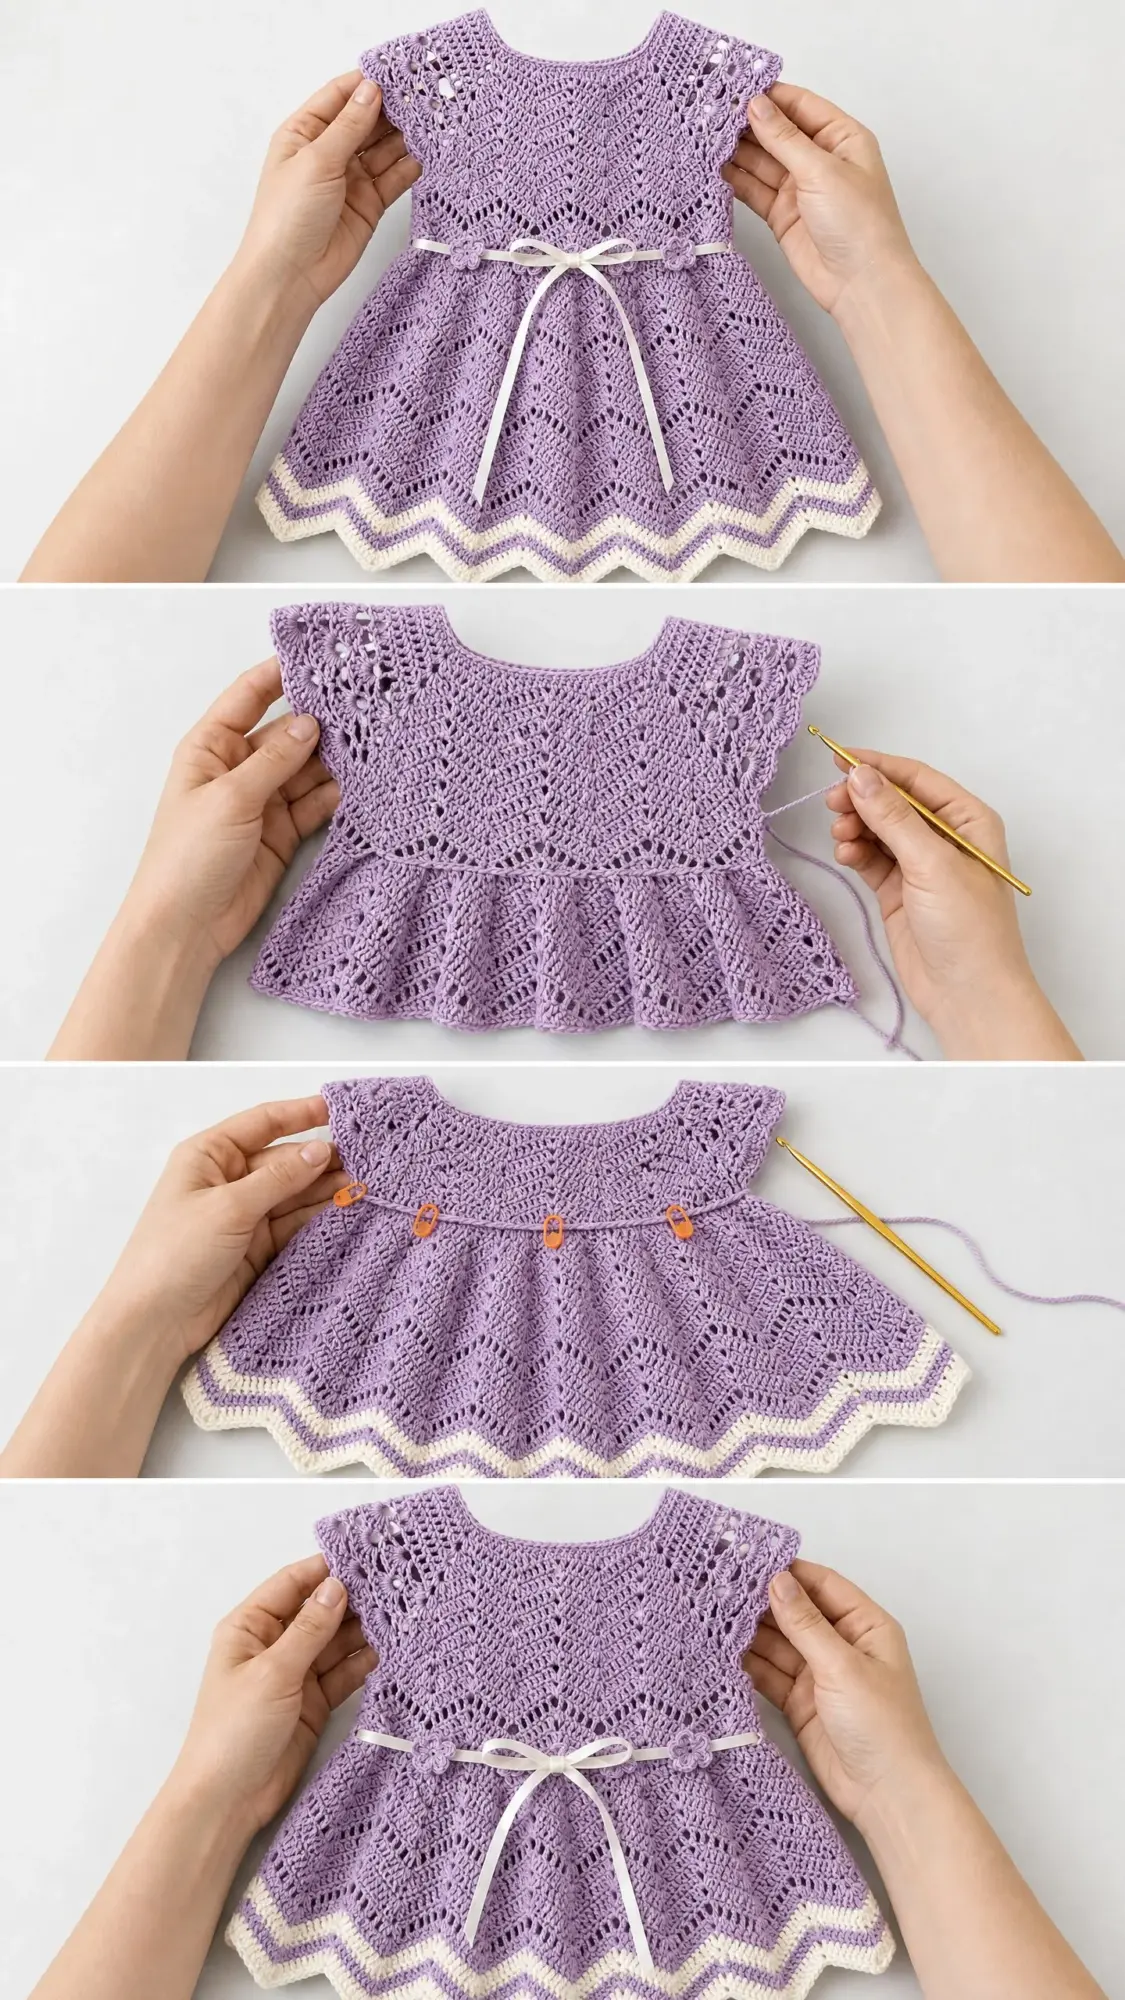
The genius of this baby dress pattern lies in its all-in-one construction. Instead of making separate pieces and seaming them together, you work from the neckline down through the yoke, separate for the sleeves, continue through the bodice and waistband, then flare out into that dreamy lace skirt. The whole dress flows naturally, and the stitch pattern carries through from top to bottom for a cohesive look.
The raglan-style fan increases at the yoke create the armhole shaping while establishing the lace texture you see throughout. It’s efficient and elegant.
That chevron border at the hem? It’s worked in two colors, alternating lavender and cream, creating those crisp zigzag points that give this dress its signature charm. A satin ribbon threaded through the waistband eyelets adds the finishing touch, cinching the empire waist and letting you add those adorable crochet flower accents.
Finished Measurements
Size: 12 to 18 months
| Measurement | Inches | Centimeters |
|---|---|---|
| Chest circumference | 19 in | 48 cm |
| Total length (shoulder to hem) | 14 in | 35.5 cm |
| Yoke depth | 3.5 in | 9 cm |
| Bodice length | 2.5 in | 6.5 cm |
| Skirt length | 8 in | 20.5 cm |
| Cap sleeve circumference | 8 in | 20 cm |
The lace fabric has slight stretch, and the dress includes about 1 inch of ease for comfortable fit.
Materials Needed
Yarn: DK weight (CYCA 3)
Hook: US size D-3 (3.25 mm) or size needed to achieve gauge
Notions:
Yarn Recommendations
Paintbox Yarns Simply DK in Dusty Lilac and White works beautifully for this project. It’s 100% acrylic, machine washable, and gives excellent stitch definition.
Drops Safran (100% cotton) in shade 29 lavender and shade 17 natural creates a crisp heirloom look perfect for warmer weather and sensitive baby skin.
Scheepjes Stonewashed in Lilac Quartz and Moonstone adds subtle texture without obscuring the lace pattern.
Whatever you choose, avoid fuzzy or heavily textured yarns. They’ll hide all that gorgeous lacework you’re about to create.
Gauge
18 stitches and 20 rows = 4 inches in single crochet, blocked
One 12-stitch fan lace repeat = approximately 2 inches wide and 1.5 inches tall
Gauge matters here. This is a garment, and fit depends on hitting these numbers. Make a 6-inch swatch in the fan lace pattern, wet block it, then measure. Adjust your hook size up or down until you match.
Abbreviations and Special Stitches
Let me walk you through all the stitches you’ll need. I’ll give you the abbreviation, the full name, and exactly what to do.
ch = chain: yarn over, pull through loop on hook
sl st = slip stitch: insert hook, yarn over, pull through stitch and loop on hook in one motion
sc = single crochet: insert hook, yarn over, pull up a loop (2 loops on hook), yarn over, pull through both loops
dc = double crochet: yarn over, insert hook, yarn over, pull up a loop (3 loops), yarn over, pull through 2 loops, yarn over, pull through remaining 2 loops
sk = skip: pass over the indicated stitch without working into it
st(s) = stitch(es)
sp = space
ch-sp = chain space: the gap created by a chain in the previous round
MC = main color (lavender)
CC = contrast color (cream)
pm = place marker
rnd = round
Special Stitches You’ll Use
Fan Stitch: Work 5 dc all into the same stitch or space. This creates the shell shape visible throughout the dress.
Picot: Ch 3, sl st into the first chain of that ch-3. Creates a small decorative knot for the sleeve edging.
sc2tog (single crochet 2 together): Insert hook into next stitch, pull up a loop. Insert hook into following stitch, pull up a loop. You now have 3 loops on hook. Yarn over, draw through all 3 loops. This decreases by one stitch.
dc2tog (double crochet 2 together): Yarn over, insert hook into next stitch, yarn over, pull up a loop, yarn over, draw through 2 loops. Yarn over, insert hook into following stitch, yarn over, pull up a loop, yarn over, draw through 2 loops. Yarn over, draw through all 3 remaining loops.
Pattern Notes Before You Begin
1. The dress is worked top-down in joined rounds. The right side faces outward throughout.
2. All rounds begin with ch 3 (counts as first dc) unless the instruction specifies ch 1 (counts as first sc).
3. Join each round with a slip stitch to the top of the first stitch.
4. Stitch counts appear in parentheses at the end of each round.
5. The two flowers at the waistband are made separately and sewn on after blocking.
6. Blocking is not optional. Wet blocking opens the lace pattern significantly and is essential for this design.
Time Estimate
Plan for 18 to 24 hours total across multiple sessions:
This is a labor of love, but every hour shows in the finished piece.
Crochet Pattern Instructions
Neckline Foundation
With MC, leaving a 12 inch tail for seaming later, make a magic ring.
Round 1: Ch 3 (counts as first dc), work 71 dc into the ring, sl st to top of beg ch-3 to join. Pull the magic ring tail firmly closed. (72 dc)
Place 4 stitch markers to mark the raglan increase points:
This creates sections: 9 sts (right back), 18 sts (right sleeve), 18 sts (front), 18 sts (left sleeve), 9 sts (left back).
Yoke
The yoke is worked over Rounds 2 through 12. Each increase round adds a Fan at each of the 4 raglan markers, adding 16 stitches total per increase round.
Round 2 (Increase Round): Ch 3, dc in next 8 sts, [work Fan in marked st, dc in next 17 sts] 3 times, work Fan in marked st, dc in next 8 sts, sl st to join. (88 sts)
Round 3 (Plain Lace Round): Ch 3, dc in each st around, sl st to join. (88 sts)
Round 4 (Increase Round): Ch 3, dc in next 8 sts, [work Fan in next marked-section center st, dc in next 21 sts] 3 times, work Fan in next marked-section center st, dc in remaining 12 sts, sl st to join. (104 sts)
After each increase round, move your raglan markers to the center dc of each new fan.
Round 5 (Plain Lace Round): Ch 3, dc in each st around, sl st to join. (104 sts)
Round 6 (Increase Round): Ch 3, work as established, working Fan at each of the 4 raglan marker positions. Sl st to join. (120 sts)
Round 7 (Plain Lace Round): Ch 3, dc in each st around, sl st to join. (120 sts)
Round 8 (Increase Round): Ch 3, work as established with Fan at each raglan marker. Sl st to join. (136 sts)
Round 9 (Plain Lace Round): Ch 3, dc in each st around, sl st to join. (136 sts)
Round 10 (Increase Round): Ch 3, work as established with Fan at each raglan marker. Sl st to join. (152 sts)
Round 11 (Plain Lace Round): Ch 3, dc in each st around, sl st to join. (152 sts)
Round 12 (Increase Round): Ch 3, work as established with Fan at each raglan marker. Sl st to join. (168 sts)
Checkpoint: Your yoke should measure approximately 3.5 inches from center neckline to bottom edge. You should see 6 visible fan clusters radiating from the neckline when laid flat.
Sleeve Separation
Round 13 (Separation Round): Ch 1, sc in next 26 sts (right back), place the next 36 sts on scrap yarn (right sleeve), ch 4 (underarm chain bridge), sc in next 36 sts (front), place the next 36 sts on scrap yarn (left sleeve), ch 4 (underarm chain bridge), sc in next 27 sts (left back), sl st to join. (104 working sts)
Bodice
Round 14 (Adjustment Round): Ch 3, dc in each st around, working 1 extra dc evenly into each ch-4 bridge (5 dc across each bridge instead of 4). Sl st to join. (108 sts)
Round 15 (Fan Lace Round): Ch 1 (counts as sc), [sk 2 sts, work Fan into next st, sk 2 sts, sc into next st] 18 times, sl st to join. (108 sts)
Round 16 (Connector Round): Ch 3, [dc into each of the 5 dc of next Fan, ch 2, sk the sc] 18 times, sl st to join. (90 dc plus 18 ch-2 sps)
Round 17 (Fan Lace Round): Ch 1, [sc into ch-2 sp, sk 2 sts, Fan into center dc of fan below, sk 2 sts] 18 times, sl st to join. (108 sts)
Round 18 (Connector Round): Repeat Round 16. (90 dc plus 18 ch-2 sps)
Round 19 (Fan Lace Round): Repeat Round 17. (108 sts)
Waistband Eyelet Round
Round 20 (Eyelet Round): Ch 3, [dc in next 2 sts, ch 1, sk 1 st] across, ending dc in remaining sts, sl st to join. (72 dc plus 36 ch-1 sps)
This creates the holes for threading your satin ribbon.
Round 21 (Stabilizing Round): Ch 3, dc in each dc and in each ch-1 sp around, sl st to join. (108 sts)
Skirt
Round 22 (Skirt Increase Round 1): Ch 1, [sc in next 2 sts, 2 sc in next st] 36 times, sl st to join. (144 sts)
Round 23 (Fan Lace Round): Ch 1, [sk 2 sts, Fan into next st, sk 2 sts, sc into next st] 24 times, sl st to join. (144 sts)
Round 24 (Connector Round): Ch 3, [dc in each of the 5 dc of next Fan, ch 2, sk the sc] 24 times, sl st to join. (120 dc plus 24 ch-2 sps)
Round 25 (Fan Lace Round): Ch 1, [sc into ch-2 sp, sk 2 dc, Fan into center dc of fan, sk 2 dc] 24 times, sl st to join. (144 sts)
Round 26 (Connector Round): Repeat Round 24. (120 dc plus 24 ch-2 sps)
Round 27 (Fan Lace Round with Increase): Work fan lace pattern as established, adding 2 extra sc into 12 evenly spaced connector sc positions. Sl st to join. (156 sts)
Round 28 (Connector Round): Ch 3, [dc in each of 5 dc of Fan, ch 2, sk sc] 26 times, sl st to join. (130 dc plus 26 ch-2 sps)
Rounds 29-32: Continue alternating Fan Lace Rounds and Connector Rounds as established. (156 sts)
Round 33 (Fan Lace Round with Increase): Work as Round 29 for 24 repeats, then add 2 sc in the next 2 connector positions. Sl st to join. (168 sts)
Rounds 34-39: Continue alternating Fan Lace Rounds and Connector Rounds as established. (168 sts)
Chevron Border
Round 40 (Setup Round, MC): Ch 1, sc in each st and each ch-sp around, distributing to produce 168 sc total. Sl st to join. (168 sc)
Round 41 (Chevron Round 1, MC): Ch 1. [Sc2tog over next 2 sts, sc in next 2 sts, work 5 dc into next st (peak), sc in next 2 sts, sc2tog over next 2 sts] 12 times. Sl st to join. (144 sts)
Round 42 (Chevron Round 2, CC): Join CC at any valley point. Ch 1. [Sc2tog over valley sts, sc in next 2 sts, 5 dc into peak dc, sc in next 2 sts, sc2tog] 12 times. Sl st to join. Drop CC. (144 sts)
Round 43 (Chevron Round 3, MC): Pick up MC. Ch 1. Work chevron repeat as established. Sl st to join. (144 sts)
Round 44 (Chevron Round 4, CC): Pick up CC. Work as Round 42. Sl st to join. Fasten off CC. (144 sts)
Round 45 (Final Chevron Round, MC): Ch 1. Work as established. At each peak, work sl st into the peak dc to keep points tight. Fasten off MC. (144 sts)
Sleeves (Make 2)
Place the 36 held sleeve stitches back onto your hook with MC. Attach yarn with sl st at the center of the underarm chain bridge. Pick up and sc into each of the 4 underarm ch, then work around the 36 held sts. Join. (40 sts)
Sleeve Round 1: Ch 3, dc in each st around, sl st to join. (40 sts)
Sleeve Round 2 (Fan Round): Ch 1, [sk 2, Fan into next st, sk 2, sc into next st] 6 times, sc in remaining 4 sts, sl st to join. (40 sts)
Sleeve Round 3 (Picot Edging): Ch 1, [sc in next st, work Picot] across, sc in each remaining st, sl st to join. Fasten off.
Repeat for second sleeve.
Waist Flowers (Make 2)
With MC, make a magic ring.
Round 1: Ch 1, 10 sc into ring, sl st to join. (10 sc)
Round 2 (Petals): [Ch 3, dc in same st, ch 3, sl st into next st] 5 times. (5 petals)
Fasten off, leaving a 10 inch tail for sewing.
Finishing
Using the starting tail at the neckline, whipstitch the two back edges together for 1/2 inch. Create a button loop by chaining 6 and attaching at the back neck opening. Sew on your button or snap.
Thread the satin ribbon through the waistband eyelets, starting and ending at center front. Sew the two flowers to the front waistband where the ribbon emerges.
Wet block your finished dress by soaking in cool water for 15 minutes, gently squeezing out excess water in a towel, then pinning to measurements on a blocking mat. Let dry completely before removing pins.
Helpful Tips for Success
Take your time with the yoke. Getting those fan increases in the right spots sets up the whole dress for success. Count your stitches after every round.
When you reach the sleeve separation, use a smooth scrap yarn in a contrasting color. It makes picking up those stitches later much easier.
For the chevron border, pay close attention to where your peaks and valleys fall. The sc2tog stitches always happen at the valleys, and the 5-dc fans always happen at the peaks. Once you get the rhythm, it flows naturally.
Don’t skip blocking. I know it’s tempting to tie on that ribbon and call it done, but wet blocking transforms this dress from nice to stunning.
Thank you so much for choosing this pattern for your next project. I hope you love making this little dress as much as I loved designing it. If you complete one, I’d absolutely love to see it! Share your finished dress on Instagram or in my Facebook group and tag me.
If you found this baby dress crochet pattern helpful, go ahead and pin it to your Pinterest boards so you can find it again when you’re ready to start. And please drop a comment below if you make one. I love hearing which color combinations you choose and seeing your beautiful work come to life!
You Might Also Like
- Sage Green Shell Stitch Sofa Set Free Crochet Pattern
- Coral Sunset Granny Square Maxi Dress Free Crochet Pattern
- Ivory Pineapple Lace Girl Dress Free Crochet Pattern
- Boho Rainbow Granny Square Tote Free Crochet Pattern