
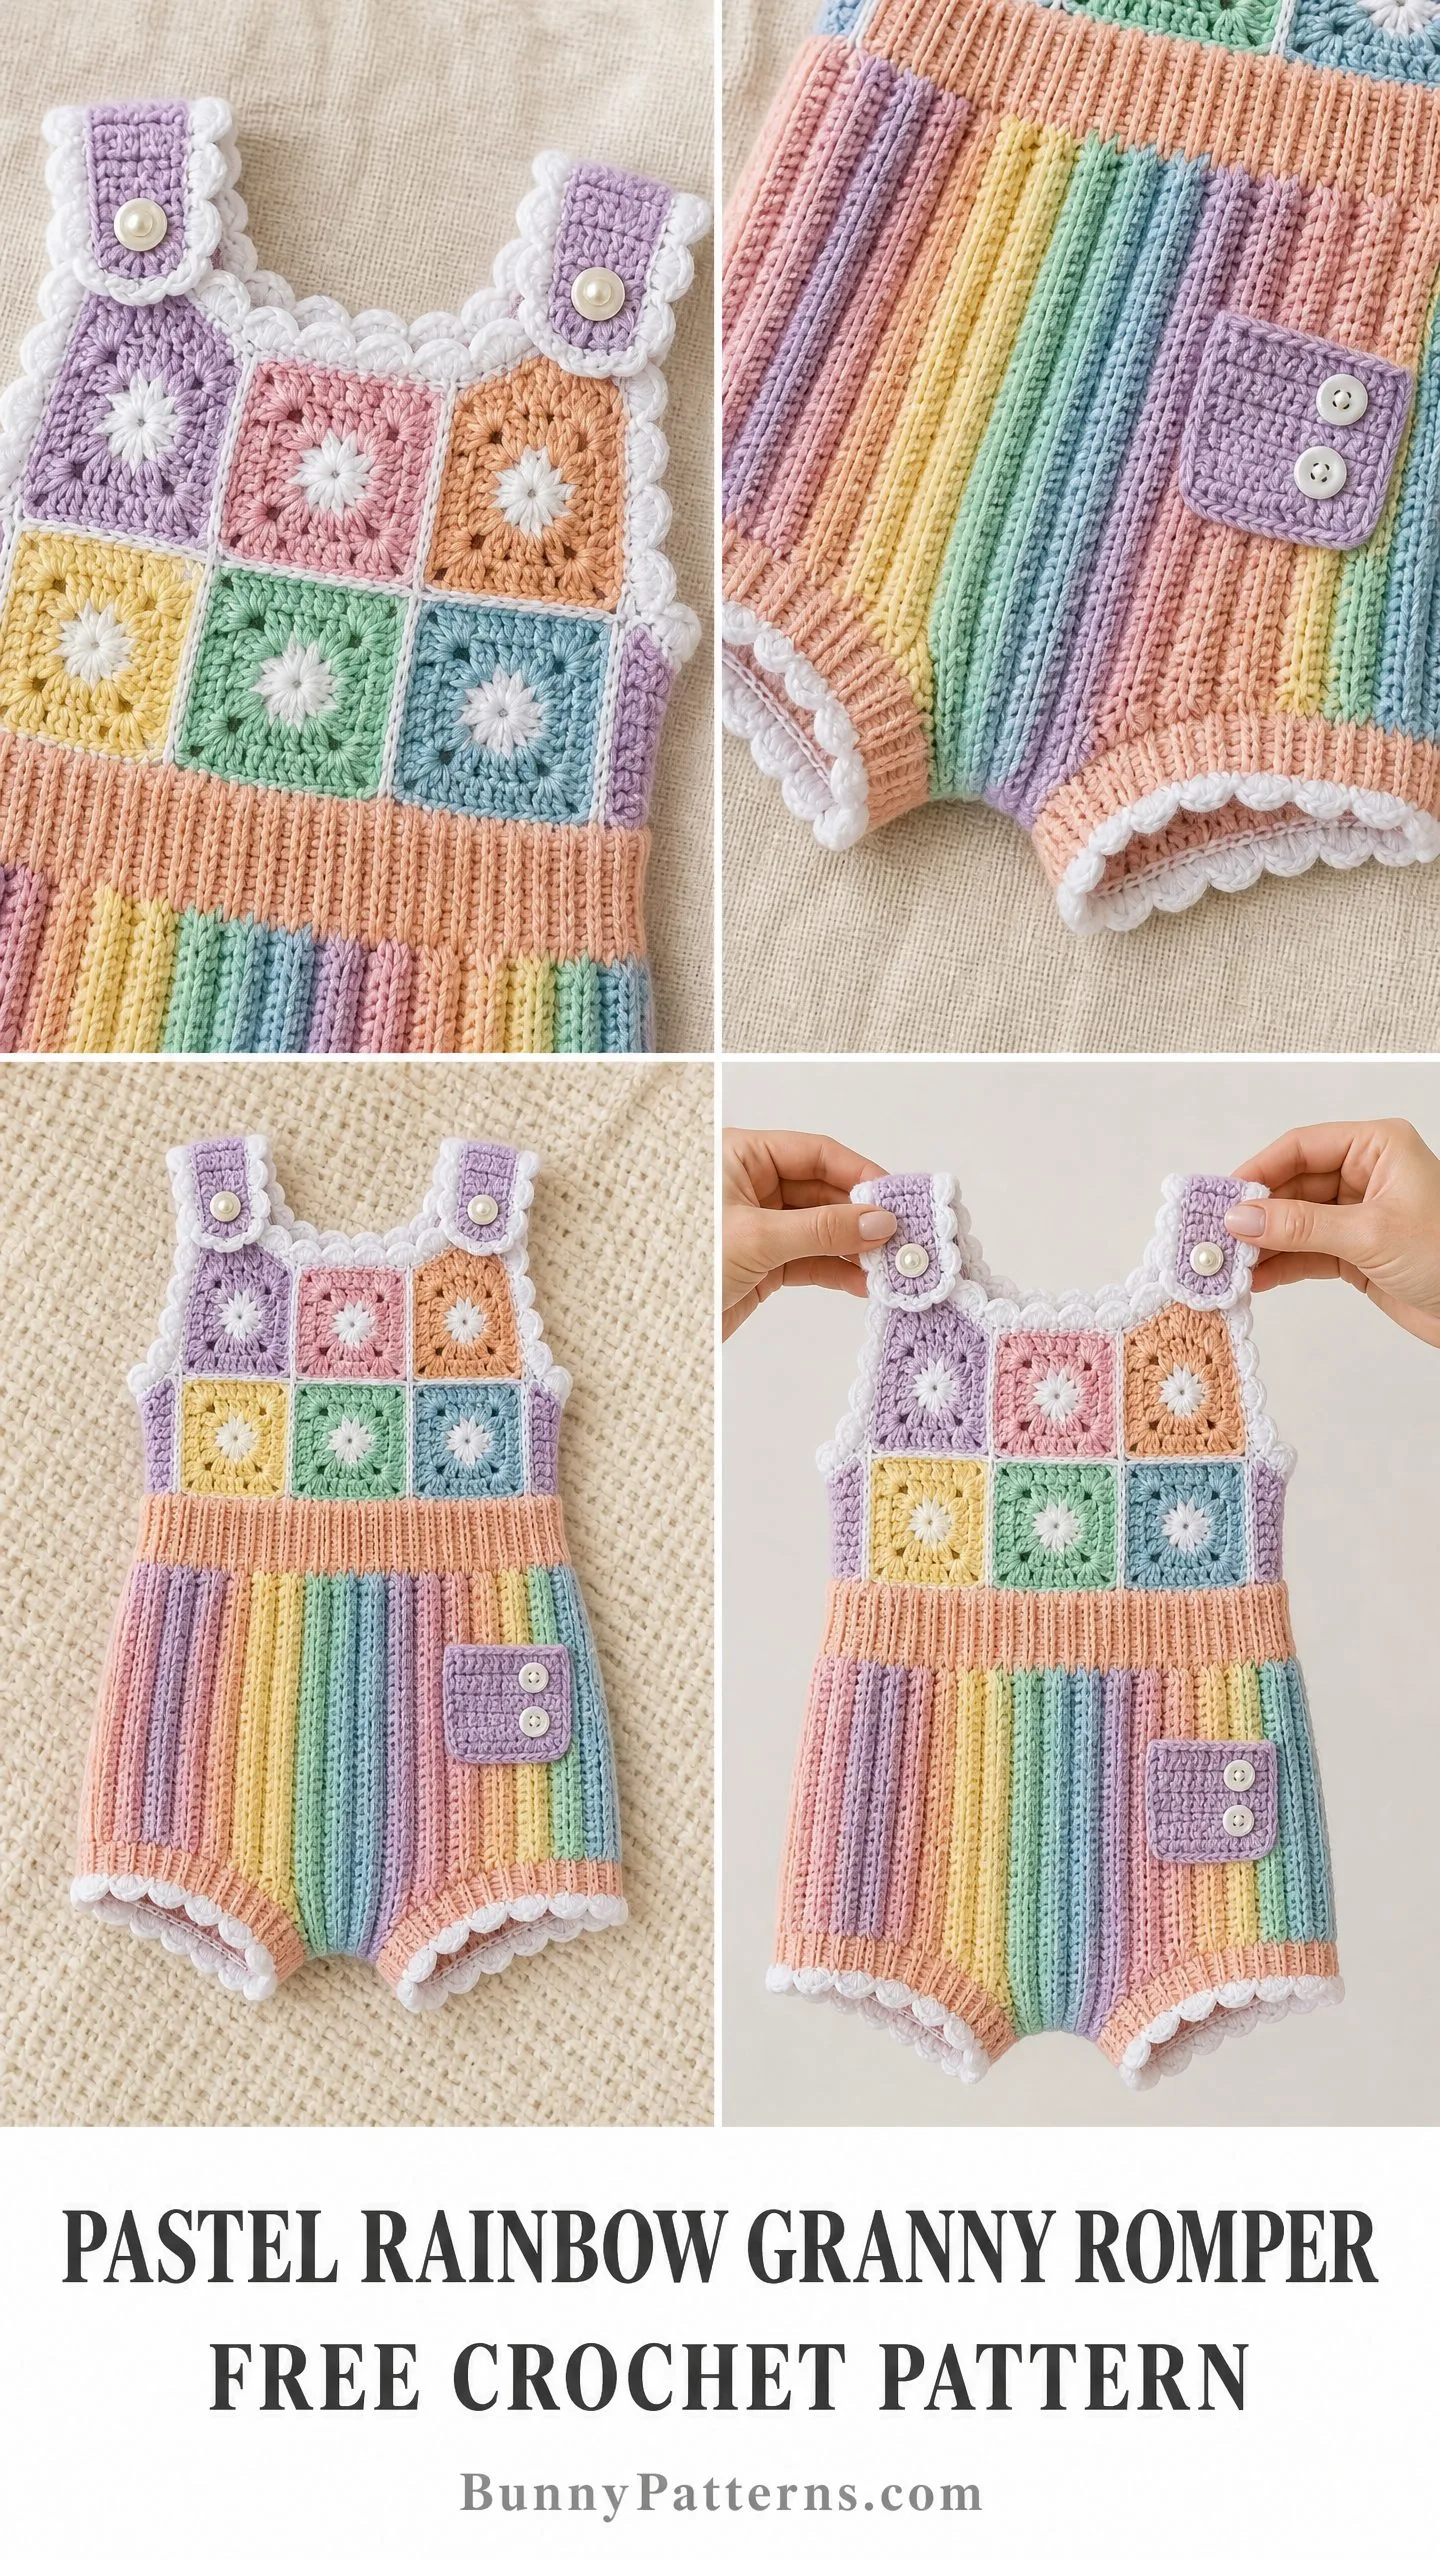
OH MY GOODNESS, this romper! If you have been searching for that perfect baby shower gift that will make every single person in the room gasp, you just found it. This pastel rainbow granny romper combines classic granny squares with modern striped ribbing, and the result is absolutely show-stopping.
I am not going to lie to you. This is an intermediate project that takes around 15 to 22 hours to complete. But here is the thing. Every single one of those hours is WORTH IT when you see the finished piece. The construction is straightforward once you understand the flow, and I will walk you through every step.
This romper fits babies 3 to 6 months old and features a granny square bib yoke, vertical rainbow stripes on the body, adorable scallop shell edging, and a sweet little pocket. It is the kind of handmade gift that becomes an heirloom. Let me show you exactly how to make it.
Why This Crochet Pattern Works So Well
The genius of this design is in the construction. You make 12 granny squares first, join them into two panels for the front and back yoke, then work the striped ribbed body downward from there. The pieces come together logically, and each section builds on the last.
The granny squares use a white center with pastel outer rounds. You will make squares in lavender, baby pink, pale yellow, mint green, sky blue, and soft peach. These get arranged in a specific color layout that creates visual balance across the front and back.
The ribbed body uses back loop only single crochet to create that stretchy, knit-look texture. The vertical stripes happen because you change colors within each row. It sounds complicated but becomes second nature after a few rows.
The shell edging finishes everything beautifully. Those scalloped edges on the leg openings and neckline give the romper its polished, professional look.
Materials You Will Need
Yarn: DK weight yarn (CYCA 3), approximately 550 yards total
| Color | Name | Yardage Needed |
|---|---|---|
| Color A | Soft Peach | 120 yards |
| Color B | Lavender | 70 yards |
| Color C | Baby Pink | 70 yards |
| Color D | Pale Yellow | 60 yards |
| Color E | Mint Green | 60 yards |
| Color F | Sky Blue | 60 yards |
| Color W | White | 110 yards |
Recommended Yarn Brands:
Hooks:
Notions:
Gauge for This Crochet Tutorial
Granny square gauge: One completed square through Round 3 measures 2.25 inches / 5.7 cm square after blocking
Ribbing gauge with smaller hook: 22 stitches and 24 rows equals 4 inches / 10 cm in back loop only single crochet
Gauge matters here because this is a garment. Please make a test square and a small ribbing swatch before diving in. Adjust your hook size up or down if needed.
Finished Measurements
Abbreviations and Special Stitches
Abbreviations:
Special Stitches:
Granny Cluster: Work 3 double crochet stitches into the same space or stitch. This creates the classic granny square cluster.
Shell Stitch: Work 5 double crochet stitches into the same stitch or space. This creates the decorative scallop edge.
Back Loop Only Ribbing: Work single crochet into only the back loop of each stitch. This creates stretchy, ridged fabric that looks like knit ribbing. Always turn your work and chain 1 at the beginning of each row. The chain 1 does NOT count as a stitch.
Flat Join: Place squares with right sides together, insert hook through corresponding stitches of both squares, slip stitch to join.
Step by Step Pattern Instructions
Section 1: Granny Squares (Make 12)
Make the following quantities in each color for the outer rounds:
All squares use White for Round 1.
Round 1 (Color W):
With Color W and US E-4 hook, make a magic ring.
Ch 3 (counts as first dc).
Work 2 dc into ring.
Ch 2.
Work 3 dc into ring, ch 2. Repeat from * two more times.
Join with sl st to top of beginning ch-3.
Fasten off Color W.
(4 clusters of 3 dc, 4 ch-2 corner spaces)
Round 2 (designated pastel color):
Join pastel color with sl st to any ch-2 corner space.
Ch 3 (counts as dc).
Work 2 dc into same corner space, ch 2, work 3 dc into same corner space.
Ch 1.
In next ch-2 corner space, work 3 dc, ch 2, 3 dc. Ch 1. Repeat from * around remaining corners.
Join with sl st to top of beginning ch-3.
Do not fasten off.
(4 corners with 2 clusters each separated by ch-2, 4 ch-1 side spaces)
Round 3 (continue with same pastel):
Sl st across to ch-2 corner space.
Ch 3 (counts as dc).
Work 2 dc into corner space, ch 2, work 3 dc into corner space.
Ch 1.
Work 3 dc into next ch-1 side space, ch 1.
In corner ch-2 space, work 3 dc, ch 2, 3 dc. Ch 1. Work 3 dc in next ch-1 side space, ch 1. Repeat from * around.
Join with sl st to top of beginning ch-3.
Fasten off, leaving a 12-inch tail for joining.
Checkpoint: Each square should measure 2.25 inches after light blocking. Adjust hook size if yours are bigger or smaller.
Section 2: Joining Squares Into Yoke Panels
Arrange 6 squares for the front yoke in a 3-wide by 2-tall grid:
Arrange 6 squares for the back yoke:
To Join Squares:
Place two adjacent squares with right sides together.
With Color W and US E-4 hook, sl st through corresponding stitches of both squares across the shared edge.
Begin at corner ch-2 space: sl st, ch 1, then sl st into each ch-1 space and dc top along the edge, ch 1, sl st into the corner at the other end.
Fasten off.
Join all 3 squares in each row first, then join the two rows together along their long shared edge.
Yoke Border:
With Color W and US E-4 hook, join to any outer corner.
Work 1 round of sc evenly around, placing 3 sc into each outer corner to turn neatly.
Join with sl st.
Work 1 more round of sc.
Fasten off.
Repeat for back yoke panel.
Checkpoint: Each panel should measure approximately 6.75 inches wide by 4.5 inches tall.
Section 3: Ribbed Striped Body (Front)
The body uses vertical rainbow stripes worked in BLO sc ribbing. The stripe sequence across the row from left to right:
| Stripe | Color | Width |
|---|---|---|
| 1 | Peach (A) | 4 sts |
| 2 | Lavender (B) | 3 sts |
| 3 | Yellow (D) | 3 sts |
| 4 | Mint (E) | 3 sts |
| 5 | Sky Blue (F) | 3 sts |
| 6 | Pink (C) | 3 sts |
| 7 | Peach (A) | 4 sts |
Total: 23 stitches
Row 1 (RS, set-up row):
With US D-3 hook, join Color A to bottom-left corner of front yoke panel border.
Pick up and sc evenly across bottom edge of yoke: 23 sc total. (23 sts)
If your yoke bottom does not have exactly 23 usable stitches, space your sc evenly to reach 23.
Row 2 (WS):
Ch 1, turn (does not count as st).
BLO sc across all 23 stitches, changing colors at each stripe transition. (23 sts)
Row 3 (RS):
Ch 1, turn.
BLO sc across all 23 stitches in established stripe pattern. (23 sts)
Continue working BLO sc ribbing in the stripe pattern for 36 rows total.
Color Change Tip: Complete the last yarn over of the final stitch in the old color with the new color yarn. This creates a clean color transition.
Checkpoint: After 36 rows, the front body panel should measure approximately 6 inches tall.
Section 4: Ribbed Striped Body (Back)
Work exactly as Front Body Panel. Pick up 23 sc into the bottom edge of the back yoke panel, then work 36 rows of BLO sc ribbing in the same stripe sequence.
Fasten off after Row 36.
Section 5: Side Seams
Hold front and back body panels with right sides together.
Using Color A and tapestry needle, whipstitch or mattress stitch the side edges together. Begin just below the yoke join and work down to the bottom of the body (Row 36).
Leave the bottom open for now.
Repeat for both side seams. Turn right side out.
Checkpoint: The body tube should measure approximately 17 inches in circumference.
Section 6: Crotch Shaping
Lay the romper flat with front and back bottom edges aligned. The total bottom opening is 46 stitches (23 front plus 23 back).
Count 8 stitches in from each side edge on the front. This leaves 7 center stitches on the front and 7 center stitches on the back to join for the crotch. That is 14 stitches total (7 pairs).
With Color A and US D-3 hook, place RS together and sl st join through corresponding pairs of stitches across the center 14 stitches.
Fasten off.
This leaves 8 unworked stitches on each side forming the leg openings.
Section 7: Shoulder Straps
Front Strap Edging:
With Color W and US E-4 hook, join to the top edge of the top-left front yoke square.
Work 10 sc across the top edge. (10 sts)
Ch 1, turn. Sc in each st. (10 sts)
Ch 1, turn. Sc in each st. (10 sts)
Buttonhole Row:
Ch 1, turn.
Sc 4, ch 2, skip 2 sts, sc 4. (10 sts equivalent with 1 buttonhole)
Fasten off.
Repeat for the top-right front strap.
Back Strap Top:
Work 3 rows of 10 sc on each back strap top. No buttonholes needed. Sew buttons onto back strap tops to align with front buttonholes.
Section 8: Pocket
With Color B and US D-3 hook, ch 12.
Row 1: Sc into second ch from hook, sc across. (11 sts)
Rows 2 to 8: Ch 1, turn. BLO sc across. (11 sts each row)
Fasten off Color B.
Pocket Border:
With Color W and US E-4 hook, join to any corner.
Work 1 round of sc around all 4 edges, working 3 sc into each corner.
Fasten off.
Sew 2 small decorative buttons onto the pocket front.
Whipstitch the pocket to the front right body panel, approximately 1 inch from the right side seam and 1 inch below the yoke join.
Section 9: Shell Edging
Apply white scallop shell edging to both leg openings, the neckline, and the strap tops.
Shell Edging Pattern:
Sc in first st, skip 2 sts, work 5 dc (shell) in next st, skip 2 sts. Repeat from * around.
Join with sl st to first sc.
Fasten off.
This repeat uses 6 stitches. Adjust your plain sc round before edging to a number divisible by 6.
Leg Openings:
Work 1 round of sc around each leg opening, adjusting to exactly 24 stitches. (24 sts)
Apply shell edging. (4 shells, 4 sc)
Neckline:
Work 1 round of sc around the entire neckline opening, adjusting to exactly 48 stitches. (48 sts)
Apply shell edging. (8 shells, 8 sc)
Strap Tops:
Adjust each strap top edge to 12 stitches by adding 1 sc at each end. (12 sts)
Apply shell edging. (2 shells, 2 sc)
Section 10: Final Assembly
1. Weave in all ends carefully, burying them within the fabric.
2. Wet block the entire romper. Submerge in cool water, squeeze gently, lay flat on a blocking mat, pin to finished measurements, and allow to dry completely.
3. Attach 4 pearl buttons: 2 on back strap tops (aligning with front buttonholes) and 2 decorative buttons on the pocket.
4. Attach 3 snap fasteners to the inside crotch seam at approximately 1 inch, 2 inches, and 3 inches from center.
Size Customization Tips
For 6 to 9 months: Add Round 4 to each granny square, increasing each square to approximately 2.75 inches. Increase the body width to 27 stitches. Add 4 rows to the body ribbing (40 rows total).
For 0 to 3 months: Make squares through Round 2 only, yielding approximately 1.75 inch squares. Reduce body to 19 stitches wide and 28 rows.
Care Instructions
Hand wash in cool water with gentle detergent. Do not wring. Roll in a clean towel, press gently, then lay flat to dry.
For 100% acrylic yarn, machine wash on gentle cold and lay flat to dry. Never tumble dry or iron acrylic.
Store folded flat, not on a hanger, to maintain the ribbing shape.
You Did It!
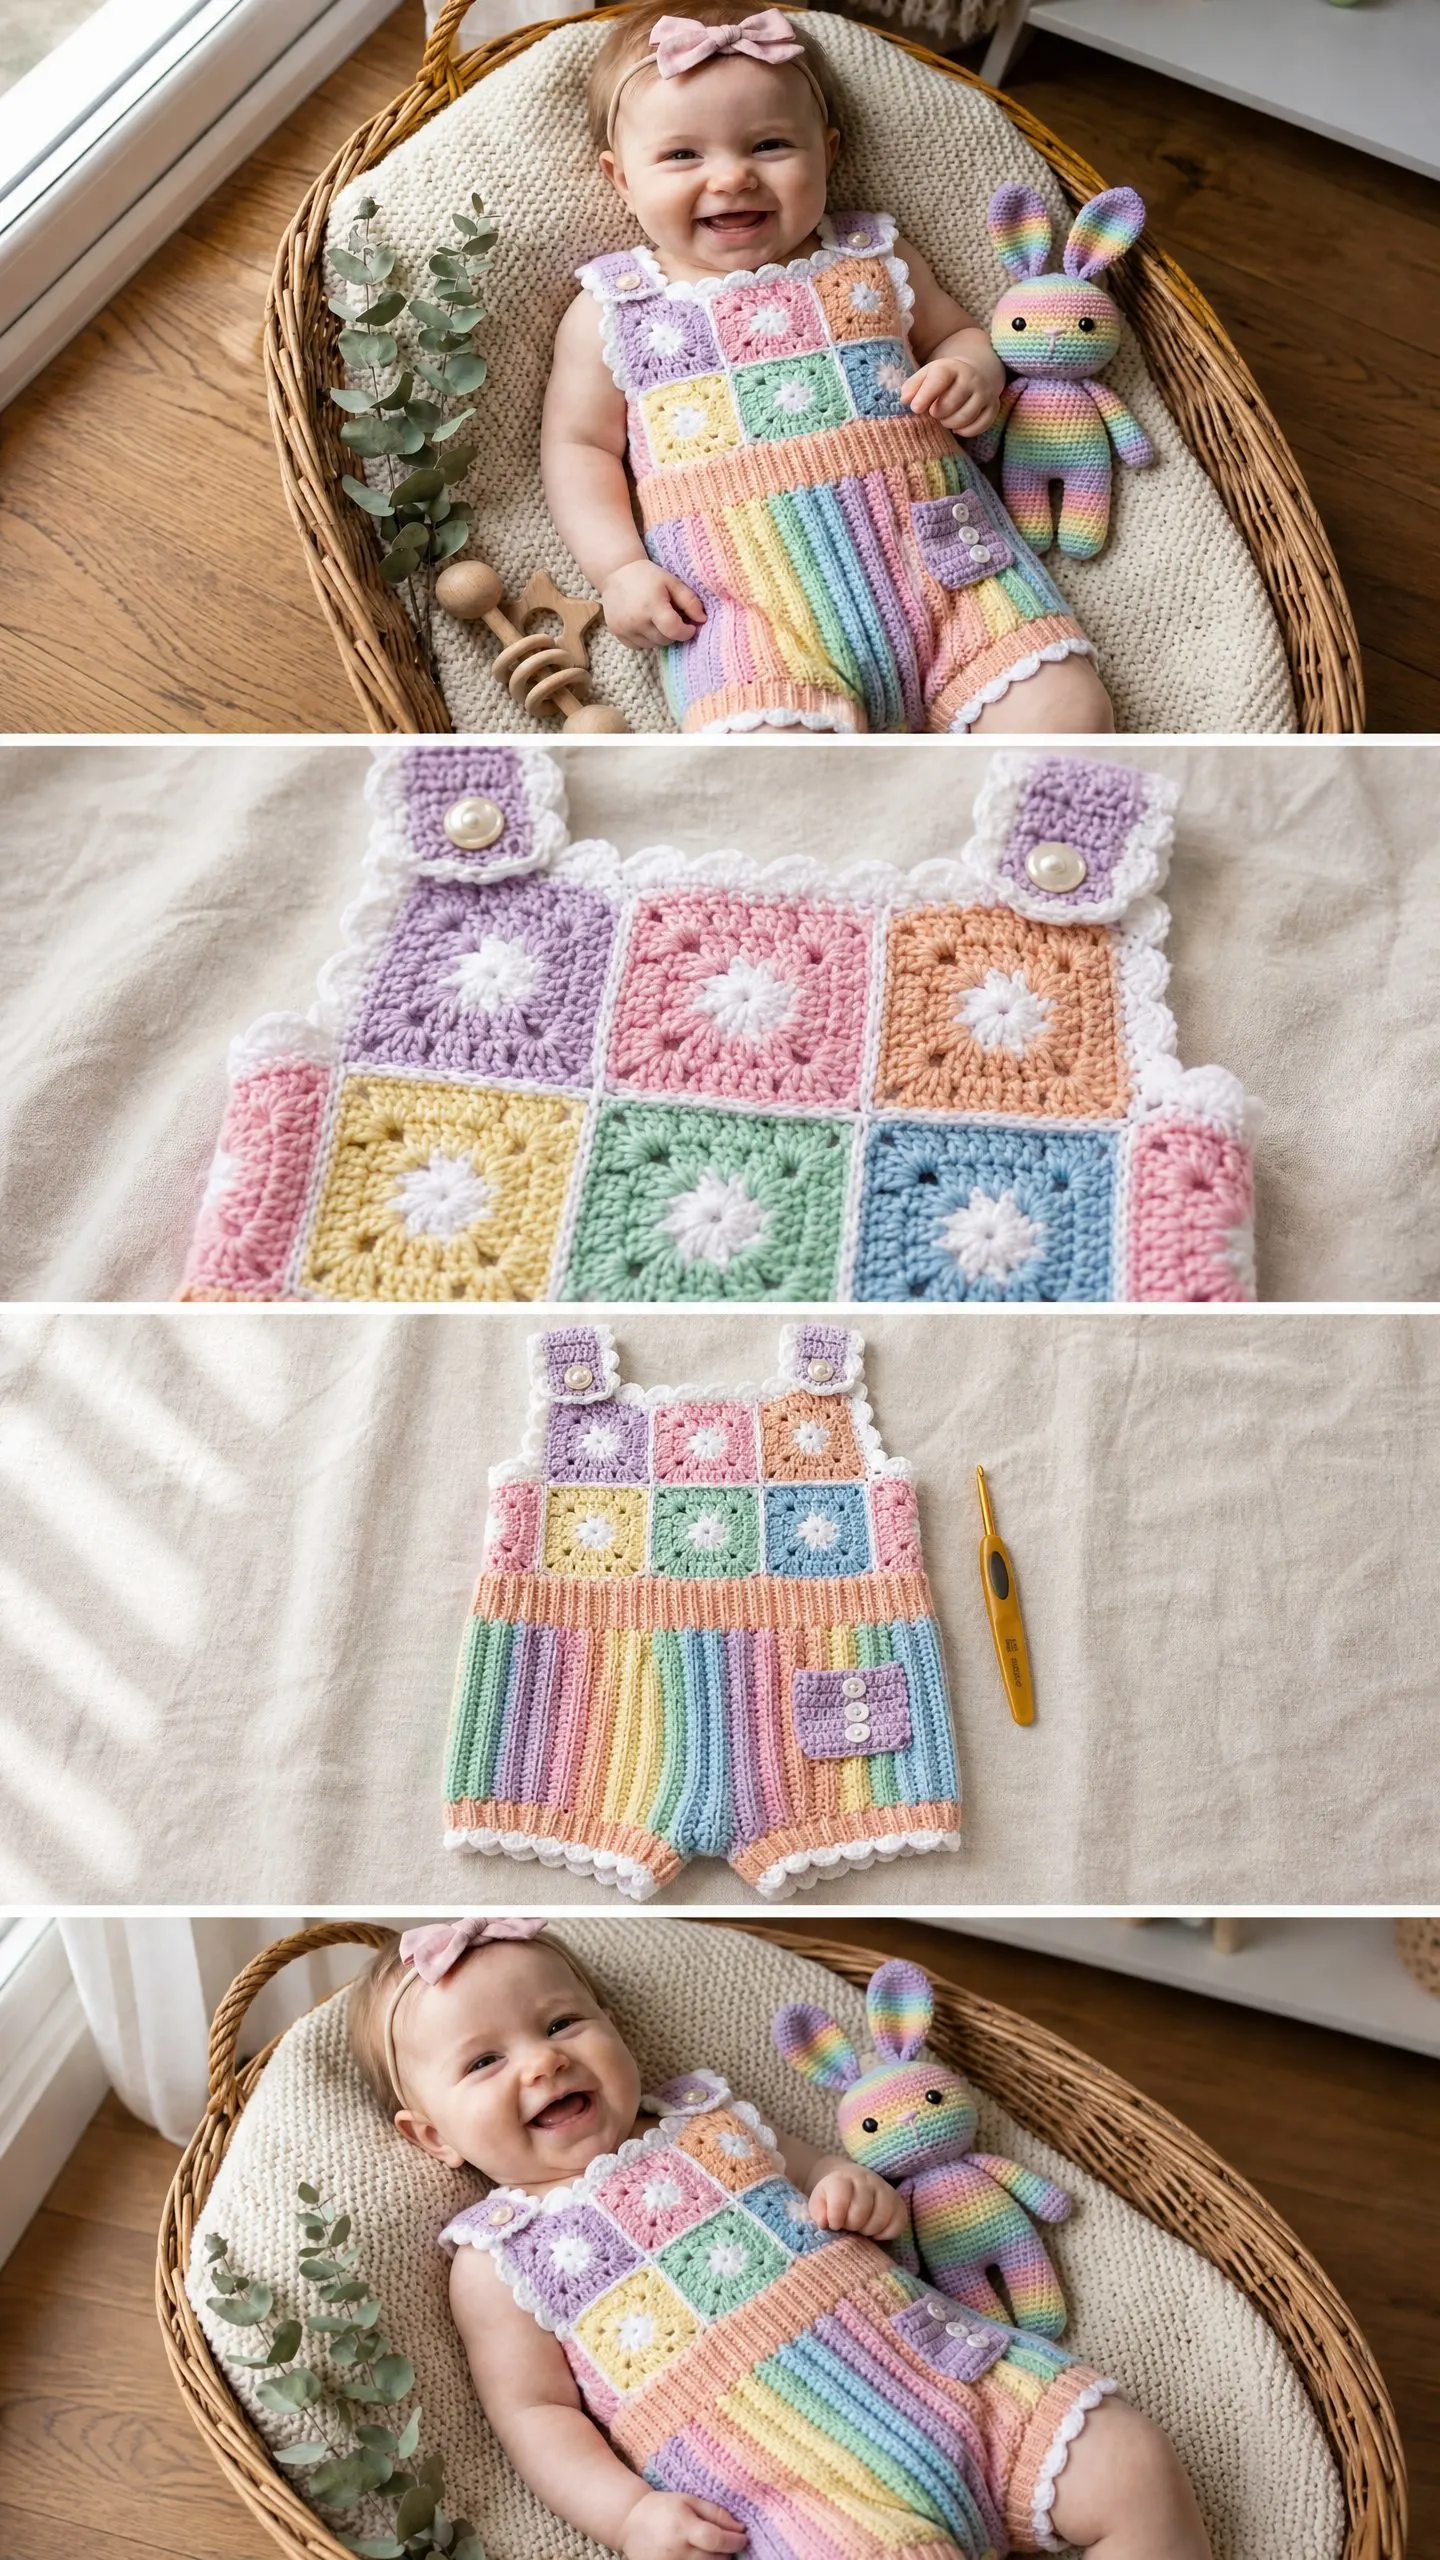
This pastel rainbow granny romper crochet pattern creates something truly special. The combination of traditional granny squares with modern striped ribbing, finished with delicate shell edging, results in a baby garment that looks like it belongs in a boutique.
Take your time with the granny squares. Block everything before joining. And trust the process. Each section builds on the last, and when you seam it all together, you will have created something absolutely beautiful.
Thank you so much for choosing this pattern! I would absolutely love to see your finished romper. Tag me on Instagram or share your photos in the Facebook group. Seeing your creations honestly makes my whole day.
If you loved making this, save it to your Pinterest boards so you can find it again later. And please drop a comment below if you give this a try. I read every single one and I am always here to help if you get stuck. Happy crocheting, friend!
You Might Also Like
- Ocean Blue Chevron Lace Dress Free Crochet Pattern
- Mint Garden Baby Crochet Dress Free Pattern
- Sunflower Granny Square Hobo Bag Free Crochet Pattern
- Blush Pink Floral Crochet Gladiator Sandals Free Pattern