
I’ve been looking for the perfect summer dress pattern for ages. Something with that effortless boho vibe, dramatic sleeves, and a color palette that makes me think of ocean waves. This Coastal Blue Bell Sleeve Crochet Dress is exactly what I had in mind.
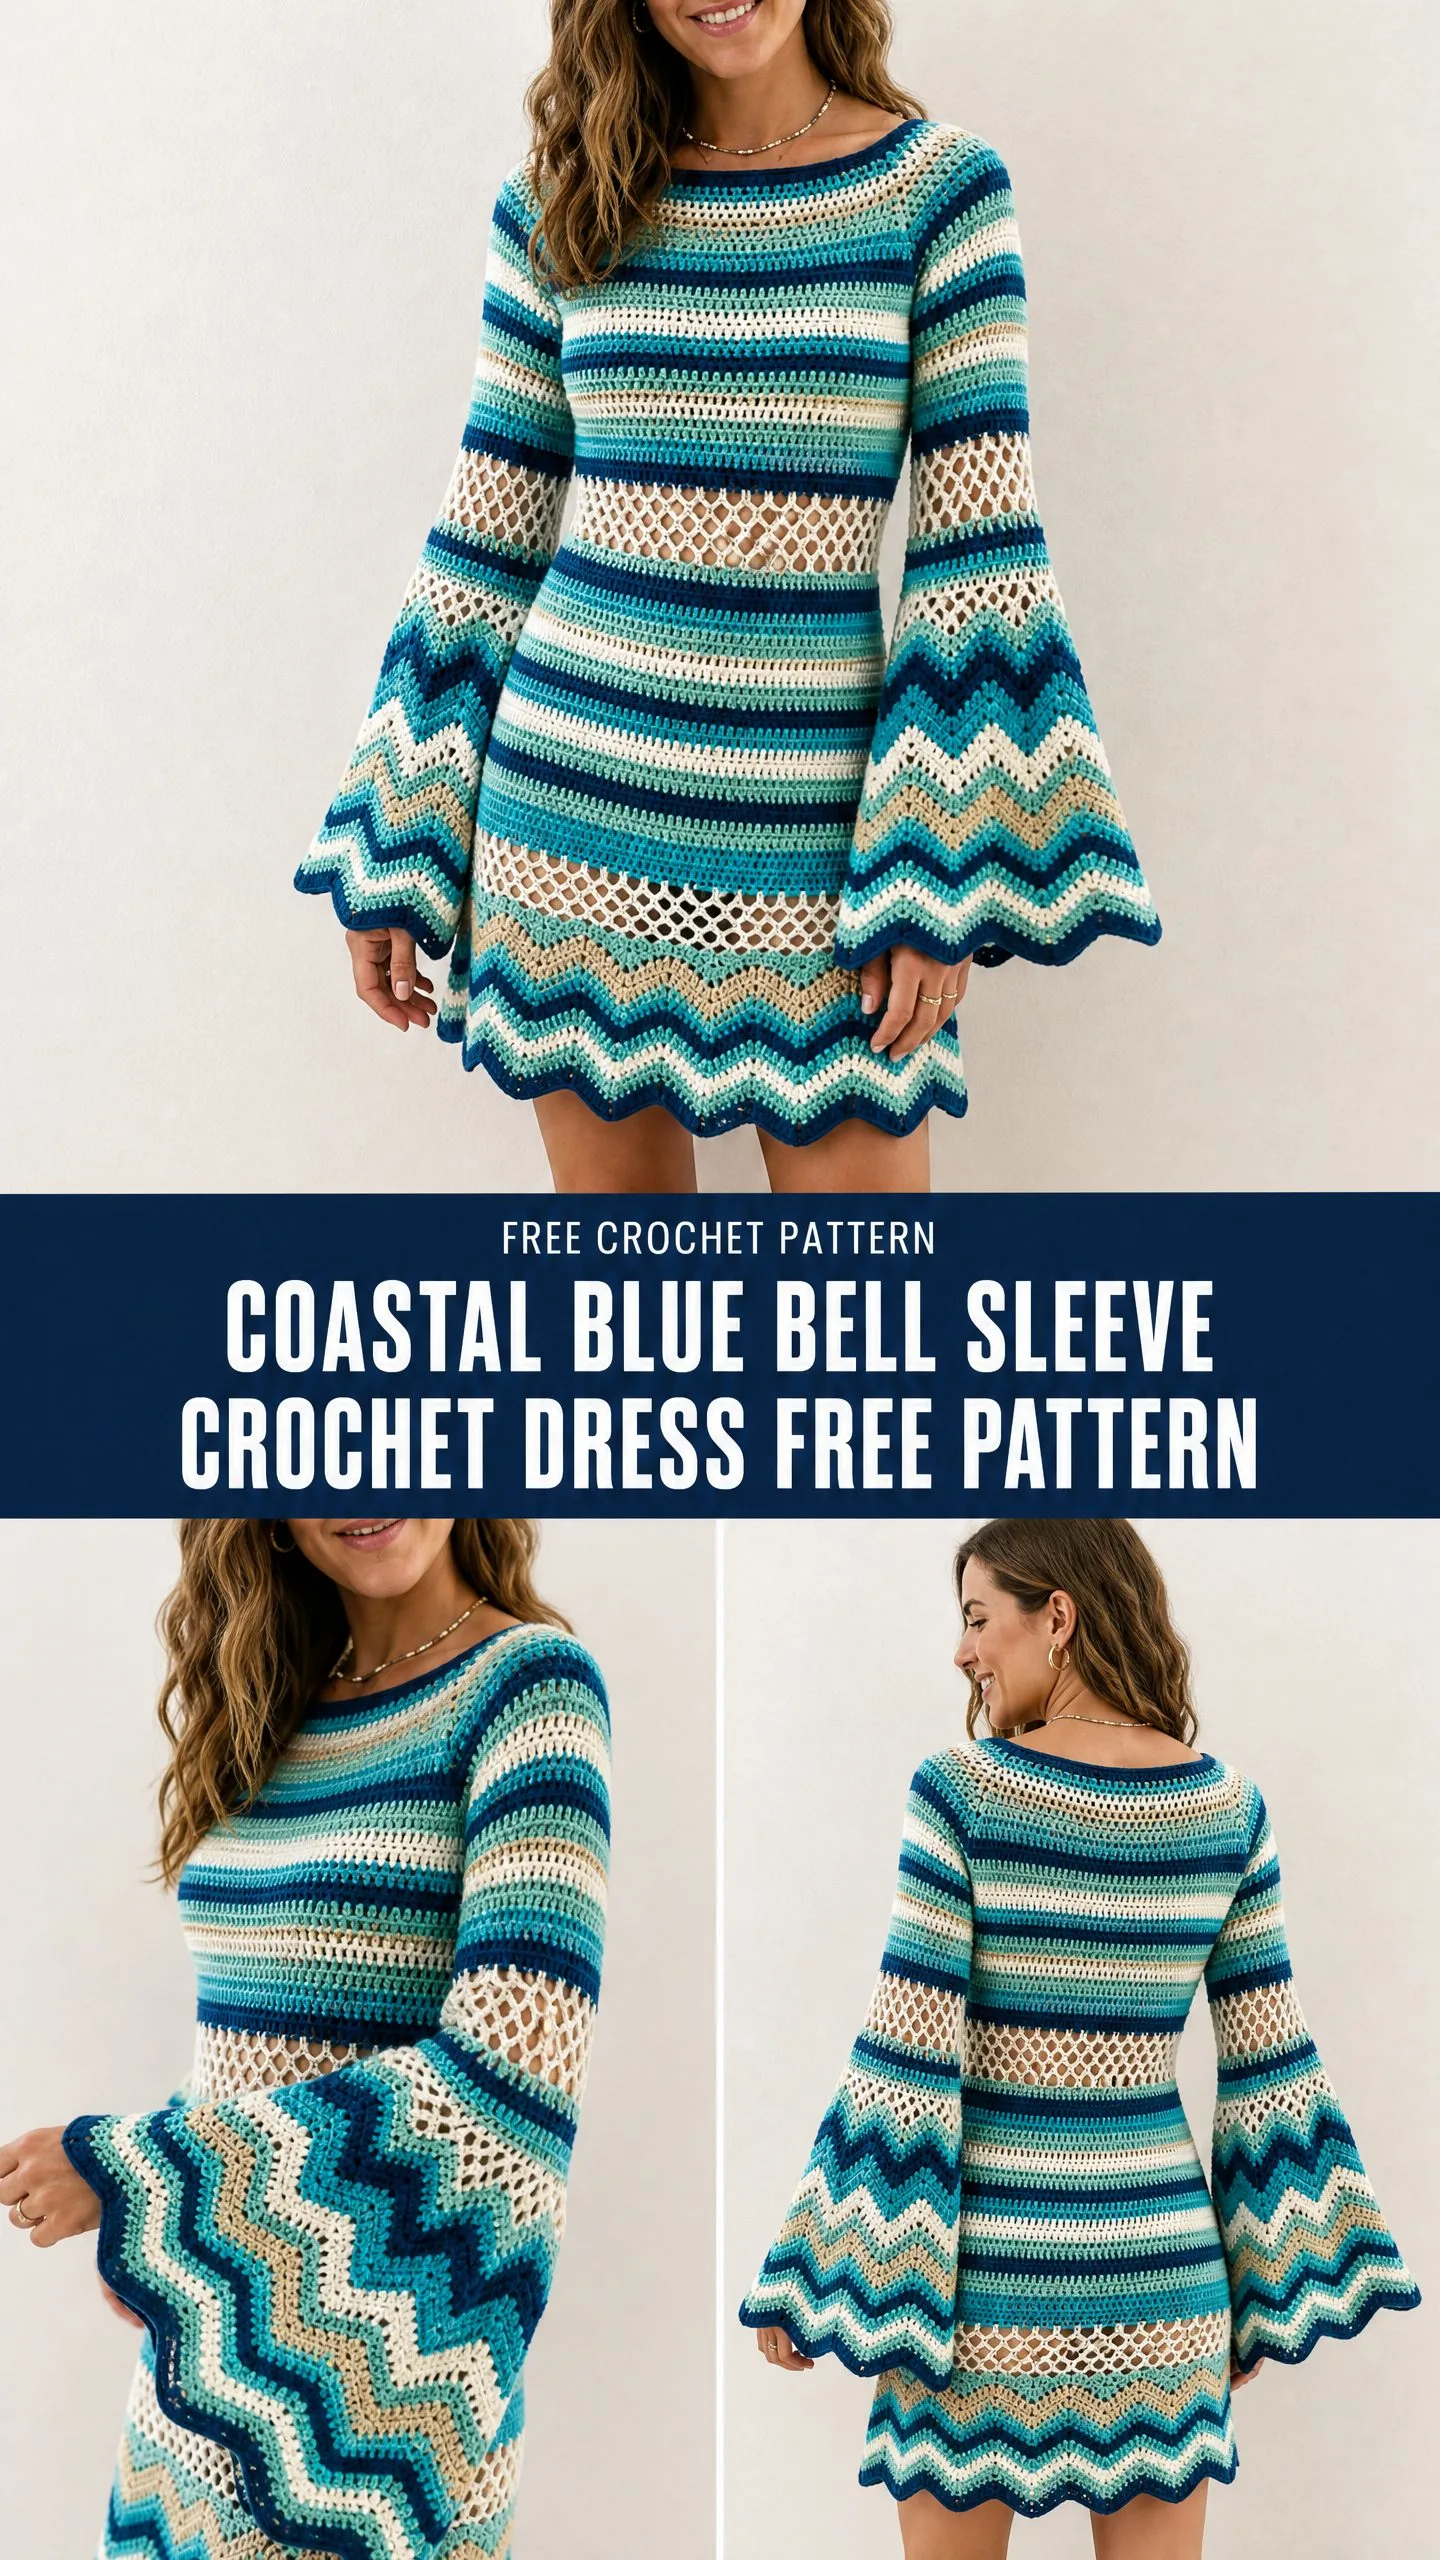
The moment I saw this design, I knew it needed to be in my pattern collection. Those bell sleeves with the chevron edges, the peek-a-boo mesh panels at the waist, the striped bodice that transitions into that gorgeous ripple hem. It’s a statement piece that looks way more complicated than it actually is.
If you’re ready for a project that will challenge you just enough to keep things interesting while still being totally achievable, this crochet dress pattern is calling your name. Grab your hooks and let’s dive in.
Why You’ll Love This Crochet Dress Pattern
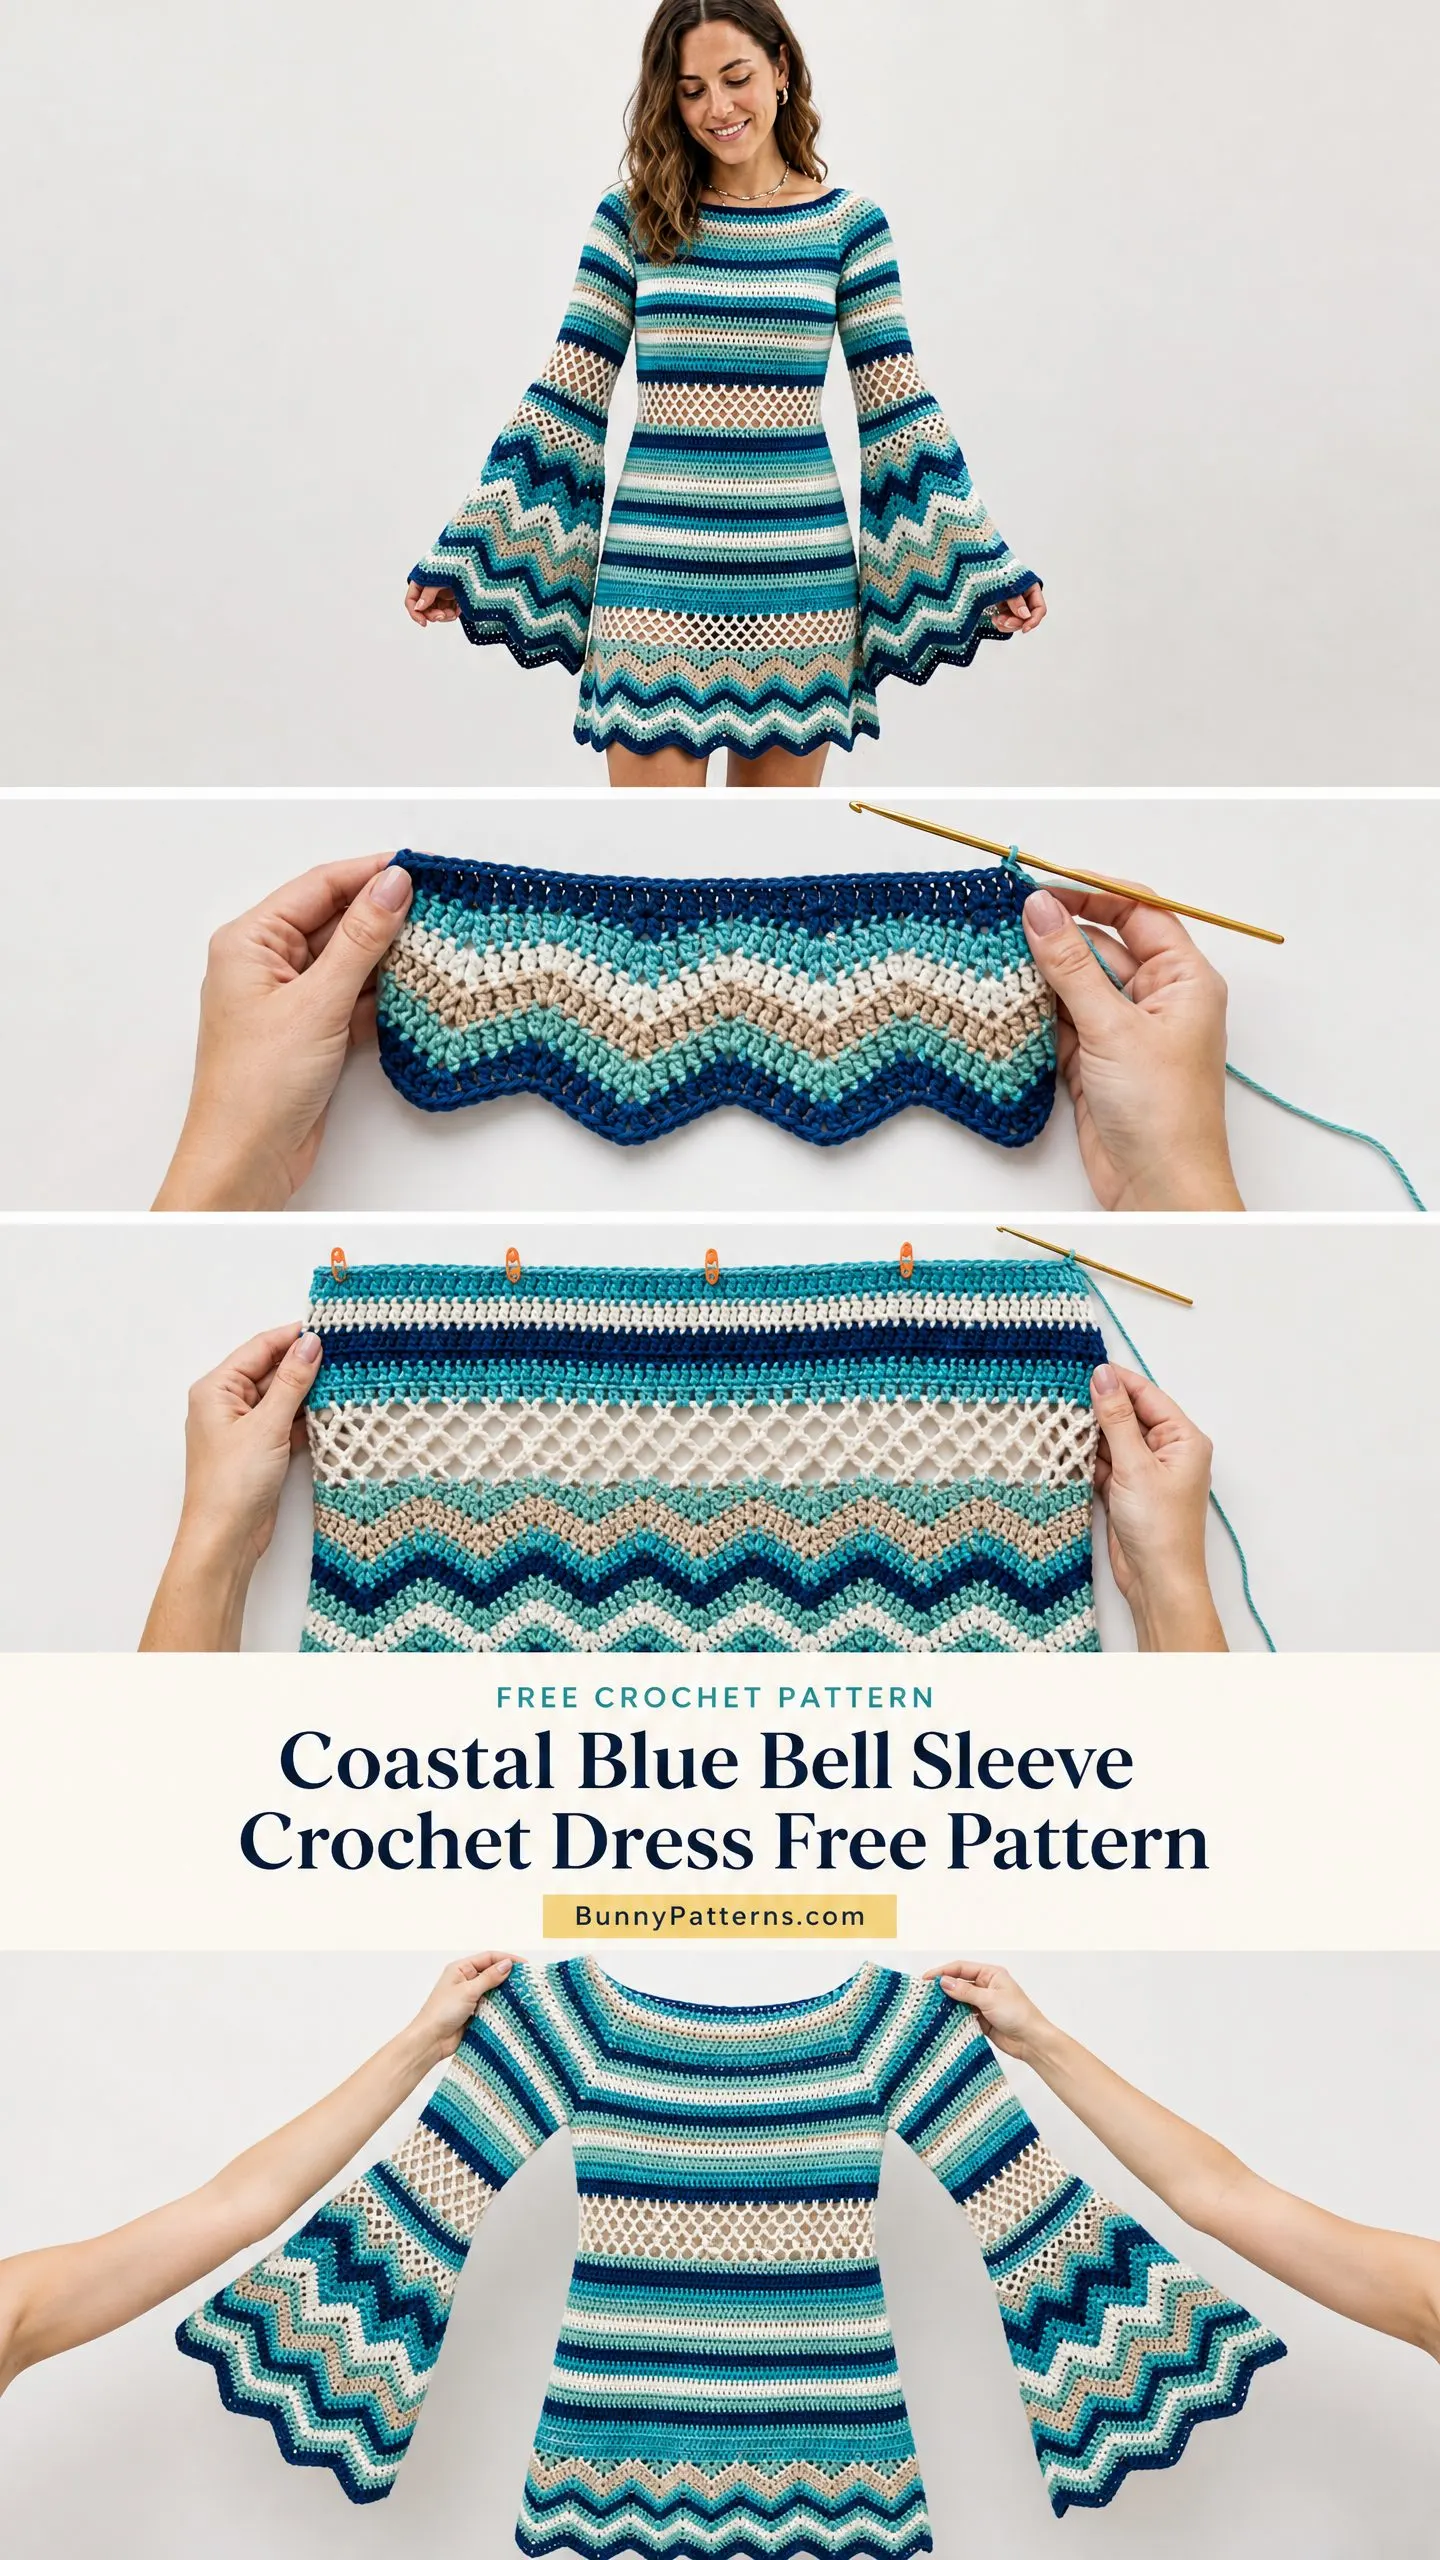
This dress brings together so many techniques I adore. You’ve got your basic single crochet stripes for the bodice, open mesh diamond stitch for that flirty waist detail, and chevron ripple stitch for the hem and cuffs. Each section teaches you something new while building on skills you already have.
The construction is pretty clever too. You work the whole thing top down in joined rounds, which means minimal seaming at the end. The sleeves are worked separately and attached at the armholes, then you work them downward into those dramatic bell cuffs.
Skill level: Intermediate to Advanced. You should be comfortable working in the round, following color changes, and reading multi-section instructions. Don’t worry if you haven’t tried chevron stitch before. I’ll walk you through it.
Time estimate: Plan for about 40 to 60 hours depending on your experience level and how fast you crochet. This is a labor of love, but the result is absolutely worth it.
Finished Measurements
This pattern is written for size Small/Medium with the following measurements:
I’ve included size customization tips at the end if you need to go larger or smaller.
Materials Needed for This Crochet Tutorial
Yarn
You’ll need worsted weight yarn (CYCA #4), approximately 1,400 yards (1,280 meters) total, divided across five colors:
Yarn suggestions: Lion Brand Pound of Love works beautifully and is easy to care for. Cascade 220 Superwash gives excellent stitch definition if you want a more polished look. Avoid fuzzy yarns since they’ll hide all that gorgeous stitch detail in the mesh and chevron sections.
Tools
Gauge (Please Don’t Skip This)
With J-10 (6.0 mm) hook and worsted weight yarn:
Gauge is mandatory for this garment. Please swatch in each stitch pattern before beginning. Wash and block your swatch before measuring. I know it’s tempting to skip this step, but trust me on this one. A dress that doesn’t fit is heartbreaking after all those hours of work.
Abbreviations (US Terms)
Let me break down all the abbreviations you’ll see in this step by step crochet pattern:
Special Stitches Explained
Chevron Ripple Stitch
This creates the wavy zigzag at the hem and cuffs. Each repeat uses 14 stitches.
Here’s how one 14-stitch repeat works:
1. Sc in each of the next 4 stitches
2. Sc2tog over next 2 stitches
3. Sc2tog over next 2 stitches
4. Sc in each of the next 4 stitches
5. Work 3 sc into the next stitch (this is your peak)
The peaks add 2 stitches and the valleys remove 2 stitches, so your count stays the same throughout.
Mesh Diamond Stitch
This creates the open lacework at the waist. Your stitch count needs to be a multiple of 4 plus 2.
Round 1: Ch 3 (counts as dc), sk next st, dc in next st, (ch 1, sk next st, dc in next st) around, ch 1, sl st to top of beginning ch-3.
Round 2: Ch 1, sc in first ch-sp, (ch 3, sc in next ch-sp) around, ch 3, sl st to first sc.
Round 3: Ch 3 (counts as dc), dc in same st, (sk ch-3 sp, 2 dc in next sc) around, sl st to top of beginning ch-3.
Round 4: Ch 1, sc in first st, sc in next st, (ch 1, sk 1 st, sc in next st, sc in next st) around, sl st to first sc.
Sc2tog (Single Crochet Decrease)
Insert hook into next stitch, draw up a loop (2 loops on hook). Insert hook into following stitch, draw up a loop (3 loops on hook). Yarn over and pull through all 3 loops. You’ve just turned two stitches into one.
Pattern Notes Before You Begin
1. This dress is constructed top down. You’ll start at the neckline, work through the yoke and bodice, add a mesh panel at the waist, work the flared skirt, and finish with the chevron hem. Sleeves are worked separately.
2. All rounds are joined rounds. Do not turn at the end of rounds unless instructed.
3. To change colors: work the final slip stitch join with the new color by drawing the new color through the final loop.
4. Place stitch markers at the beginning of each round and at each underarm join point.
5. The open mesh sections mean this dress works best over a swimsuit, slip, or coordinating bralette.
Coastal Blue Bell Sleeve Crochet Dress Pattern Instructions
Yoke
With J-10 hook and Color A, ch 80, sl st to first ch to join into a ring, being careful not to twist. (80 ch sts)
Round 1 (Setup): Ch 1 (does not count as st throughout), sc in each ch around, sl st to first sc to join. (80 sc)
Round 2: Ch 1, 2 sc in first st, sc in next 9 sts, 2 sc in next st, sc in next 18 sts, 2 sc in next st, sc in next 9 sts, 2 sc in next st, sc in next 18 sts, 2 sc in next st, sc in next 9 sts, 2 sc in next st, sl st to first sc to join. (86 sc)
The 6 increase points are evenly distributed at each shoulder and at front/back midpoints. Continue placing increases at these same 6 points for Rounds 3 through 8.
Round 3: Change to Color D. Ch 1, work 6 increases evenly, sc in all other sts, sl st to join. (92 sc)
Round 4: Color D. Ch 1, work 6 increases evenly, sc in all other sts, sl st to join. (98 sc)
Round 5: Change to Color B. Ch 1, work 6 increases evenly, sc in all other sts, sl st to join. (104 sc)
Round 6: Color B. Ch 1, work 6 increases evenly, sc in all other sts, sl st to join. (110 sc)
Round 7: Change to Color C. Ch 1, work 6 increases evenly, sc in all other sts, sl st to join. (116 sc)
Round 8: Color C. Ch 1, work 6 increases evenly, sc in all other sts, sl st to join. (122 sc)
After Round 8, the yoke should measure approximately 2 inches (5 cm) from the neckline. Place stitch markers at the 4 armhole dividing points.
Armhole Separation
Round 9 (Separation Round): Color C. Ch 1, sc across the next 31 sts (front panel), ch 8 (underarm chain bridge), skip the next 30 sts (leave on hold for sleeve), sc across the next 31 sts (back panel), ch 8 (underarm chain bridge), skip the next 30 sts (leave on hold for sleeve), sl st to first sc to join. (62 sc + 16 ch = 78 working stitches)
Round 10: Ch 1, sc in each sc and each ch across, sl st to join. (78 sc)
Bodice
Work Rounds 11 through 40 in sc, changing colors as follows. There is no shaping in the bodice until the waist decrease section.
Stripe Sequence:
For each round: Ch 1, sc in each st around, sl st to first sc to join. (78 sc per round)
Waist Shaping
Round 41: Color C. Ch 1, (sc in next 11 sts, sc2tog) 6 times, sl st to join. (72 sc)
Round 42: Color C. Ch 1, sc in each st around, sl st to join. (72 sc)
Round 43: Color D. Ch 1, (sc in next 10 sts, sc2tog) 6 times, sl st to join. (66 sc)
Round 44: Color D. Ch 1, sc in each st around, sl st to join. (66 sc)
Waist Mesh Panel
Mesh Round 1 (Color E): Ch 3 (counts as dc), sk next st, dc in next st, (ch 1, sk 1 st, dc in next st) 32 times, ch 1, sl st to top of beginning ch-3. (33 dc, 33 ch-1 spaces)
Mesh Round 2 (Color D): Ch 1, sc in first ch-1 sp, (ch 3, sc in next ch-1 sp) 32 times, ch 3, sl st to first sc. (33 sc, 33 ch-3 spaces)
Mesh Round 3 (Color C): Ch 3 (counts as dc), dc in same sc, (sk ch-3 sp, 2 dc in next sc) 32 times, sk last ch-3 sp, sl st to top of beginning ch-3. (66 dc)
Mesh Round 4 (Color D): Ch 1, sc in first st, sc in next st, (ch 1, sk 1 st, sc in next st, sc in next st) 16 times, ch 1, sl st to first sc. (66 sts)
After the mesh panel, work 1 round of sc in Color A across all 66 stitches. (66 sc)
Skirt
Round 45 (Increase Round 1): Color A. Ch 1, (sc in next 4 sts, 2 sc in next st) 13 times, sc in last st, sl st to join. (79 sc)
Round 46 (Increase Round 2): Color B. Ch 1, (sc in next 4 sts, 2 sc in next st) 15 times, sc in last 4 sts, sl st to join. (94 sc)
Rounds 47 to 48: Color D. Ch 1, sc in each st around, sl st to join. (94 sc)
Round 49 (Increase Round 3): Color B. Ch 1, (sc in next 5 sts, 2 sc in next st) 15 times, sc in next 4 sts, sl st to join. (109 sc)
Round 50 (Increase Round 4): Color C. Ch 1, sc in each st around, adding 3 evenly spaced increases to reach 112 stitches, sl st to join. (112 sc)
Rounds 51 to 52: Color D. Ch 1, sc in each st around, sl st to join. (112 sc)
Rounds 53 to 54: Color A. Ch 1, sc in each st around, sl st to join. (112 sc)
Rounds 55 to 56: Color B. Ch 1, sc in each st around, sl st to join. (112 sc)
Round 57: Color C. Ch 1, sc in each st around, sl st to join. (112 sc)
Chevron Hem
Work 8 rounds of Chevron Ripple Stitch with 8 repeats of 14 stitches. The stitch count remains 112 throughout.
Chevron Round 1: Color E. Work Chevron Ripple across 8 repeats, sl st to join. (112 sc)
Chevron Round 2: Color D. Work Chevron Ripple across 8 repeats, sl st to join. (112 sc)
Chevron Round 3: Color C. Work Chevron Ripple across 8 repeats, sl st to join. (112 sc)
Chevron Round 4: Color B. Work Chevron Ripple across 8 repeats, sl st to join. (112 sc)
Chevron Round 5: Color A. Work Chevron Ripple across 8 repeats, sl st to join. (112 sc)
Chevron Round 6: Color D. Work Chevron Ripple across 8 repeats, sl st to join. (112 sc)
Chevron Round 7: Color E. Work Chevron Ripple across 8 repeats, sl st to join. (112 sc)
Chevron Round 8: Color A. Work Chevron Ripple across 8 repeats, sl st to join. (112 sc)
Fasten off. Weave in all ends.
Sleeves (Make 2)
Return to the held sleeve stitches. With RS facing, join Color A to the center of the 8-ch underarm bridge.
Setup Round: Ch 1, sc across the 8 underarm chain stitches, then sc across the 30 held sleeve stitches, sl st to first sc to join. (38 sc)
Sleeve Rounds 1 to 2: Color A. Ch 1, sc in each st around, sl st to join. (38 sc)
Sleeve Rounds 3 to 4: Color D. Ch 1, sc in each st around, sl st to join. (38 sc)
Sleeve Round 5: Color B. Ch 1, sc in each st around, sl st to join. (38 sc)
Sleeve Round 6: Color D. Ch 1, sc in each st around, sl st to join. (38 sc)
Sleeve Rounds 7 to 8: Color C. Ch 1, sc in each st around, sl st to join. (38 sc)
Sleeve Rounds 9 to 10: Color D. Ch 1, sc in each st around, sl st to join. (38 sc)
Sleeve Round 11: Color E. Ch 1, sc in each st around, sl st to join. (38 sc)
Sleeve Rounds 12 to 13: Color B. Ch 1, sc in each st around, sl st to join. (38 sc)
Sleeve Bell Shaping
Sleeve Round 14: Color A. Ch 1, (sc in next 4 sts, 2 sc in next st) 7 times, sc in last 3 sts, sl st to join. (45 sc)
Sleeve Round 15: Color A. Ch 1, sc in each st around, sl st to join. (45 sc)
Sleeve Round 16: Color D. Ch 1, (sc in next 4 sts, 2 sc in next st) 9 times, sl st to join. (54 sc)
Sleeve Round 17: Color D. Ch 1, sc in each st around, sl st to join. (54 sc)
Sleeve Round 18: Color B. Ch 1, (sc in next 5 sts, 2 sc in next st) 9 times, sl st to join. (63 sc)
Sleeve Round 19: Color B. Ch 1, sc in each st around, sl st to join. (63 sc)
Sleeve Round 20: Color C. Ch 1, (sc in next 8 sts, 2 sc in next st) 7 times, sl st to join. (70 sc)
Sleeve Rounds 21 to 24: Continue in pattern with Colors C, D, E, D. Ch 1, sc in each st around, sl st to join. (70 sc)
Bell Cuff Chevron
Work 8 rounds of Chevron Ripple with 5 repeats of 14 stitches.
Cuff Round 1: Color E. Work Chevron Ripple across 5 repeats, sl st to join. (70 sc)
Cuff Round 2: Color D. Work Chevron Ripple across 5 repeats, sl st to join. (70 sc)
Cuff Round 3: Color C. Work Chevron Ripple across 5 repeats, sl st to join. (70 sc)
Cuff Round 4: Color B. Work Chevron Ripple across 5 repeats, sl st to join. (70 sc)
Cuff Round 5: Color A. Work Chevron Ripple across 5 repeats, sl st to join. (70 sc)
Cuff Round 6: Color D. Work Chevron Ripple across 5 repeats, sl st to join. (70 sc)
Cuff Round 7: Color E. Work Chevron Ripple across 5 repeats, sl st to join. (70 sc)
Cuff Round 8: Color A. Work Chevron Ripple across 5 repeats, sl st to join. (70 sc)
Fasten off. Weave in ends. Repeat for second sleeve.
Neckline Finishing
Using the smaller I-9 (5.5 mm) hook and Color A, join to any stitch of the neckline edge. Work 1 round of sc evenly around the neckline, placing 1 sc in each foundation chain stitch. (80 sc) Sl st to join. Fasten off.
Size Customization Tips
To size up (Large to XL): Add 8 to 16 stitches to the starting chain, keeping the count divisible by 8. Target 126 stitches (9 chevron repeats) for the skirt hem.
To size down (XS): Reduce the starting chain to 72 stitches. Target 98 stitches (7 repeats) for the skirt chevron.
To add length: Work additional stripe rounds in the bodice and skirt. Each 4 rounds adds approximately 1 inch.
Blocking and Finishing
Wet block your finished dress by submerging it in cool water for 20 minutes. Gently press out excess water in a towel without wringing. Lay flat to dry on a blocking mat.
Pin the chevron edges open while damp. Pin each peak outward and each valley inward to create crisp waves. Pin the mesh panels open to show off that diamond lattice. Allow to dry completely before unpinning.
Care Instructions
Hand wash in cool water with gentle wool wash. Lay flat to dry. Do not tumble dry or iron directly on the fabric. Store folded to prevent stretching of the mesh panels.
Final Thoughts on This Beginner Friendly Crochet Project
I’m so excited for you to make this Coastal Blue Bell Sleeve Crochet Dress. It’s the kind of project that looks impressive hanging in your closet and feels amazing to wear. Those bell sleeves will get compliments everywhere you go.
Take your time with this one. The different stitch sections give you natural stopping points, so you can work on it over several weeks without losing your place. And when you’re done, you’ll have a handmade piece that looks like it came from a boutique.
Thank you so much for choosing this pattern. I’d love to see your finished dress! Tag me on Instagram or share a photo in my Facebook group. Seeing your creations is honestly the best part of designing patterns.
If you loved this crochet dress pattern, save it to your Pinterest boards so you can find it easily when you’re ready to start. And please drop a comment below if you make one. I’d love to hear how it turns out for you!
You Might Also Like
- Blush Pink Tiered Ruffle Crochet Set Free Pattern
- Lavender Lace Chevron Baby Dress Free Crochet Pattern
- Coral Sunset Textured Handbag Free Crochet Pattern
- Ocean Blue Highland Cow Amigurumi Free Crochet Pattern