
Among the countless lace dress patterns available to crocheters, this one earns a spot on the must-make list for good reason. The Sage Meadow Lace Dress combines a fitted mesh bodice with a beautifully flared, tiered skirt that moves gracefully with every step.
Get the Ad-Free PDF Pattern
Scroll down for the full pattern, or get the ad-free printable PDF from the shop.
Get the Printable PDF →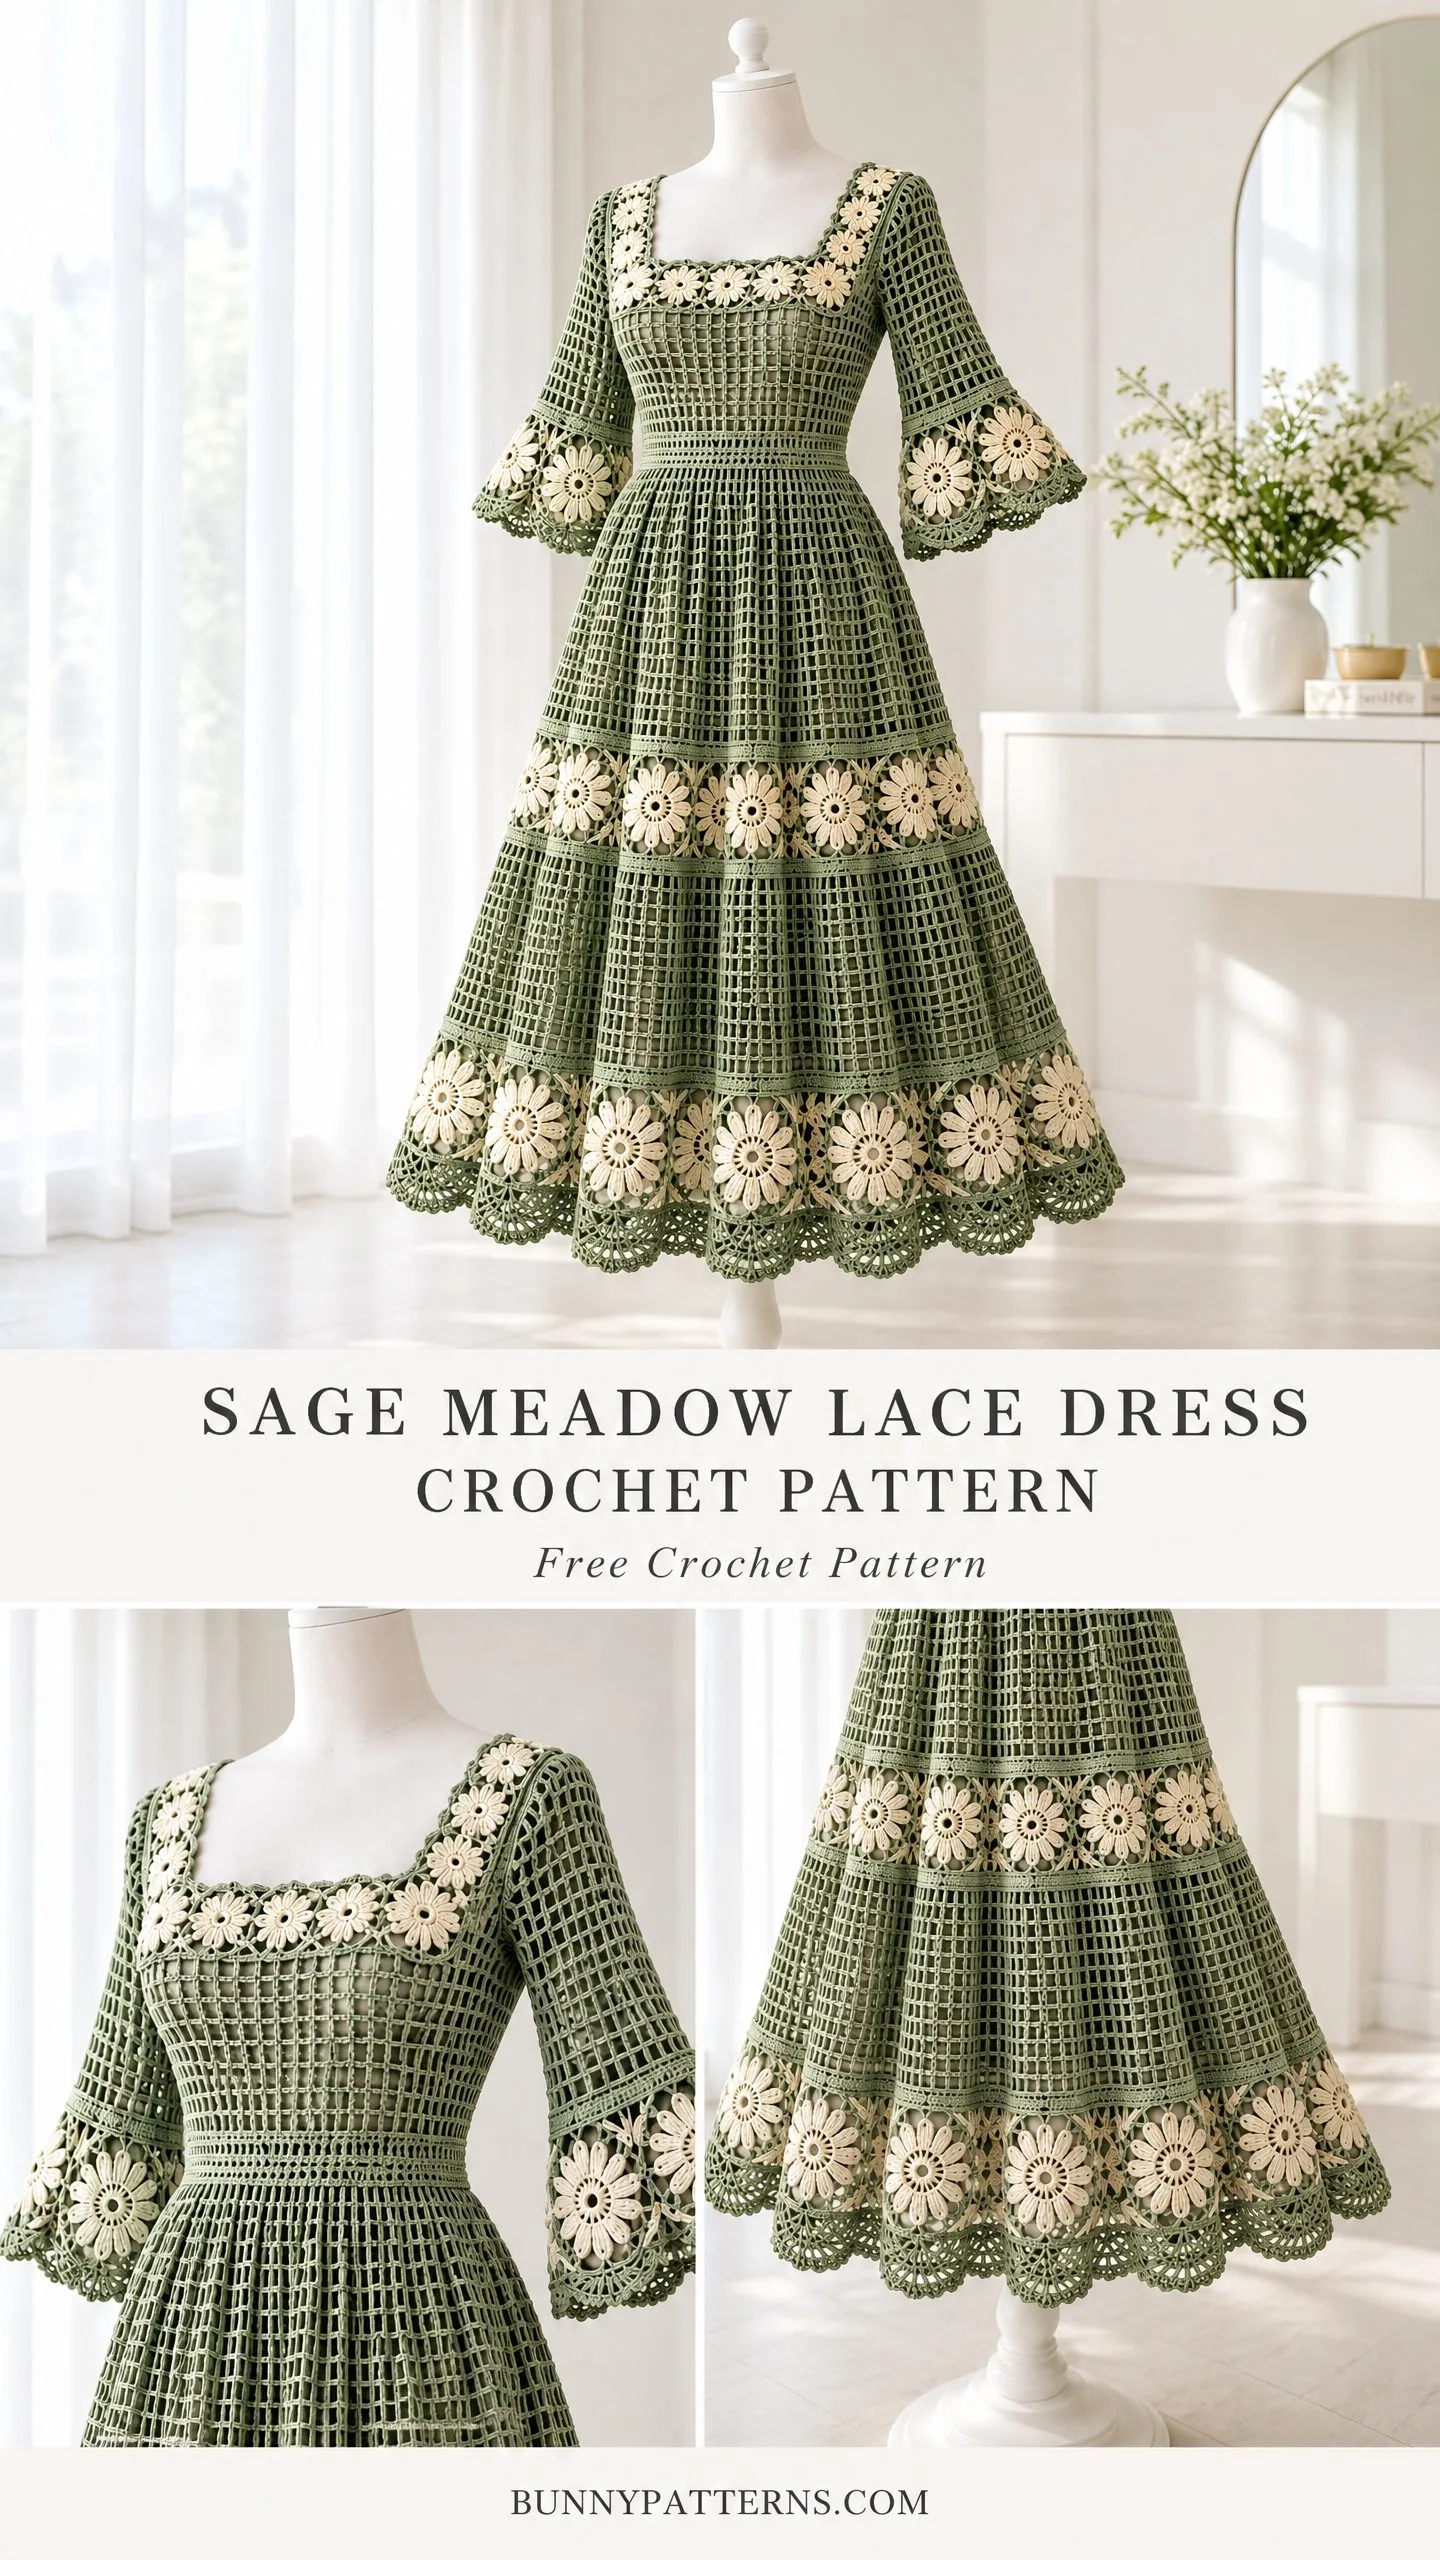
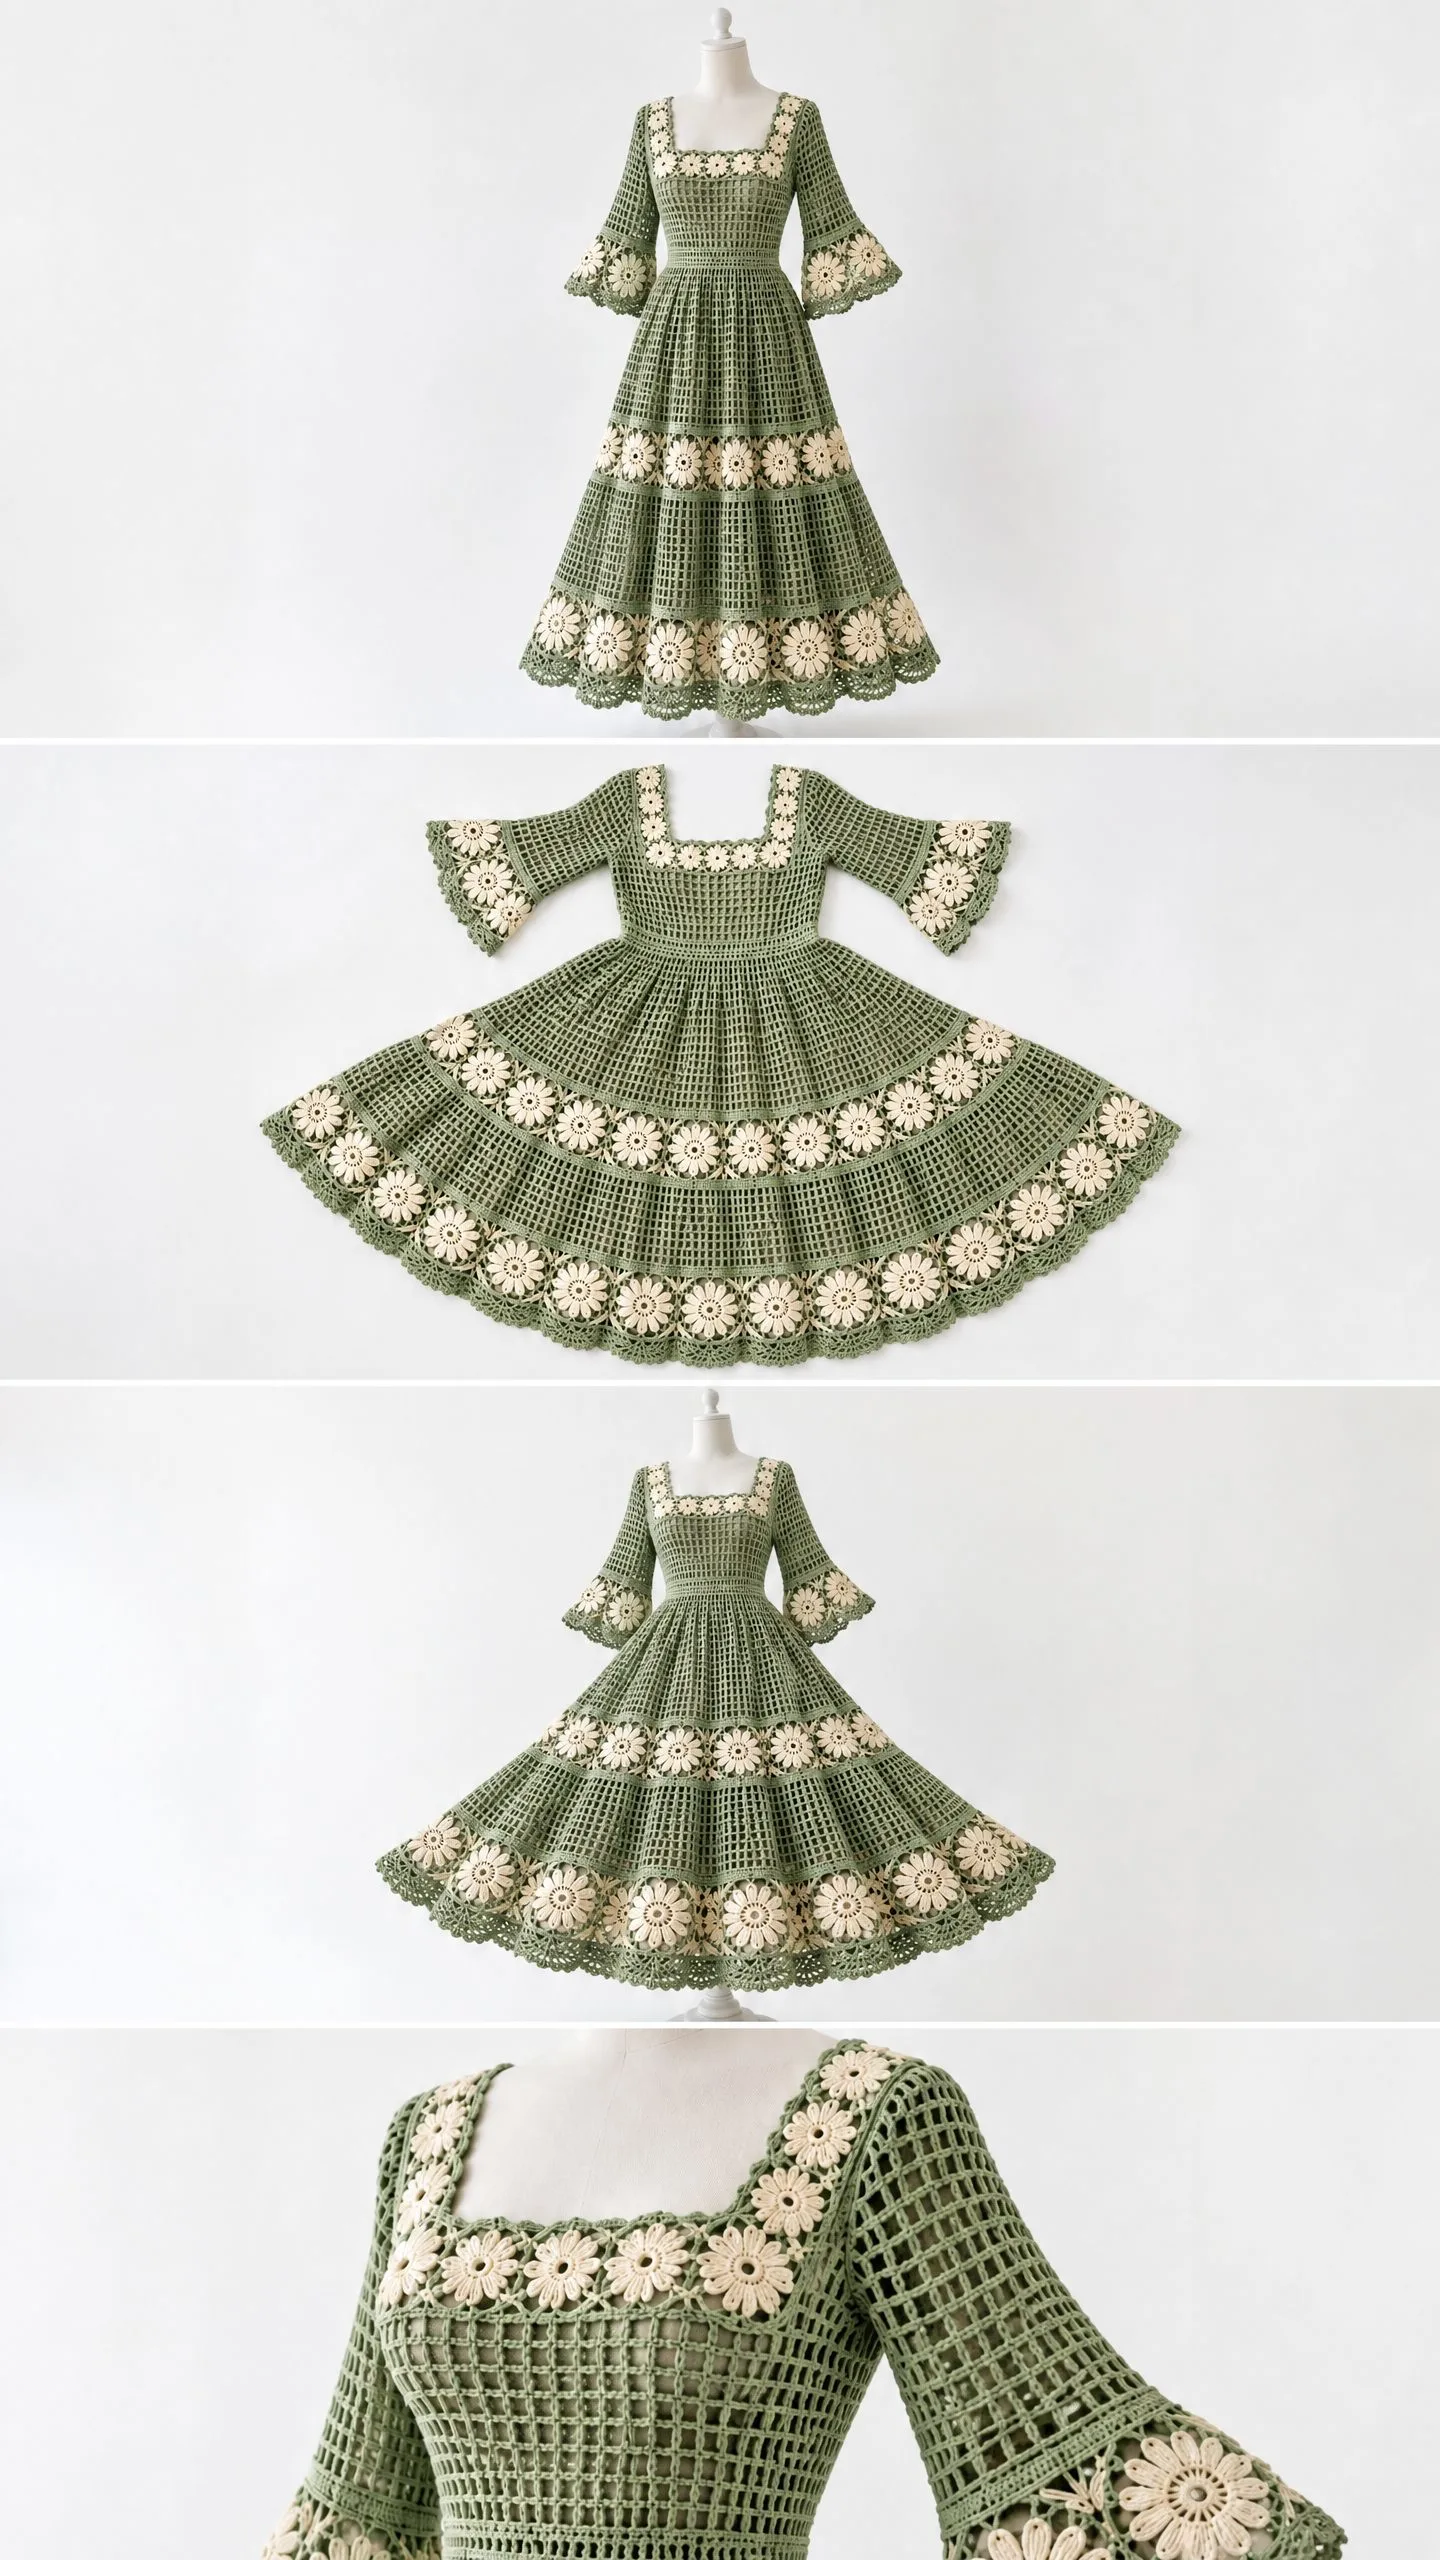
What sets this design apart is the thoughtful balance between openwork construction and decorative detail. The ivory sunburst rosettes scattered around the neckline and hem create a romantic, vintage-inspired aesthetic without overwhelming the clean lines of the sage green mesh. The bell sleeves add a touch of bohemian elegance that feels both timeless and fresh.
This is an intermediate-level project that rewards patience with stunning results. If you have experience with basic mesh crochet and are ready to tackle garment construction, this dress offers an exciting next step in your crochet journey.
Why You’ll Love Making This Lace Dress
The construction method here is clever and satisfying. You’ll work the bodice panels flat, shape the front neckline, then join everything at the waist before crocheting the skirt downward in joined rounds. This approach means you can try on the bodice over your slip before committing to the skirt, ensuring a great fit.
The three-stage flared skirt is where the real magic happens. Strategic increases at tier transitions create that gorgeous A-line silhouette that photographs so beautifully. The hem circumference grows from about 88 cm at the waist to approximately 218 cm at the bottom, giving the skirt wonderful movement and drape.
Those sunburst rosettes are quick to make individually and transform the dress from simple to show-stopping. They’re sewn on as decorative overlays rather than structural elements, so you have flexibility in placement.
Materials You’ll Need
Before you begin, gather these supplies. The pattern calls for smooth fingering weight cotton yarn, which gives the lace excellent stitch definition and a cool, comfortable drape against the skin.
Yarn Requirements:
- Main color (sage green): 650 g, approximately 2600 m total
- Contrast color (ivory): 100 g, approximately 400 m total for rosettes and trim
Look for yarn with approximately 200 m per 50 g ball. Smooth, mercerized cotton works beautifully for this project and blocks to crisp, even stitches.
Tools:
- 3 mm crochet hook for main fabric (or size needed to obtain gauge)
- 2.5 mm crochet hook for edgings
- Tapestry needle
- Stitch markers
- Measuring tape
- Scissors
- Blocking mats and rustproof pins
- 4 sew-on imitation pearls and strong thread (optional, for pearl version)
Important: This dress requires a matching opaque slip when worn. The mesh construction is intentionally open and does not provide coverage on its own.
Finished Measurements
This pattern provides one adult sample size with these blocked dimensions:
- Finished bust: approximately 88 cm (suitable for 80 to 84 cm body bust)
- Waist: gathers to 80 to 84 cm with drawstring cord
- Total length: approximately 105 cm
- Hem circumference: approximately 218 cm
- Sleeve length: approximately 28 cm
The design features a square neckline, elbow-length bell sleeves, and a calf-length gathered two-tier skirt with ivory rosette bands near the hem and a scalloped edge.
Gauge Information
Getting gauge right is essential for a garment that fits properly. Your blocked gauge should measure:
22 stitch positions (11 mesh cells) x 12 mesh rows = 10 cm
For the flat bodice panel, 48 cells with 49 double crochet (dc) posts and 48 chains should measure about 44 cm wide. Each rosette should block to approximately 7 to 8 cm across.
How to check gauge: Make a swatch at least 15 x 15 cm. Wash and dry it exactly as you plan to care for the finished dress. Measure the central 10 cm without stretching. Record both width and height, then adjust your hook size up or down as needed.
Cotton lace tends to lengthen while worn, so all dimensions listed are blocked targets.
Abbreviations and Special Stitches
This pattern uses US crochet terminology throughout. Here are all the abbreviations you’ll encounter:
- ch = chain
- st(s) = stitch(es)
- sp = space
- sl st = slip stitch
- sc = single crochet (insert hook, yarn over, pull through, yarn over, pull through both loops)
- hdc = half double crochet
- dc = double crochet (yarn over, insert hook, yarn over, pull through, yarn over, pull through two loops twice)
- tr = treble crochet
- BLO = back loop only
- RS/WS = right side/wrong side
- rep = repeat
- inc = increase
- sc2tog = single crochet two stitches together (a decrease)
Small Mesh (Flat)
This is your primary stitch pattern. Chain 3 (this counts as your first dc), then work [ch 1, skip next ch-1 sp, dc in next dc] across to the end of the row. Always work the dc into the post stitch, not into the gap.
A mesh cell is one ch-1 space bounded by dc posts on either side. When working flat with C cells, you’ll have C+1 dc posts and C chains. The total stitch positions equal 2C+1.
Shell Trim
On a prepared single crochet (sc) edge with a multiple of 6 stitches, work: [skip 2 sc, 5 dc in next sc, skip 2 sc, sl st in next sc]. This creates a pretty scalloped edge.
Picot Trim
Work: [sc in next 3 sts, ch 3, sl st into third ch from hook]. The chain-3 forms a small decorative bump.
Pattern Notes Before You Begin
A few important things to keep in mind as you work:
- The turning ch 3 counts as a dc throughout
- Ch 1 does NOT count as a sc
- Join rounds with a slip stitch unless otherwise stated
- Flat rows turn after each row, but joined dress rounds do not turn
- Instructions in brackets [ ] indicate a repeat
- Do not count joining slip stitches in your stitch totals
- Sew seams with right sides (RS) together unless directed otherwise
This document provides one adult sample size only. Please check all measurements carefully before purchasing yarn. Altering stitch counts requires recalculating motif placement and shaping.
Step-by-Step Instructions
Back Bodice Panel
Row 1: Ch 100. Dc in sixth ch from hook, [ch 1, skip 1 ch, dc in next ch] 47 times. Turn. The skipped chains form your first dc and first ch-1 space. (49 dc + 48 ch-1 spaces; 48 cells)
Rows 2 through 48: Work small mesh across. Turn at the end of each row. (48 cells; 49 dc + 48 ch-1 spaces)
Front Bodice Panel
Row 1: Ch 100. Dc in sixth ch from hook, [ch 1, skip 1 ch, dc in next ch] 47 times. Turn. (49 dc + 48 ch-1 spaces; 48 cells)
Rows 2 through 42: Work small mesh across. Turn. (48 cells; 49 dc + 48 ch-1 spaces)
Front Shoulder Tabs
Leave the center 24 cells unworked for the square neckline. Work the first 12 cells for one shoulder, then rejoin yarn at the opposite outer edge and work the other 12 cells for the second shoulder.
Rows 43 through 48 (each shoulder): Work small mesh over shoulder cells only. Turn. (12 cells; 13 dc + 12 ch-1 spaces)
Checkpoint: Each bodice panel should measure about 44 cm wide x 40 cm long. Final shoulder width is approximately 11 cm. Back neck opening measures about 22 cm. Complete bodice seams before beginning the skirt.
Skirt (Joined Rounds from Waist)
After seaming the bodice, distribute 192 sc evenly around the lower waist edge: 96 per panel, skipping each duplicated seam-edge post. Join to form a round. This is your foundation Round 0. (192 sc)
Round 1: Ch 3, [ch 1, skip 1 sc, dc in next sc] 95 times. Ch 1, skip final sc. Join. (96 cells; 96 dc + 96 ch-1 spaces)
Round 2: Work into the 96 old ch-1 spaces. Alternately work [dc, ch 1, dc, ch 1] in one space and [dc, ch 1] in the next, 48 pairs total. Replace the first dc with ch 3. Join. (144 dc + 144 ch-1 spaces; 144 cells)
Rounds 3 through 26: Work [dc in next dc, ch 1] around. Replace first dc with ch 3. Join. (144 dc + 144 ch-1 spaces; 144 cells)
Round 27: Into old ch-1 spaces work [(dc, ch 1, dc, ch 1) in next space, (dc, ch 1) in each of next 2 spaces] 48 times. Replace first dc with ch 3. Join. (192 dc + 192 ch-1 spaces; 192 cells)
Rounds 28 through 52: Work [dc in next dc, ch 1] around. Replace first dc with ch 3. Join. (192 dc + 192 ch-1 spaces; 192 cells)
Round 53: Into old ch-1 spaces work [(dc, ch 1, dc, ch 1) in next space, (dc, ch 1) in each of next 3 spaces] 48 times. Replace first dc with ch 3. Join. (240 dc + 240 ch-1 spaces; 240 cells)
Rounds 54 through 78: Work [dc in next dc, ch 1] around. Replace first dc with ch 3. Join. (240 dc + 240 ch-1 spaces; 240 cells)
Sleeves (Make 2, Top Down)
Row 1: Ch 82. Dc in sixth ch from hook, [ch 1, skip 1 ch, dc in next ch] 38 times. Turn. (40 dc + 39 ch-1 spaces; 39 cells)
Rows 2 through 26: Work small mesh across. Turn. (39 cells; 40 dc + 39 ch-1 spaces)
Row 27: Ch 3, (ch 1, dc) in same first dc, work mesh to last dc, then (ch 1, dc) again in last dc. Turn. (41 cells; 42 dc + 41 ch-1 spaces)
Row 28: Ch 3, (ch 1, dc) in same first dc, work mesh to last dc, then (ch 1, dc) again in last dc. Turn. (43 cells; 44 dc + 43 ch-1 spaces)
Row 29: Ch 3, (ch 1, dc) in same first dc, work mesh to last dc, then (ch 1, dc) again in last dc. Turn. (45 cells; 46 dc + 45 ch-1 spaces)
Row 30: Ch 3, (ch 1, dc) in same first dc, work mesh to last dc, then (ch 1, dc) again in last dc. Turn. (47 cells; 48 dc + 47 ch-1 spaces)
Row 31: Ch 3, (ch 1, dc) in same first dc, work mesh to last dc, then (ch 1, dc) again in last dc. Turn. (49 cells; 50 dc + 49 ch-1 spaces)
Row 32: Ch 3, (ch 1, dc) in same first dc, work mesh to last dc, then (ch 1, dc) again in last dc. Turn. (51 cells; 52 dc + 51 ch-1 spaces)
Row 33: Ch 3, (ch 1, dc) in same first dc, work mesh to last dc, then (ch 1, dc) again in last dc. Turn. (53 cells; 54 dc + 53 ch-1 spaces)
Row 34: Ch 3, (ch 1, dc) in same first dc, work mesh to last dc, then (ch 1, dc) again in last dc. Turn. (55 cells; 56 dc + 55 ch-1 spaces)
Checkpoint: Sleeve top width measures about 36 cm. Length is approximately 28 cm. The top edge fits the 36 cm armhole perimeter. Bell shaping adds 16 cells across the final 8 rows.
Sunburst Rosettes (Make 28)
These charming flower motifs are worked in the round using your contrast color.
Round 1: Into an adjustable ring, ch 1, work 10 sc. Join to first sc. (10 sc)
Round 2: Ch 3 (counts as dc), dc in same st. 2 dc in each remaining st. Join to top of ch 3. (20 dc)
Round 3: Ch 1, [sc in next dc, ch 3, skip next dc] 10 times. Join to first sc. (10 sc + 10 ch-3 spaces)
Round 4: In each ch-3 space work [sc, hdc, 3 dc, hdc, sc]. Join and fasten off. (70 sts; 10 petals)
Block each rosette flat. They should measure 7 to 8 cm across when using dress yarn.
Assembly Instructions
Seam Pass 1 (Shoulders): Sew the outer 12 cells of each front shoulder to the corresponding back shoulder. (2 seams, 12 cells each)
Seam Pass 2 (Sides): Mark 18 cm down from each shoulder on both front and back panels. Sew side seams from waist up to these markers. Leave the upper portions open for armholes. (2 armholes, each about 36 cm around)
Seam Pass 3 (Sleeves): If making the sleeved version, seam each sleeve lengthwise first. Then match the sleeve-top seam to the underarm and sew the sleeve top evenly around the armhole. (2 sleeves attached)
Checkpoint: Try the bodice over your intended slip before adding the skirt. The neckline should lie flat. Shoulders and armholes should not pull. Waist measures about 88 cm before gathering.
Edgings and Details
Switch to your 2.5 mm hook for all edging work.
Hem Edging
Round 1: Sc in each dc and each ch-1 space around the skirt. (480 sc)
Round 2: Work shell trim 80 times around, or picot trim 160 times where picot is specified. Join. (480 base sc consumed)
Neckline Edging
Round 1: Sc evenly around the neckline, working 1 sc per top stitch position and 2 sc per dc row end. Use 3 sc at each outward corner and sc2tog across each inward corner. Record your count as N. (N sc)
Round 2: Sl st in every neckline sc without tightening. Join. (N sl sts)
Sleeve Edging
Round 1: Work 1 sc in each dc and each ch-1 space. Record the count as C. For sleeveless versions, work 2 sc per dc row end around each armhole. (C sc per opening)
Round 2: Work shell trim over complete 6-st repeats, then sc in remaining 0 to 5 sts. Join. (C base sts consumed)
Waist Cord
Row 1: Ch 241. Sl st in second ch and each remaining ch. Fasten off. (240 sl sts)
Thread the waist cord through alternate waist mesh cells and tie to fit 80 to 84 cm.
For the center-neck bow: Make two 60-chain cords with 59 return sl sts each. Attach at the front neck point.
For pearl versions: Sew beads onto cord tips using doubled strong thread.
Rosette Placement
Arrange the 28 sunburst rosettes as follows:
- 6 rosettes around the neckline
- 22 rosettes around the lower skirt
Sew each rosette at four or more points onto the underlying mesh. They are decorative overlays, not structural inserts.
Checkpoint: Rosettes should not bridge or close the wearing openings. Check that decoration is balanced and the skirt hangs evenly without tight horizontal bands.
Finishing Your Dress
Weave in ends: Work each tail through at least 5 cm of stitches, then reverse direction. (0 loose tails remaining)
Block: Wash the dress gently and block flat to the listed dimensions. Support all wet fabric fully. Do not hang to dry. (1 finished dress)
Final Checkpoint: Finished bust approximately 88 cm. Total length approximately 105 cm before optional trim. Sleeve length approximately 28 cm. Hem approximately 218 cm. Let dry completely, then check length again over your intended slip.
Care Instructions
Follow the yarn label for specific care recommendations. Unless otherwise specified:
- Hand-wash in cool water with mild detergent
- Support the wet fabric at all times
- Dry flat away from direct heat
- Do not wring, tumble dry, or iron acrylic components
Safety Notes
This is an adult item only. Beads, tassels, and appliques present small parts and snagging hazards. Attach all decorations securely and inspect before each wear. Keep away from babies and young children. Avoid loose cords around machinery.
Open mesh does not provide sun protection or opaque coverage. A separate opaque slip is required when wearing this dress.
Tips for Success
Take your time with the bodice. The flat panels are straightforward, but accurate stitch counts matter for proper fit. Count your cells at the end of each section.
Try on early and often. The checkpoint before adding the skirt is your best opportunity to adjust fit. It’s much easier to modify the bodice before 78 rounds of skirt are attached.
Block your rosettes before sewing them on. This ensures consistent sizing and makes placement much easier.
Support the weight while blocking. A wet cotton lace dress is surprisingly heavy. Never hang it by the shoulders or the fabric will stretch unevenly.
Consider making extras. The rosettes work up quickly, and having a few spares means you can experiment with placement before committing.
This Sage Meadow Lace Dress is the kind of project that becomes a treasured handmade heirloom. The combination of structured mesh, romantic florals, and flowing silhouette creates a garment that looks far more complex than it actually is. Every hour you invest will show in the finished piece.
Thank you so much for choosing this pattern for your next crochet project. If you make this dress, please share your photos on Instagram or Facebook. Seeing your finished creations is always the best part.
Save this Sage Meadow Lace Dress Crochet Pattern to your Pinterest boards so you can find it when you’re ready to start. And if you do make it, drop a comment below. Your fellow crocheters would love to hear how it turned out!
Want a Quick & Easy Printable Version?
Get a clean, beautifully formatted PDF of this pattern — easy to follow step by step, ready to print or save on any device. No scrolling, no distractions, just the pattern.
Get the Printable PDF →You Might Also Like
- Pastel Rainbow Granny Square Purse Free Crochet Pattern
- Blush Pink Shell Clutch with Pearl Accents Free Crochet Pattern
- Blush Pink Tiered Lace Puff Sleeve Dress Free Crochet Pattern
- Ocean Blue Ombre Crochet Platform Wedge Sandals Pattern