
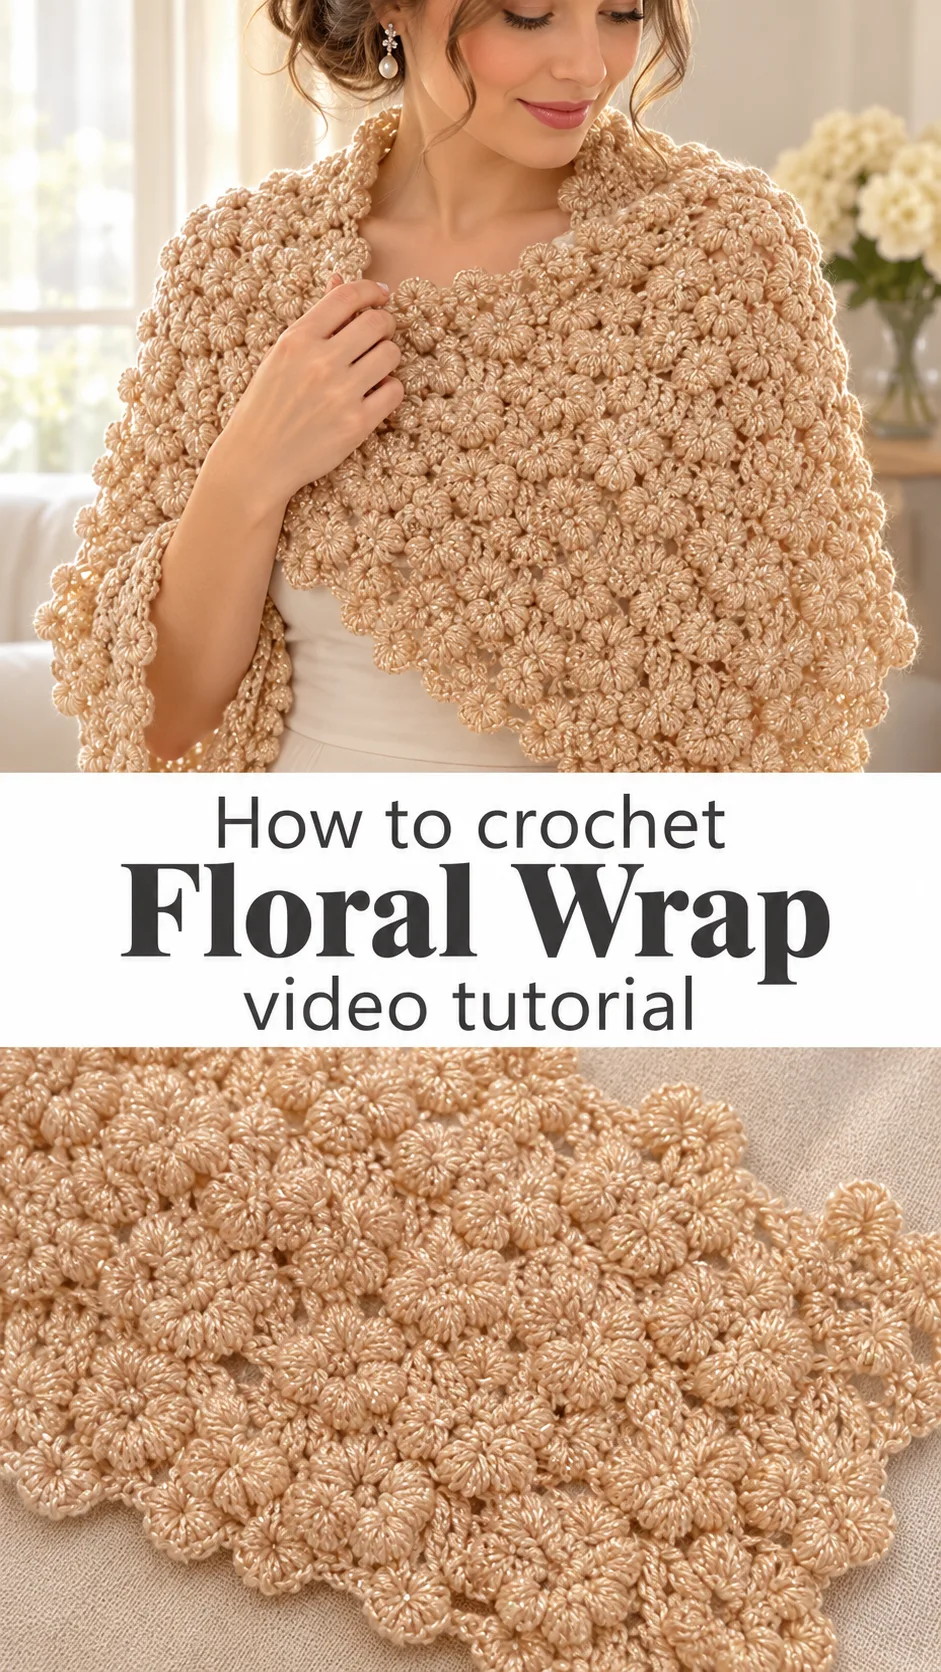
A crochet floral wrap covered in tiny round blossoms turns a plain strip of yarn into something that looks almost embroidered, with a soft glint of gold running through every petal.
The Crochet Floral Wrap
A crochet floral wrap like this one is built from small, tightly wound flower puffs set on a base of tall, ribbed-looking stitches. The blossoms sit close together, so the surface reads as a field of little rosettes rather than a flat piece of lace. Between them, a few open gaps let light through and keep the fabric from feeling heavy. The colour is a warm sand beige, and a fine metallic thread catches the light at every turn. The wrap looks delicate, yet the texture is plump and tactile. It suits evenings out, wedding guests’ shoulders, and cool summer nights. It also works as a wide cuff or a band for a hat. The shape is a long, wide strip with softly scalloped edges, which makes it easy to wear in many ways.
The strip format is the quiet strength of this design. Wrapped once around the shoulders, it behaves like a shawl. Folded and pinned, it becomes a collar or a belt. Because it is made as a single long band, it also makes a fine gift for someone whose size you do not know.
Floral Wrap Related Posts:
- Crochet Sweet Hearts: A Charming Handmade Accent
- Crochet Flower Filet Shawl: A Delicate Timeless Wrap
- Crochet Ripple Blanket: A Timeless Colorful Classic
- Crochet Reversible Cardigan: A Chic Versatile Wrap
Materials
For a crochet floral wrap with this much surface texture, choose a smooth, lightly twisted yarn with a thin metallic strand plugged into the ply, in sand, oatmeal or ivory. A fingering or sport weight cotton or cotton blend is the safest bet, because the puffs show every stitch and a fuzzy yarn would blur their petal shape. The stitches in the photos look small and firm, so a hook around 2.5 to 3.5 mm is a sensible general range, but the label on your own yarn should guide the final choice. Go down half a size if the puffs look floppy. You will also need a tapestry needle for weaving ends and a few stitch markers to flag the start of each flower row. Blocking pins and a flat towel are worth having on hand. Choose a yarn with some body, since the wrap relies on the fabric standing up slightly rather than collapsing.
Choosing the Best Yarn for Sparkle and Shape
The metallic thread is what lifts this wrap above an ordinary textured band. In the photos it appears as tiny flecks of pale gold and green, not a heavy glitter, which suggests a cotton or acrylic blend with a fine lurex strand. That subtle shine is easy to wear in daytime and still glows in evening light.
Cotton blends give crisp petals and a cool hand, which suits warm weather. Acrylic blends are lighter and springier, so the wrap drapes more softly, though the puffs may look a little less defined. Avoid wool with a halo, because the fuzz hides the centre of each blossom, where the wound loops should be visible.
Colour deserves a moment of thought. Sand beige hides well against skin tones and pairs with nearly everything. Soft blush, pale sage or dusty lilac would keep the same romantic feeling. A deep colour such as navy would turn the flowers dramatic, but the metallic flecks need a lighter background to read as sparkle.
Understanding the Flower Puff Texture
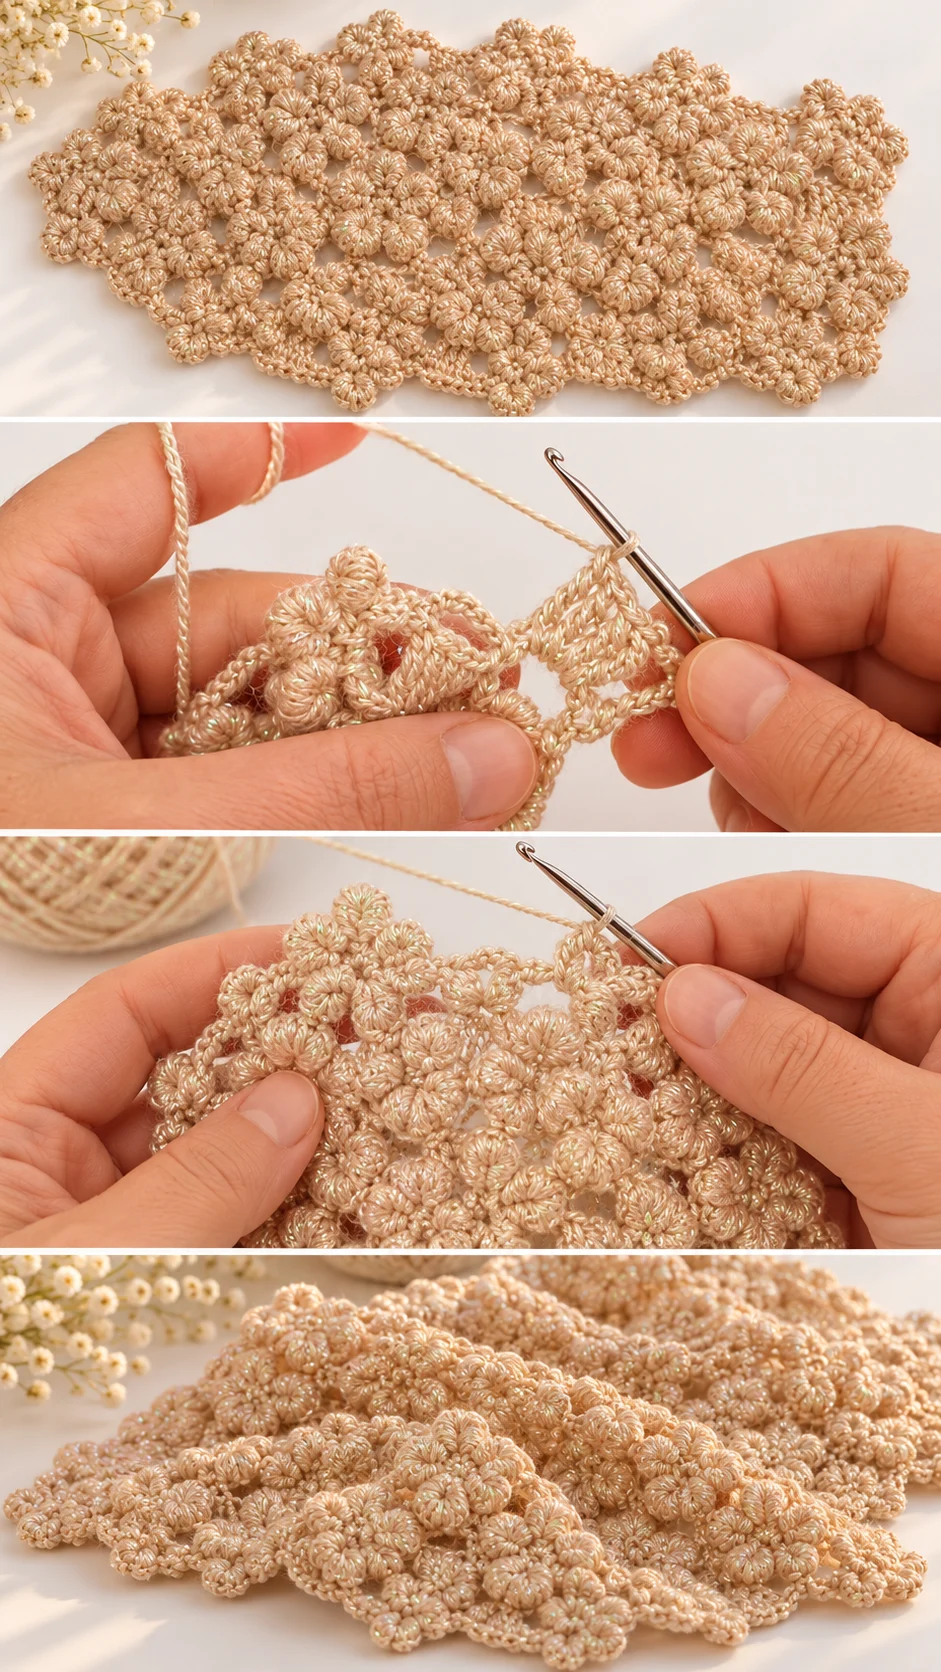
The blossoms are the signature detail. Each one is a round cluster of wound loops gathered into a tight centre, so it resembles a small daisy seen from above. Several of them sit side by side in each row, and the next row tucks new flowers into the spaces left by the last. That staggering is why the surface looks organic and not gridded.
The loops must be pulled up to the same height every time. If one puff is taller, it flops over its neighbour and the flower loses its round outline. A good habit is to keep the loops loose on the hook, then pull the final yarn through firmly so the centre closes into a neat star.
Between the flower rows, the base looks like a band of tall stitches worked in vertical ridges. These give the wrap its structure and carry the puffs. Watch for the transition where you leave the tall stitches and begin the next flower row, since that is where most miscounts happen.
If your puffs look cramped, the base stitches are probably too tight. Loosen your tension on the tall rows, not on the flowers. If gaps between the blossoms look too wide, you may have skipped a base stitch, so check against the previous row before moving on.
Keeping the Rows Even
Because each flower row depends on the one below, small errors multiply quickly. Mark the first stitch of every row, and count the number of blossoms after finishing each one. A strip that slowly widens or narrows usually means a flower was added or lost near the edge.
The tutorial shows a row labelled 4 where the work is turned and the tall stitches begin again. Pause there and replay it, since the way the hook enters the previous row sets the spacing for everything that follows.
Skill Level and What Takes Patience
This is a project for a confident beginner moving toward intermediate. The stitches themselves are familiar ones, namely chains, tall stitches and wound loop clusters. What asks for patience is repetition, because a wrap this wide holds hundreds of tiny puffs, and each needs the same careful pull.
The hardest stretch is usually the first three rows, while you learn the rhythm of the wound loops. After that, the work settles into a pleasant pattern. Work in good light, since the pale yarn and the metallic strand make stitches hard to read in dim rooms.
If your hand tires, stop at the end of a flower row, not in the middle of one. A half-finished cluster is easy to misread when you pick the work up again. Short, regular sessions give a more even fabric than one long marathon.
Shaping the Edges and Length
The wrap in the photos has an uneven, scalloped outline, with blossoms poking out past the tall-stitch band on both long sides. That edge is part of the charm, so do not trim it or try to straighten it. The effect comes from the flower rows being slightly wider than the base rows they sit on.
Length is yours to decide. For a shawl-style wrap, keep going until the strip reaches comfortably from one elbow to the other across your back. For a collar or cuff, a much shorter strip is plenty. Hold the work against your body now and then to check, because the fabric stretches a little when worn.
Stop at the end of a complete flower row so the finished edge matches the starting one. An uneven finish shows plainly in a design this regular.
How to Style a Crochet Floral Wrap
In the photos the wrap is held open flat, which shows how wide and structured it is. Draped over the shoulders of a plain sleeveless dress, the sand colour and gold flecks would look like a piece of jewellery. The blossoms do the decorating, so keep the outfit simple.
For daytime, wrap it once around the neck over a white linen shirt and let the ends hang loose. At a summer wedding, pin it at one shoulder over a slip dress in champagne or soft green. On a cool evening, fold it lengthwise and wear it as a wide belt over a long cardigan.
It also crosses over into home use. Laid along a console table or draped across the back of a chair, the textured strip adds a handmade accent without taking much space.
Tips for a Neat Finish
Weave in ends along the tall-stitch ridges, not through the puffs. The ridges hide yarn well, and the blossoms stay clean. Because the metallic strand can wriggle loose, weave each tail in two directions and trim with sharp scissors rather than pulling.
Blocking is worth the effort. Pin the wrap flat on a towel, spray it lightly with water, and let it dry without stretching the puffs. This relaxes the stitches, evens out the scalloped edges and lets the flowers sit upright. Do not press with an iron, since heat can dull or damage a metallic thread.
If the strip curls at the edges after blocking, pin it again and let it dry fully before unpinning. If a puff looks flattened, tease it gently with a fingertip and a little steam from a distance. Store the wrap folded loosely or rolled, because hanging may pull the open gaps out of shape.
Following the Tutorial
Watch the video once through before touching your hook. Notice how the maker wraps the yarn around the hook for each loop and how the hand holds the work close to the stitch. Then pause at each flower and copy the motion slowly.
Work a short test strip first. A few rows are enough to confirm your tension, show how large the blossoms come out, and tell you whether your yarn and hook make a fabric you like. Replay the section at the start of the fourth row as often as you need, since it is the point where the pattern turns from set-up into repeat.
A Delicate Handmade Keepsake
This crochet floral wrap is a strip of tiny puffed blossoms on a ribbed base, shimmering with a hint of gold. It rewards steady hands more than advanced skill.
Four things decide how it turns out: a smooth yarn with a fine metallic strand, even loop height in every flower, a loose base row, and a gentle block at the end. Get those right and the wrap will look finished and graceful.
Make it once and it will find its way into many outfits.
Video tutorial credit: the Crochet Floral Wrap is taught step by step by its original creator in the video below.
Follow us on Pinterest and subscribe to the Newsletter so you don’t miss a thing!
Tutorial and photos of this floral wrap by: Crochet Knitting Sort.