
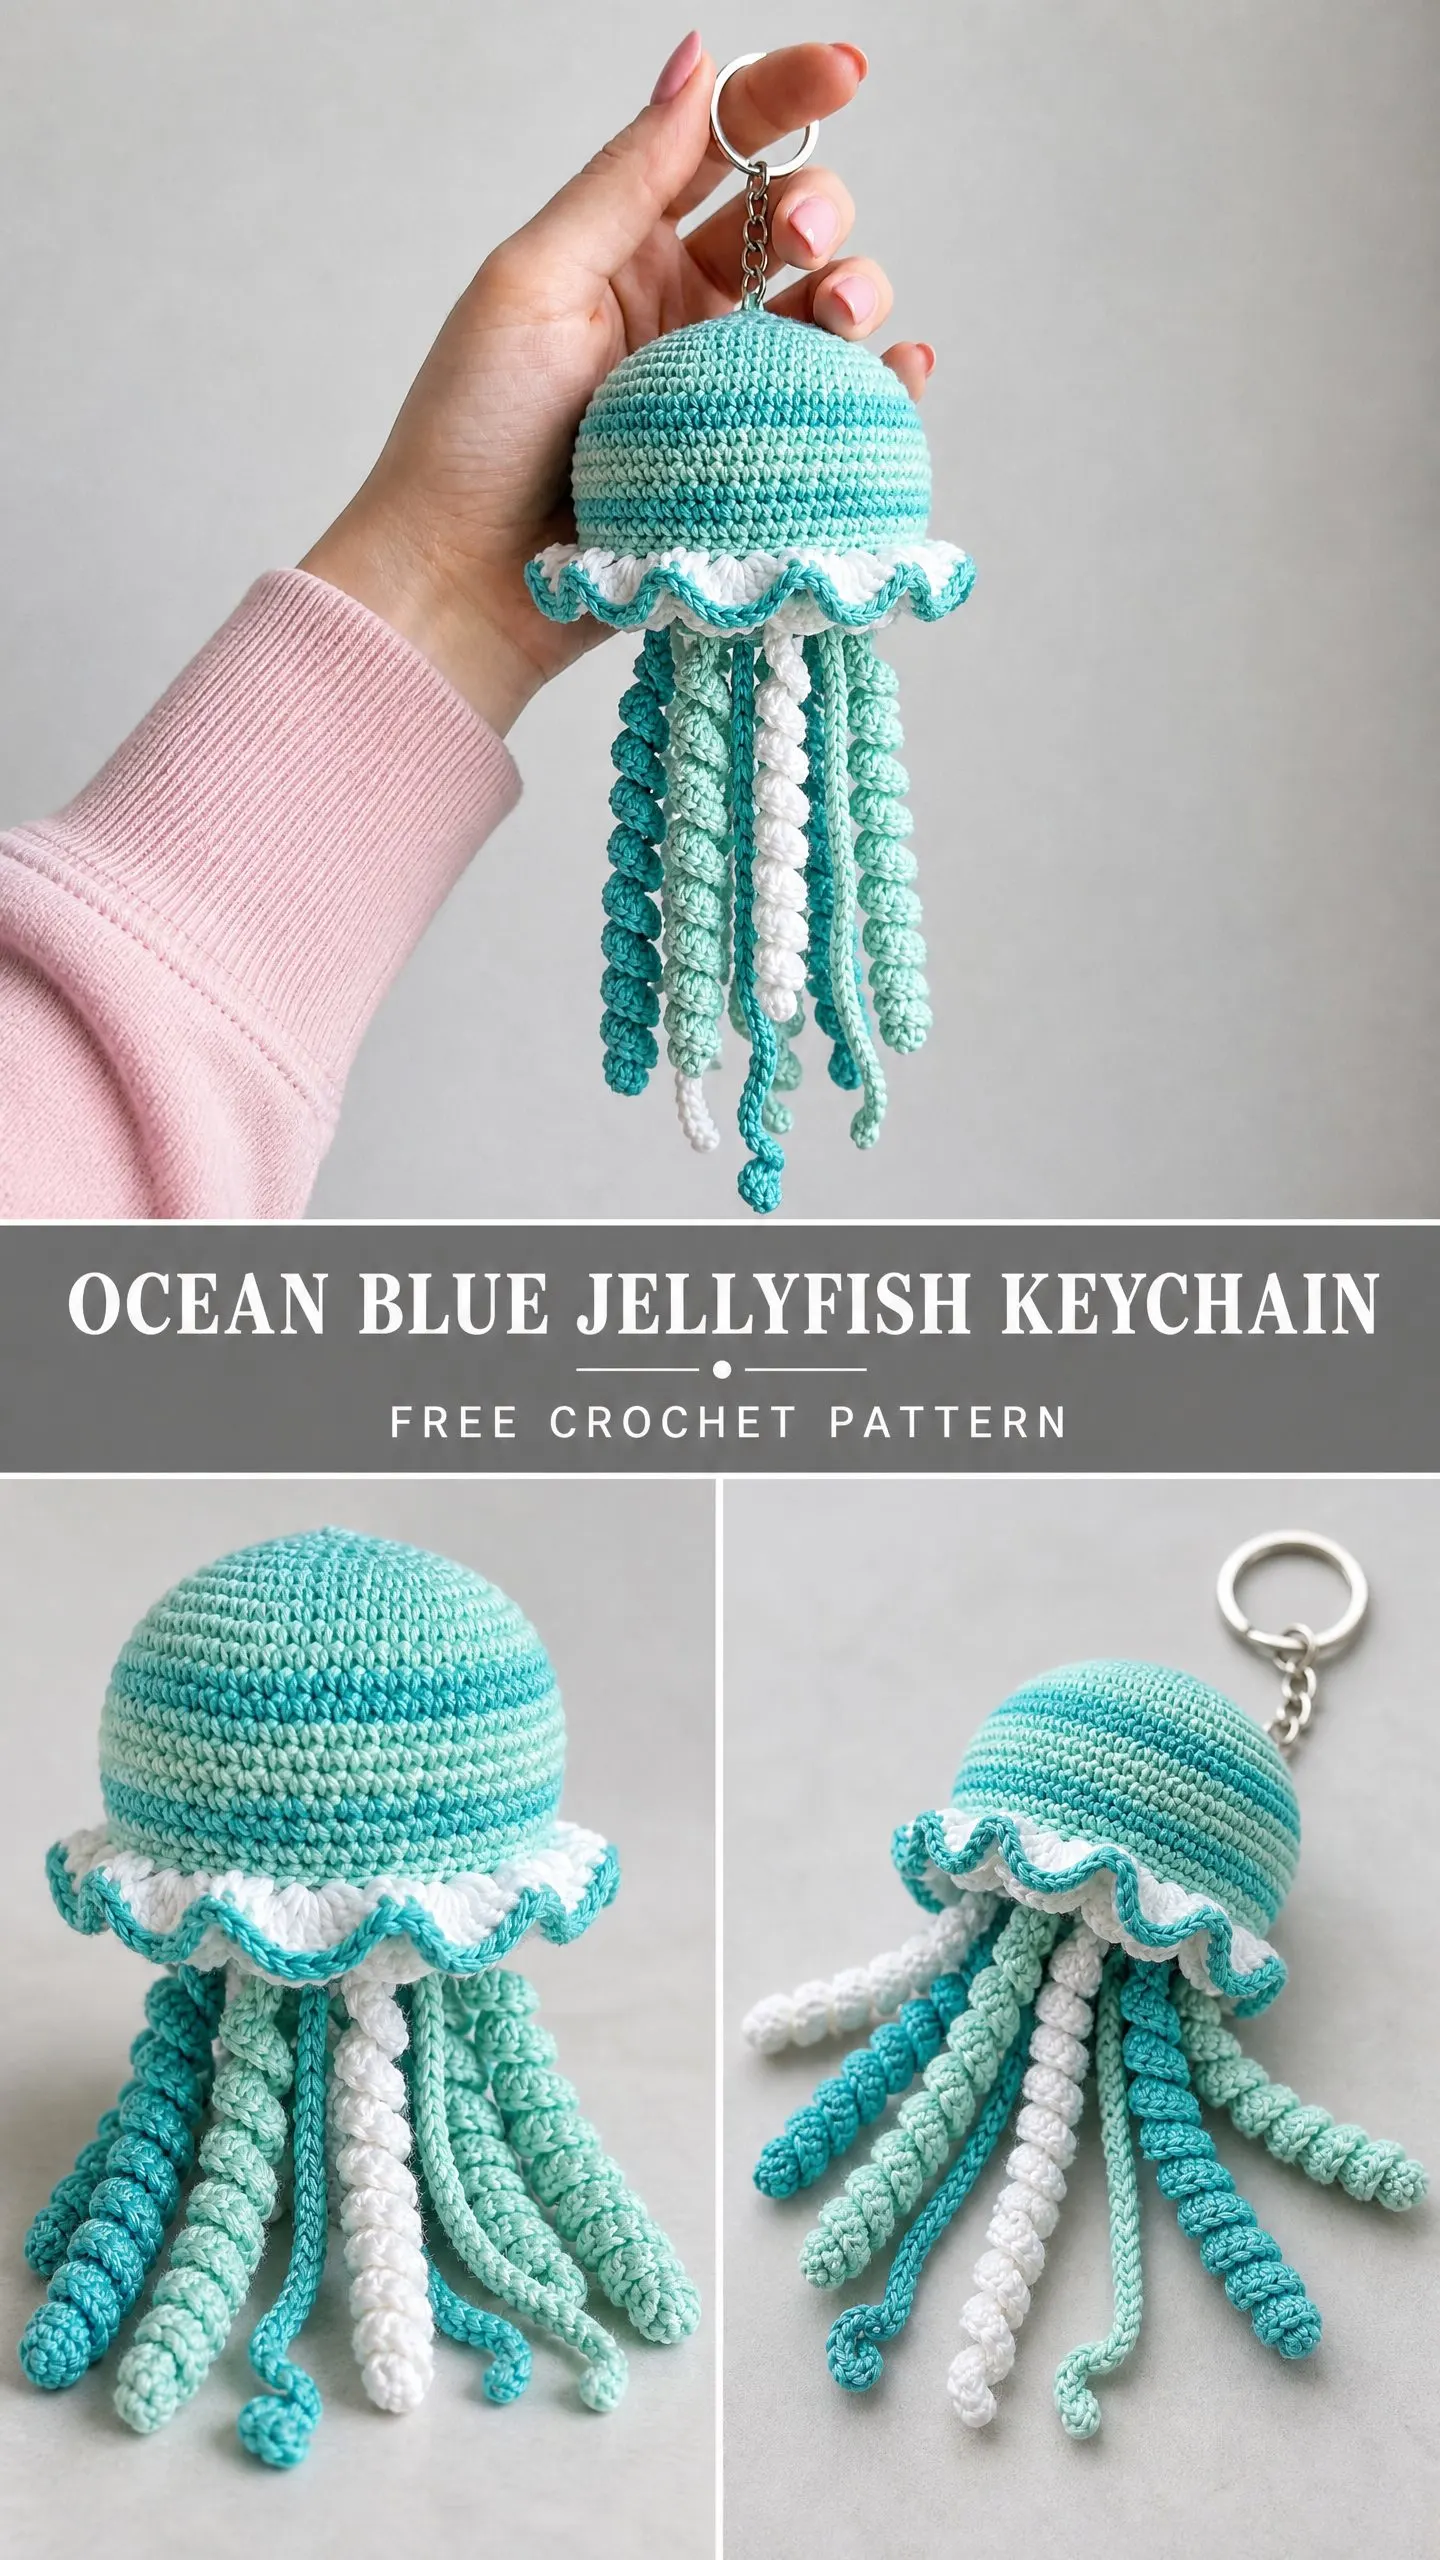
This is a crocheted jellyfish keychain. It uses single crochet for the bell, a special bobble chain stitch for the curly tentacles, and double crochet shells for the ruffled frill. The whole thing works up in about three to five hours.
If you can crochet in the round and you are comfortable with basic increases and decreases, you can absolutely make this. The tentacle technique might be new to you, but I will walk you through every step.
The finished keychain measures roughly 3.5 inches across the bell and 8 inches long including tentacles. It hangs beautifully from a bag, a zipper pull, or your keys. Let me show you exactly how to make one.
Why This Jellyfish Keychain Pattern Works So Well
The secret to this little ocean creature is all in the construction. The bell is worked in continuous rounds from the top down, which means no seaming and no fussing with joining at the end of every round. You stuff the dome as you go, attach your keychain hardware before closing up, and then add a frilly white border at the opening.
The tentacles are where the magic happens. Each one is worked using something called a bobble chain stitch, which creates bumpy little segments that curl naturally without any blocking. You do not have to coax them into shape. They just spiral on their own.
The color palette uses three shades: a medium teal, a light mint, and crisp white. These blend together in a gradient pattern on the bell and mix throughout the tentacles for that dreamy underwater look you see in the finished piece.
Materials You Will Need
Before you start, gather everything on this list. Having your supplies ready makes the whole process smoother.
Yarn:
Hook: US size B-1 / 2.25 mm crochet hook, or the size needed to match gauge
Notions:
Yarn Suggestions
You want a cotton or cotton blend yarn in fingering to light DK weight. Cotton holds the dome shape beautifully and gives you crisp stitch definition.
Here are three options that work wonderfully:
1. DMC Natura Just Cotton (50 g / 169 yds): Use Turquoise for Color A, Green Smoke for Color B, and Blanc for Color C.
2. Scheepjes Catona (50 g / 125 yds): This mercerized cotton has a slight sheen that enhances the oceanic look. Use Cyan for Color A, Chrystaline for Color B, and White for Color C.
3. Paintbox Yarns Cotton DK (50 g / 137 yds): An affordable choice with good stitch clarity. Use Kingfisher Blue for Color A, Misty Teal for Color B, and Paper White for Color C.
Avoid very stretchy fibers like wool or acrylic blends for the bell. They can cause the dome to lose its rounded shape over time.
Gauge
8 single crochet stitches and 9 rounds = 1 inch / 2.5 cm worked in continuous rounds with a US B-1 / 2.25 mm hook.
To check your gauge, work a flat circle through Round 5 of the bell instructions. After Round 5, the diameter should measure approximately 1.75 inches or 4.5 cm.
If your swatch is too big, try a smaller hook. If it is too small, go up a hook size.
Abbreviations and Stitch Definitions
Let me explain every abbreviation before we begin. If you are newer to crochet, read through this section carefully.
Special Stitches
This pattern uses two special techniques. Both are easier than they sound.
Bobble Chain Stitch (for tentacles)
This stitch creates the bumpy, curling cords that form your tentacles. Here is how it works:
Step 1: Chain 4.
Step 2: In the very first chain made (the chain four stitches back from your hook), work 1 dc. Yarn over and pull through all loops on hook to close.
Step 3: You now have one bobble sitting on a chain stem. The excess chain and bobble naturally cause the cord to spiral.
Repeat Steps 1 and 2 for the desired length. The more units you work, the longer and curlier the tentacle becomes.
Ruffle Shell Stitch (for the frill)
Work 5 dc into a single stitch. This fan of stitches spreads outward and causes the edge to ruffle when worked around a complete round.
Picot Edging (along frill border)
Step 1: Slip stitch into next stitch.
Step 2: Chain 3.
Step 3: Slip stitch into the first of those 3 chains.
Step 4: Slip stitch into the next stitch on the working round.
Repeat Steps 1 through 4 across.
Pattern Notes Before You Begin
Read these tips before starting. They will save you confusion later.
Step by Step Instructions
The Bell (worked in continuous rounds, top down)
Rnd 1: Using Color A, make a MR, work 6 sc into ring, pull ring closed. (6 sc)
Rnd 2: Work 2 sc in each st around. (12 sc)
Rnd 3: [Sc in 1 st, 2 sc in next st] 6 times. (18 sc)
Rnd 4: Change to Color B on last yo of Rnd 3 final st. [Sc in 2 sts, 2 sc in next st] 6 times. (24 sc)
Rnd 5: [Sc in 3 sts, 2 sc in next st] 6 times. (30 sc)
Rnd 6: Change to Color A on last yo of Rnd 5 final st. [Sc in 4 sts, 2 sc in next st] 6 times. (36 sc)
Rnd 7: [Sc in 5 sts, 2 sc in next st] 6 times. (42 sc)
Rnd 8: Change to Color B on last yo of Rnd 7 final st. [Sc in 6 sts, 2 sc in next st] 6 times. (48 sc)
Rnd 9: Sc in each st around. (48 sc)
Rnd 10: Change to Color A on last yo of Rnd 9 final st. Sc in each st around. (48 sc)
Rnd 11: Sc in each st around. (48 sc)
Rnd 12: Change to Color B on last yo of Rnd 11 final st. Sc in each st around. (48 sc)
Rnd 13: Sc in each st around. (48 sc)
Rnd 14: Change to Color A on last yo of Rnd 13 final st. Sc in each st around. (48 sc)
Rnd 15: Sc in each st around. (48 sc)
Before continuing, attach the keychain hardware. Thread the split ring through the center loop of the magic ring at the crown. If the ring slips, use a short length of Color A to whipstitch around the bar of the ring and through the crown loop several times, then knot securely.
Now begin stuffing the bell gradually as you work the next rounds.
Rnd 16: Change to Color B on last yo of Rnd 15 final st. [Sc in 6 sts, sc2tog] 6 times. (42 sc)
Rnd 17: [Sc in 5 sts, sc2tog] 6 times. (36 sc)
Add remaining stuffing now so the dome is firm before the opening closes further.
Rnd 18: Change to Color A on last yo of Rnd 17 final st. [Sc in 4 sts, sc2tog] 6 times. (30 sc)
Rnd 19: [Sc in 3 sts, sc2tog] 6 times. (24 sc)
Checkpoint: After Round 19, your bell should measure approximately 3.5 inches / 9 cm across the widest point and approximately 2 inches / 5 cm tall from crown to current opening. If your piece is larger, try a smaller hook or tighter tension. If smaller, try a larger hook.
Do not fasten off. Continue to the frill.
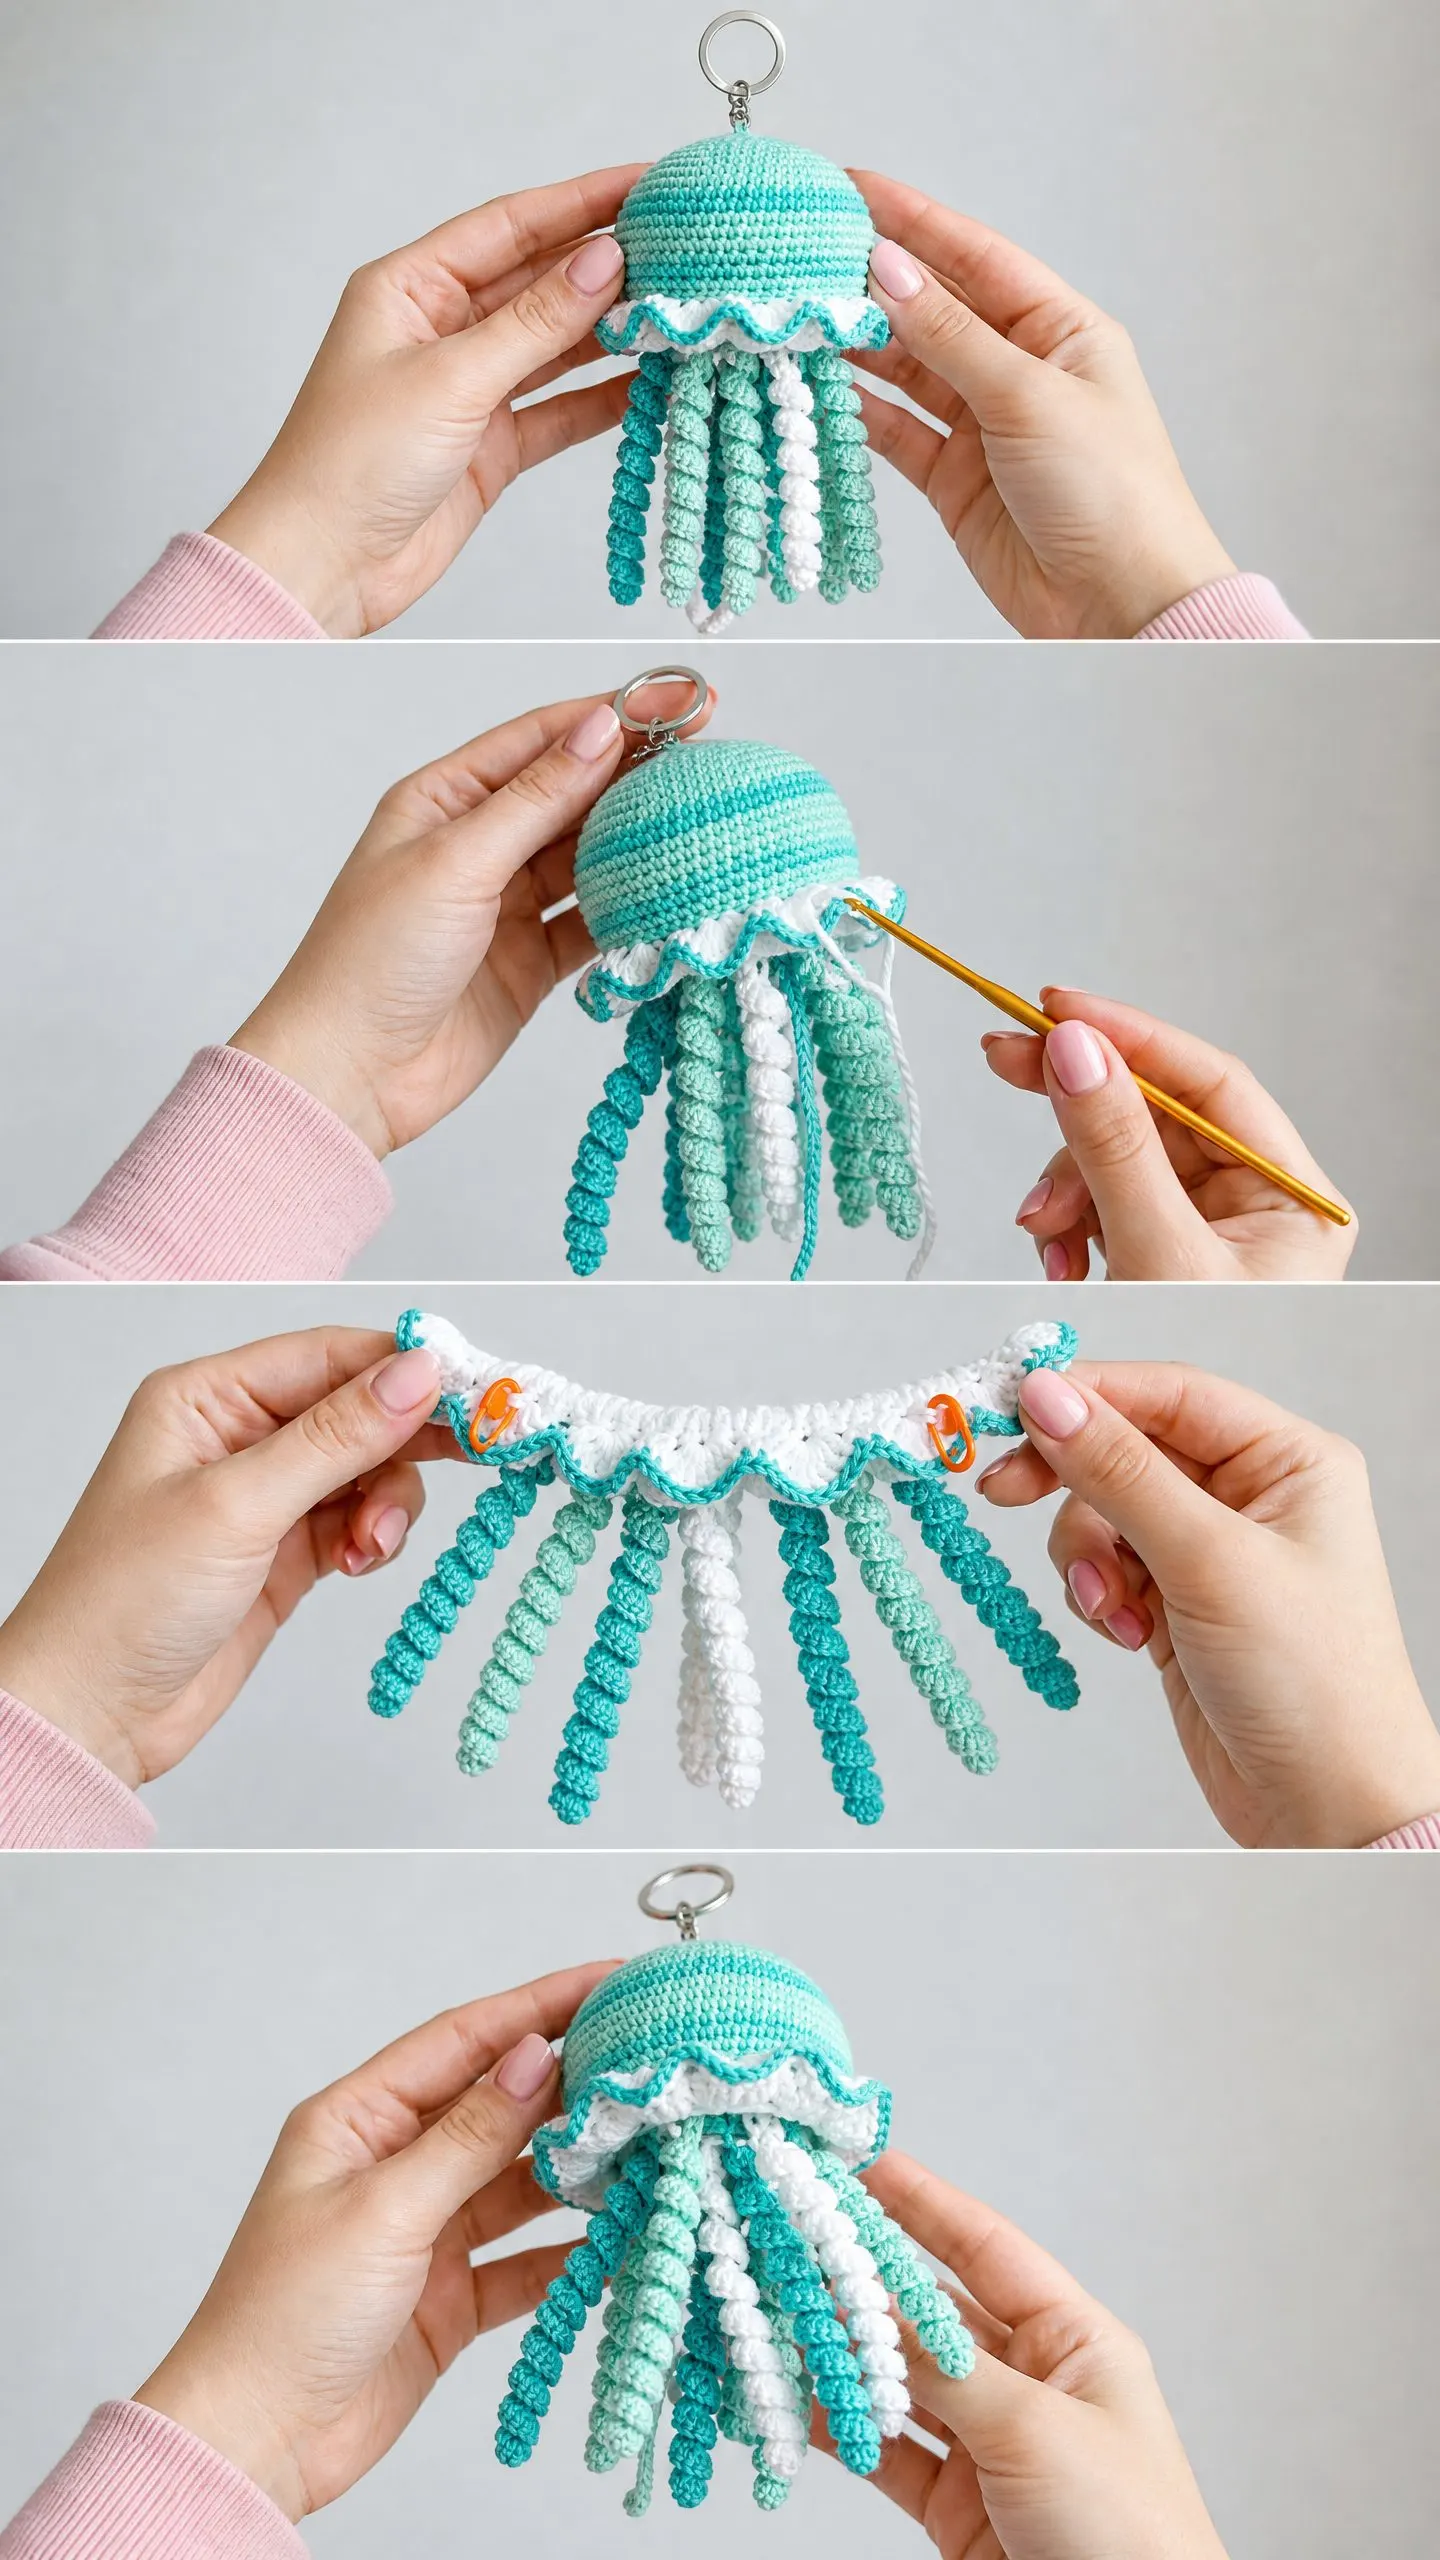
The Frill (worked into the front loops of Round 19)
Before working the frill, change to Color C (white).
Working into the FLO of each st of Round 19 only:
Rnd 20 (Frill base): Join Color C with a sl st into any FLO, ch 1, sc in same st, sc in each FLO around, sl st to first sc to join this round. (24 sc)
Rnd 21 (Ruffle round): Ch 3 (counts as first dc), work 4 more dc in same st (first ruffle shell complete), [work 5 dc in next st] 23 times, sl st to top of beginning ch-3 to join. (120 dc total, 24 shells of 5 dc)
Rnd 22 (Picot edging): Using Color A, join with a sl st into the top of any dc. Work picot edging as follows: [sl st in next dc, ch 3, sl st in first of those 3 chs, sl st in next dc] around. Continue until all 120 dc have been edged. Fasten off and weave in end.
The frill will naturally ruffle outward from the base of the bell.
The Tentacles (make 8 total)
Make 3 tentacles in Color A (teal), 3 tentacles in Color B (mint), and 2 tentacles in Color C (white). This creates the mixed color cascade visible in the finished piece.
Each tentacle uses the Bobble Chain Stitch described in Special Stitches.
Short tentacles (make 4, one of each color plus one extra Color A):
Work 18 bobble chain units. This produces a tentacle approximately 3 inches / 7.5 cm long when relaxed and curled.
Long tentacles (make 4, one of each color plus one extra Color B):
Work 28 bobble chain units. This produces a tentacle approximately 4.5 inches / 11.5 cm long when relaxed and curled.
To start each tentacle: Make a slip knot, ch 1 to secure, then begin the bobble chain sequence immediately. Leave a tail of approximately 6 inches / 15 cm at the start of each tentacle for attachment.
To end each tentacle: After the final bobble unit, cut yarn leaving a 4 inch / 10 cm tail, pull tail through the last loop to fasten off. Tuck the end tail back through several bobbles to hide it.
Tentacle Attachment
Hold the bell with the frill facing down and the crown facing up. The back loops of Round 19 (left exposed when you worked the frill into the front loops) form a ring of 24 loops at the base of the bell.
Divide the 24 back loops into 8 groups of 3 loops each.
Thread the starting tail of each tentacle onto a yarn needle. Insert the needle under the 3 back loops of one group from outside to inside, wrap around twice, then knot securely on the inside of the bell. Pull snugly so the tentacle hangs straight down.
Attach one tentacle to each group of 3 loops, working evenly around the base. Alternate colors as you go: teal, mint, white, teal, teal, mint, mint, white. This arrangement, when the tentacles curl, creates the mixed swirling look of the finished piece.
After all 8 tentacles are attached, weave in all remaining tails on the inside of the bell.
Size Customization Tips
To make a larger jellyfish ornament rather than a keychain, use DK or worsted weight yarn with a correspondingly larger hook (US E-4 / 3.5 mm for DK, US G-6 / 4 mm for worsted). Continue adding increase rounds following the established pattern of adding 6 stitches per round until the bell reaches the desired diameter, then work straight rounds to build height, then decrease. Increase the number of tentacle bobble units proportionally. A worsted weight version will finish at approximately 5 to 6 inches / 13 to 15 cm diameter.
To make a smaller version for an earring or pendant, use size 10 crochet thread and a steel hook size 7 / 1.65 mm. Reduce the bell by stopping increases at Round 5 (30 sc), working 4 straight rounds, then decreasing back. Make tentacles with only 10 to 12 bobble units each.
Finishing and Blocking
Cotton yarn does not require aggressive blocking. Once all ends are woven in, lightly mist the bell with water, gently coax it into a smooth hemisphere, and allow to dry on a flat surface with the dome facing up.
Do not wet block the tentacles. The moisture may temporarily relax the curl. If tentacles lose curl after washing, allow them to air dry hanging vertically and the spiral will return.
Trim all tails close to the fabric after weaving in. Do not leave any tails longer than 0.25 inch / 0.5 cm inside the bell.
Care Instructions
Hand wash in cool water with a small amount of mild soap. Do not wring or twist. Press gently between two clean towels to remove excess water. Hang to dry vertically so tentacles retain their curl direction. Do not machine wash or tumble dry. Do not iron. Store hanging or laid flat in a dry location away from direct sunlight to prevent color fading.
You Did It!
Thank you so much for making this jellyfish keychain crochet pattern with me. I hope you love how your little ocean creature turned out. If you make one, I would absolutely love to see it! Share your finished jellyfish on Instagram or Facebook and tag me so I can admire your work.
If this pattern made you smile, save it to your Pinterest boards so you can find it again later or share it with a crochet-loving friend. And please drop a comment below if you have any questions or just want to say hello. Happy crocheting!
You Might Also Like
- Coral Sunset African Flower Tote Free Crochet Pattern
- Coral Sunset Textured Handbag Free Crochet Pattern
- Blush Pink Tiered Ruffle Crochet Set Free Pattern
- Dusty Rose Peplum Baby Outfit Free Crochet Pattern