
A crochet Yoshi egg turns fluffy chenille yarn into a plump, spotted keepsake that sits happily on a shelf, a nursery dresser or beside a favorite plush dinosaur.
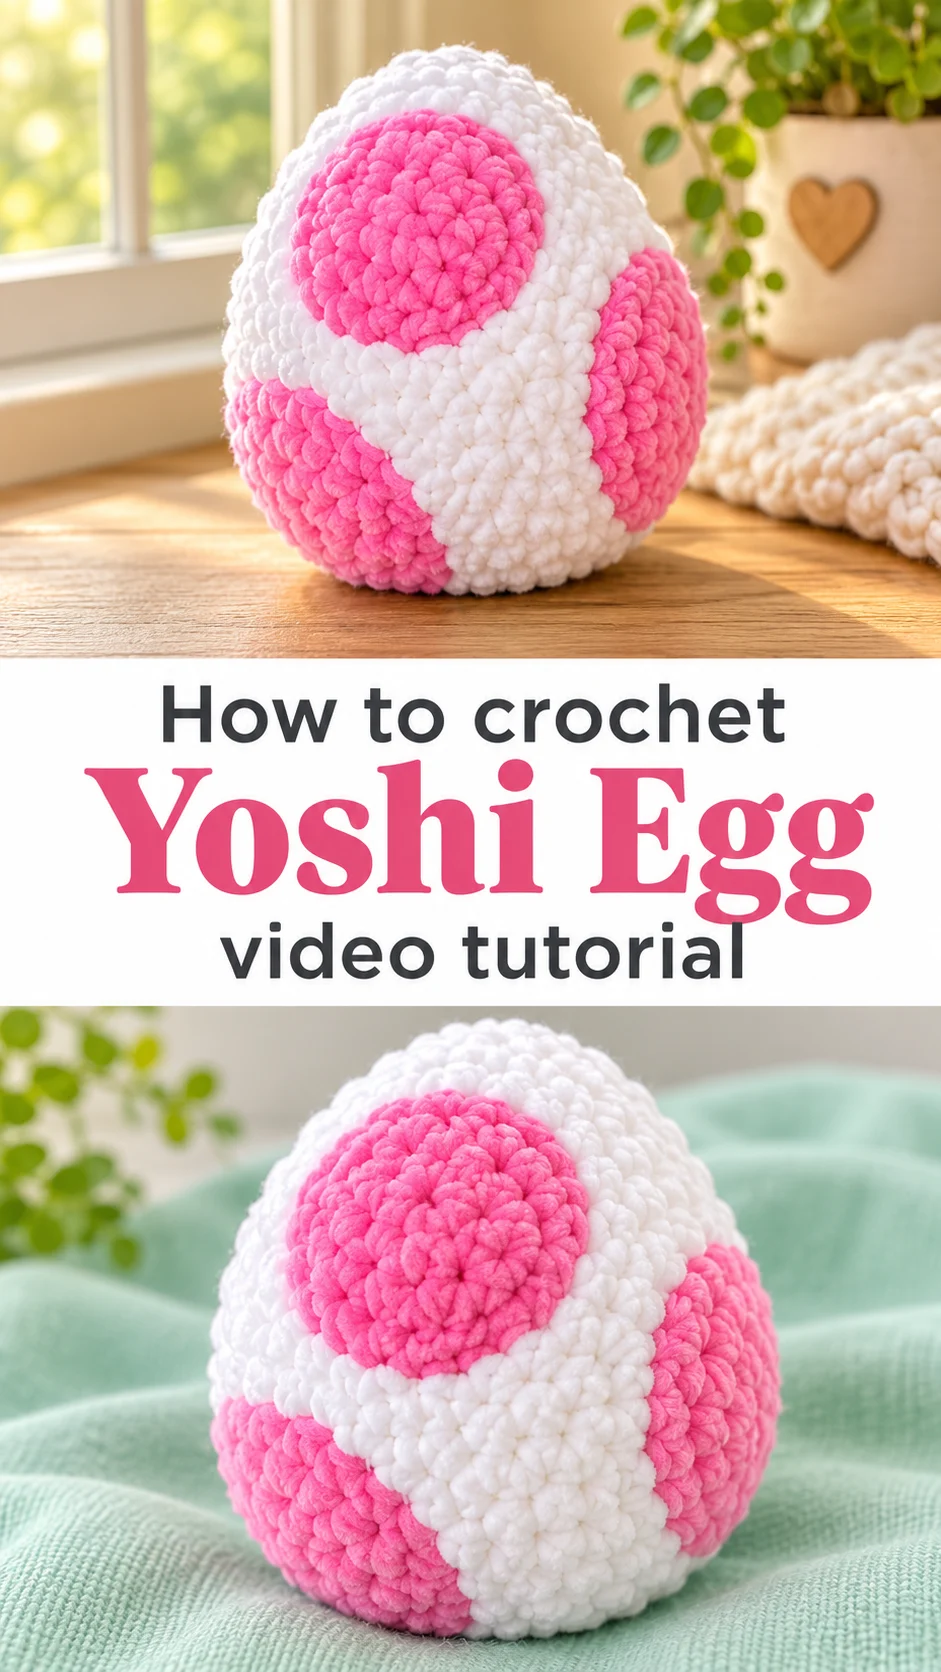
The Crochet Yoshi Egg
The crochet Yoshi egg is a soft, oversized take on the famous spotted egg from the Mario games. Its shape is a true egg, rounded at the base and tapering gently toward the top. White forms the shell, and large, smooth-edged spots break it up in a single contrasting color. One version in the tutorial uses mint green spots, the other bubblegum pink. The yarn has a velvety, fuzzy look, so the spots read as plush patches against the crisp white stitches. It is the kind of piece that looks equally at home in a game room, a baby’s nursery or a spring display.
Because the egg is stuffed and holds its own shape, it works as decor, a pillow-like cuddle toy or a gift for a fan. Pair it with a Yoshi plush and the two look made for each other. Making it also builds a useful skill, which is switching colors cleanly inside a worked-in-the-round shape. Small project, big payoff.
Yoshi Egg Related Posts:
- Crochet Bikini Bottom: A Chic Summer Essential
- Crochet Teddy Bear & Sweater: A Sweet Handmade Treasure
- Crochet Textured Beanie: A Warm Winter Essential
- Crochet Rope Basket: A Bold and Textured Statement
Materials
For a crochet Yoshi egg, choose a chunky chenille or velvet-style yarn, because it gives the plush, slightly fuzzy surface seen on both the white shell and the colored spots. You need white for the body and one contrast color for the spots, such as mint green for the classic look or bright pink for a playful twist. Pair the yarn with a large hook, since a hook that feels a little small for the yarn produces tight stitches that hide the stuffing. Chenille is slippery, so a hook with a comfortable ergonomic handle saves your hand during longer sessions. You also need polyester fiberfill, stitch markers to track the start of each round, a yarn needle for weaving in ends, and scissors. Choose a pale, matching white across all your skeins, since mixed dye lots show up quickly against the spots.
Choosing the Best Yarn for a Plush Egg
Chenille is the star here. Its soft pile gives the spots a velvety finish that contrasts nicely with the slightly ridged texture of the white shell. The stitches show clearly in the white sections, forming neat horizontal rows around the egg.
A cotton or acrylic worsted yarn would also work, though the result would look flatter and more traditional. It would also need more rounds to reach the same size, and the egg would feel firmer. If you want the cuddly look, stay with chenille or a similar velvet yarn.
Avoid very thin yarns. Fiberfill pushes through the gaps in loose stitches, leaving white fluff poking through the spots. If you notice stuffing showing, go down a hook size or double your strand.
Understanding the Egg Shape
The egg is worked in the round from the bottom up, or from the top down, as one continuous piece without seams. It begins with a small circle that grows in even increases, then moves through several straight rounds to build the belly of the egg. After that, the rounds decrease gradually to close the top.
The shaping is what makes it an egg rather than a ball. The wide point sits low and the narrow end rises, so the decreases at the top must come steadily rather than all at once. Watch the tutorial closely at the point where the increases stop and the straight rounds begin, since that is where the silhouette is decided.
The mouth of the piece stays open until the very end. In the video, the maker works the final rounds with the egg already firmly stuffed, then closes the opening neatly by pulling the last stitches tight. Pause there and replay it, because a rushed closure leaves a visible gap.
Mark the start of every round with a stitch marker. With fuzzy chenille the stitches are hard to read, and losing your place leads to lopsided shaping.
Spots: The Detail That Makes the Egg
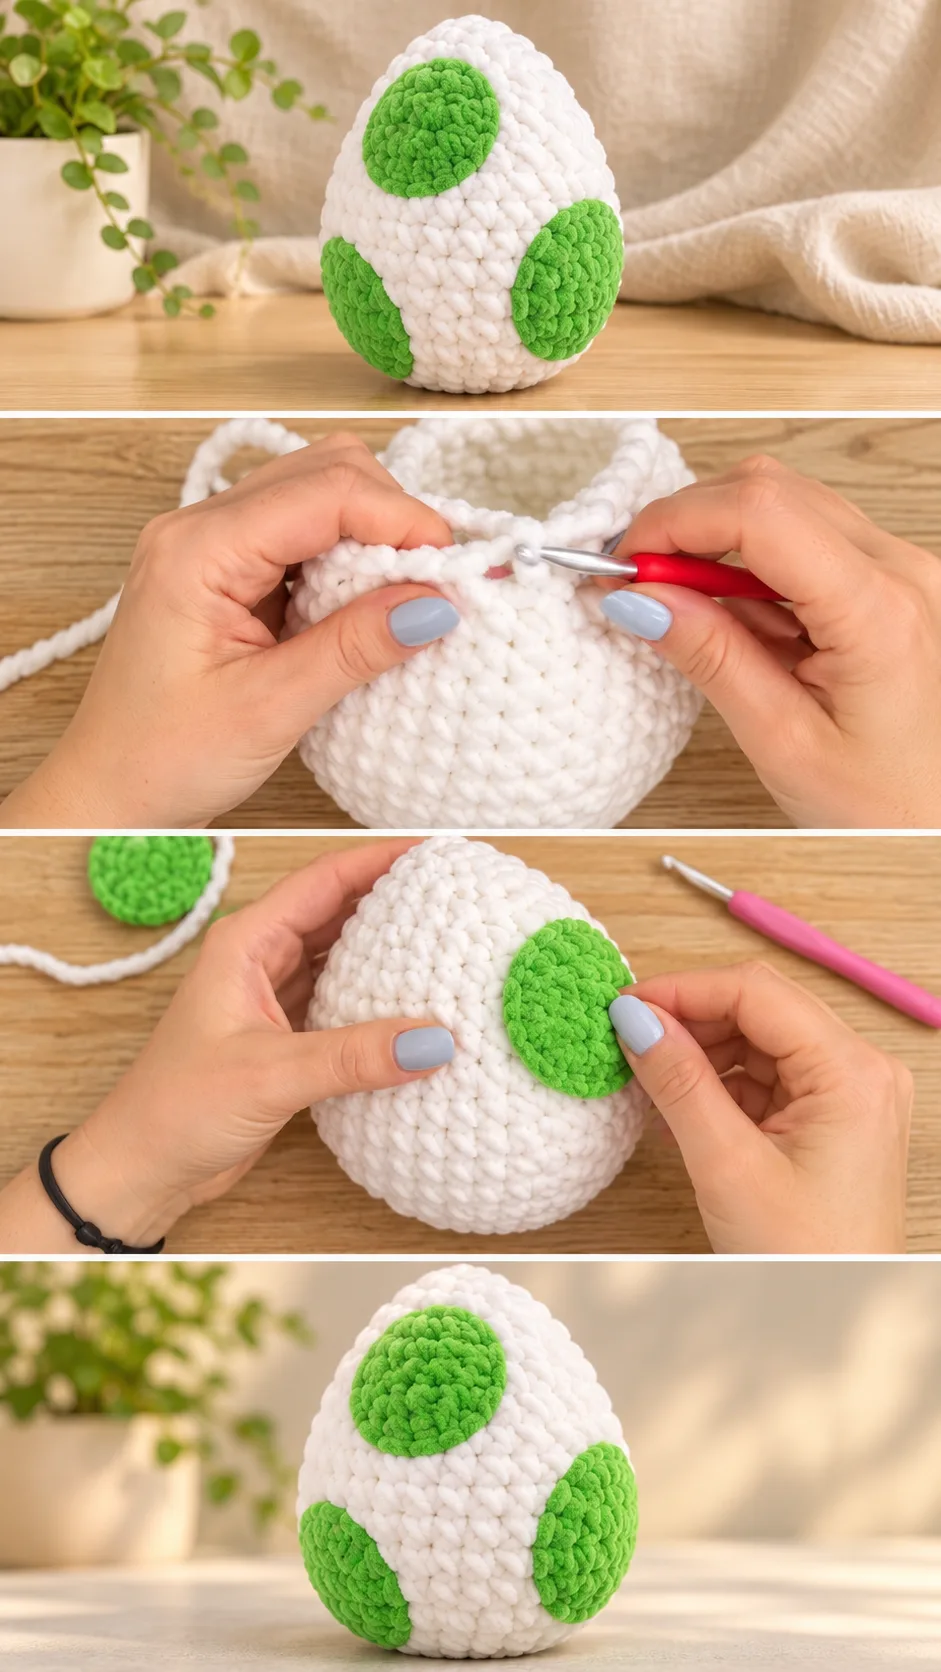
The spots are the signature feature. On the white shell, the colored patches are large and rounded, with one big spot near the top and others wrapping around the sides. They are worked directly into the fabric by changing yarn color within a round, which keeps the surface smooth with no sewn-on pieces.
The tutorial shows the color change in a close-up, and it is worth a careful watch. The trick is to carry the yarn behind the work and drop the old color without pulling it tight. If you tug, the fabric puckers and the spot looks dented.
The spots sit lower than the white stitches because the chenille is fluffier, which gives a pleasing raised effect. If a spot edge looks jagged, do not worry. A gentle tug on the fabric and a few strokes with your fingers settle the pile and blur small irregularities.
Position matters as much as shape. Place the large spot toward the upper front and balance the others around the sides, so the egg looks good from every angle. Check the placement before you commit to each spot.
Keeping Color Changes Neat
Switch colors on the last step of the stitch before the change, so the new color appears fully on the next stitch. This leaves a clean edge instead of a blurry mix of white and green. Weave in the loose strands as you go, because chenille ends are bulky and hard to hide later.
If the carried yarn shows through on the white side, the strand is too tight or your tension is too loose around the spot. Pull it a little looser and pad the area lightly with stuffing from inside.
Stuffing and Closing
Stuff firmly and evenly. A soft egg slumps and loses its pointed top, while an overfilled one stretches the stitches and shows gaps. Push small handfuls of fiberfill into the narrow top first, then fill the belly, and check the shape from the side as you go.
If the egg leans when set down, the base is likely underfilled or the stuffing has shifted. Open a few stitches near the closure and add a little more at the bottom. A slightly firmer base lets the egg stand upright on a shelf.
Close the last round by threading the tail through the remaining stitches and pulling snugly. Tuck the end deep inside the egg so the chenille does not tangle on the surface. Because the yarn is fuzzy, even a visible closure often disappears after a little fluffing.
How to Style a Crochet Yoshi Egg
Start with the setup seen in the tutorial, where the egg sits beside a green Yoshi plush on a light surface. The white and pastel tones read well against neutral walls and wood, so a bookshelf or mantel gives it a clean backdrop.
In a nursery, a pink version pairs nicely with soft cream linens and acts as a squishy decorative toy. For a game room, the classic green suits a shelf next to controllers and collectibles. At Easter, a trio in different spot colors makes a playful basket filler that avoids the usual bunny theme.
It also makes a thoughtful gift for a gamer friend. Tuck a small card inside the gift wrap and let the egg be the surprise.
Tips for a Smooth Finish
Chenille sheds a little, so trim loose tails short instead of pulling hard on them. If a stitch looks uneven after finishing, rub the area gently with your fingertips to even out the pile. If the egg looks lumpy, squeeze and roll it between your hands to redistribute the filling.
Check your tension in the first few rounds. If the early circle cups upward like a bowl, you have too many increases or the stitches are too tight. Redo it with a slightly looser hand, because the base sets the shape for everything above.
Wash by hand if needed, using cool water and mild soap, and let it air dry. Chenille mats in a hot dryer, and the fluff loses its softness. Brush the spots lightly once dry to bring back the velvet look.
A Playful Handmade Treasure
This crochet Yoshi egg is a small project with a big personality: a smooth egg silhouette, bold spots and a plush finish that begs to be held. The things that decide how well it turns out are a snug hook, steady shaping toward the top, tidy color changes and firm, even stuffing.
Follow the tutorial slowly, pause at the color changes and the closure, and trust the process. The reward is a charming keepsake that looks as good on a shelf as it feels in your hands.
Soft, spotted and ready to hatch.
Follow us on Pinterest and subscribe to the Newsletter so you don’t miss a thing!
Tutorial and photos of this yoshi egg by: Crochet Pink Pumpkin.