A crochet striped raglan sweater turns three soft colours and one humble stitch into a pullover that feels like it was always in your wardrobe, comfortable from the first wear.
The Crochet Striped Raglan Sweater
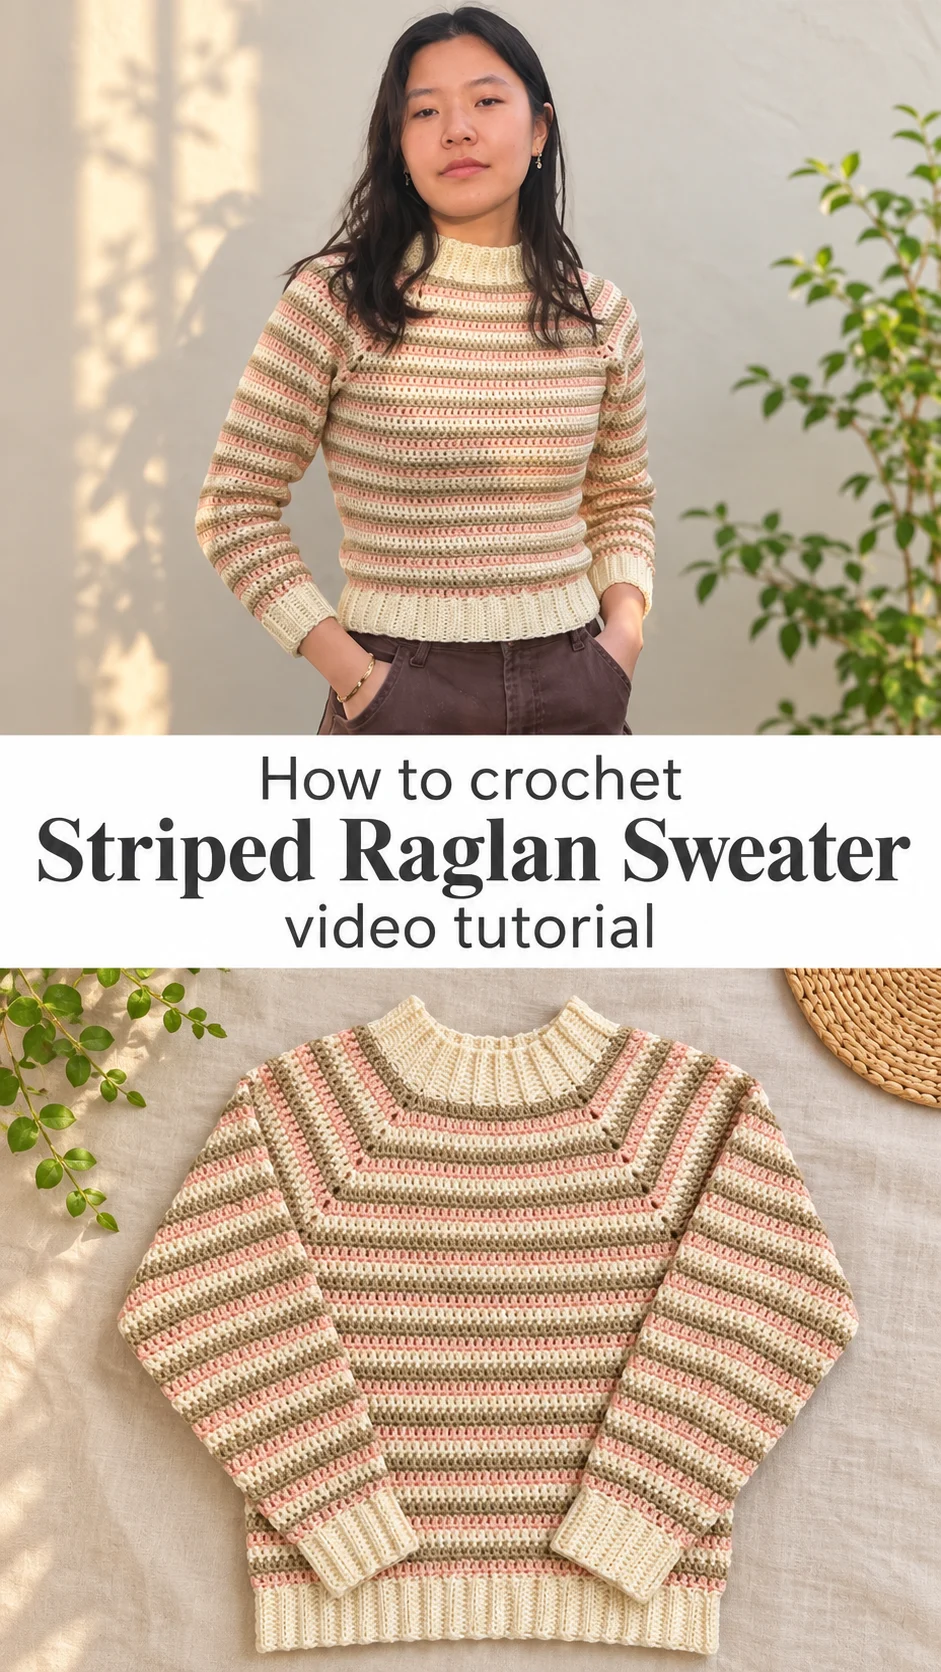
The crochet striped raglan sweater is a fitted-but-easy pullover worked in cream, peach pink and warm tan. The stripes run evenly around the body and sleeves, and they bend in diagonal lines where the raglan shaping runs from the neck to the underarm. The fabric is dense and smooth, built from a compact stitch that looks closer to knitting than to lace. Ribbed cream bands finish the hem, the cuffs and a short funnel neck. The silhouette is slim through the body with a hem that stops near the waistband. It is a piece for cool mornings, for layering under a jacket, and for days when you want something quiet and well made.
The design suits anyone who prefers wearable crochet over novelty crochet. Nothing about it shouts handmade, which is exactly its charm. Worn with trousers or a denim skirt, it passes as a classic stripe sweater, and only a closer look reveals the stitches.
Raglan Sweater Related Posts:
- Crochet Ripple Blanket: A Timeless Colorful Classic
- Crochet Lace Motif Cloth: A Timeless Delicate Treasure
- Crochet Textured Beanie: A Warm Winter Essential
- Crochet Basket Weave Blanket: A Timeless Handmade Classic
Materials
For a crochet striped raglan sweater, choose a smooth, medium-weight yarn with a little give, such as a soft acrylic, a cotton blend or a superwash wool. The stitches in the finished piece are crisp and even, with a gentle sheen, which points to a plied yarn rather than a fuzzy or brushed one. Plied yarn shows stripes cleanly and keeps the fabric from pilling at the underarms. You need three colours: a cream for the ribbing and stripes, a peachy pink, and a muted tan. Buy the cream in the largest quantity, because it covers every edge band as well as its share of stripes. A hook in the 4 to 5 mm range is a sensible starting point for this kind of fabric, but let your swatch decide. Add stitch markers for the raglan corners, a yarn needle for weaving ends, and a tape measure.
Understanding the Raglan Construction
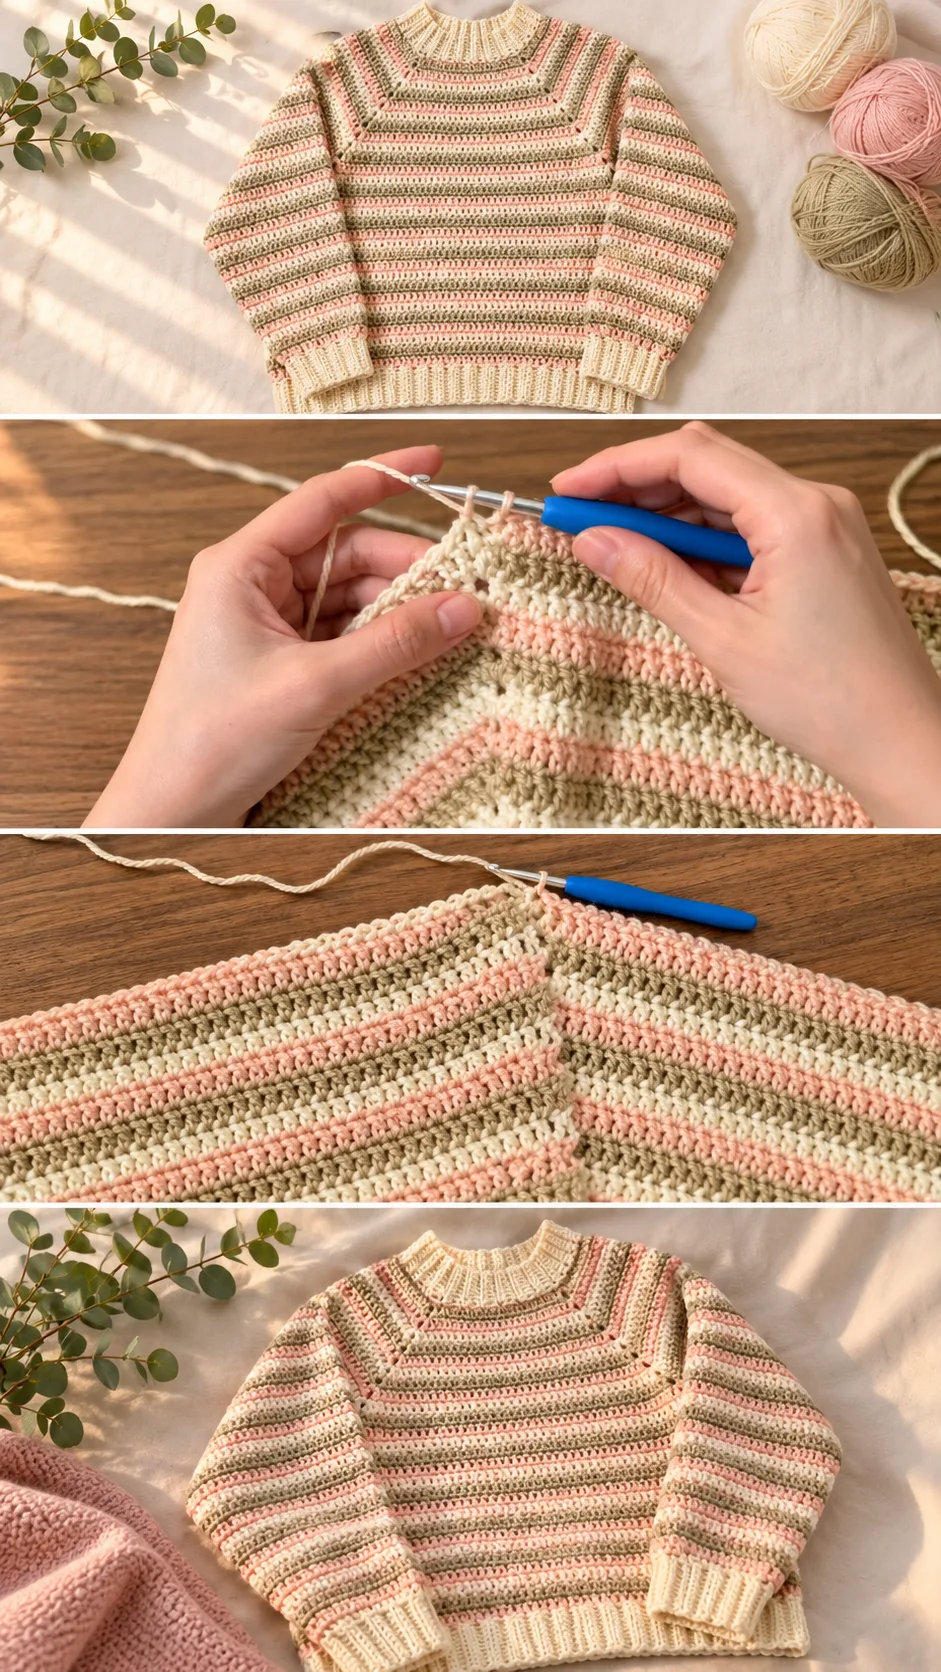
The raglan shape is what makes this sweater simple to fit. Instead of sewing separate front, back and sleeve panels together, the work begins at the neckline and grows outward. Four diagonal lines of increases run from the collar down to the underarms, and they are visible as neat seams where the stripes change direction. You can see the pattern clearly in the yoke, where each stripe forms a mitred corner.
At the underarm, the sleeve stitches are set aside and the body continues as a tube. That means almost no seaming. The sleeves are then worked down from the armholes, so you can try the sweater on as you go and adjust length before the cuffs.
The little holes along the raglan lines are part of the look. They come from the increase corners and form a tidy dotted line. If yours look too gappy, your increases are likely too loose, and a slightly tighter tension at those corners will close them.
Watch the video closely at the start of the yoke. Pause where the first increase round is worked and replay it until the corner placement makes sense, because every later round repeats that same logic.
Stripes and Stitch Texture
The fabric is made of a short, tightly packed stitch that leaves a small vertical ridge in each row. Because the stitches are shallow, the stripes read as clean, narrow bands of colour. Each stripe seems to be only two or three rows deep, so colour changes come often.
Frequent colour changes can leave you with a tangle of tails. Carry the yarn up the side only if a colour returns within a couple of rows. Otherwise cut it and weave the end in as you go. Weaving ends at the end of each stripe takes minutes, and weaving fifty at the end takes an evening.
The order of colours matters for the look. Cream, peach and tan repeat in a steady rhythm, and keeping the sequence consistent from yoke to sleeve is what makes the stripes line up across the underarm. Write the order on a card and tick off each stripe.
If the fabric feels stiff, your hook is too small for the yarn. Go up half a millimetre and re-swatch. If it feels floppy and the stripes look wavy, go down instead.
Ribbing: The Detail That Frames Everything
The cream ribbing at the hem, cuffs and funnel neck is the signature detail. It gives the sweater its tailored, shop-bought look. Crochet ribbing is usually worked sideways in rows of a stitch that looks like a knit rib, and then joined to the body or worked directly onto it.
The ribbing in the photos hugs the body and then flares slightly, which suggests it is worked on a smaller hook than the main fabric. Dropping a hook size or two for the bands pulls them in, so the hem does not stretch out after a few wears.
The neckband stands up in a soft funnel rather than folding over. Keep the rows firm and the neck will hold that shape. If it flops, the band is probably too loose or too short for the neck opening. Rip back a few rows and tighten your tension.
Cream was a smart choice for the bands. It frames the three stripe colours and ties the neckline to the hem. If you change the palette, pick an edging colour already present in the stripes so the ribs feel connected.
Choosing the Best Yarn and Colours
Yarn decides how the sweater wears. A wool blend gives warmth and a slight bounce, which helps the ribbing spring back. Cotton blends are cooler and show stitch definition well, but they can stretch lengthwise and make the body longer after wearing. Soft acrylic is the easiest to wash and keeps its colours bright, although cheap acrylic may feel squeaky against the skin.
Avoid anything fuzzy or heavily textured. Mohair-style yarns hide the stitch pattern and blur the stripe edges, which are the whole point of this design. Avoid very slippery silk blends too, since the weight of a full sweater can pull them out of shape.
For colours, the original uses peach, tan and cream, a warm trio that suits most skin tones. For a cooler version, try dusty blue, grey and ivory. For something bolder, pair navy and rust with cream. Keep the three colours close in value, so the stripes stay gentle rather than loud.
Buy all the yarn at once if you can. Dye lots vary, and a slightly different batch of cream across the ribbing and stripes will show in daylight.
How to Style a Crochet Striped Raglan Sweater
The sweater is shown with brown utility trousers, and the pairing works because the earthy tones echo the tan stripe. The cropped hem sits at the waistband, so high-rise bottoms keep the proportions neat.
For a softer look, wear it over a collared shirt with the collar folded out at the neck, and add a pleated midi skirt. For something more casual, pair it with straight-leg jeans and white trainers. On cold days, layer a long wool coat on top, since the slim sleeves slip easily under outerwear.
It also makes a good gift. A handmade sweater says a lot, and this one is neutral enough to suit nearly anyone. Match the colours to the person’s wardrobe rather than your own.
Tips for a Neat Finish
Weave in ends along the stripe edges, following the same colour so nothing shows through. Split the strands of the yarn tail and run them through the back of stitches for a secure hold.
Block the sweater gently. Lay it flat, mist or soak it as the yarn label allows, and shape the yoke so the raglan lines run straight. Blocking evens out stitches and relaxes the ribbing without stretching it.
Try the sweater on before the final bands. If the body looks short, add rows before the hem ribbing. If the sleeves bunch, extend them slightly. This is the great advantage of top-down work.
Wash by hand or on a delicate cycle, following the yarn label, and dry flat. Hanging a heavy crochet sweater lets gravity stretch it, so fold it in a drawer instead.
A Cozy Handmade Classic
This crochet striped raglan sweater is a project that rewards patience with something you will reach for all season. The top-down raglan keeps fitting simple, the three-colour stripes give it character, and the cream ribbing gives it polish.
Whether it turns out well depends on four things: a smooth yarn, an even tension, tidy colour changes, and firm ribbing worked on a smaller hook. Get those right and the rest follows.
Pause the video at the yoke, trust the diagonal lines, and enjoy the quiet rhythm of the stripes.
Wear it often.
Follow us on Pinterest and subscribe to the Newsletter so you don’t miss a thing!
Tutorial and photos of this striped raglan sweater by: VivCrochets.